Troubleshoot TranslatePress
Is TranslatePress not working as it should? Although rarely, things might not always work as expected. Here’s a list of the most common issues that might arise and how to troubleshoot them.
If you can’t find what you are looking for, please check out the Frequently Asked Questions page as well.
A common error in WordPress is a 500 Internal Server Error (or sometimes a white page or "The site is experiencing technical difficulties."). This error can look like the image below.
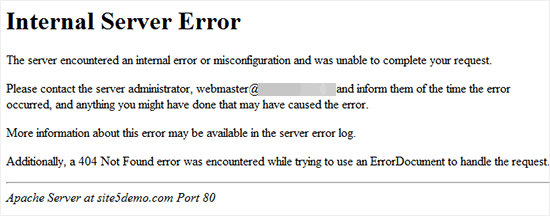
Internal server errors in WordPress can be caused by plugin or theme functions, corrupted .htaccess file, or PHP memory limit.
Debugging
To start debugging this error we need to see if we can get more information about the error.
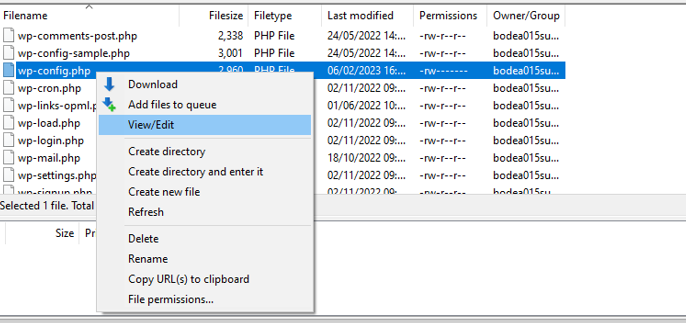
The first method with which we can find out more information about the error is to set WP_DEBUG to true in wp_config.php. Please follow the steps below:
- Access your site via FTP
- Open the file named wp-config.php
- Find the line where you see define('WP_DEBUG', false);
- Change false to true and save the file
 The next time you refresh the page you were getting an error on you should see more information about the error messages which will help in troubleshooting.
If the line is already set to
The next time you refresh the page you were getting an error on you should see more information about the error messages which will help in troubleshooting.
If the line is already set to true you may have another plugin or server configuration which is suppressing the error output.
And we can also find out more information about this error by checking if we have any PHP errors in the PHP error logs.
Increase the WordPress Memory Limit
When you install WordPress, the default memory limit is typically set at 64MB. However, as you install plugins, themes, and other WordPress add-ons, your website's memory usage can increase. If your website's memory usage exceeds the default limit, you may start to experience various performance issues, including slow loading times, error messages, and even website crashes.
To increase the WordPress memory limit, you will typically need to modify your website's wp-config.php file or contact your web hosting provider to request an increase.
- FTP into your website
- Open the file named wp-config.php
- You need to paste this code in wp-config.php file just before the line that says ‘That’s all, stop editing! Happy blogging.’
define( 'WP_MEMORY_LIMIT', '256M' ); - Save the file
You can now visit your WordPress site and the memory exhausted error should disappear now.
Checking for Corrupt .htaccess File
.htaccess file can cause issues with your website, such as error pages or broken links. Here are the steps to check for a corrupt .htaccess file:
- Access your website's root directory through an FTP client or file manager provided by your hosting provider.
- Look for the
.htaccessfile in the root directory. If you cannot find it, make sure that you have enabled the option to view hidden files. - Download a copy of the
.htaccessfile to your computer, and then delete it from your website's root directory. - Try accessing your website to see if the issues have been resolved. If they have, then the issue was likely caused by a corrupt
.htaccessfile. - To create a new
.htaccessfile, go to your WordPress dashboard, and navigate to Settings > Permalinks. Click the "Save Changes" button, and WordPress will generate a new.htaccessfile for you.
If you continue to experience issues after deleting the .htaccess file and generating a new one, it may be caused by a different issue, and you should contact your hosting provider or WordPress support for further assistance.
Ask your Hosting Provider
If you did not manage to solve your error please contact your host provider team and they will be able to check the server logs and locate the root cause of the error.
Make sure you have pretty permalinks enabled and working. https://wordpress.org/support/article/using-permalinks/#using-pretty-permalinks
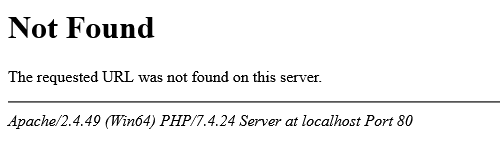
You know they are not working correctly because WordPress normally takes over 404 pages and serves a nice error for the user that looks like a page on your site. If your 404 error page comes directly from the server (all you get is a "The requested URL /sample was not found on this server."), means it's not configured properly.If the error is a white page (doesn't come from WordPress 404 page template) it's possible your .htaccess contains server rewrite rules that simply direct the subdirectory (example.com/fr) to somewhere else.
This usually happens as a conflict with the Gtranslate WordPress plugin and their Sub-directory URL structure. The Gtranslate plugin will add extra rewrite rules inside the .htaccess file in order to make this feature work.
Deactivating Gtranslate and activating TranslatePress will cause secondary languages from TranslatePress to not work and throw a Not Found error from the apache server
For a quick fix, all you have to do is edit your .htaccess file and remove the Gtranslate config section.
Theme and plugin conflicts occur when compatibility issues between a WordPress theme and a plugin result in errors, broken functionality, missing content, or website crashes. A theme conflict occurs when a WordPress theme's code conflicts with the code of a plugin, causing errors or unexpected behavior. A plugin conflict, on the other hand, occurs if the plugins use the same functions or resources, or if one plugin modifies a core WordPress feature that another plugin relies on.
Conflict test
Performing a conflict test is an important step in troubleshooting WordPress website issues caused by plugin or theme conflicts. Here are the steps that you need to follow to do a conflict test:
- Update all your plugins and themes: Using the most recent versions of your website software can sometimes resolve conflicts as the updated releases often contain bug fixes.
- Create a staging site: A staging site is an exact copy of the live website created for testing purposes or to make changes without affecting the live site. It allows developers to experiment and test changes without risking errors on the live website.
- Disable caching: If your website uses caching, disable it to ensure that you are testing the actual site and not a cached version.
- Deactivate all plugins: Deactivate all plugins on your WordPress site. You can do this by going to the Plugins page and selecting all plugins, then choosing to Deactivate from the Bulk Actions drop-down menu.
- Switch to a default theme: Change your theme to a default WordPress theme, such as Twenty Twenty-Two, to eliminate any conflicts caused by the theme.
- Test the site: Check your website to see if the issue is resolved. If the issue is gone, it was caused by a plugin or theme conflict.
- Activate plugins: Activate each plugin one by one, and after each activation, check the website to see if the issue occurs. If the issue reappears after activating a specific plugin, that plugin is causing the conflict.
- Reactivate the theme: Once you have identified the problematic plugin, reactivate all the other plugins and switch back to your original theme. Then, deactivate the problematic plugin and check if the issue is resolved.
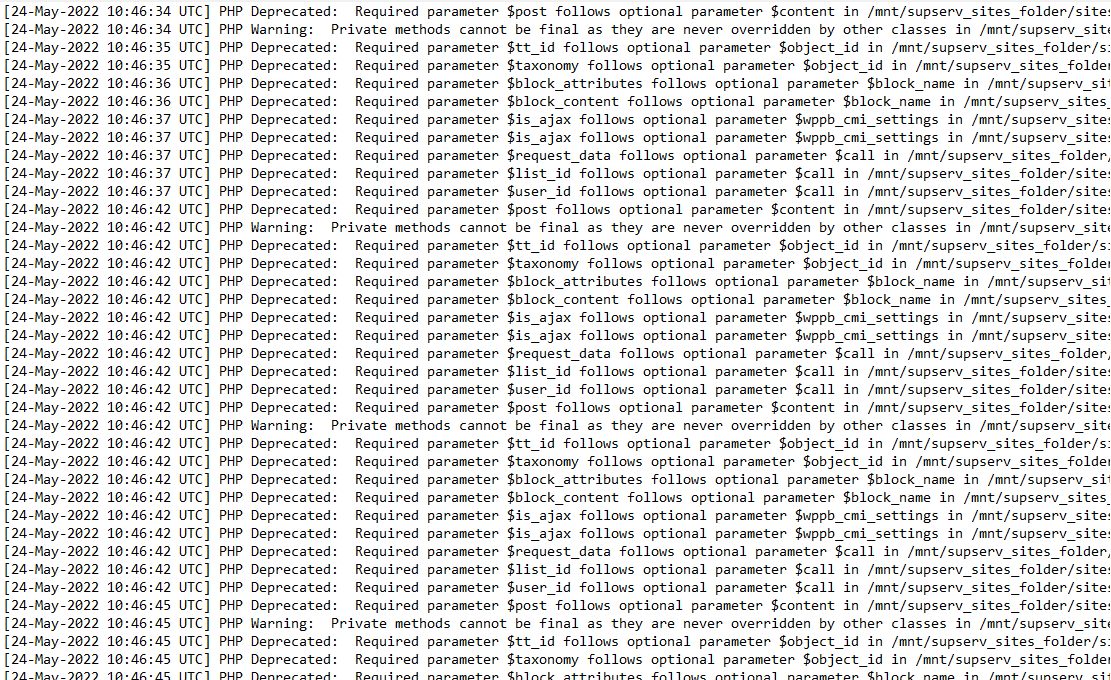
In WordPress, PHP error logs are files that contain information about any errors or warnings that occur within the PHP code of your WordPress site. These logs are useful for troubleshooting issues with your WordPress site.
How to enable the WordPress Debug mode
To enable the PHP error log for WordPress you will need to connect to your site while using FTP and then edit the wp-config.php file
After you've opened this file you will need to add the following lines of code before the text where it says "That's all, stop editing! Happy publishing."
define( 'WP_DEBUG', true );
define( 'WP_DEBUG_LOG', true );
/* That's all, stop editing! Happy publishing. */
This code will enable debugging mode in WordPress and write any PHP errors to a log file.
Where to view the WordPress Error logs
After you enabled WordPress Debug mode, you will need to go to the "wp-content" directory to find the "debug.log" file (again being connected to your site via FTP), then right-click on this file and choose to View/Edit the file.
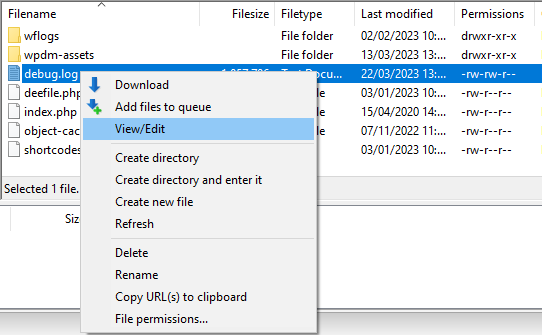
After accessing the error log file, you will be able to review the error messages along with their corresponding date and time stamps.
To disable the Debug mode, you will just need to set the WP_DEBUG and WP_DEBUG_LOG lines to "false".
define( 'WP_DEBUG', false );
define( 'WP_DEBUG_LOG', false );
/* That's all, stop editing! Happy publishing. */
In case you’re not experienced with connecting to your site via FTP or you were not successful in viewing the PHP Error Logs, please contact your hosting provider and ask them for help regarding this. If you encounter a white page when opening the TranslatePress translation interface, check the following common causes:
1. Content Security Policy (CSP) Error — Check This First
Open your browser Developer Console → Console tab and look for a red CSP error.
To fix, install the Really Simple SSL plugin, which often resolves CSP-related issues.
2. JavaScript Errors From Minification or File Merging
Some optimization plugins (e.g., WP-Optimize) minify or merge JS files, causing conflicts.
- Exclude These Files (Translation Editor Only) These JS files are required for the Translation Editor and must not be optimized:
- Optional Exclusions (Frontend Issues)
/wp-content/plugins/translatepress-multilingual/assets/js/trp-editor.js

/wp-content/plugins/translatepress-multilingual/assets/js/trp-string-translation-editor.js

/wp-content/plugins/translatepress-multilingual/assets/js/trp-iframe-preview-script.js

/wp-content/plugins/translatepress-multilingual/assets/js/trp-editor-overlay.jsIf you see JS errors or translation issues on the frontend—especially WooCommerce cart items or JS-generated text—exclude these as well:
/wp-content/plugins/translatepress-multilingual/assets/js/trp-translate-dom-changes.js

/wp-content/plugins/translatepress-multilingual/assets/js/trp-frontend-compatibility.js
3. PHP Errors
Enable debugging to check whether PHP errors are preventing the editor from loading:
Enable WP_DEBUG in and WP_DEBUG_LOGwp-config.php, then inspect the log at: wp-content/debug.log
Common PHP Issues:
- PHP Memory Limit Reached → Increase the server's PHP memory limit.
- PHP Fatal error: Call to undefined function mb_http_output() → The server is missing the Multibyte String (mbstring) library. Install and enable https://www.php.net/manual/en/book.mbstring.php
If none of the above resolves the issue, gather errors from the browser console and debug.log, then contact support for further assistance.
When this issue happen, it may be due to some .htaccess rewrite rules if you used GTranslate plugin in the past. This plugin seems to add new rules to the file that are not cleared when the plugin is deleted. These break the way TranslatePress works if you choose to use it after.
Please try removing the GTranslate config section (it should look similar with the following code) and everything should work as intended:
### BEGIN GTranslate config ### RewriteRule ^(af|sq|am|ar|hy|az|eu|be|bn|bs|bg|ca|ceb|ny|zh-CN|zh-TW|co|hr|cs|da|nl|en|eo|et|tl|fi|fr|fy|gl|ka|de|el|gu|ht|ha|haw|iw|hi|hmn|hu|is|ig|id|ga|it|ja|jw|kn|kk|km|ko|ku|ky|lo|la|lv|lt|lb|mk|mg|ms|ml|mt|mi|mr|mn|my|ne|no|ps|fa|pl|pt|pa|ro|ru|sm|gd|sr|st|sn|sd|si|sk|sl|so|es|su|sw|sv|tg|ta|te|th|tr|uk|ur|uz|vi|cy|xh|yi|yo|zu)/(af|sq|am|ar|hy|az|eu|be|bn|bs|bg|ca|ceb|ny|zh-CN|zh-TW|co|hr|cs|da|nl|en|eo|et|tl|fi|fr|fy|gl|ka|de|el|gu|ht|ha|haw|iw|hi|hmn|hu|is|ig|id|ga|it|ja|jw|kn|kk|km|ko|ku|ky|lo|la|lv|lt|lb|mk|mg|ms|ml|mt|mi|mr|mn|my|ne|no|ps|fa|pl|pt|pa|ro|ru|sm|gd|sr|st|sn|sd|si|sk|sl|so|es|su|sw|sv|tg|ta|te|th|tr|uk|ur|uz|vi|cy|xh|yi|yo|zu)/(.*)$ /$1/$3 [R=301,L] RewriteCond %{REQUEST_FILENAME} !-f RewriteRule ^(af|sq|am|ar|hy|az|eu|be|bn|bs|bg|ca|ceb|ny|zh-CN|zh-TW|co|hr|cs|da|nl|en|eo|et|tl|fi|fr|fy|gl|ka|de|el|gu|ht|ha|haw|iw|hi|hmn|hu|is|ig|id|ga|it|ja|jw|kn|kk|km|ko|ku|ky|lo|la|lv|lt|lb|mk|mg|ms|ml|mt|mi|mr|mn|my|ne|no|ps|fa|pl|pt|pa|ro|ru|sm|gd|sr|st|sn|sd|si|sk|sl|so|es|su|sw|sv|tg|ta|te|th|tr|uk|ur|uz|vi|cy|xh|yi|yo|zu)/(.*)$ /wp-content/plugins/gtranslate/url_addon/gtranslate.php?glang=$1&gurl=$2 [L,QSA] RewriteRule ^(af|sq|am|ar|hy|az|eu|be|bn|bs|bg|ca|ceb|ny|zh-CN|zh-TW|co|hr|cs|da|nl|en|eo|et|tl|fi|fr|fy|gl|ka|de|el|gu|ht|ha|haw|iw|hi|hmn|hu|is|ig|id|ga|it|ja|jw|kn|kk|km|ko|ku|ky|lo|la|lv|lt|lb|mk|mg|ms|ml|mt|mi|mr|mn|my|ne|no|ps|fa|pl|pt|pa|ro|ru|sm|gd|sr|st|sn|sd|si|sk|sl|so|es|su|sw|sv|tg|ta|te|th|tr|uk|ur|uz|vi|cy|xh|yi|yo|zu)$ /$1/ [R=301,L] ### END GTranslate config ###
So first go to your TranslatePress Account page, download the addon, then install and activate it on your website. The License input will show afterward.
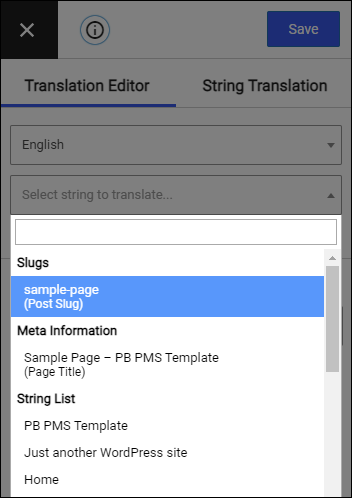
It's possible that some strings cannot be clicked through our visual interface.
If this is the case, you should try to look for them inside the Strings List that's available under the current language at the top of the translation interface.
If the issue is still not fixed, please contact support.
If you're having trouble with your Google API key, please make sure that you followed correctly our guide for generating it.
Be extra careful at Step 4 since this is the cause of issues most of the time.
If in the translated part of the website there are page titles (or post title, custom post type titles) that are empty or broken, first thing you need to try is go to TranslatePress -> Settings -> Advanced -> Disable post container tags for post title and enable it.
If that doesn't work, please contact support with as many details as possible so we can debug the issue
If the issue is still not fixed, please contact support.
wp-config.php:
define( 'WPE_GOVERNOR', false ); If you create a post/page, translate its slug and then duplicate it, any reference to the duplicated post/page will redirect you to the original post/page even if the link points to the duplicated page.
To fix this, open the front-end of TranslatePress and go to String Translation -> Post Slugs. Manually translate each slug of the affected posts/pages.
This error means there is a gettext string that was not translated correctly and doesn't contain a %s for example. So instead of translating "Ola %s" it was translated to just "Ola", thus throwing the error.
To fix this you need to find the exact string that's being translated and exclude it from gettext translation inside TranslatePress -> Settings -> Advanced -> Exclude Gettext Strings.
In this case you need to go to that file and number and see what gettext string is being translated there and exclude it. If that doesn't work, you'll probably need to delete the translation from the .po files that automatically come with WordPress (it's possible the translation is wrong) and you can do that by using a plugin like LocoTranslate.