Charitable is a free WordPress plugin that allows you to create fundraising campaigns. To translate Charitable plugin we’ll use TranslatePress.
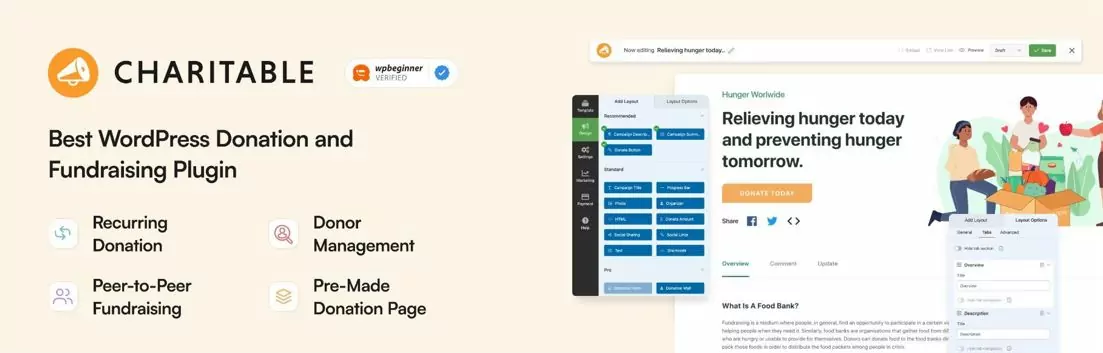
Some of its features include:
- support for a lot of payment gateways: offline, Paypal, Stripe, Authorize.net, PayUMoney, PayFast;
- really easy to use: the process of creating a campaign is as simple as creating a page with a few extra fields;
- donation management: access to details, possibility to sort and export donations as a CSV;
- unlimited campaigns;
- works with any theme and it’s developer-friendly so you can extend it if needed;
- plenty of add-ons if you need more features.
Set Up Charitable
In this tutorial, we’ll set up Charitable and its companion theme Reach, import some demo content (so we get up to speed quickly), set up TranslatePress to work with another language, and finalize by translating everything in the front-end as well as the emails sent to users.
1. Install Charitable
You can find Charitable directly on the WordPress.org repository. Simply navigate to Plugins → Add New and search for Charitable. The first result will be the plugin we’re after.
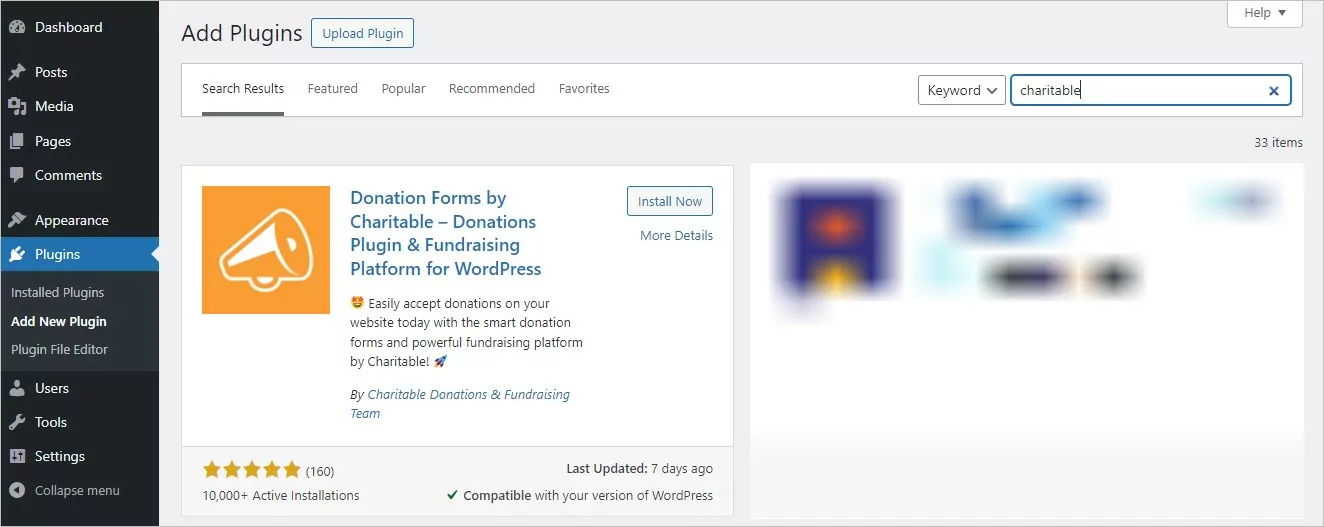
Alternatively, you can download Charitable from WordPress.org and install it manually or via FTP.
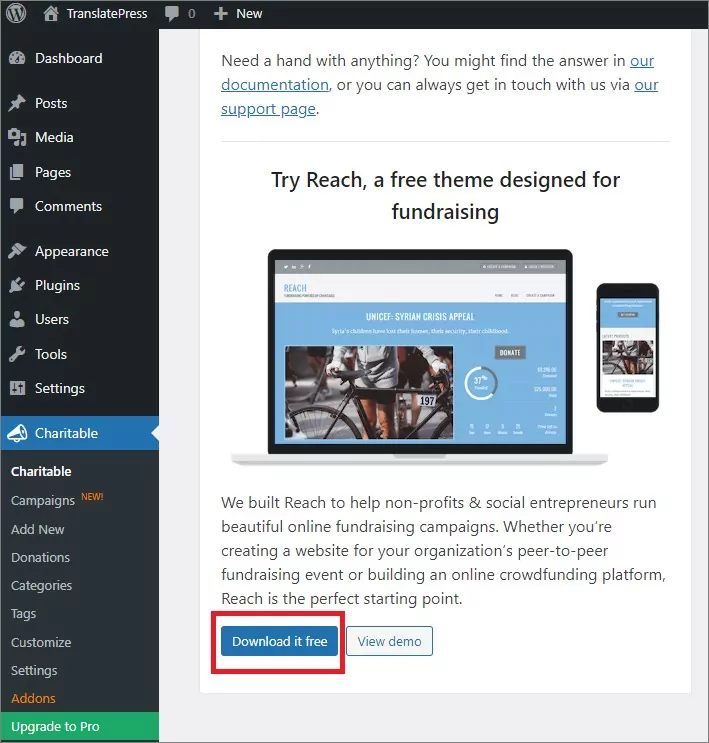
2. Install Reach Theme and its Childtheme
While Charitable works well with any WordPress theme, we’re going to use the Reach theme.
Download the theme via The Link in the Charitable dashboard or install Reach from the Theme Repository.
Once the setup is done, not only we’re translating the Charitable plugin, but we’ll also translate the gettext strings that might come from the Reach theme.
You can also download and install the Reach Childtheme. This way, changes to our theme won’t be deleted if we update the parent theme.
It’s a great way of making CSS and template changes while still receiving bug fixes, security updates, and even new features from our parent theme.
3. Install Sample Data
To speed up our setup, we’re going to use the sample data available for Charitable.
- after you install and activate Charitable plugin, to ensure its functions correctly, you need to configure your site permalinks. The setting should be anything but “Plain”. A good option would be “Post Name.” You can find more about how to set the Permalinks;
- next, download this zip file Charitable Export Example. Unzip it, and you will have two JSON files.;
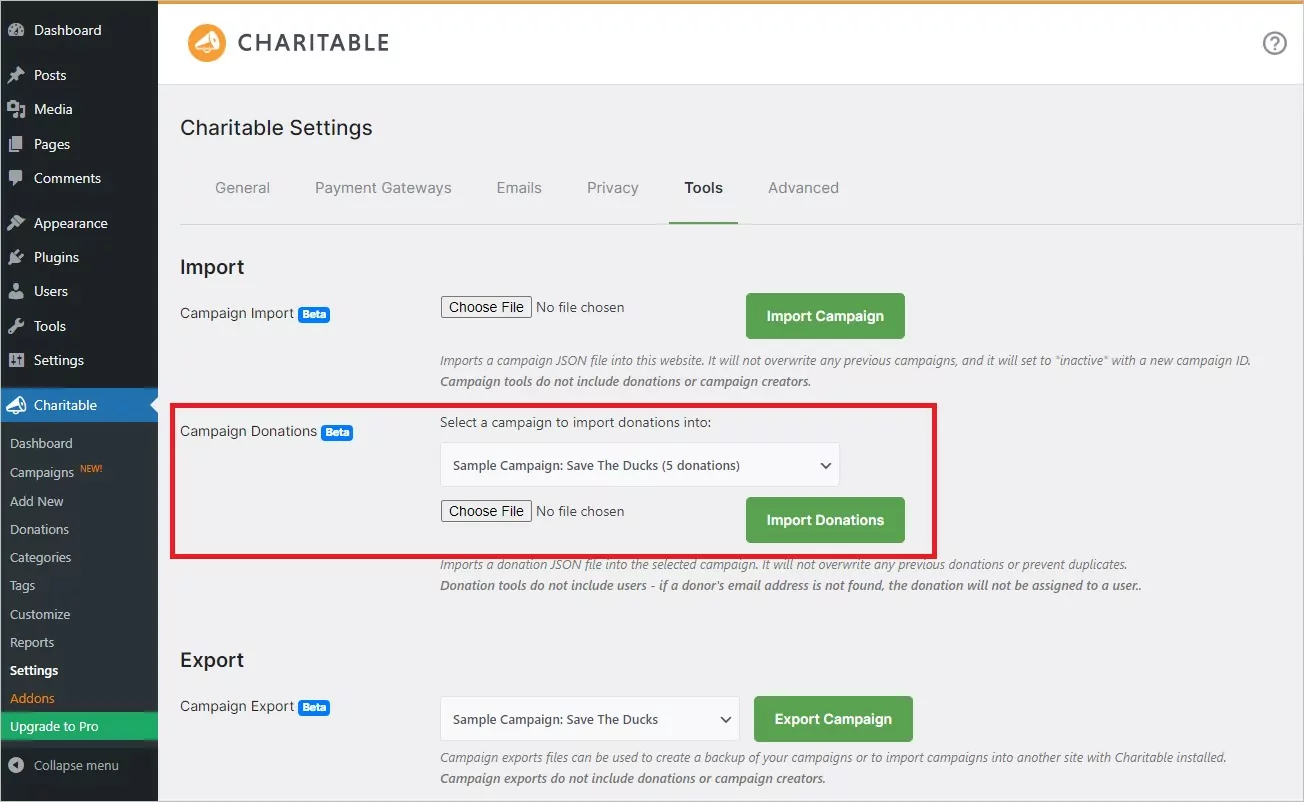
- in your WordPress dashboard, navigate to Charitable -> Settings -> Tools. Here you should see an option to import a campaign. Select the charitable-campaign-sample.json file and upload it. This will add a sample campaign to your campaign screen;
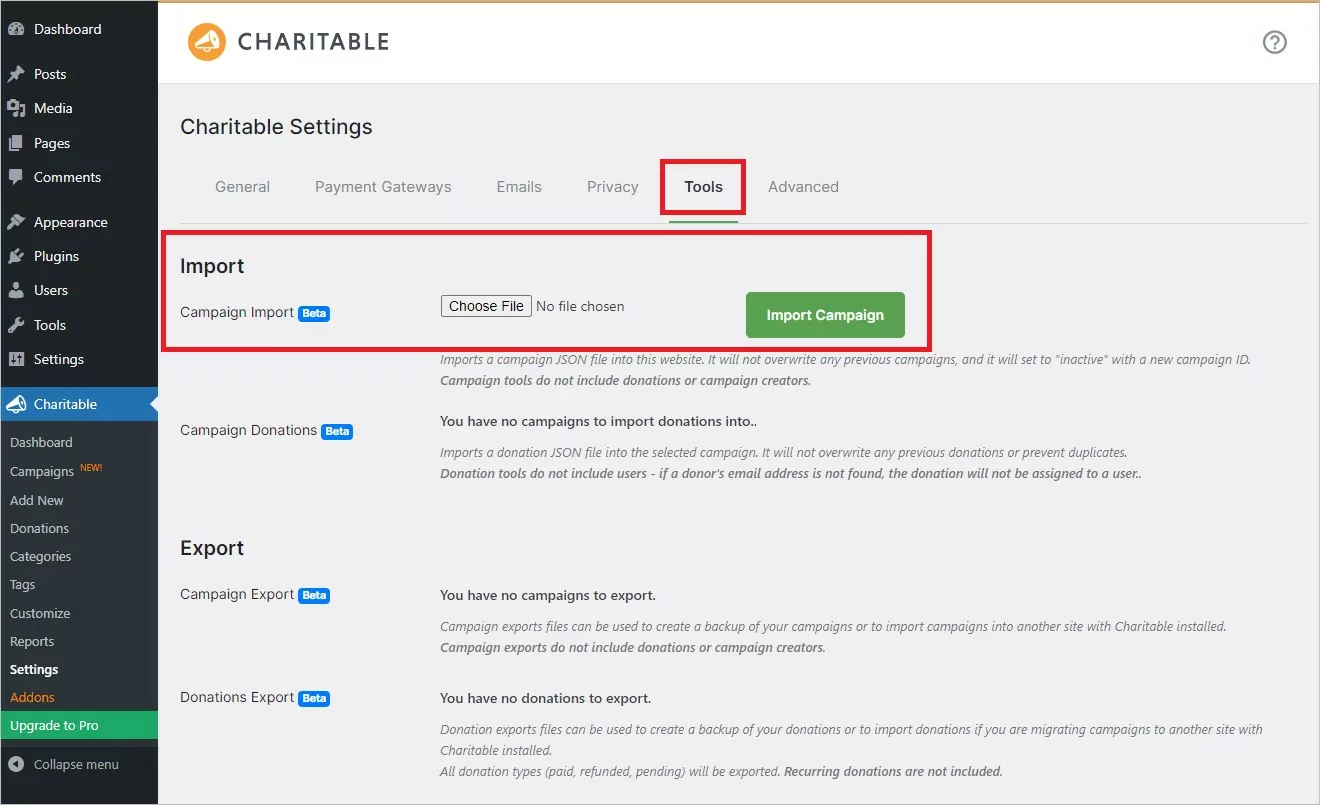
- to upload donations, you should first have at least one campaign. In the Tools screen, there should be a dropdown menu where you can choose the campaign to which you want to import donations. Select the charitable-donations-sample.json file and the campaign you recently added, then upload. You should have about five new donations associated
with the campaign (these donations will have statuses of paid, refunded, and pending, etc.);
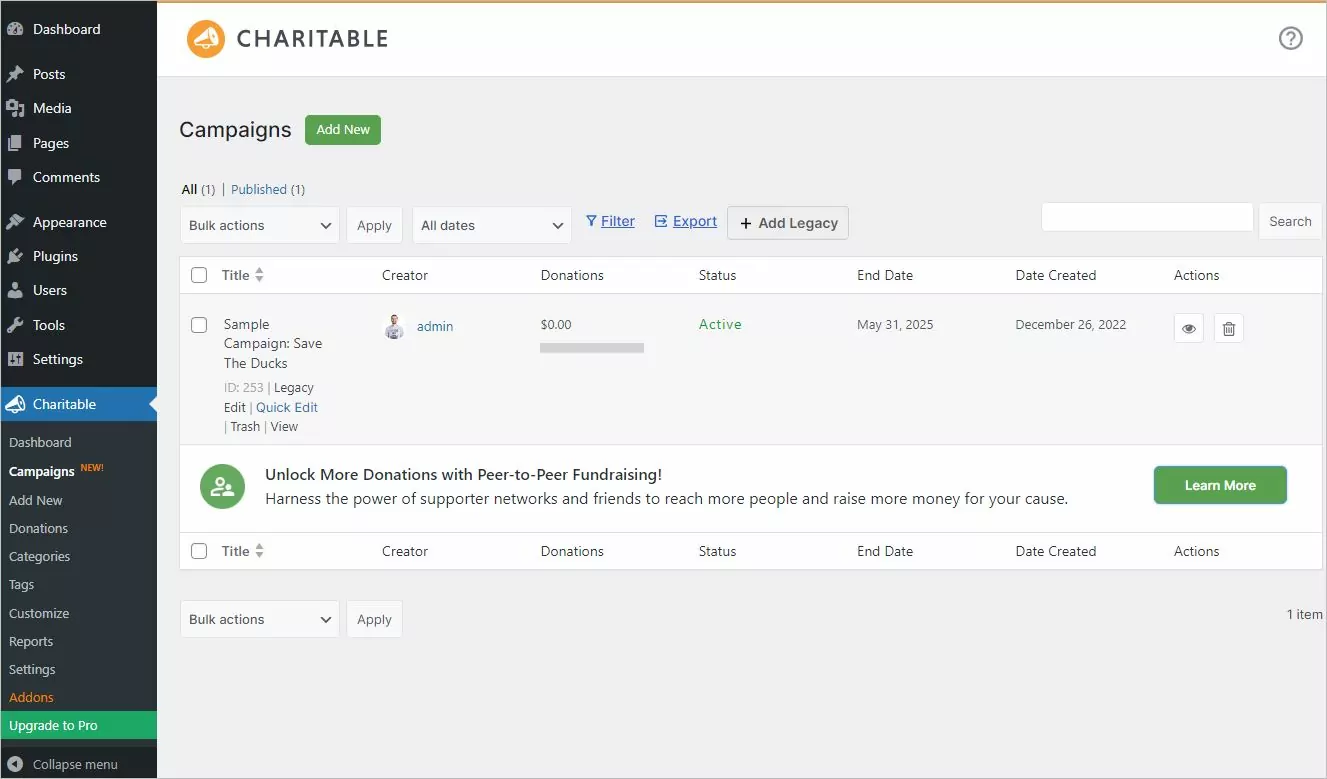
- be sure to publish the campaign. If “Post Name” is selected as your permalink, you might be able to view your campaign here: https://example.com/campaigns/sample-campaign-save-the-ducks/;
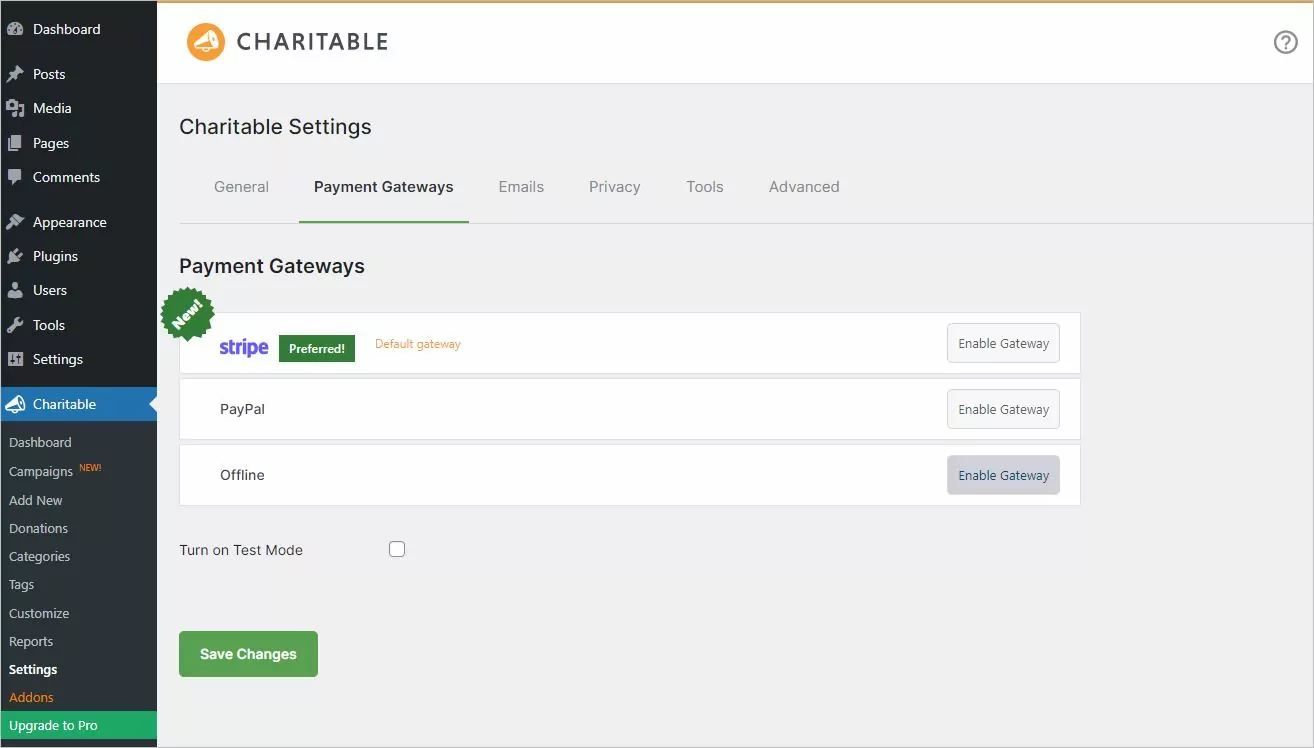
- lastly, consider enabling payment options. For initial testing, you can turn on the “offline payment” option. To do this, go to Charitable -> Settings -> Payment Gateways. Click on the “Enable Gateway” button, and the payment gateway will be activated. If you want to disable it later, the same button can be used (it’ll show as “Disable Gateway”).
After all set you can check the created campaign. Note that, the campaign will initially be in draft. You need to change its status to publish to make it live on your site.
4. Setting Up the Homepage
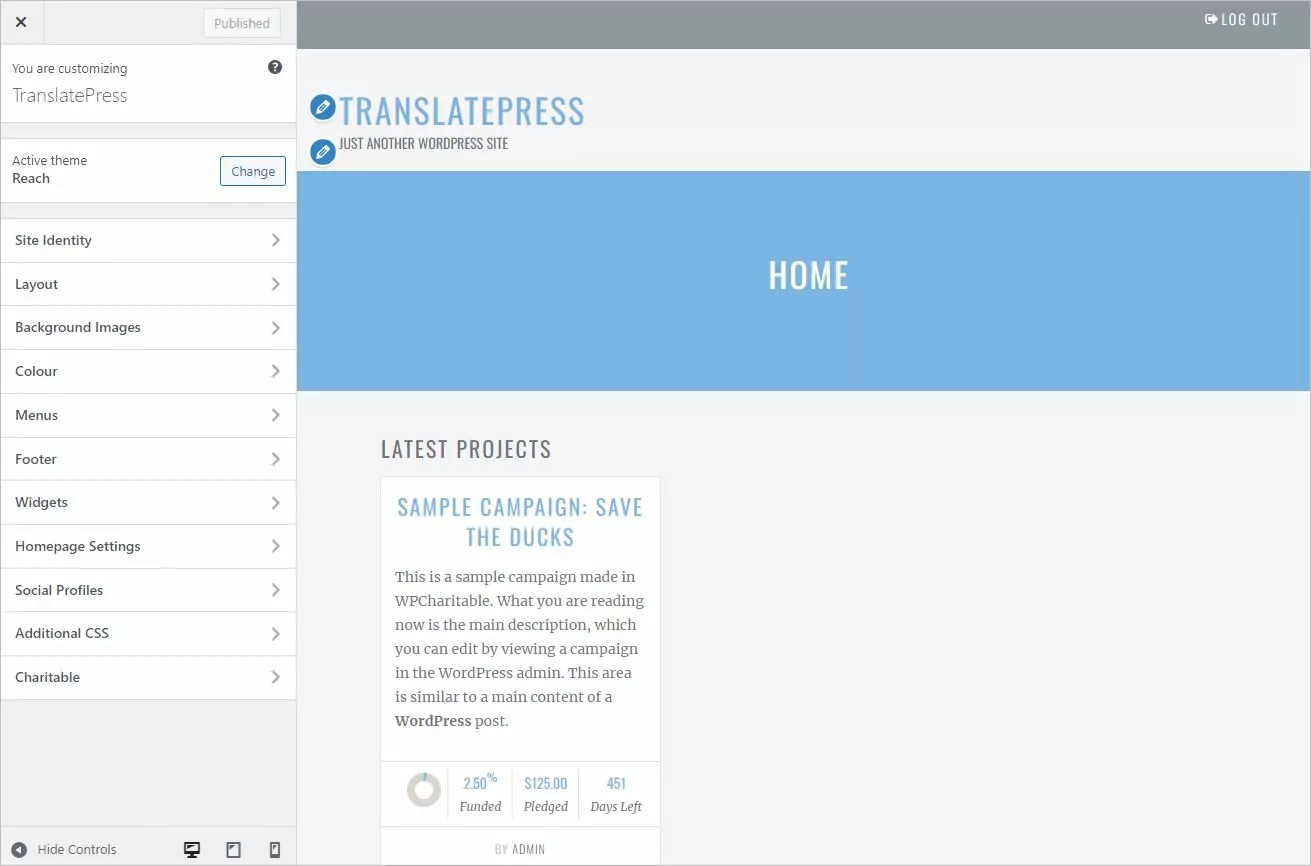
By default, if this was a default WordPress installation, we would have the blog listings on our homepage.
The Reach theme comes with a proper homepage that lists all of the campaigns currently published.
- create a new page called Home;
- inside the Page Attributes meta box, select “Homepage” for the “Template” setting;
- you can also use a Slider above the main content: Soliloquy, Layer Slider, and Revolution Slider are all supported;
- setup WordPress to work with a static homepage from the Customizer or via WordPress → Settings → Reading.
5. Adding the Campaigns Page in the Menu
Charitable campaigns are actually WordPress custom post types. This means you have an archive page with all of the campaigns available at https://example.com/campaigns/
While you can place the [campaigns] shortcode on any page, when using the Reach theme it’s best to link in the menu to the /campaigns archive page generated by WordPress. You can do that with a Custom Link in the WordPress → Menus interface.
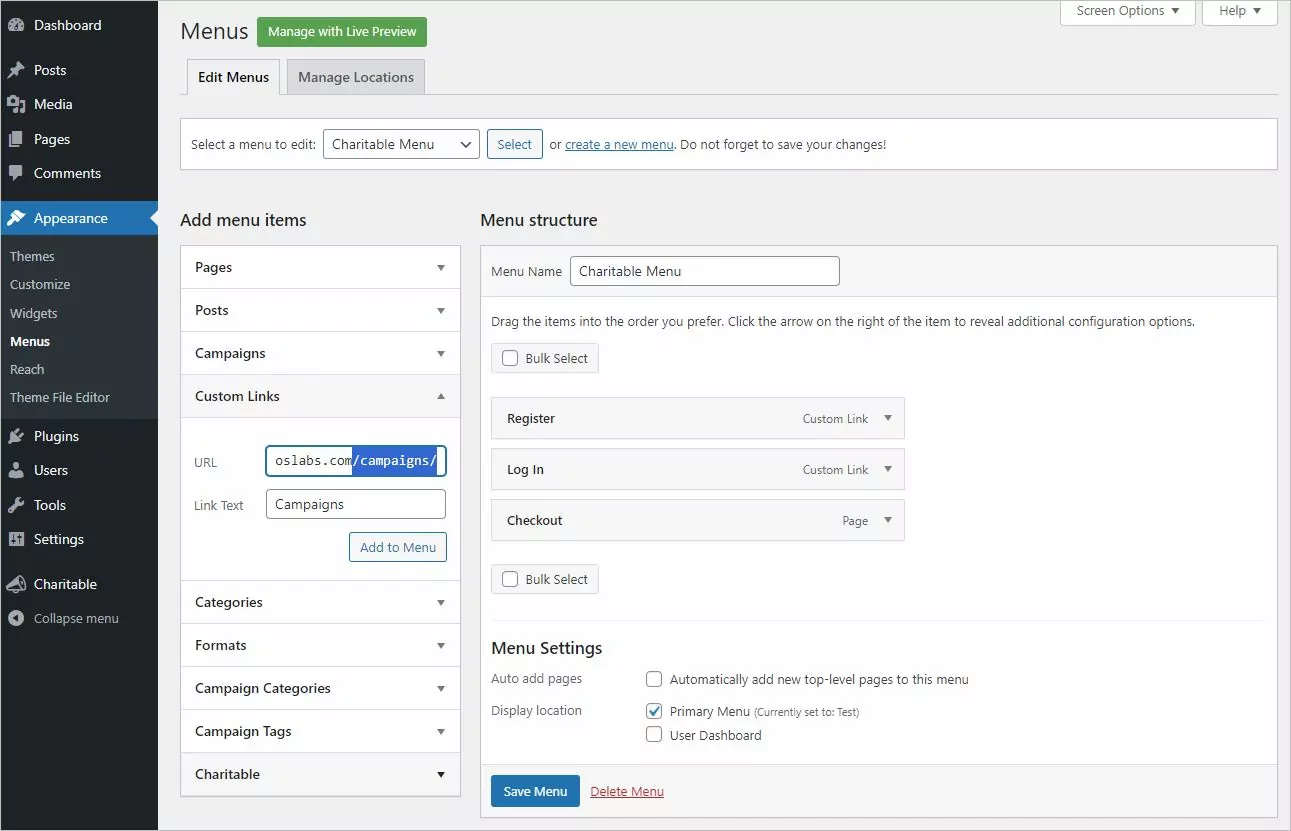
From the /campaigns/ page we can then view individual campaigns, how much time they have until they close, how much until completion, etc.
Other Charitable specific pages like register, login, and your profile can be added to your top menu, making it easy for supporters to access the website and manage their accounts.

Translate Charitable Plugin
With Charitable installed and configured, we can now translate the campaigns, pages, and posts one by one, using TranslatePress.
Since there is specific content created for the fundraising (like the campaigns) we’ll focus to translate the Charitable plugin instead of translating the rest of the posts and pages.
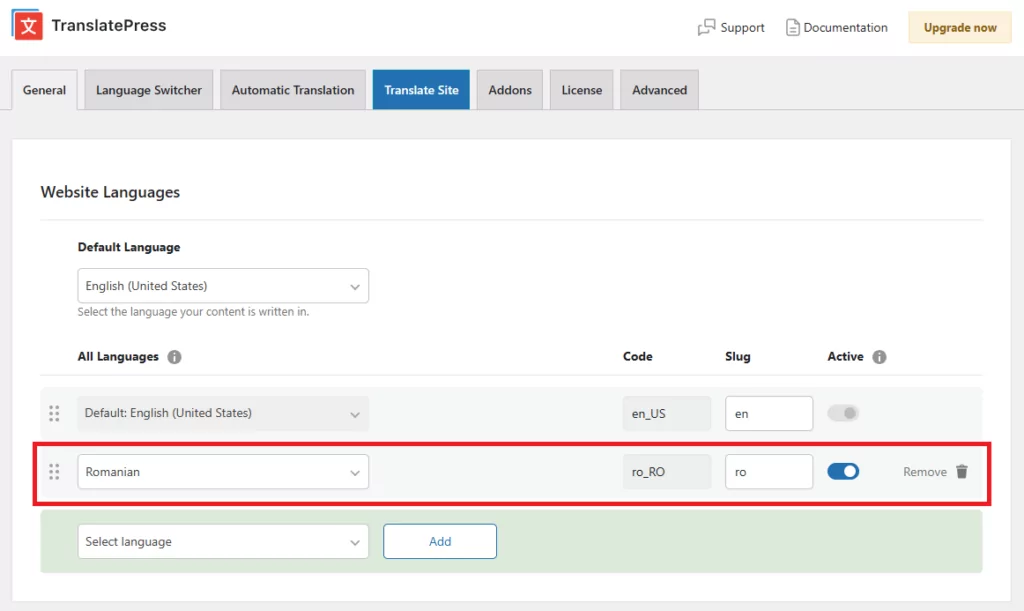
1. Install and Setup TranslatePress
You can install TranslatePress by searching for it in the WordPress → Plugins interface and installing it and activating it from there.

The setup process is straightforward:
- add a second language: I’m using Romanian as the language we want to translate into
- I would also suggest setting “Force Language in Custom Links” to Yes, since we have a custom link in our menu for /campaigns/
2. Translate Charitable Plugin
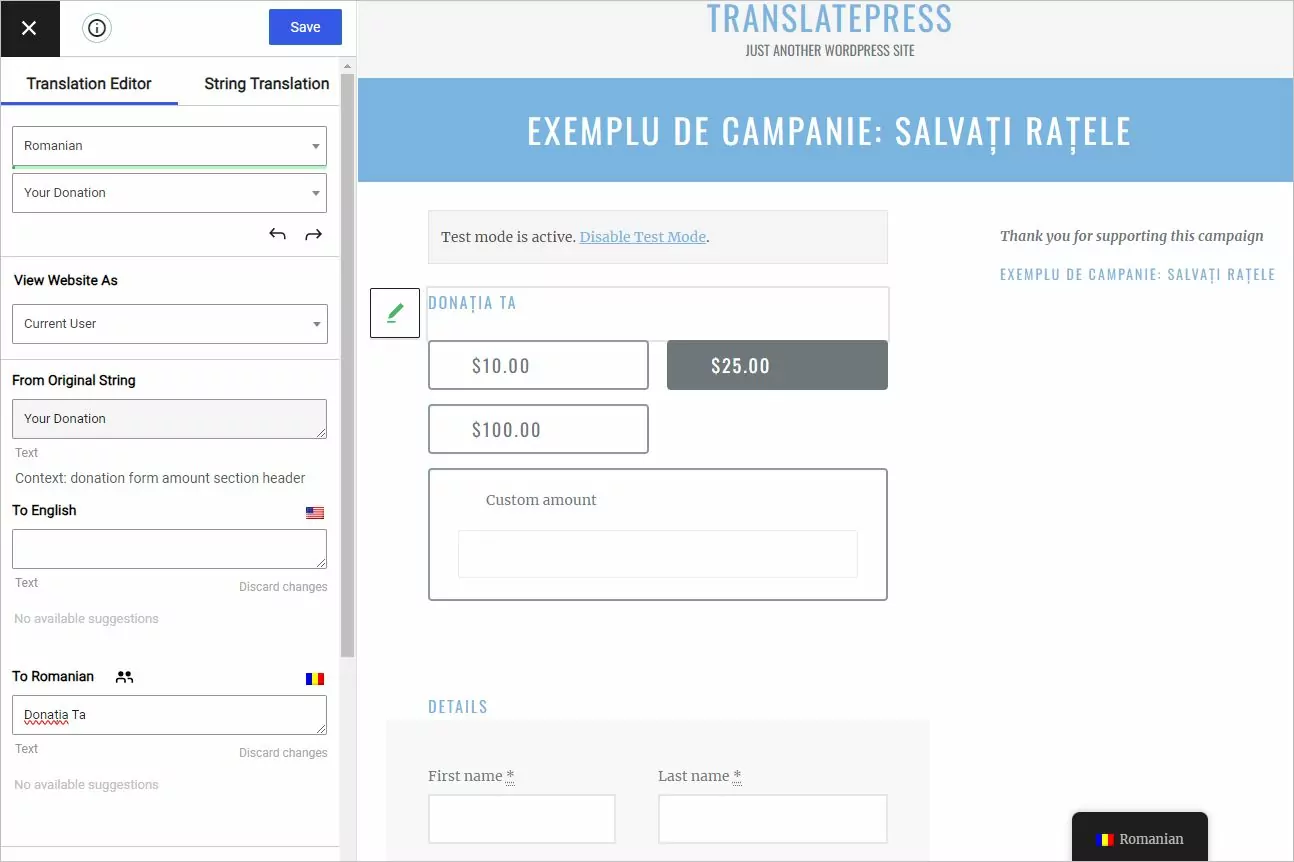
The translation interface can be accessed from the top admin bar. Once opened, simply hover over strings on the right side and translate them one by one.
The blue icon strings are user-generated (like the page title or the content of a post), while green icon strings are gettext strings from your plugins and theme.
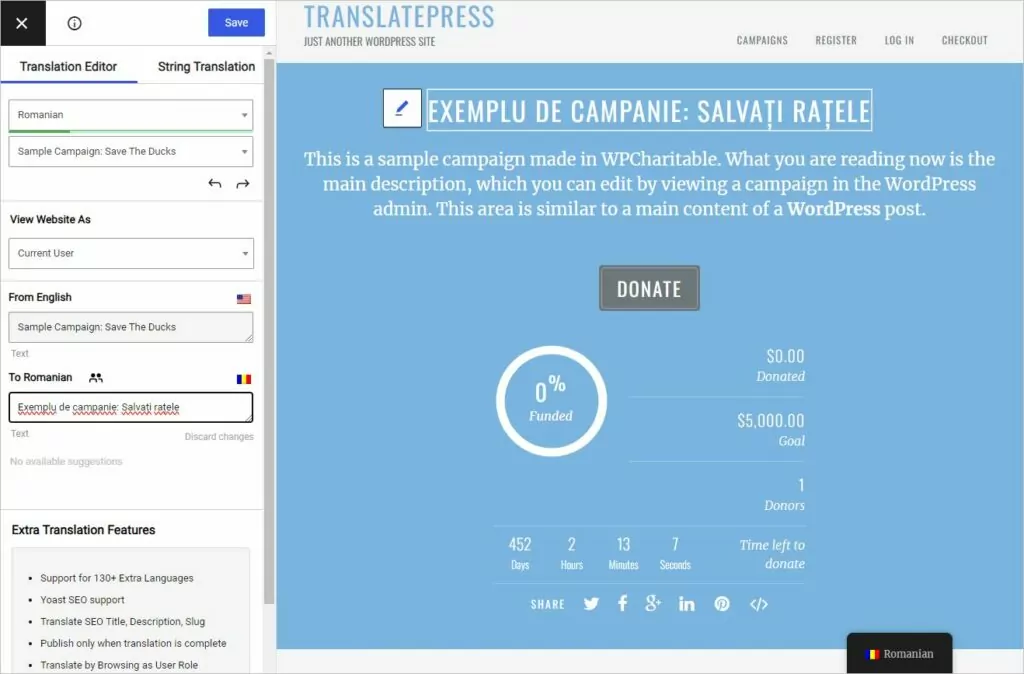
To be able to translate your entire website, all you have to do is to navigate the website from page to page. For example, you can even translate all the dynamic pages generated by Charitable by going through the process of Donating:
- visit a campaign page
- click the Donate button
- translate the entire Donation checkout page
- go through with the payment (if you’re the administrator, you can enable the Offline Payment Gateway so you don’t have to go through Paypal)
- if successful, you’ll get redirected to the Receipt page and you can translate this page as well.
An interesting side-effect of the translation interface is that you can use TranslatePress without a secondary language, to simply change various strings from your plugins or theme.
3. Translate Charitable Plugin Emails
Charitable gives us the possibility to modify the emails sent to supporters after a successful donation. Before we can translate those emails, we need to enable them.
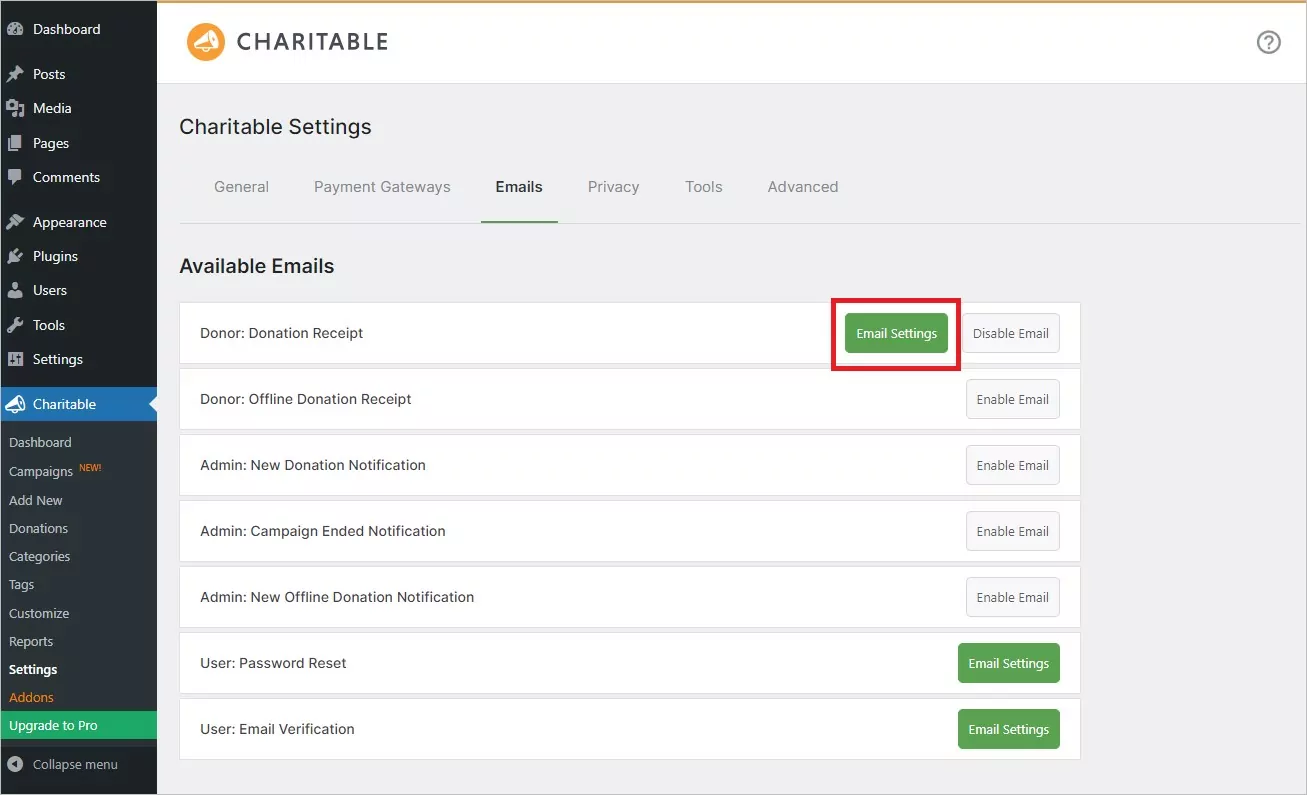
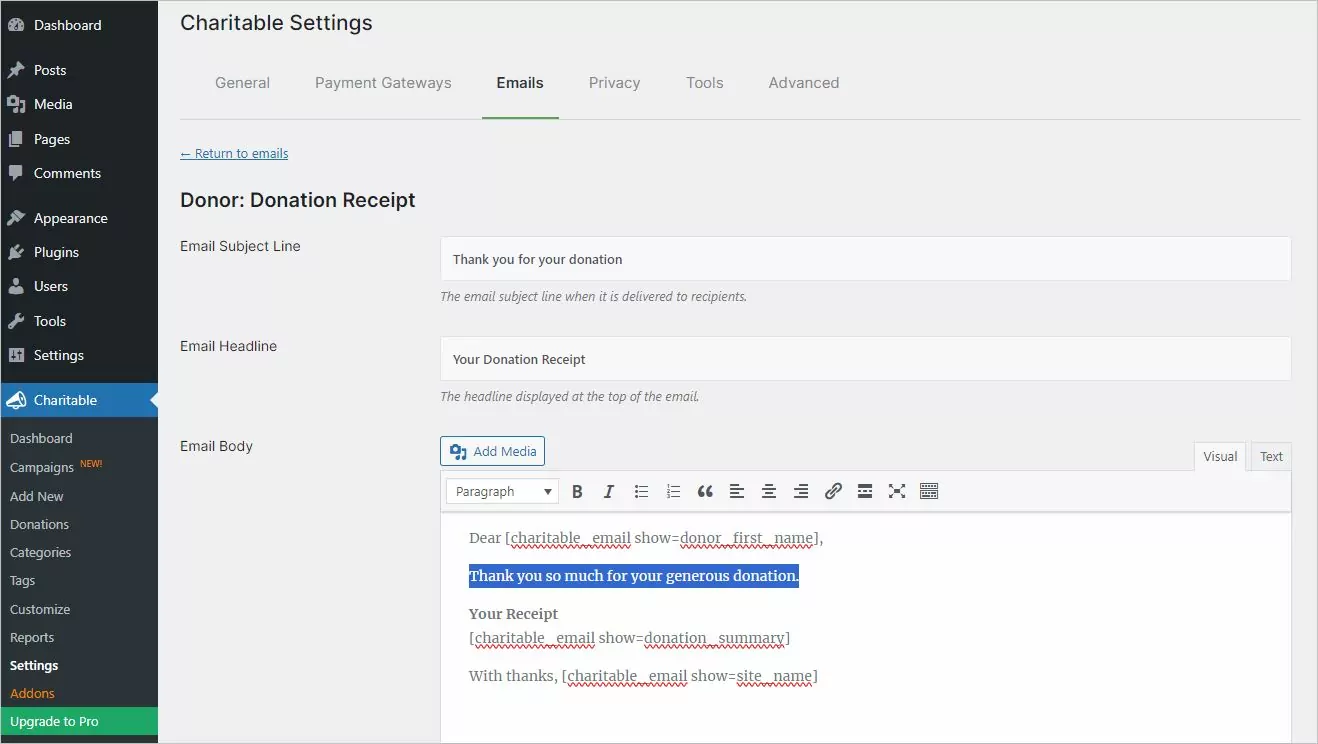
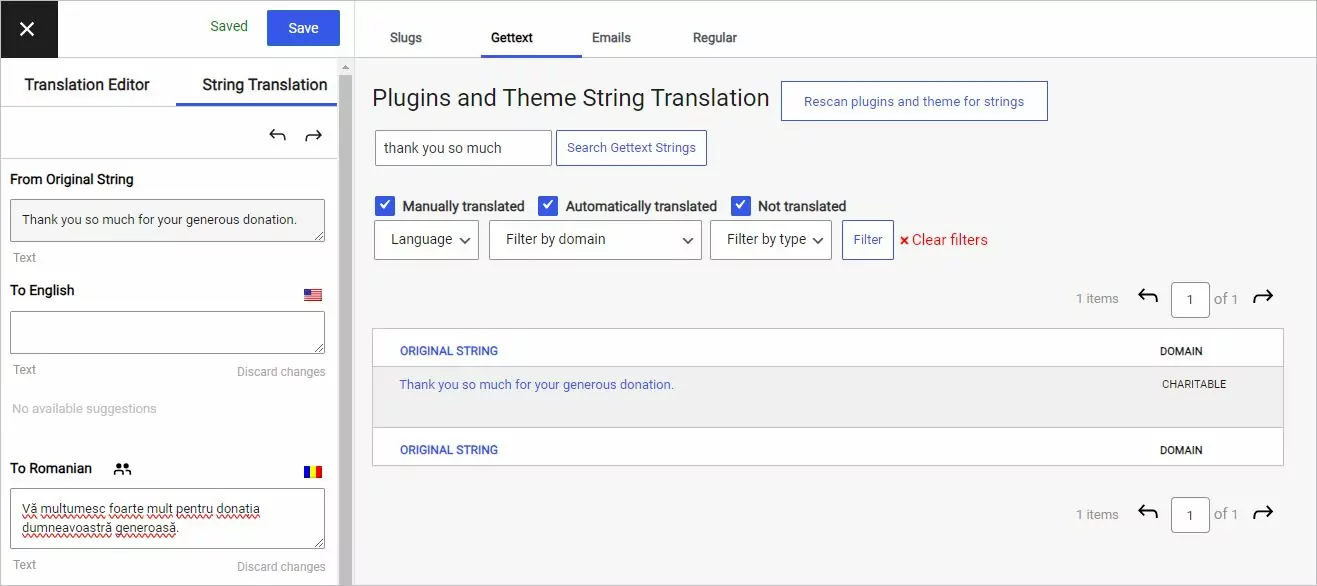
Even those emails are never displayed on the front-end, you can translate the content of them using the String Translation Interface from Translation Editor.
You have to open the Translation Editor and navigate to String Translation tab, the select the string type category the string you want to translate belongs. In our example, this is a Gettext string.
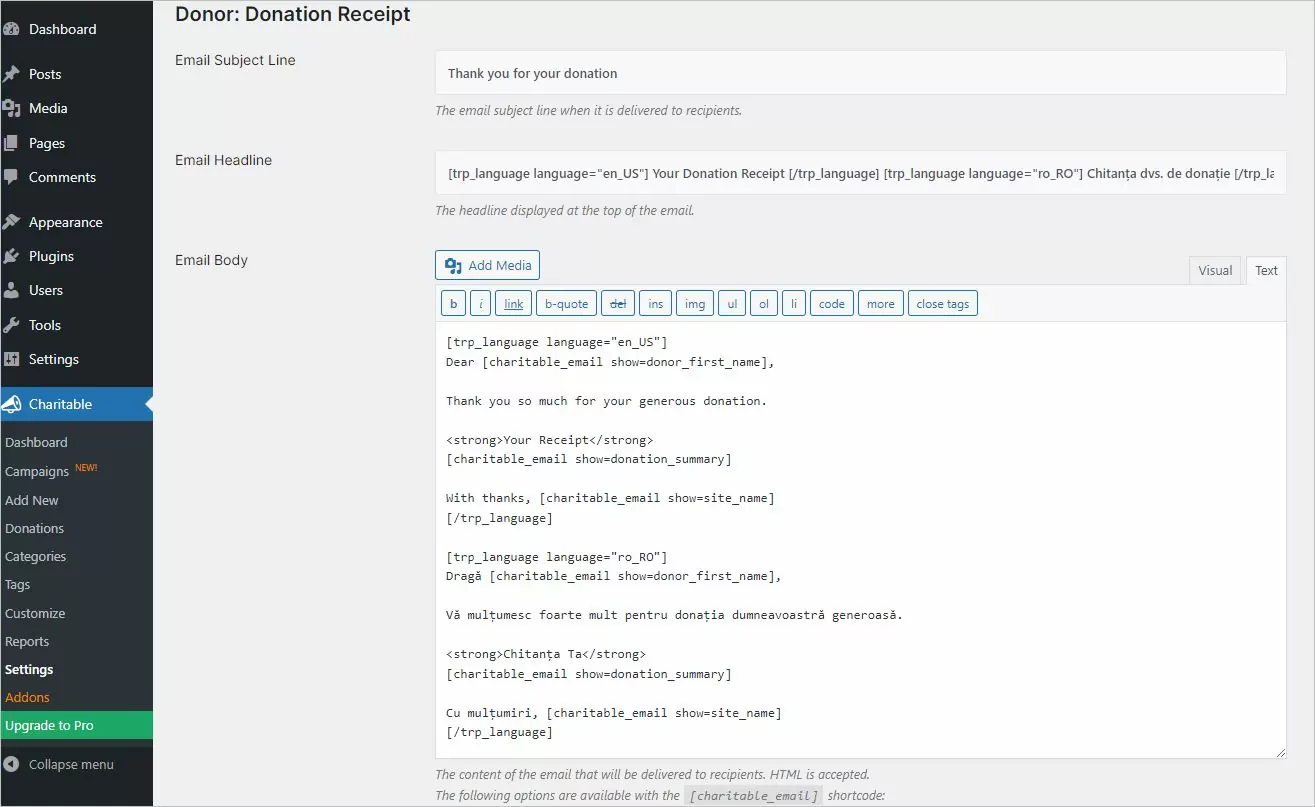
Another approach will be to use the Conditional Language Shortcode in TranslatePress that will output the content inside it only if the current language matches the one in the shortcode.
English content only
Please make sure the language locales (e.g. en_US or ro_RO) are correct. If it’s not, the content in the shortcode will not be displayed.
Conclusions
With the help of Charitable and TranslatePress, you can create a multilingual fundraising website, making it easier to reach supporters in their own native language.
While it does require an initial setup, once that is out of the way, you can focus on creating a great campaign and sharing it with as many people as possible all over the world!