You can access the TranslatePress plugin settings in the administrator area in the menu under Settings -> TranslatePress.
It can also be accessed both from the frontend and administrator area from the Admin Bar under the newly created button under the Settings drop-down.
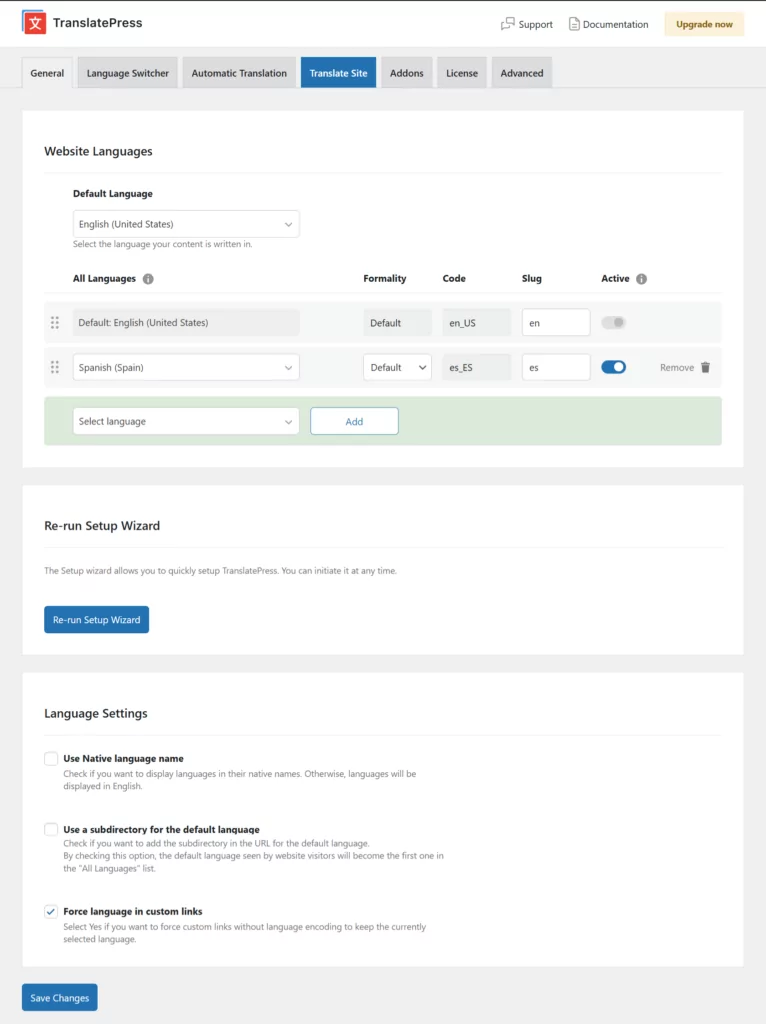
Default Language
Select the original language from the drop-down your website was written in.
By default the language is inherited from the WordPress language that you can setup on install or change from Settings -> General.
Translation Languages
This interface allows you to select the languages you wish to make your website available in. You just have to select the language from the drop-down and click the Add button.
Actions you can perform on the languages:
- Edit the slug of the language that will appear in the URLs of the site from the Slug input.
- Make the language active for the visitors of the site or only available for translation for the administrator and the translator by checking or un-checking the Activate checkbox ( Feature available only with the Multiple Languages add-on )
- Remove the language by clicking the Remove link ( this will not delete the existing translations from your database).
- Rearrange the order of the languages with the drag-and-drop interface. This will determine the order in the language switcher floater and shortcode.
- Placing a translated language in the first position will make the website load in that language by default for visitors, provided that the option Use subdirectory for default language is enabled.
Formality on languages
For some languages,there will be available a dropdown select where you can choose between Formal/Informal translation.
The choice determines the pronouns and related words used in your translation.
*This feature is available only for TranslatePress AI and DeepL.
Display languages in their native names
Enable the option Use Native language name if you want languages to display their native names. Otherwise, they will be displayed in English.
Use subdirectory for default language
Activate this setting if you want to add the language slug in the URL for the default language. For example www.myhomepage.com/en/ instead of www.myhomepage.com when visitors are viewing the site in its default language.
By enabling it, the default language seen by website visitors will become the first one in the “All Languages” list. This means that you can have one of the translated languages displayed when visitors access your website without language encoding in the URL.
For example, if your site’s default language is English and the site is www.myhomepage.com, and Spanish is set as the first language in the list, then when someone accesses your site using a URL without language encoding, they’ll be taken to the Spanish version: www.myhomepage.com/es/ in this case.
Force language in custom links
Enable this option if you want to force custom links without language encoding to add the language slug in the URL for the default language.
Translate Site
Clicking on this tab will open the Translation Editor in the frontend of the site where you can begin translating your site.
Advanced Settings
Find out about options that help fix certain issues with integrating TranslatePress into your project here.