General Preview
TranslatePress includes a dedicated Language Switcher tab in the Settings, making it simpler to configure and manage your switchers. This enhances usability, maintains full backward compatibility, and delivers a modern, more flexible language-switching experience.
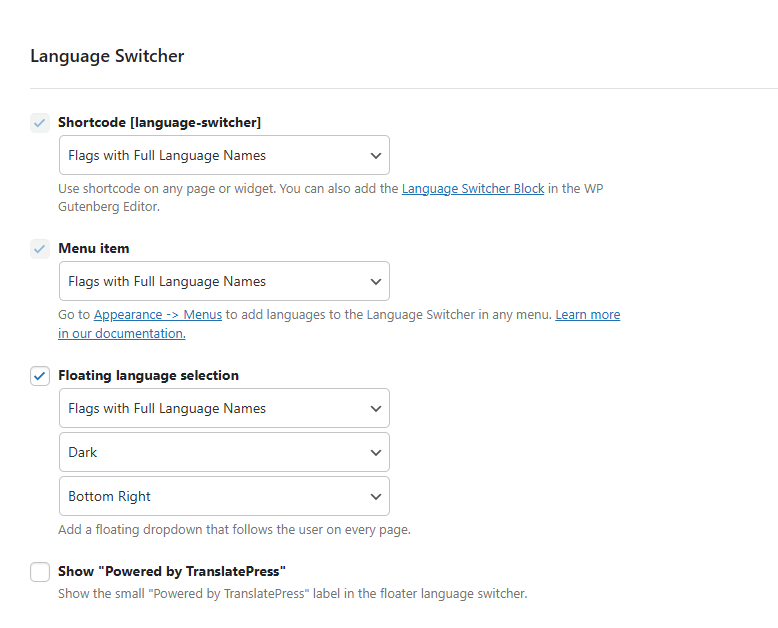
The tab centralizes all options related to the switcher and is divided into three sections:
- Floating Switcher – controls the floating language switcher display and style (Have a floating dropdown/side-by-side following the user on every page).
- Shortcode / Gutenberg Block – configuration options for embedding the switcher via shortcode or block (Use the [language-switcher] shortcode on any page or widget. You can also add the Language Switcher block in the WP Gutenberg Editor).
- Menu Item – settings for the switcher added inside WordPress menus (Go to Appearance → Menus to add Language Switcher Languages in any menu).
This separation provides a clearer structure and a more intuitive setup experience.
The “Revert changes” button from the Language Switcher tab restores the last saved configuration, not the legacy defaults.
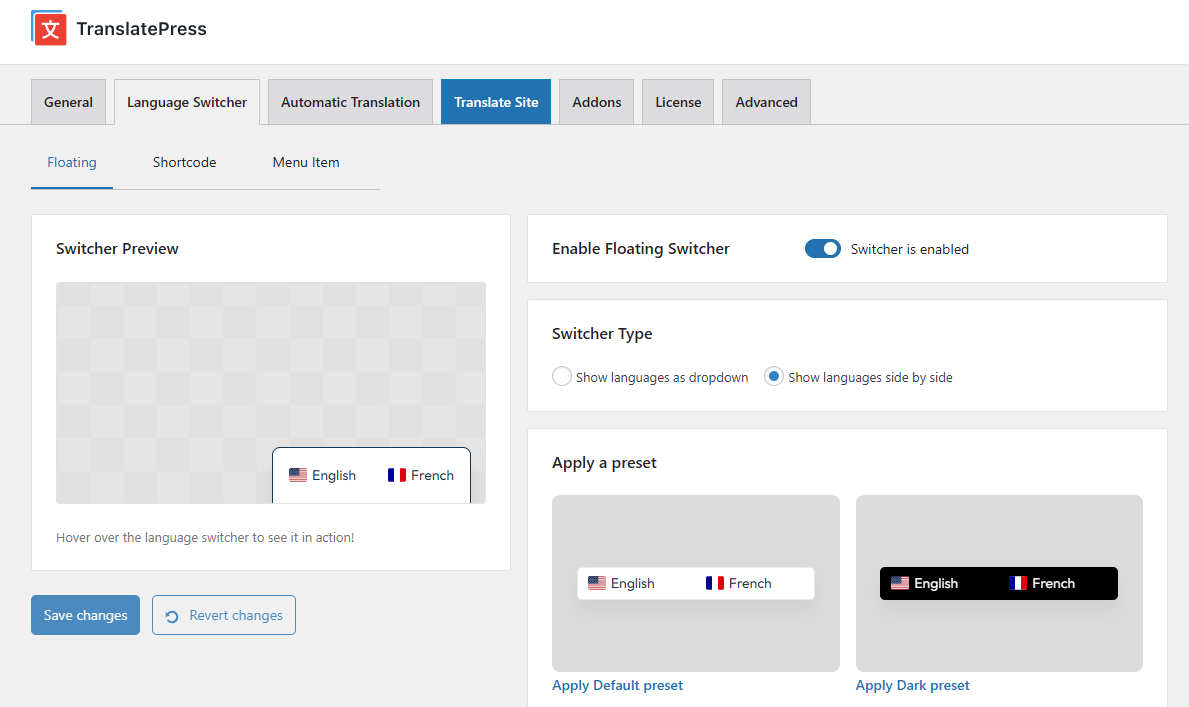
Floating Switcher
With this design, you can now customize your Floating Language Switcher from the Language Switcher tab → Floating section:
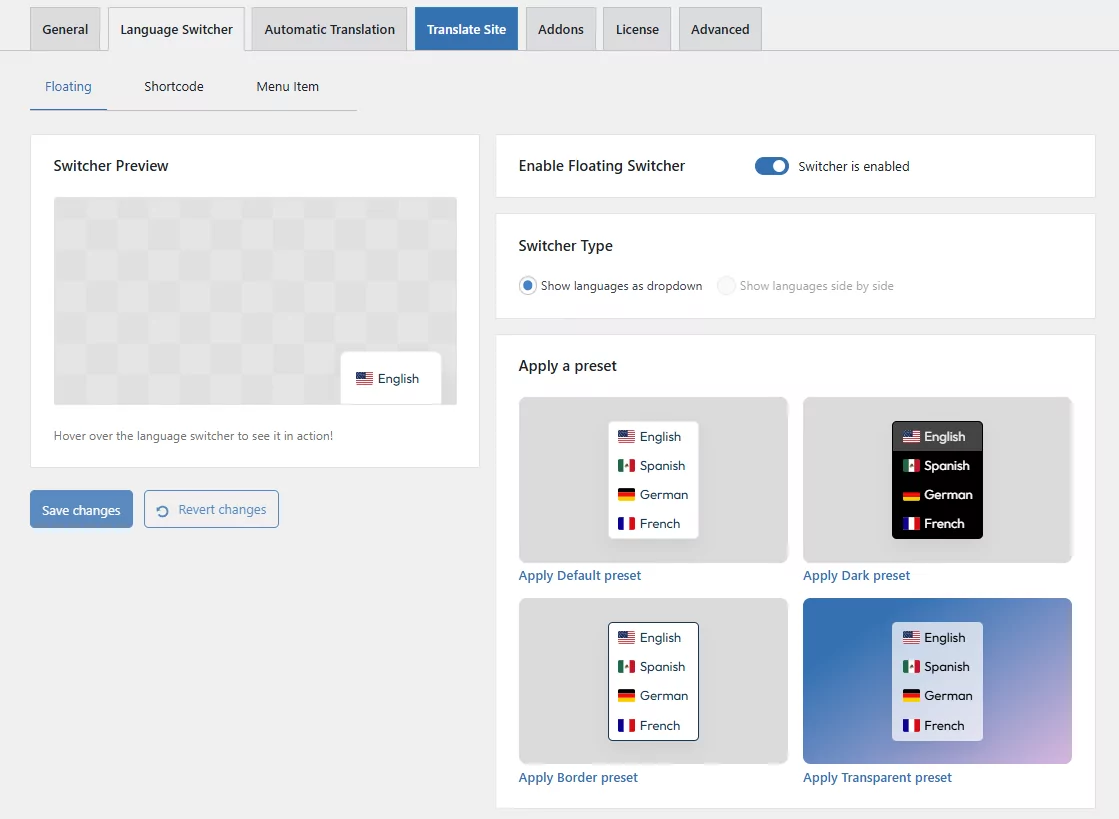
You can now choose the switcher type of your Floating Language Switcher:
- Show languages as dropdown.
- Show languages side by side (this feature works only if you have exactly 2 languages published).
You can select a preset from the available design options and apply it to your website without creating a custom one.
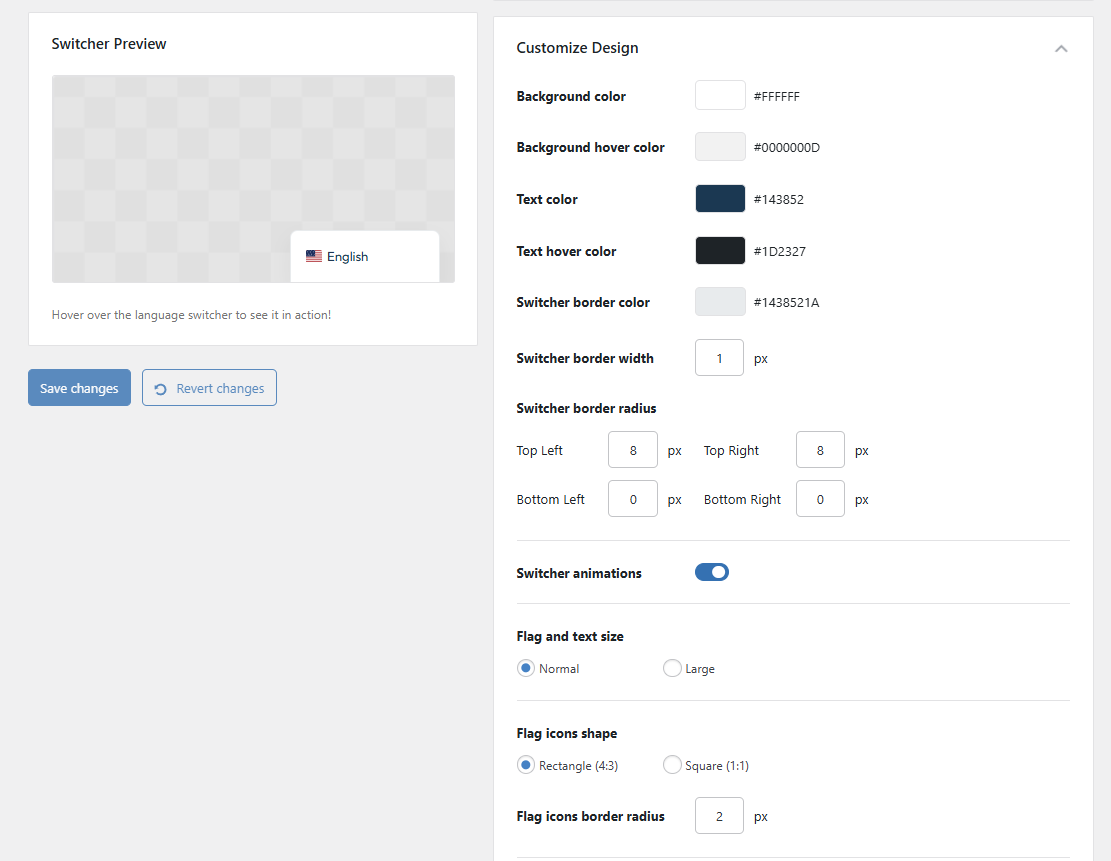
However, if you want to customize your language switcher, you can do this using the Customize Design section, where you can modify the backgrounds, text color, and border radius.
To adjust the appearance of the floating language switcher, go to the Customize Layout section. From there, you can define how the switcher should look on both desktop and mobile devices.
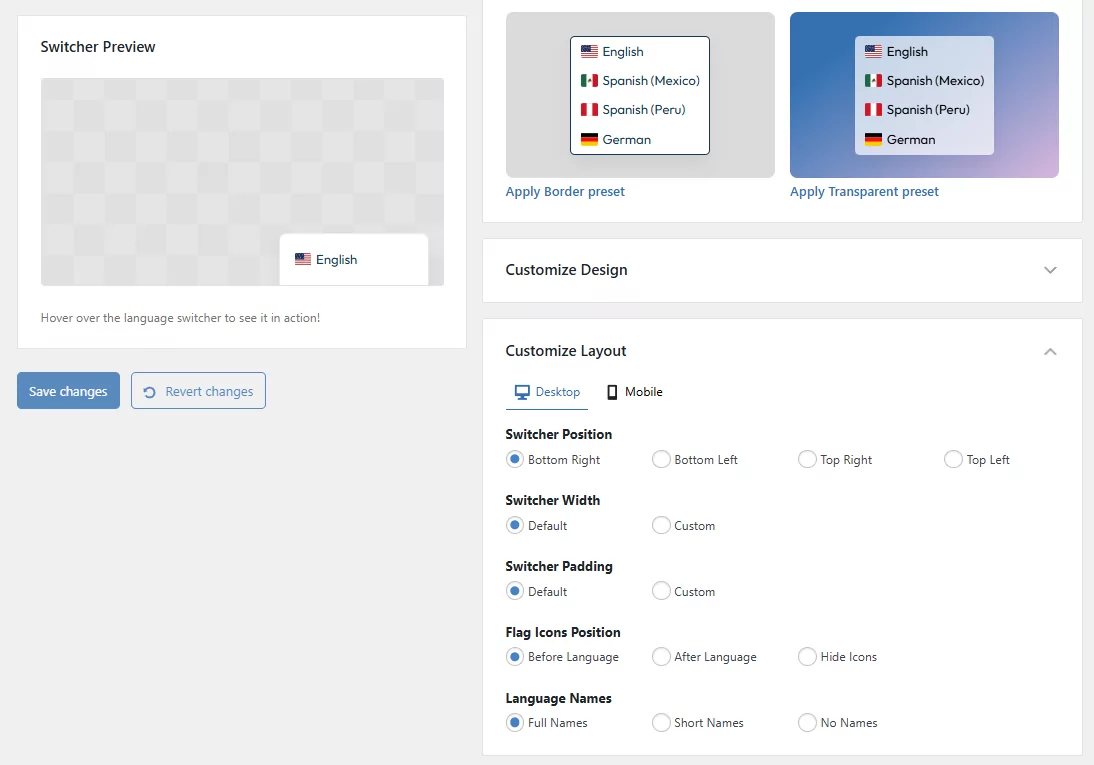
The available options include:
- Language Names – show or hide the language names alongside the flags.
- Switcher Position – choose where the switcher will be displayed on the screen.
- Switcher Width – set the overall width of the switcher container.
- Switcher Padding – control the spacing inside the switcher.
- Flag Icons Position – adjust where the flags appear in relation to the language names.
Shortcode / Gutenberg Switcher
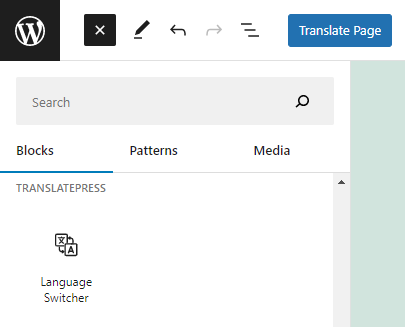
When editing using WordPress’s Gutenberg Editor, you can easily add the Language Switcher block. To do this, open the block inserter by clicking the “+” Add Block button in the editor toolbar or within your content area. In the search bar, type “Language Switcher” and select it from the list of available blocks. Once added, the Language Switcher block will appear in your layout.
TranslatePress provides also a shortcode that allows you to place a language switcher anywhere on your site. The [language-switcher] shortcode can be inserted into:
- Pages or Posts (via Gutenberg block editor, Classic editor, etc.).
- Widgets (using a Text widget).
- Page Builders (e.g., Elementor, WPBakery, Beaver Builder, using a Shortcode or Text block).
- Templates created with your theme. For custom placement in theme templates, you may also use the PHP function:
<?php echo do_shortcode('[language-switcher]'); ?>
From the Shortcode section in the Language Switcher tab, you can:
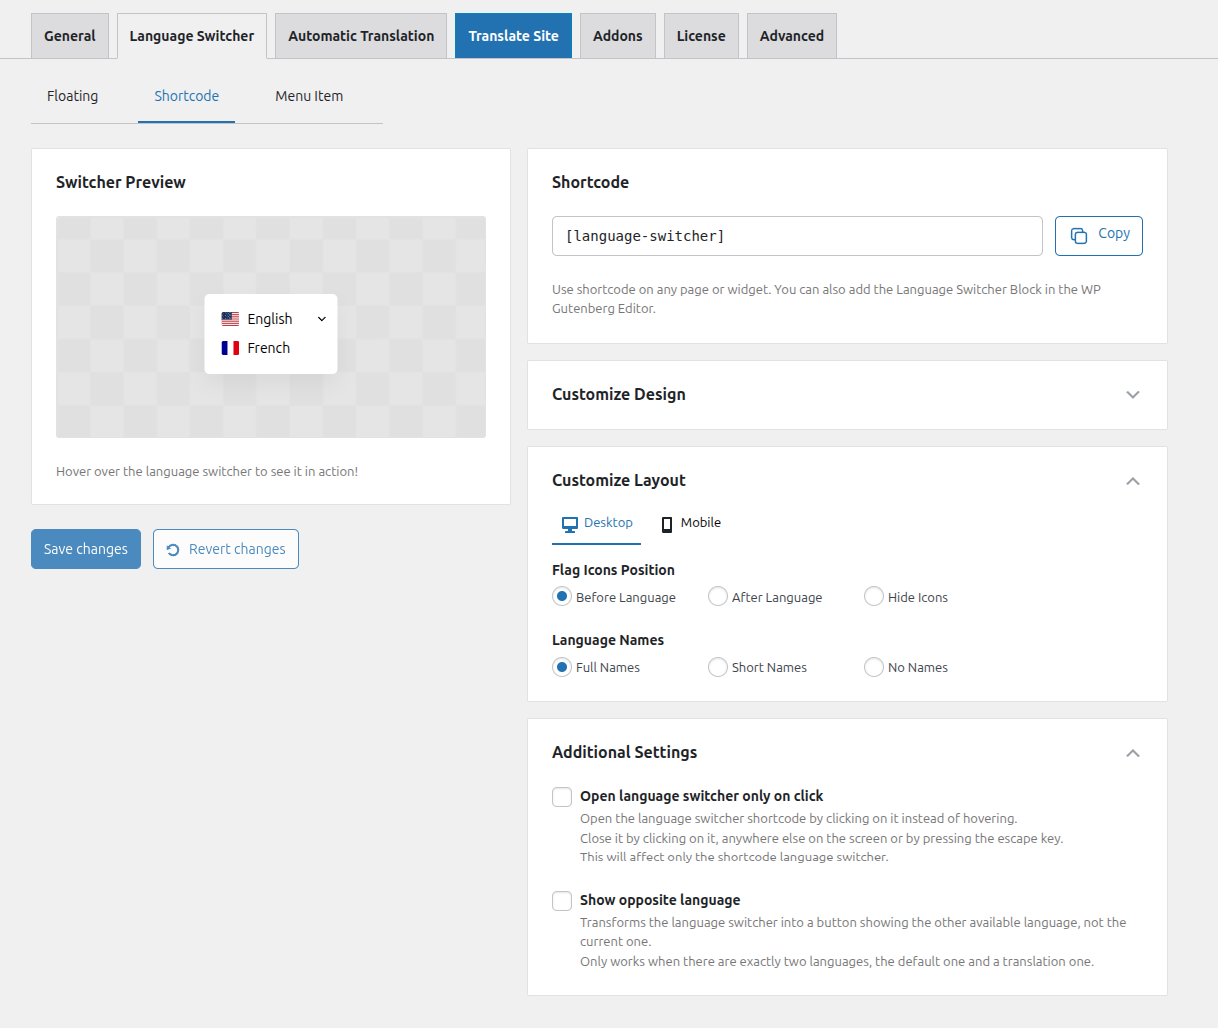
- Customize the design, including backgrounds, text color, and border radius.
- Control the display style of the switcher (flags, language names, or both) – independently for desktop and mobile.
- Enable additional behaviors, such as “Open language switcher only on click” and “Show opposite language”.
This ensures consistency whether you are working with the classic editor (shortcode) or the Gutenberg block editor.
Menu Switcher
The Menu Item Language Switcher allows you to add language options directly into any WordPress menu. It automatically adapts to the styling of your theme’s menu, ensuring a seamless look and feel.
- Go to Appearance → Menus in your WordPress Dashboard.
- In the Add menu items panel, you will see a Language Switcher section you can choose from. Select the languages you want to include, then click Add to Menu.
- Arrange the language switcher items within your menu as needed.
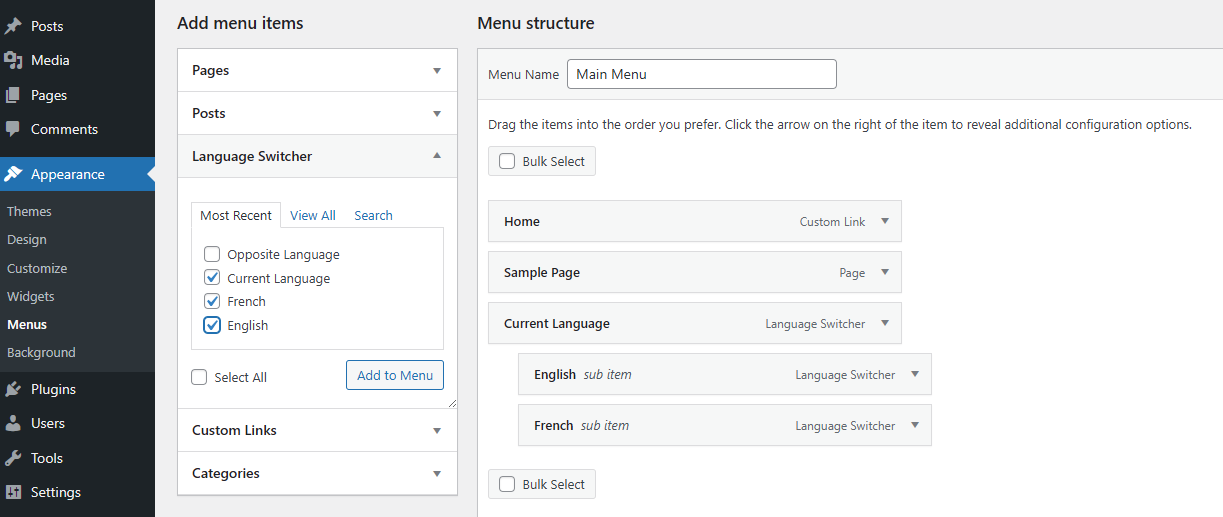
You can choose creating a menu switcher using the Current Language block, or place the languages as singular items into your menu. In case of using only 2 languages, you have the option to create an Opposite Language switcher by using the proper menu block.
In the Menu Item section of the Language Switcher tab, you can customize how the switcher items appear by choosing whether to display the flag icons, adjusting their position and shape, or enabling / disabling language names (or combining them with flags).

Configuring these layouts can be done independently for desktop and mobile navigation.
Legacy Mode Compatibility
Beginning with TranslatePress – Multilingual 2.9.25, the Language Switcher has been completely redesigned (as shown above), making configuration and management more intuitive and streamlined.
To ensure a smooth transition from the old design, a Load legacy Language Switcher option has been introduced in TranslatePress Settings → Advanced tab → Troubleshooting section:
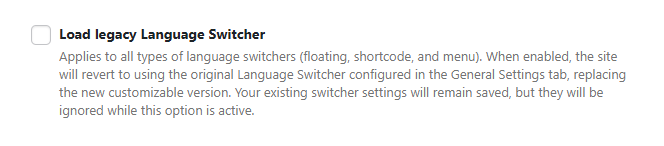
- Disabled by default for new users – meaning for the customers who have not previously used TranslatePress and are installing the plugin for the first time, starting with this version, the Load legacy Language Switcher option will be disabled by default. These new clients will only have access directly to the new switcher structure.
- Enabled by default for existing users – so their sites continue to use the older switcher design without requiring any immediate changes. In this case, the old switcher settings will be located in TranslatePress Settings → General tab.
Disabling the Load legacy Language Switcher option automatically switches to the new design structure. This ensures that disabling legacy mode does not reset or remove previous customizations of the switchers which are migrated automatically by the system, including:
- Flag + language name preferences.
- Show opposite language option.
- Show “Powered by TranslatePress” option.
- Enable floating switcher.
- Floater theme (dark / light) → migrated to dark / default preset.