
In this post
In this post
Looking to create a WordPress multi language site?
The truth is, limiting yourself to publishing online content in English can result in several missed opportunities. With a WordPress multi language site, you could be attracting readers for your blog from Spain, marketing products to customers in China, selling services to people in Brazil, and more.
Fortunately, creating a WordPress multi language site is easier than you might imagine, as long as you use the right tools for the job. Depending on which language(s) you want to target, you can multiply your site’s audience many times over.
In this article, we’re going to talk about the advantages of going multilingual and how you can use TranslatePress to do so. Then we’ll guide you through the process of translating your entire WordPress website in five easy steps. Let’s dive in.
The Advantages of Having a WordPress Multi Language Site
The most immediate advantage of having a multi language WordPress website is that it expands your audience. The more languages your content is available in, the more people you can reach.
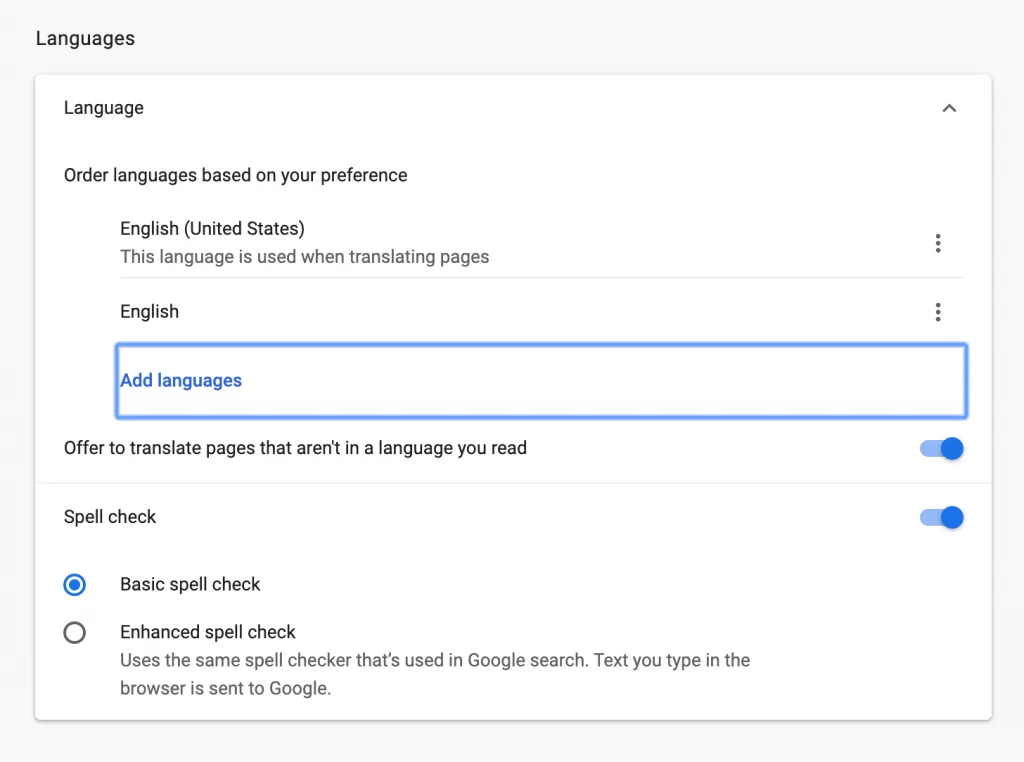
There are a few factors that contribute to this. Firstly, most browsers enable users to specify their preferred language for browsing:
If your content is available in multiple languages, you can reach people despite their browsers’ settings.
Additionally, online shoppers prefer to make purchases in their native language. This makes sense, considering customers probably want to be certain of what they’re buying before entering their payment information.
By translating your store into languages besides English and enabling international shipping, you can suddenly access a massive number of potential new customers. This, in turn, could significantly increase your sales.
However, online stores aren’t the only websites that can benefit from going multilingual. For instance, translating your blog could bring in more readers and increase your ad revenue.
Translating your website also helps from a multilingual Search Engine Optimization (SEO) standpoint. Some keywords you might have difficulty ranking for in English could be easier to target in other languages, thus increasing the visibility of your site.
Why You Might Want to Use a WordPress Multi Language Plugin
No one ever said translating a website is simple. If you’re using WordPress, you have one major advantage, however – multilingual plugins. Installing the right extension can significantly decrease the amount of time required to take your site from English-only to multilingual.
For instance, with our plugin TranslatePress, you can translate all your website’s content, metadata, and even its plugins and themes, all without touching a line of code:
For straightforward websites with less complex content, TranslatePress can also enable you to incorporate machine translation services to add languages to your site almost instantly.
In general, translation plugins are useful not only because they can save you a massive amount of time, but also because they’re relatively inexpensive. Professional translation companies usually cost an arm and a leg, and even more so if you’re dealing with a development agency that subcontracts translators.
With TranslatePress, you have the option of pursuing several different methods for a wide range of budgets. In addition to automated translation, you can use our helpful interface to add new languages yourself. Alternatively, you can also contract freelance translators to work on your site without having to grant them admin-level access (more on this on Step 4).
How to Create a WordPress Multi Language Site with TranslatePress (In 5 Steps)
For this tutorial, we’re going to show you how to use TranslatePress to translate multiple types of content, including your website’s SEO metadata. With that in mind, go ahead and install the free version from WordPress.org, activate the plugin on your website, then move on to Step 1.
Step 1: Add New Languages to WordPress
Before you get around to translating anything, you’ll first need to add languages to your website. To do so, go to Settings → TranslatePress in your WordPress dashboard and look for the section that says All Languages.
You’ll see your default language listed first. You can use the drop-down menu right below it to add new languages:
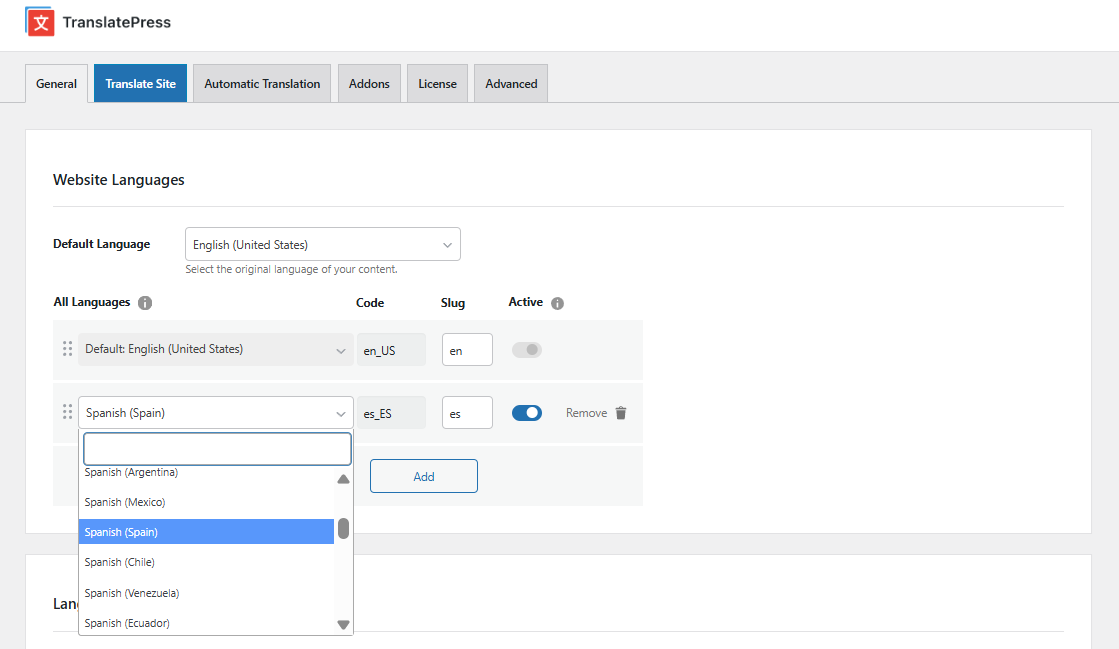
Keep in mind – the free version is limited to one new translation language, but you can add as many languages as you want using the Extra Languages add-on (available in any premium version). When you go on to translate its content, you’ll choose which strings to target and which language you’re translating them into.
Under TranslatePress settings you have a few other options, like customizing the looks of your WordPress language switcher, but we’ll leave them as default for now. So, once you’ve added all the languages you want to incorporate on your site, simply save the changes, and let’s proceed to translating the actual content.
Step 2: Translate Your Content Manually
As we already mentioned, there are a few ways you can translate content using TranslatePress. First, we’ll teach you how to do so manually. This is the preferred approach if you’re fluent in your target language.
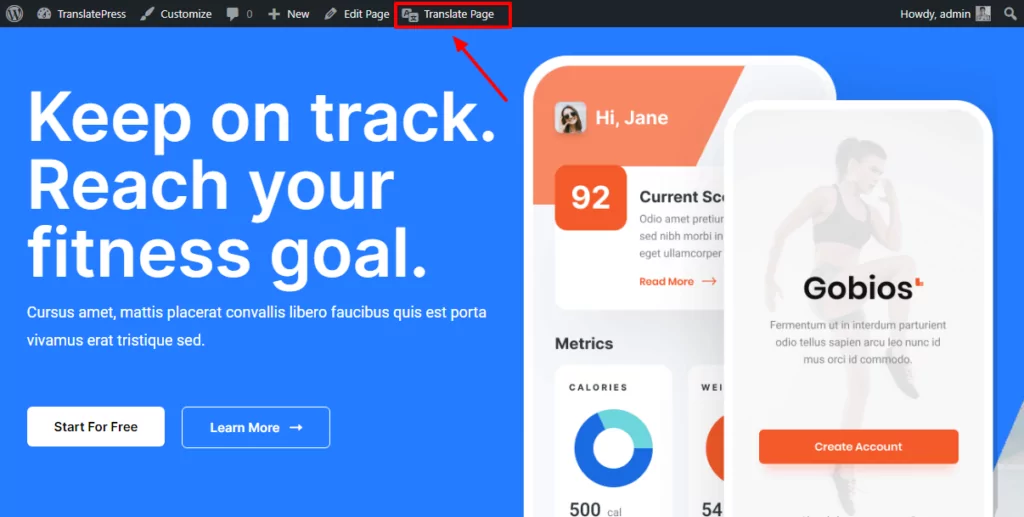
To get started, navigate to the page you want to translate and click on Translate Page in your admin toolbar. You have to be logged in to an admin account for it to appear:
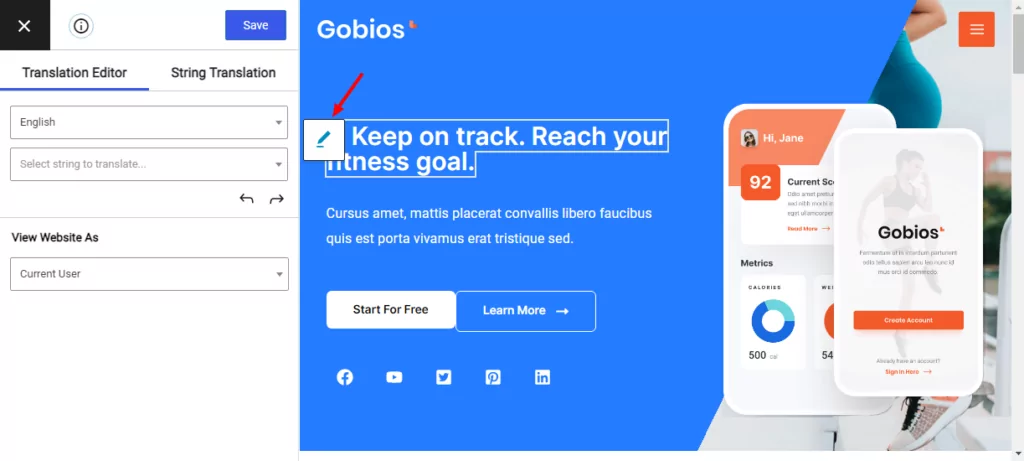
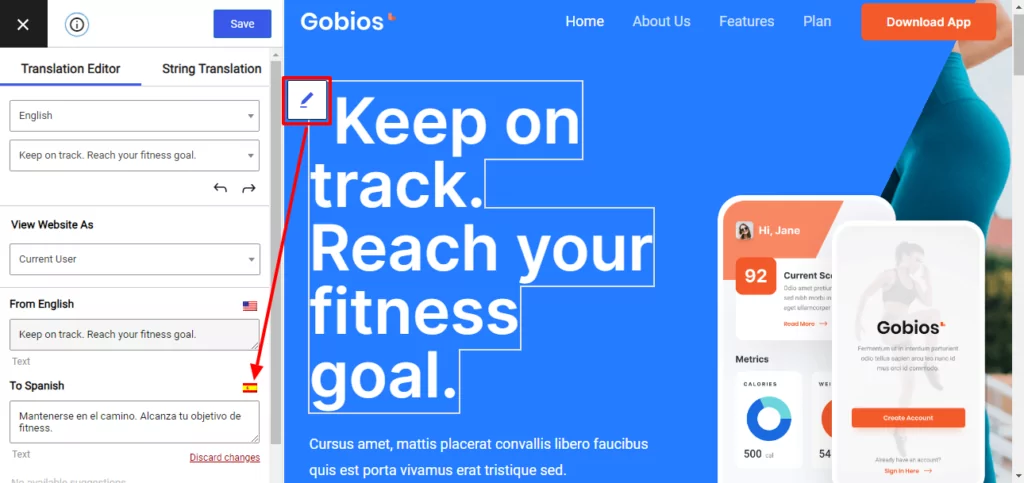
Here you’ll see an editor that looks similar to the WordPress Customizer to the left. You can now hover over any element and click on the pencil icon that appears to translate its corresponding ‘string’:
Notice the text appears to the left under From English, which is our website’s default language. To translate the string, enter the corresponding text under To Spanish, as seen below:
Once you’re done, click on Save translation. To view the page so far in Spanish, you can switch languages at the top of the screen and the translations should show up instantly.
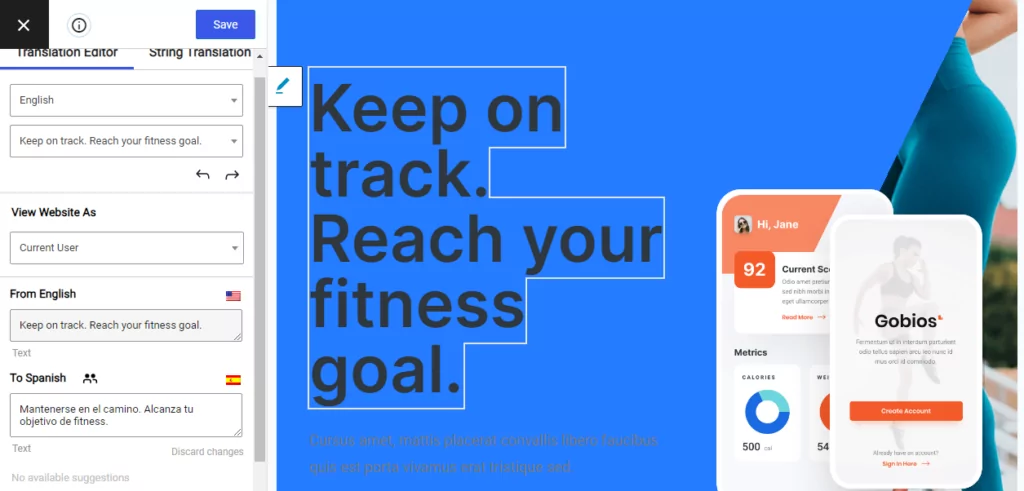
If you want to see translations live as you make them, you can change your website’s language while using the editor. For example, if we switch from viewing our page in English to Spanish, then translate the string, we can see the changes immediately:
When you finish translating a page, you can navigate within your website without closing the TranslatePress editor. Moreover, you only have to translate each string once. For example, you can see that my menu items remained in Spanish, even though I navigated to another page. That’s because I’ve already translated those strings on the homepage.

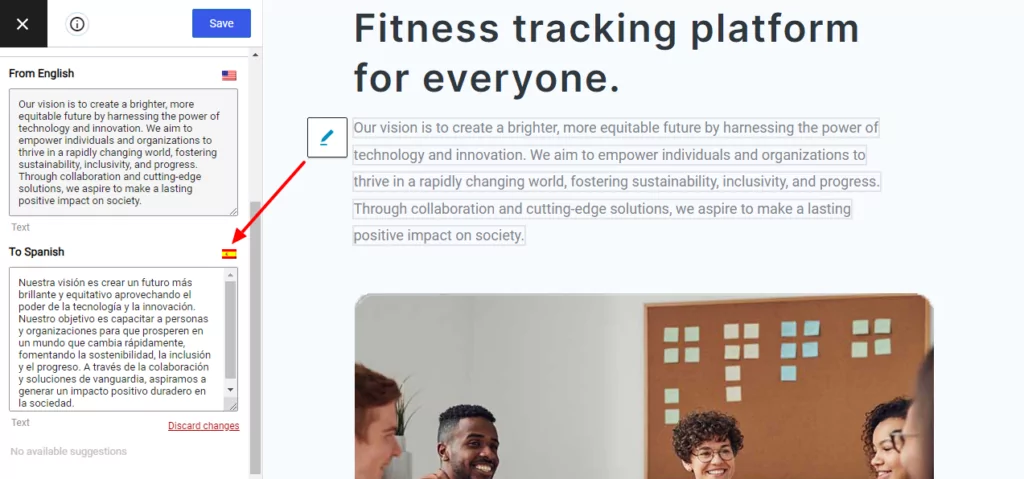
The same approach we’ve outlined here applies to all content on your website. Unfortunately, this means translating longer strings (such as whole paragraphs in posts) is much more labor-intensive:
Additionally, this method requires you to be fluent (or at least conversational) in all your target languages. We’ll discuss alternatives later in this post that can help you overcome these challenges.
Step 3: Translate Your Plugin and Theme Strings
A lot of the content that appears on your WordPress website is generated automatically by your plugins or theme. WooCommerce, for example, incorporates Add to cart buttons, checkout pages, and plenty more elements.
Some popular plugins can detect which language your website uses and supply translations for any text they add to your site. However, that’s not always the case, which means you may also have to translate dynamic plugin and theme strings manually. This is also something you can do using TranslatePress.
In our examples, we’re using WooCommerce, which is also available in Spanish. That means merely switching languages using TranslatePress is enough to update most of its strings, such as the Add to cart button:

For plugins or themes that don’t include their own translations, you can take care of their strings manually as you would any other element.
Additionally, if you use a page builder on your website, you can still translate your content using TranslatePress. The process works just like we outlined in the last section:
TranslatePress integrates with the most popular page builders, including Elementor, Divi Builder, Visual Composer, and more. All you have to do is build new pages as usual and when they’re ready, translate their content.
Step 4: Use Automatic Translation When Possible
To save time when you’re dealing with content-heavy websites, you may want to utilize automated translation. Keep in mind, however, we still recommend you review your translated content thoroughly to ensure there aren’t any mistakes.
If you want to use machine or automatic translation on your website, TranslatePress enables you to do so. And you can even do it for free.
Using Google Translate to translate a WordPress site is available in the free version of the plugin while using DeepL is included in the pro versions. However, keep in mind that Google might charge you if you go over their free tier limit when it comes to the volume of translated characters.
To get started, go to Settings → TranslatePress → Automatic Translation tab and set the dropdown to Yes under Enable Automatic Translation.
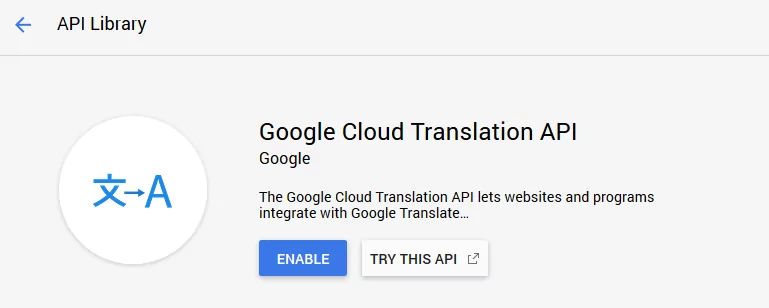
Once you do that, a number of settings will appear below. For this example, we’ll use Google Translate as our Translation Engine. To connect it to your website, you need an API key:

You can get a Google Translate API key through your Google Cloud account:
Once you’ve acquired your API key, add it to the TranslatePress Settings page and save your changes. Then you can sit back and wait for Google Translate to do its job. You can also watch this video to help you out with generating the API key.
Keep in mind that machine translations are often less accurate than human translation. If you want to ensure your multi language website is high quality, you’ll want to comb over Google’s output to make sure there aren’t any glaring mistakes.
Alternatively, you could invest the money you would put towards automated translation and hire a freelance translator instead. With our Translator Accounts add-on, you can grant them access to your site to do their work without having to give them admin-level permissions.
Step 5: Translate Your Website’s Metadata
Once you’re done translating your website’s content, you’re not ready to call it a day yet. To reap the full benefits of a WordPress multi language website, you need to translate your metadata as well.
By metadata, we mean its meta descriptions, page titles, alt text, tags, and other elements involved in SEO for multiple languages. You can do this for any page on your website, and it works the same as modifying regular types of strings with TranslatePress.
To access your page’s metadata, select the menu under your primary language in the TranslatePress editor. Here, you’ll see a full list of all the strings that appear on that page, including a section labeled Meta Information and a section called Slugs:
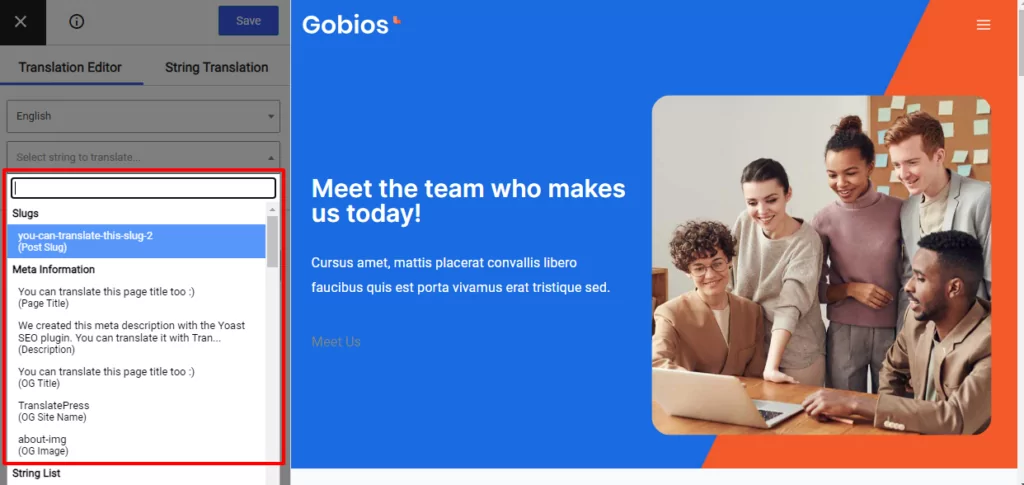
Which strings appear under Meta Information will depend on how much metadata there is on your page. If you’re meticulous when it comes to SEO, you’ll have to translate plenty of elements.
While you’re still editing strings, it’s also an excellent idea to translate each page’s URL slug, which will update its corresponding URL.
Keep in mind that metadata translation isn’t available with the free version of TranslatePress. To access the features we went over in this step, you’ll need our SEO Pack add-on, which comes with any of the premium versions of TranslatePress.
The SEO Pack add-on allows you to translate all the URL slugs, from one place. You can translate:
- Taxonomy slugs
- Term slugs
- Post slugs (this includes pages and custom post types, like WooCommerce products)
- Post type base slugs
- WooCommerce slugs
If you’re looking to translate every slug on your website more easily, you can do so from the String Translation editor. Simply go to the Slugs tab and select any slug to translate in the translation sidebar.
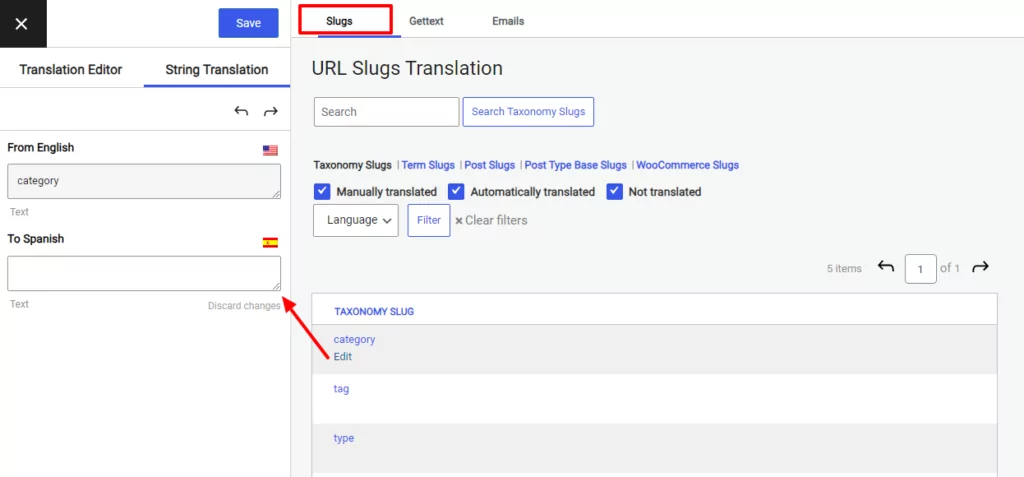
You can filter through the types of slugs you want to translate or even filter out the strings that have already been translated from being displayed in the list.
Step 6: Translate Gettext and Hidden Strings
Ok, so up until now, we’ve talked about translating all kinds of strings that are visible on your site. But what about the ones that are not directly displayed on the front end, such as emails sent to your customers?
Well, the same String Translation interface lets you tackle every other type of string that can be found on your site, front or back end. For example, if you switch to the Emails tab, you can select strings from emails that WooCommerce sends to your customers and translate them as well.
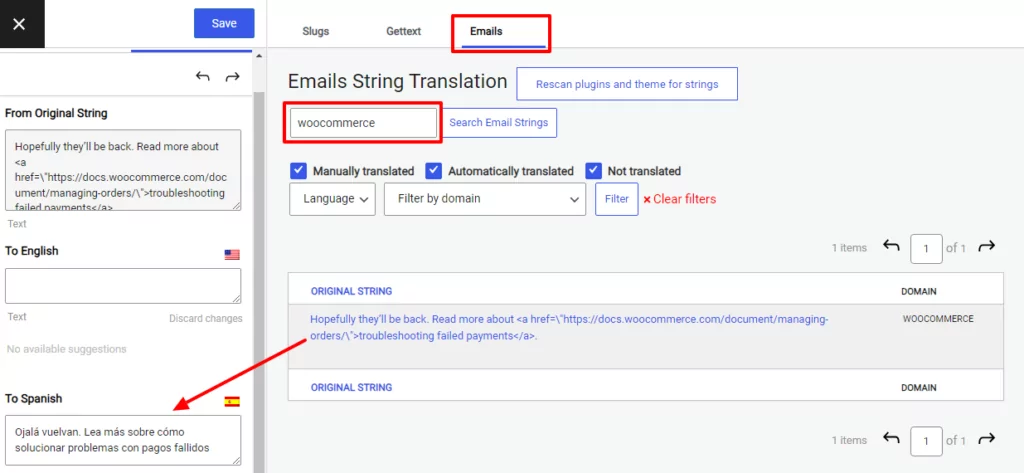
This way, your customers will receive these emails in their preferred language.
If you navigate to the Gettex tab, you’ll also be able to find all of the strings coming from your plugins and theme in the same place. You can easily translate pop-up content or strings that appear only upon certain actions from here too.
Set Up your WordPress Multi Language Site Today
Professional website translation services are costly and can take months to complete. With the right WordPress plugin, you can speed up the process and save some money by putting in the work yourself or incorporating machine translation.
Using TranslatePress, you can create a WordPress multi language site in just a few steps:
- Add new languages to WordPress;
- Translate your content manually;
- Translate your plugin and theme strings;
- Use automatic translation when possible;
- Translate your website’s metadata;
- Translate gettext and hidden strings.
TranslatePress Multilingual
Do you have any questions about translating your WordPress website? Ask away in the comments section below!
If you found this post helpful, please check out our YouTube channel, where we constantly upload short & easy-to-follow video tutorials. You can also follow us on Facebook and Twitter to be the first to know each time we post.


Hi, I have downloaded TranslatePress plugin and it works great. My problem is tough that I do not want to translate every single post on my travel blog. And those that wont be translated to English (from Slovak) should not be shown on english version of website at all. Is there any possibility to set this up? Thanks
Hi Nika,
Yes there is, you can use the “Translate only certain pages” functionality from TranslatePress. More details here: https://translatepress.com/docs/developers/translate-only-certain-pages/