In this post
In this post
Wondering whether you should use TranslatePress free vs pro?
There are some decisions you’ll have to make when building a multilingual (or bilingual) website, and picking the right tool for the job is among the first ones.
In this detailed comparison, we show you the differences between TranslatePress free vs pro, and share advice on how to best start with the TranslatePress product line to minimize costs and maximize results.
We’re going to cover:
- The main differences in a nutshell 🥜
- When to use TranslatePress free 🆓
- How to use TranslatePress free
- When to use TranslatePress pro 💪
- How to use TranslatePress pro
- Where to begin if you’re not sure 🤷♂️
TranslatePress Free vs Pro in a Nutshell
Here’s a table that compares the abilities of TranslatePress free vs pro in a nutshell:
| Feature | Free | Pro |
|---|---|---|
| Visual translation interface with live preview of your translations | ✅ | ✅ |
| Works with all themes and plugins | ✅ | ✅ |
| Translates: | ||
| – text content | ✅ | ✅ |
| – images | ✅ | ✅ |
| – buttons and interface elements | ✅ | ✅ |
| – dynamic strings of text generated by themes and plugins | ✅ | ✅ |
| – menus | ✅ | ✅ |
| – page builder content (Elementor, Divi, Beaver Builder, etc.) | ✅ | ✅ |
| – contact forms | ✅ | ✅ |
| – products in WooCommerce store | ✅ | ✅ |
| Language switcher link in menu, floating box, or in content | ✅ | ✅ |
| Automatic translations via Google Translate | ✅ | ✅ |
| Total languages on your site | 2 | unlimited |
| Add-ons: | ||
| Advanced Multilingual SEO | ✅ | |
| “Translator” user account roles | ✅ | |
| Automatic user redirect to their preferred language | ✅ | |
| Automatic translations via DeepL | ✅ | |
| “Browse as user role” | ✅ | |
| Different menu items for different languages | ✅ | |
As you can see, you can do quite a lot with the free version of TranslatePress. In fact, free is going to be all that most new users and bilingual sites will ever need – but more on that in a minute.
When it comes to TranslatePress pro, there are actually three tiers of it. You can tailor your package depending on the specific set of features that you need. (Read which specific add-ons are included in which tier here.)
Let’s now look at some common scenarios of when to use TranslatePress free vs pro:
When to Use TranslatePress Free
TranslatePress free is going to be perfect for bilingual websites.
In other words, TranslatePress free is the best way to add a second language to your WordPress website.
This opens up many opportunities for businesses that want to expand to a neighboring country or want to make their business information public in a more popular language globally.
With TranslatePress free, you get to use the full translation interface (it’s not restricted in any way). You can translate your texts, images, buttons, menus, and more.
TranslatePress free works with any WordPress theme or plugin, too. This means that you can translate all text strings that make up your site’s design/structure – like texts in the footer or copyright messages.
Further, if you’re using page builder plugins like Elementor, Divi, or Beaver Builder, TranslatePress free integrates with those as well, letting you translate everything that’s on your pages.
Last but not least, TranslatePress free gives you the option to use Google Translate in WordPress for automatic translation.
How to Start Using TranslatePress Free
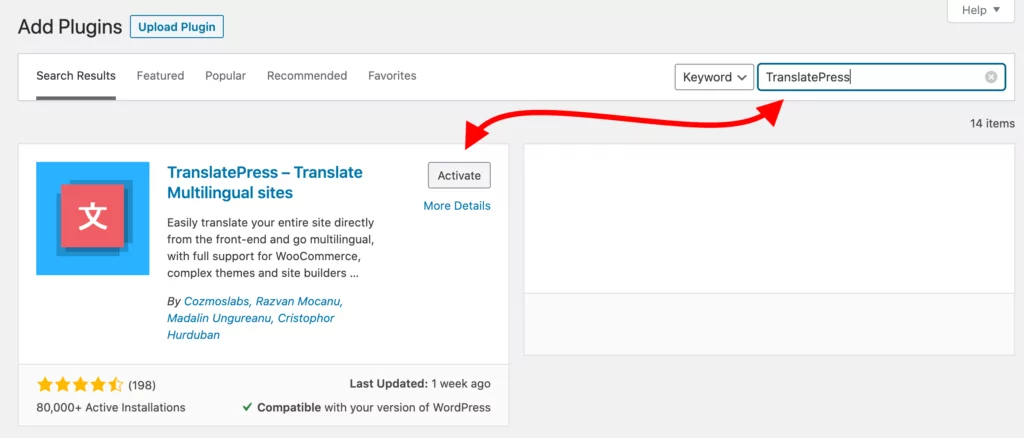
TranslatePress installs the same as any other WordPress plugin. Go to your WordPress dashboard, to Plugins → Add New, and enter “TranslatePress” into the search field. Click on Install and then on Activate.
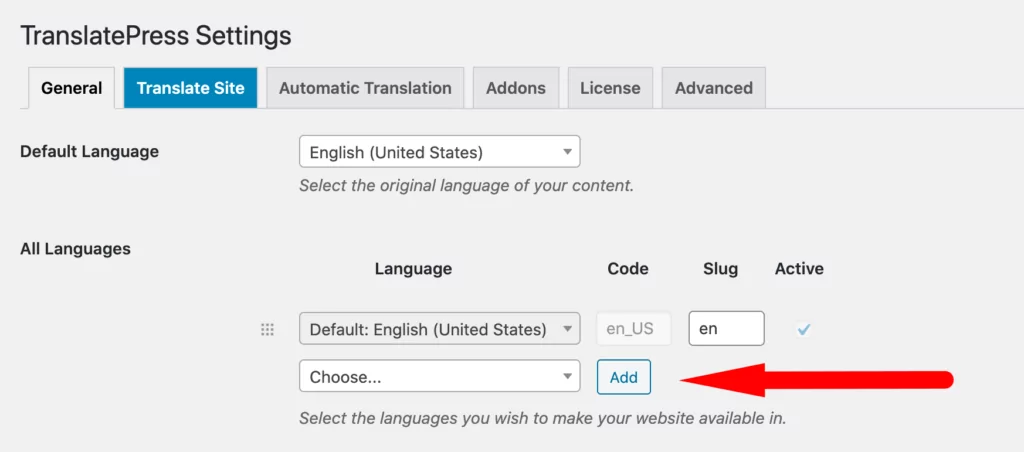
From there, TranslatePress free is ready to use. No registration or additional setup is required. To begin, go to Settings → TranslatePress. Click on the Add button to add your new language:
You can adjust some of the other settings you see on the page, but that’s all optional. Click on Save Changes when done.
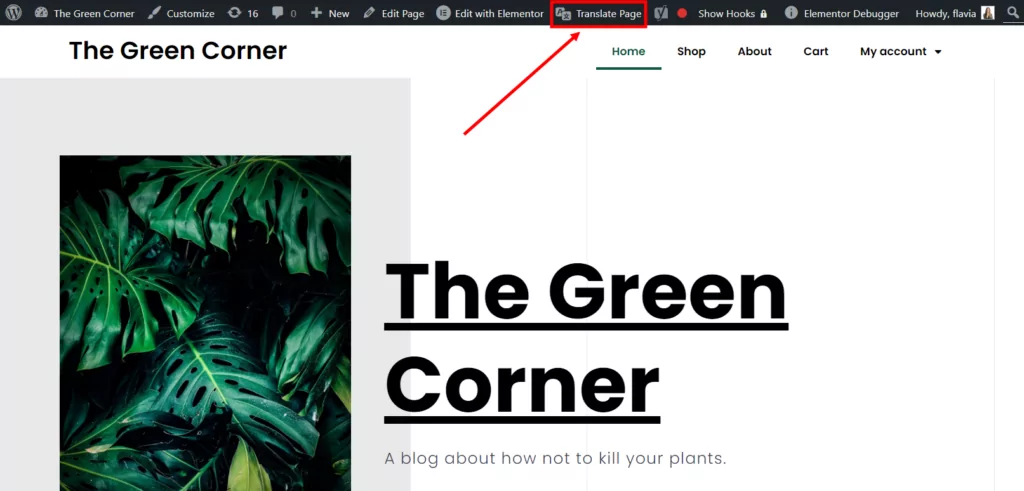
At this stage, you can go to your homepage and click on the new Translate Page button that has been added to your top bar.
You’ll be taken to the main translation interface of TranslatePress.
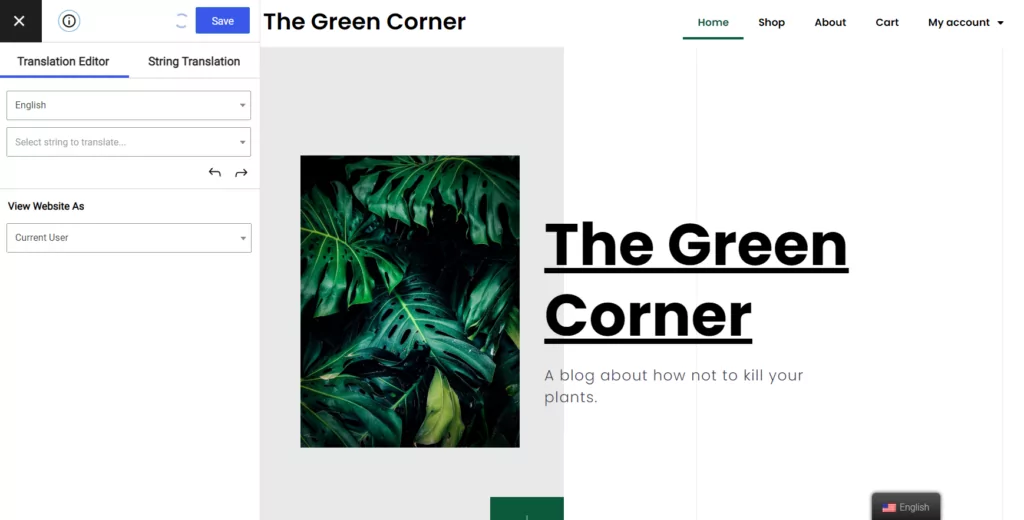
The structure of this interface is very similar to WordPress’ native Customizer UI. All you do is: (1) find a piece of text that you want to translate in the preview window on the right, (2) click on the pencil icon next to it, and then (3) enter your translation in the sidebar. Like so:
Click on Save at the top when done.
Just like that, you can go through your texts piece by piece and translate them all. With TranslatePress free, you can translate basically anything you see on your pages, including:
- text content
- images
- buttons and interface elements
- dynamic strings of text generated by themes and plugins
- menus
- page builder content (Elementor, Divi, Beaver Builder, etc.)
- contact forms
Again, this all works by clicking on the pencil icon next to what you want to translate and then entering your translation in the sidebar.
As soon as you save your translation, it is live on the site, and your visitors will be able to see it. 🍾
If you want to learn more about how to translate specific parts of your website with TranslatePress free, read any of these guides:
- 🖼️ How to translate images in WordPress
- 📋 How to translate Contact Form 7
- 🏗️ The best WordPress page builder plugins and how to translate them
How to Translate Your Site Automatically with TranslatePress Free
One of the best features of the free version of TranslatePress is the possibility to translate your entire site at the click of a button using Google Translate.
This can be a huge helper when you’re adding a second language to your site but don’t have the time to deal with each page individually.
To enable automatic translation, go to Settings → TranslatePress, and then to the Automatic Translation tab.
Select Yes from the drop-down and fill out the remaining required fields on the page:

- Translation Engine: With TranslatePress free, you can use Google Translate.
- Google Translate API Key: Here’s a guide on how to generate your unique Google Translate API key.
- The remaining fields are optional.
Pro tip: you’re not stuck with those automatic translations. If you want to, you can step in at any time and adjust them by hand – should you find something that doesn’t sound spot on.
⭐ Here’s more on how to translate your WordPress website automatically.
When to Use TranslatePress Pro
TranslatePress pro is a great tool for several scenarios:
- 👉 Use TranslatePress pro if you want to feature more than two languages on your website;
- 👉 Use TranslatePress pro if you want to add multilingual SEO capabilities to your site;
- 👉 Use TranslatePress pro if you want to enable automatic translations via DeepL;
- 👉 Use TranslatePress pro if you want to add “translator” user accounts to your site and have people help you with translations.
As you can see, the above fall under the category of pro-level features, so to speak. While new websites or fledgling businesses might not need any of those, they can be absolutely crucial for the right kind of user and/or website.
First off, the pro versions of TranslatePress let you add an unlimited number of languages to your site. This is ideal if you want to open your doors to audiences from multiple markets or when your business is going international.
Second, the TranslatePress pro versions show you the world of multilingual SEO and let you control how each of your website’s language versions appears in the search engines. This can be huge for commercial and business projects.
Lastly, TranslatePress pro is going to be more effective for websites with a lot of content. For once, you can create “translator” user accounts and invite people to help you work on your translations – without giving them access to the rest of the site’s backend. Then, there’s also integration with AI-powered automatic translation by DeepL. DeepL delivers translations of better quality than Google Translate, which can be important if you’re using the site for your business.
How to Start Using TranslatePress Pro
From a technical point of view, TranslatePress pro is a set of add-ons that you install alongside the free version of TranslatePress.
To begin, pick the specific premium license with the add-on pack that matches your needs. You’ll then be able to download your premium plugin from your TranslatePress account.
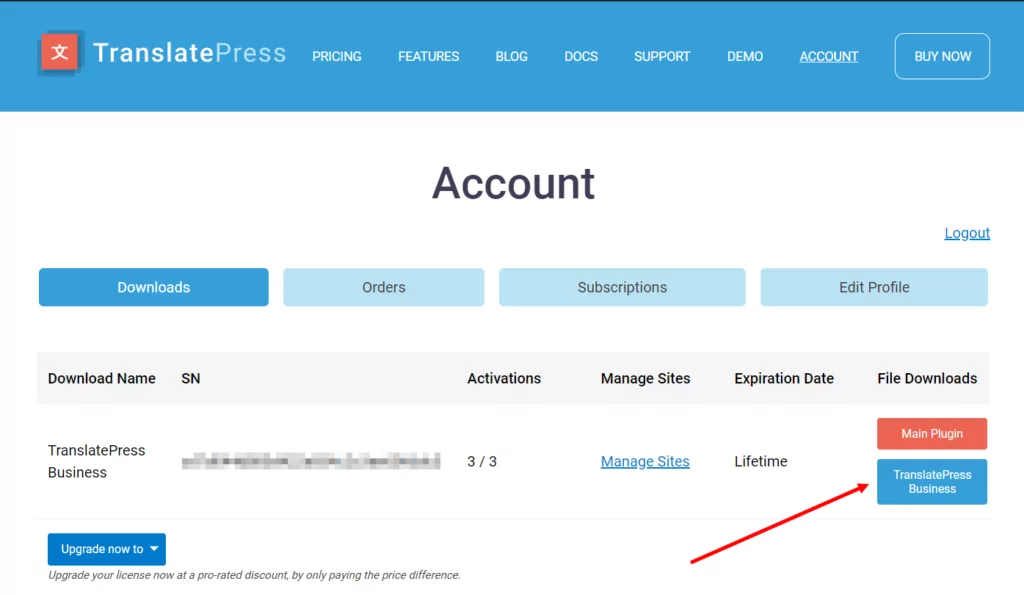
If you’re starting off with the pro plugin right from the start and you don’t have the main plugin already installed on your site, you’ll have to download that one too. You can do that directly from the account page or from the WordPress repository.
Next, you can take the ZIP file(s) and upload them to your site via Plugins → Add New → Upload Plugin.

Activate each plugin (main and pro) individually.
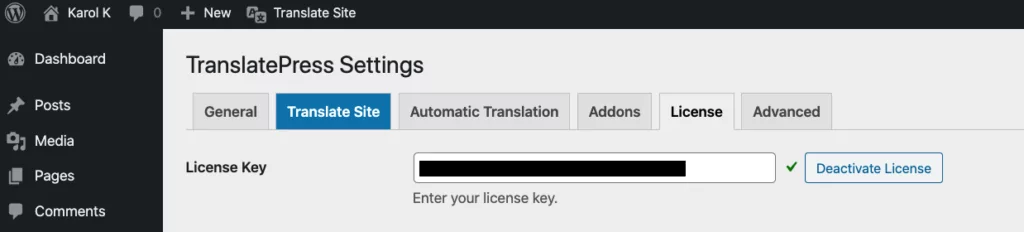
To enable your pro setup, go to Settings → TranslatePress, and then to the License tab. Enter the license key you can find on the account page to activate your TranslatePress pro subscription.
From this point on, TranslatePress is fully operational and ready to use.
To add your languages, switch back to the General tab on the TranslatePress settings page. Add your languages one by one:
Look through the other settings on the page and click on Save Changes when done.
The core features of the pro versions of TranslatePress are the same as in the free version. If you want to learn how to translate your text content, images, menus, page builder content, theme elements, and more, click here ☝️☝️☝️ to scroll to the section where we discussed the basic usage of TranslatePress free.
How to Adjust Your Multilingual SEO
💡 Note: the SEO Pack Add-on is required for this to work.
Click on the Translate Site button next to the General tab or in the top bar of your admin panel.
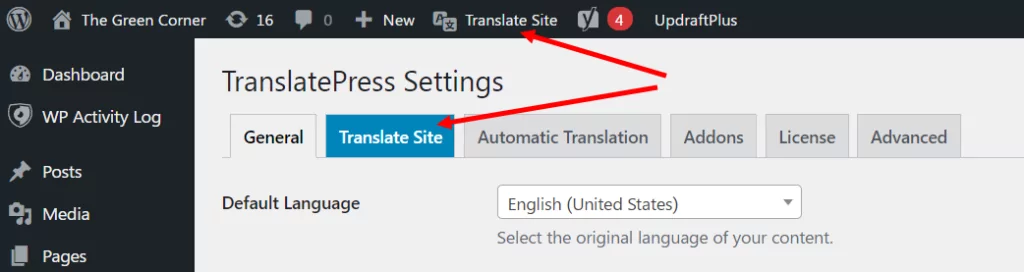
Once you’re inside the translation interface, click on the drop-down menu to see the available translations:
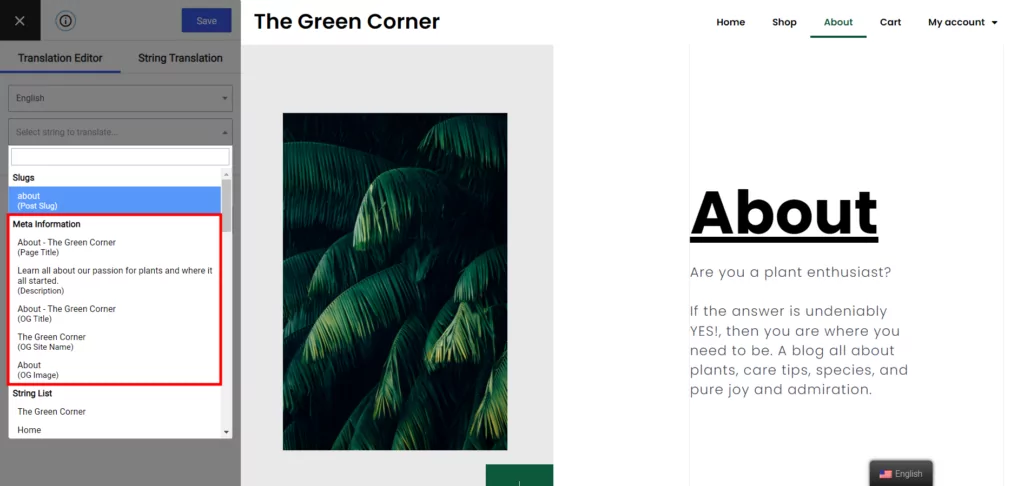
The SEO strings are right at the top of the list. You can go through them one by one and make sure that all your titles, descriptions, and slugs are optimized for their individual languages.
Remember to click on Save when you’re done with these strings.
⭐ Read our guide to learn more about multilingual SEO and how to best go about translating your SEO strings.
How to Enable Automatic Translation with DeepL
💡 Note: DeepL Automatic Translation Add-on is required for this to work.
DeepL Translator is an automatic translation service that’s AI-powered and is quickly becoming the go-to solution for translations where quality is of key importance.
The languages supported include English (American and British), German, French, Spanish, Portuguese (plus Brazilian), Italian, Dutch, Polish, Russian, Japanese, and simplified Chinese.
DeepL is a freemium solution, so keep that in mind before jumping head in.
To use it with TranslatePress, go to Settings → TranslatePress, and then to the Automatic Translation tab.
Select Yes from the drop-down and fill out the remaining fields:
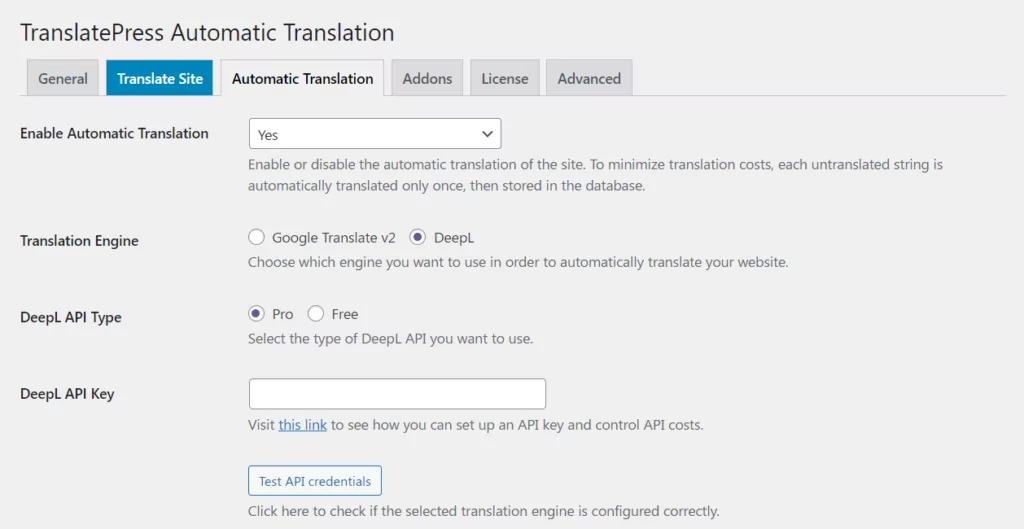
- Translation Engine: Select DeepL.
- DeepL API Type: Select Free or Pro depending on the plan you chose on their website.
- DeepL API Key: You can get it after signing up with DeepL and validating your account. Here’s a guide on how to generate your DeepL API key.
- The remaining fields are optional.
When you save changes, your DeepL integration is enabled. Go to any of your pages to see the automatic translations in action.
Pro tip: just like with Google Translate, you can adjust these auto translations later on.
⭐ Here’s more on how to translate your WordPress site with DeepL.
How to Add “Translator” User Accounts
💡 Note: the Translator Accounts Add-on is required for this to work.
This couldn’t be easier. Just go to Users → Add New. Fill out the form normally, and, at the bottom, pick Translator from the Role drop-down.
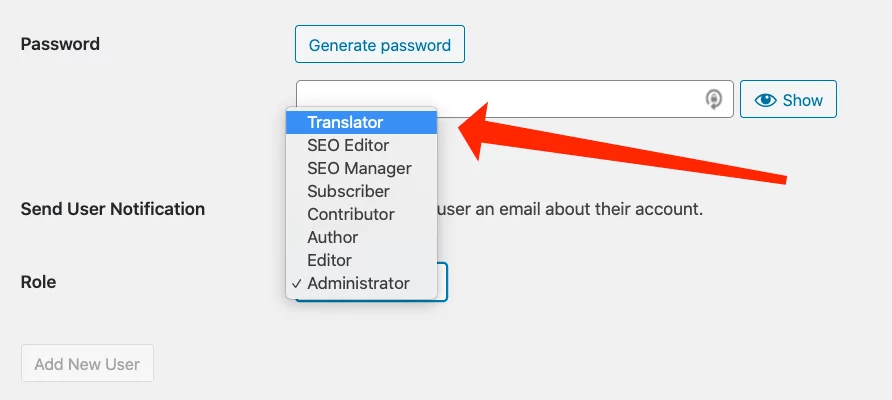
This new user will be able to translate your website from the TranslatePress frontend interface without having access to the entire backend of the site.
Where to Begin if You’re Not Sure About Choosing TranslatePress Free vs Pro
If you’re still not 100% which of the two will be right for you – TranslatePress free vs pro – then you should probably start with the free version first.
TranslatePress free has all the features that most new or small websites will need, and no core functionality is locked. You will be able to translate your website fully to one additional language, with no blank spots or untranslated strings of text here and there. Take it for a test run; see how things work.
Then, if you ever come to a point where you need any of the additional features, you will be able to upgrade to TranslatePress pro seamlessly with no tweaks needed to your already existing translations. Again, you won’t lose any of your settings or translations when switching from TranslatePress free to pro.
TranslatePress Multilingual
Are you still not sure about the main differences between the two versions of TranslatePress? Leave your questions in the comments section below!
If you found this post helpful, please check out our YouTube channel, where we constantly upload short & easy-to-follow video tutorials. You can also follow us on Facebook and Twitter to be the first to know each time we post.