In this post
In this post
Searching for a way to translate the WooCommerce checkout page and/or the WooCommerce cart page?
If your store has a multilingual audience, you probably want to be able to offer the WooCommerce cart and checkout in multiple languages.
WooCommerce doesn’t include a built-in feature for this functionality, but you can accomplish it using the right plugin.
In this post, you’ll learn how to translate the WooCommerce checkout page and cart page using the code-free TranslatePress plugin. You’ll also be able to translate the rest of your store’s content if desired. Or, if it makes sense for you, you can decide to only translate the WooCommerce cart and checkout pages and leave the rest of your store in a single language.
To manage your translations, you’ll get a simple visual translation editor like this:

Then, your visitors will be able to choose their preferred languages using a simple front-end language switcher.
Let’s dig in!
For a quick and easy video tutorial on the topic you can also watch this:
Introducing TranslatePress: An Easy Solution for WooCommerce Translation
TranslatePress is a beginner-friendly plugin that makes it easy to translate some or all of your WooCommerce store’s content.
You can use TranslatePress to create a fully multilingual store and translate 100% of the content on your site into unlimited new languages, including all of your WooCommerce products.
Or, you can also use TranslatePress for more surgical translation needs and only translate certain content on your site, such as just your WooCommerce cart and checkout pages.
It’s totally up to you!
No matter which approach you choose, you’ll be able to use the visual translation editor that you saw above.
How to Translate WooCommerce Checkout Page and Cart Page
Now, let’s get into how to translate the WooCommerce checkout and cart pages.
If you only need to translate your cart and checkout pages into one new language, you can use the free version of TranslatePress at WordPress.org for this tutorial.
However, if you want to translate your cart and checkout into multiple new languages or create a fully multilingual WooCommerce store, you might want the premium version of TranslatePress. We’ll be sure to note which features require the premium version as we go through the tutorial.
Note – if you want to create a fully multilingual store, you might want to check out our guides on how to create a multilingual WooCommerce store or how to make WooCommerce multilingual. In this guide, we are specifically focused on translating just the WooCommerce cart and checkout pages, even though TranslatePress can do a lot more than that.
TranslatePress Multilingual
1. Install TranslatePress and Choose Languages
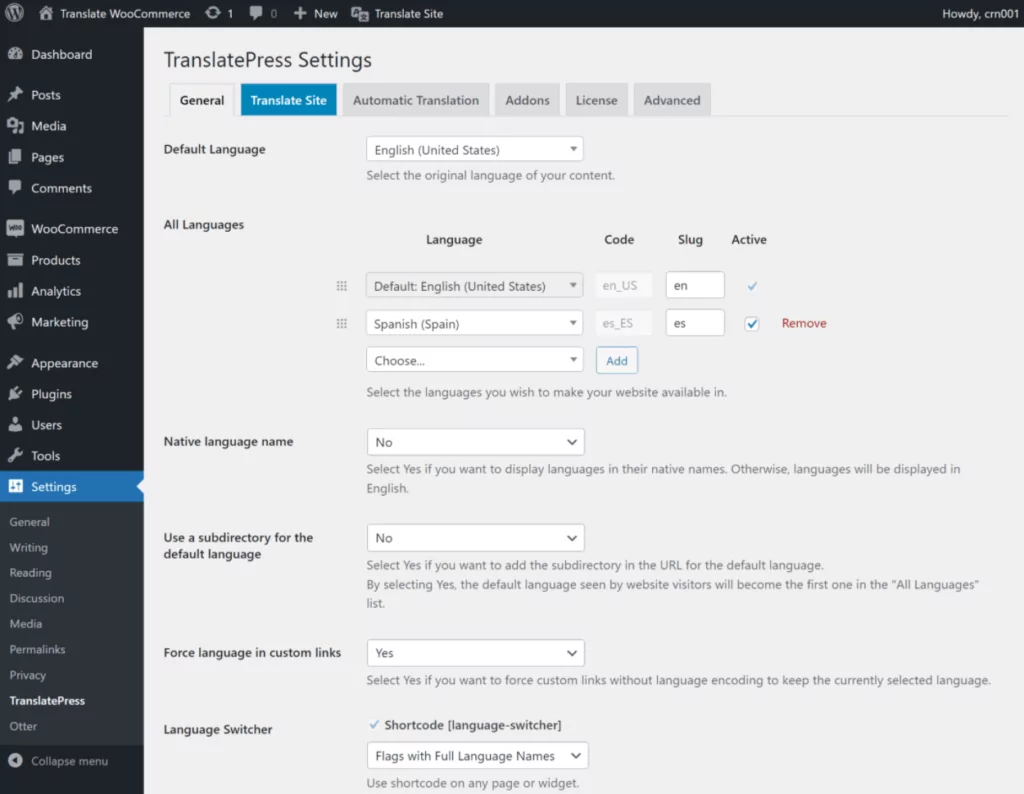
To get started, install and activate the TranslatePress plugin on your site. Then, go to Settings → TranslatePress to choose the languages that you want to offer on your cart and checkout pages:
- Default Language – the language that your store’s cart and checkout page currently exist in.
- All Languages – one or more new languages into which you want to translate your store’s cart and checkout. The free version of TranslatePress lets you add one new language while the premium version lets you add unlimited new languages.
TranslatePress offers built-in support for over a hundred languages. However, if you don’t see the language that you want to use, you can also add a custom language.
2. Open the Visual Translation Editor to Translate Cart and Checkout Pages
Now, you’re ready to translate your cart and checkout pages. With TranslatePress, you’ll do everything from the front-end of your site.
Before we get into the specific process of translating your cart and checkout pages, let’s quickly go over how the TranslatePress translation editor works.
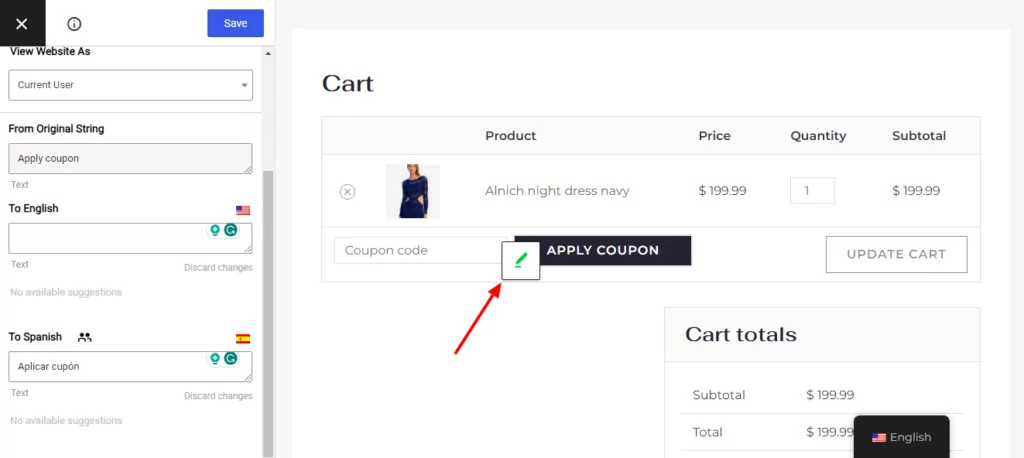
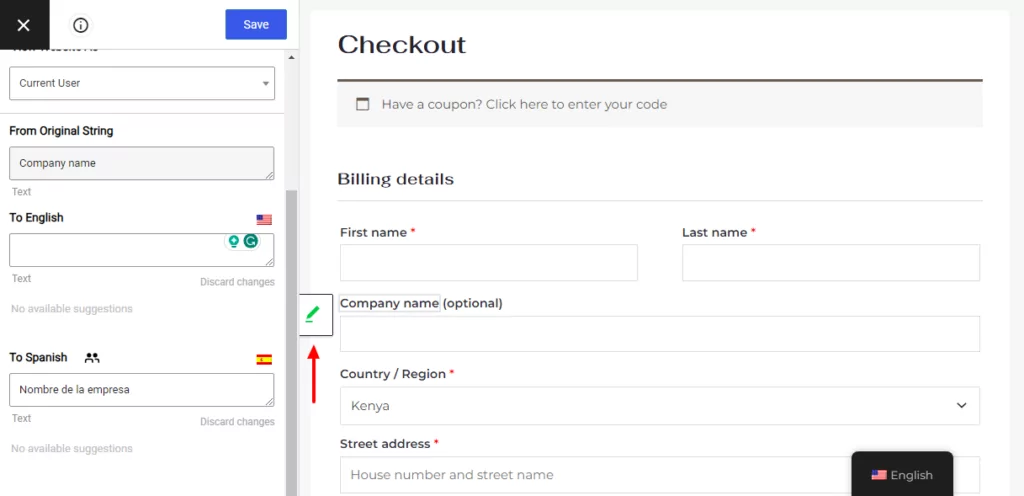
In the TranslatePress editor, you’ll see a live preview of your site. To translate any element on your site, you just need to hover over it and click the pencil icon. This will open the translation for that element in the sidebar.
TranslatePress will automatically pre-fill the translation from the WooCommerce language pack if you’re translating gettext content that comes directly from WooCommerce (which is most content on the cart and checkout pages).
However, you’ll be able to fully edit both the text in the original language as well as the translated versions. To make your edits, all you need to do is type in the fields in the sidebar:
Now, let’s go through how to fully translate your WooCommerce cart and checkout…
Translate WooCommerce Cart in “Empty” State
Your WooCommerce cart has two different “states”:
- Empty – no items added to the cart.
- Filled – one or more items added to their cart.
First, you’ll want to translate the empty state. Then, you can continue on to translate the filled state.
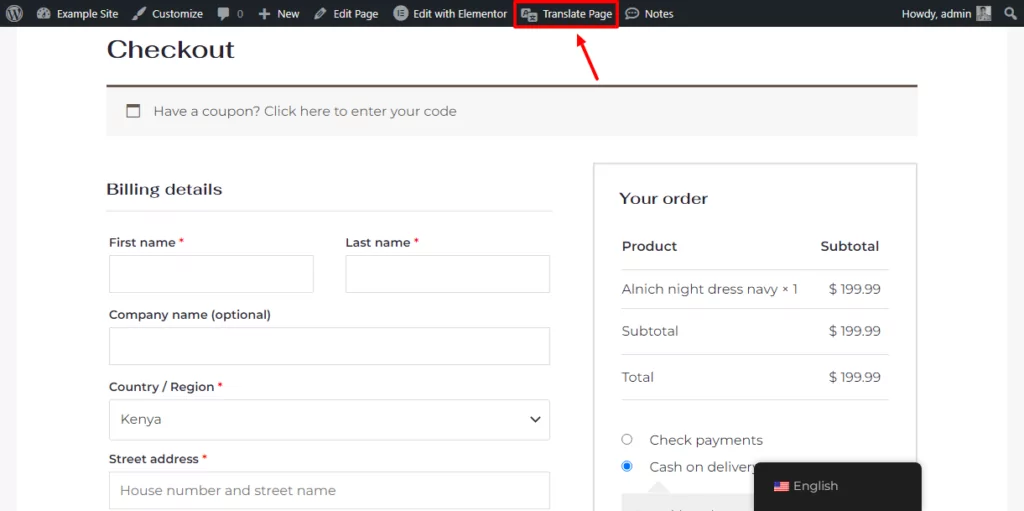
To start, open an empty cart on the front-end of your site and click the Translate Page option on the WordPress toolbar:
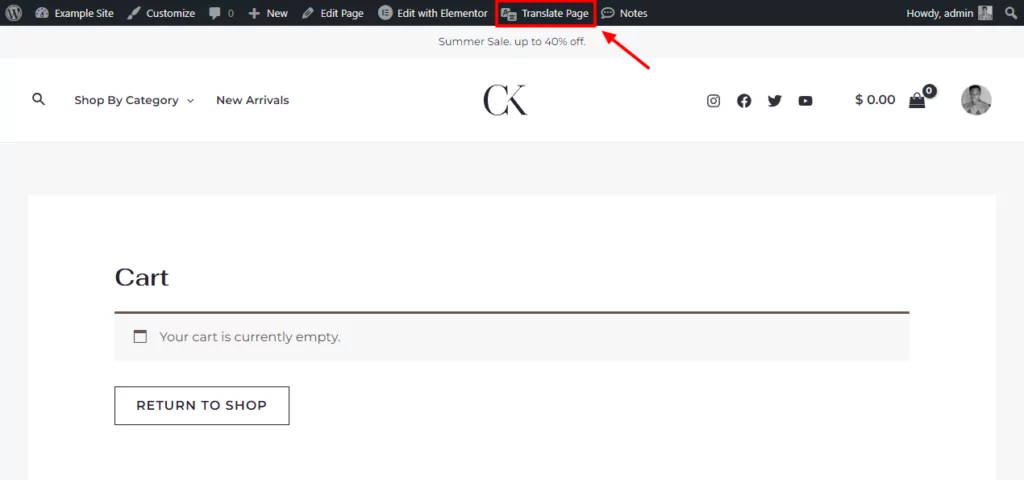
Now, you can use the editor to translate the text on your empty cart page:

Make sure to save your changes when you’re done.
Translate WooCommerce Cart in “Filled” State
Next, you’ll want to translate your cart’s “filled” state. Go back to the front-end of your site and add an item to your cart. Then, click the Translate Page option again on the cart page:
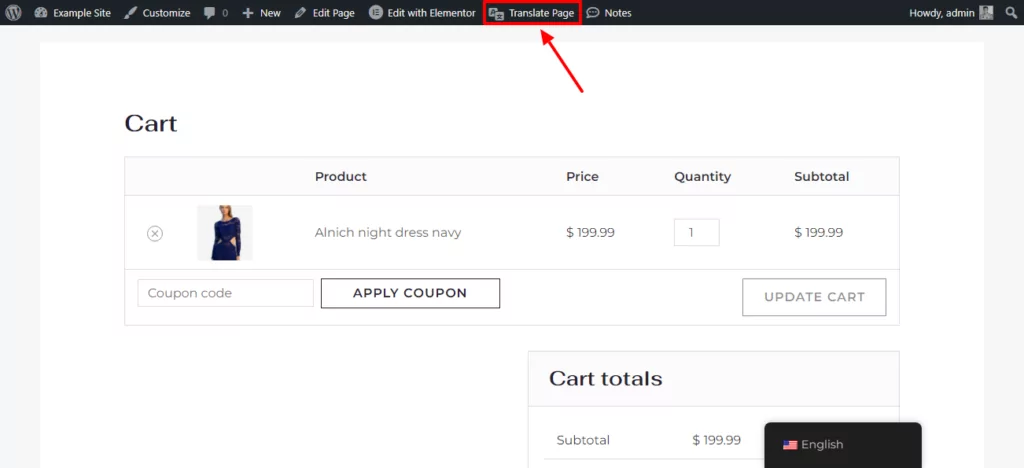
Now, use the same approach to translate all of the elements on your cart. Again, TranslatePress will automatically import the translations from the WooCommerce language pack if available, so you might not need to translate everything from scratch:
Translate WooCommerce Checkout Page
To finish things out, you’re now ready to translate the WooCommerce checkout page.
To open the translation editor for the checkout, you can use the same approach – go to the checkout page on the front-end of your site and click the Translate Page option on the toolbar:
You can translate the WooCommerce checkout page using the same approach as the cart page:
And that’s it! Make sure to save your changes when you’re finished.
3. Translate the Rest of Your Store (Optional)
This step is optional. But if you want to create a fully multilingual store, you’ll now want to translate the rest of your store’s content as well.
To do this, you can use the exact same translation editor that you saw above. You can use this editor to translate your shop pages, your individual products, your homepage, your blog, and every other part of your store.
If you want to speed up your translation efforts, TranslatePress also supports automatic machine translation via two machine translation services – Google Translate or DeepL. Google Translate is available in the free version of TranslatePress while using DeepL requires you to purchase at least the TranslatePress Business license.
To learn how to create a multilingual store in general, check out these guides:
- Create a multilingual WooCommerce store
- Translate WooCommerce products
- Create a WooCommerce multi-language site
And to learn how to automatically translate your entire WooCommerce store, check out these guides:
- How to automatically translate WooCommerce
- Configuring Google Translate with TranslatePress
- Configuring DeepL with TranslatePress
4. Configure Your Language Switcher
To help visitors choose their preferred languages, TranslatePress adds a floating language switcher to the bottom-right corner of your site by default. However, you also get options to change its color and position, which lets you move it to a different spot.
Note that the language switcher will only appear on pages where you’ve added your translations. So if you decide to only offer multiple languages on your cart and checkout pages, the language switcher will only be visible on your cart and checkout pages.
However, if you decide to translate your entire store (including all of your products), then the language switcher will be visible sitewide.
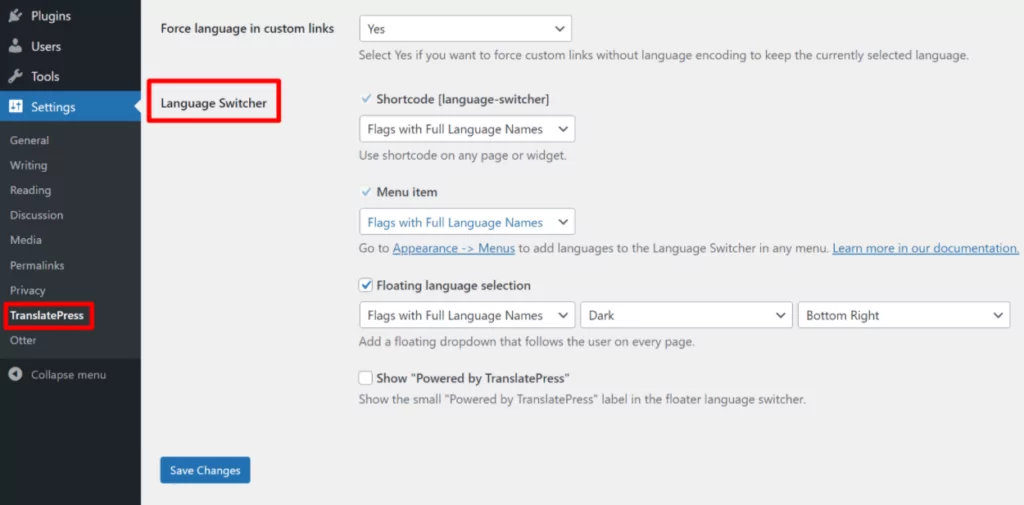
You can place your language switcher using the following options:
- Floating language switcher – place it in any corner of your site.
- Menu item – add it as a menu item by going to Appearance → Menus.
- Shortcode – manually place it anywhere using a shortcode.
You can also configure how your language switcher functions, such as whether or not to display language flags. To access these settings, go to Settings → TranslatePress and scroll down to the Language Switcher settings:
Translate Your WooCommerce Checkout and Cart Today
With TranslatePress, you can easily translate the WooCommerce checkout and cart pages, along with the rest of your store if needed.
If you specifically want to just translate your cart and checkout pages, TranslatePress can handle that. You can add a language switcher to those pages while keeping the rest of your site in a single language.
Or, TranslatePress can also help you create a 100% multilingual WooCommerce store, with support for comprehensively translating your products, shop pages, menus, blog posts, and every other part of your site.
The free version of TranslatePress at WordPress.org will let you translate your cart and checkout pages into one new language.
If you purchase the premium version of TranslatePress, you’ll be able to use unlimited languages and also access other features that are useful for creating a fully multilingual WooCommerce store including:
- Multilingual SEO support to translate SEO titles, meta descriptions, and more;
- DeepL support for automatic machine translation;
- Automatic user language detection to automatically redirect users to their preferred languages;
- The option to use completely separate navigation menus based on a user’s language;
- Dedicated translator accounts;
- …lots more!
TranslatePress Multilingual
Do you still have any questions about how to translate the WooCommerce checkout page and cart page? Let us know in the comments!