In this post
In this post
Struggling with how to install WooCommerce language packs?
Because WooCommerce is the most popular way to make an eCommerce store, it’s already been fully translated into most popular languages. From there, WooCommerce language packs let you add all of these translations to your store with just a few clicks.
For example, if you want to offer your store in Spanish, all you need to do is install the Spanish-language WooCommerce translation pack and all of the content that comes from WooCommerce will be in Spanish (such as your cart page, checkout page, etc.).
Or, with the right plugin, you can use WooCommerce language packs to build a multilingual store by installing multiple language packs and offering your product content in multiple languages. Then, shoppers can choose their preferred languages when browsing.
In this post, we’ll share everything you need to know about how to install and use WooCommerce language packs. We’ll cover four scenarios:
- How to install an existing language pack on a single-language store.
- How to edit an existing language pack without code.
- How to install multiple language packs to create a multilingual store.
- How to create your own custom language pack if you can’t find an existing language pack.
For the first scenario, you won’t need any extra plugins. For the other three scenarios, you can use the free version of the TranslatePress plugin.
Let’s dig in!
How to Check if a WooCommerce Language Pack Exists for Your Language
Before we get to the tutorials, we want to start at the beginning by showing you how to check if there’s an existing language pack for the language you want to use on your store. Again, WooCommerce has pretty good coverage, but it’s not 100% translated into all languages.
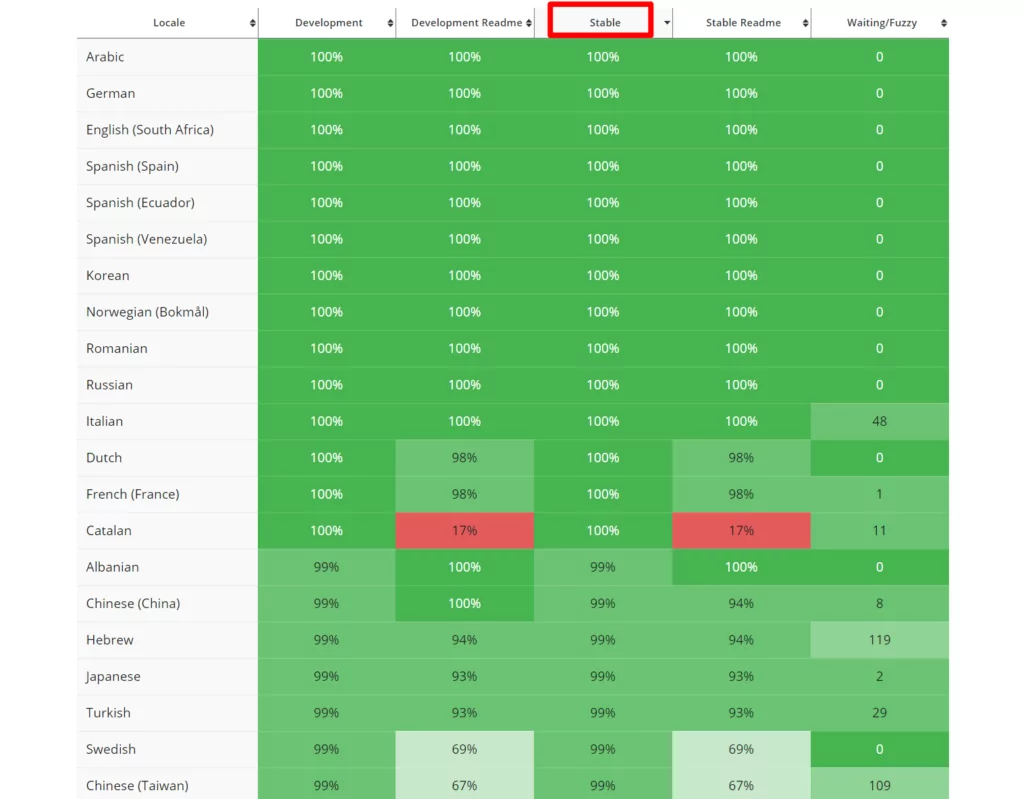
WooCommerce maintains its translation database at WordPress.org – you can view it by clicking here.
You’ll see a list of various languages along with how complete that language pack is. Ideally, you want the numbers in the “Stable” column to be as close to 100% as possible. Don’t stress if it’s not a perfect 100%, though.
You can also view a list of all the completed language packs here.
If you see an existing language pack, that’s great! Now, let’s talk about how to install it.
How to Install Individual WooCommerce Language Packs
While you can manually install a WooCommerce language pack by uploading it via FTP, a much simpler option is to just change the language in your WordPress dashboard. This will let you force WooCommerce to download the relevant language pack.
Here’s how to do it…
1. Change WordPress Site Language
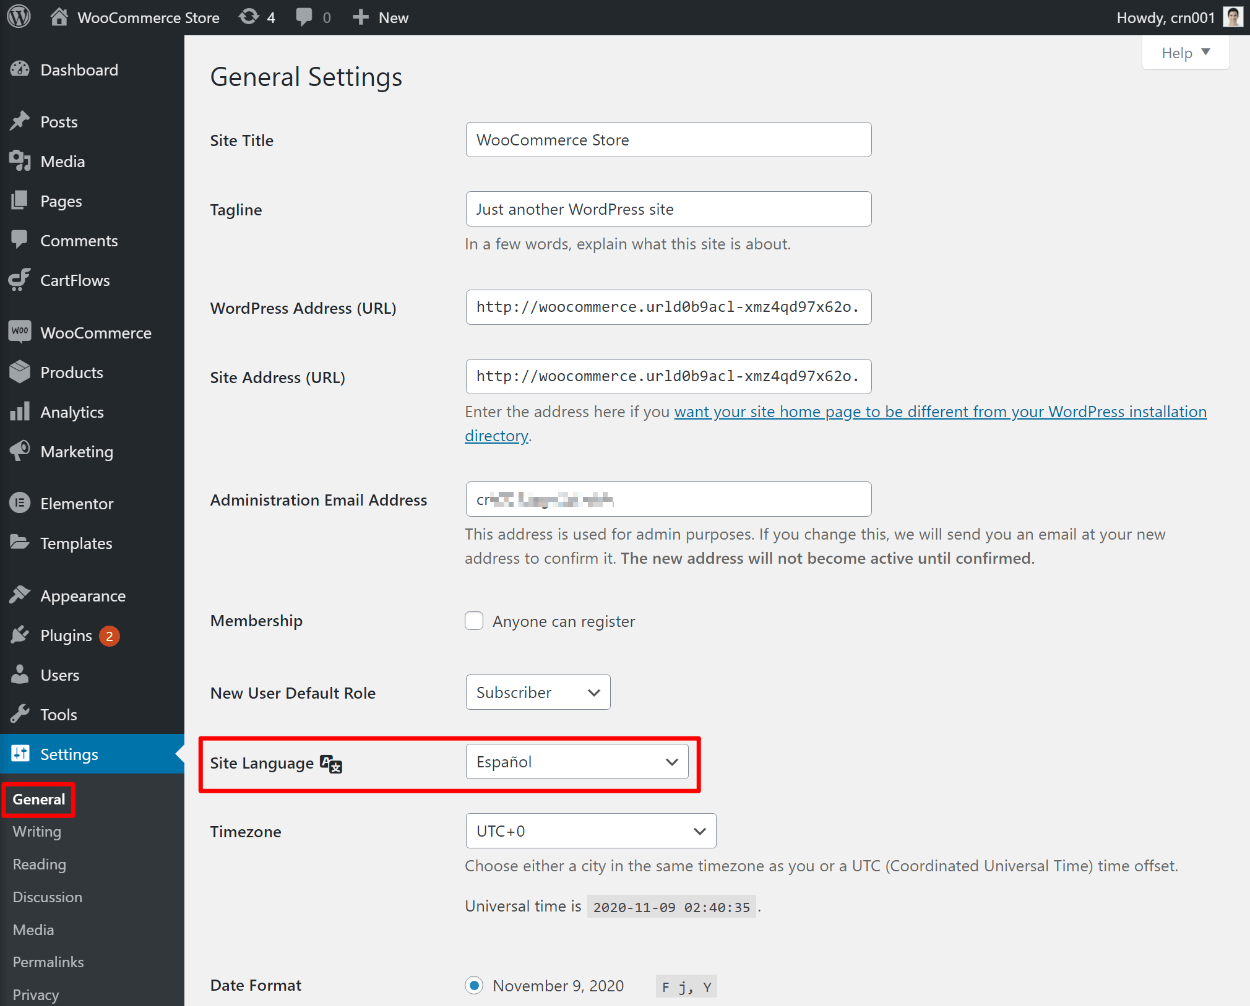
To start, you need to change your WordPress site language:
- Go to Settings → General in your WordPress dashboard.
- Locate the Site Language drop-down in the settings area.
- Select the language that you want to install for WooCommerce.
- Click Save Changes at the bottom.
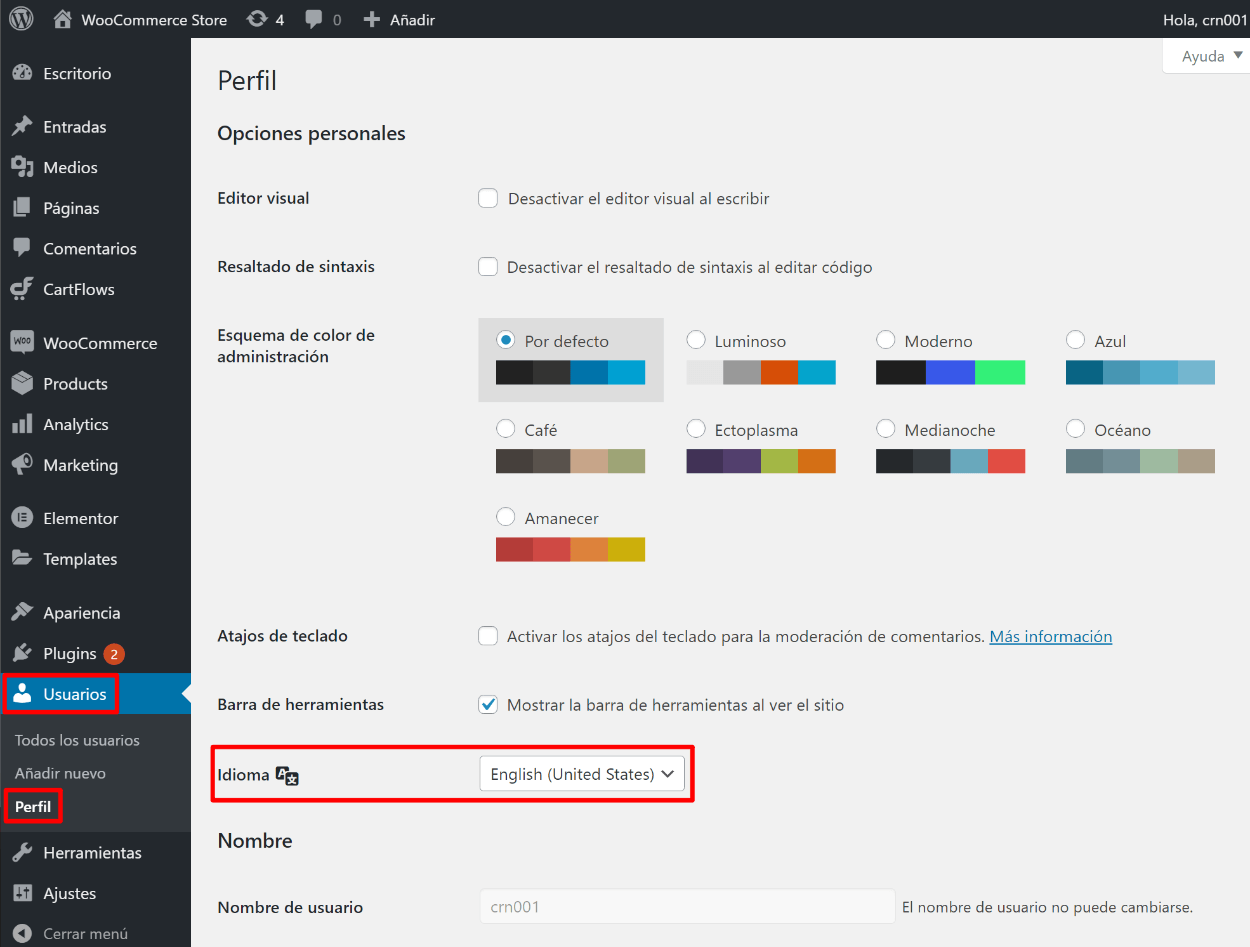
This will change the language of your WordPress dashboard. If you want to change your dashboard language back to English (or another language), you can go to Users → Profile (the equivalent in your language – marked in the screenshot) and change the language for your profile back to English. This is optional and will only affect your WordPress account – not your store’s visitors:
2. Force WooCommerce to Download Language Pack
Usually WordPress automatically installs the necessary language pack, as soon as you press Save Changes at the previous step.
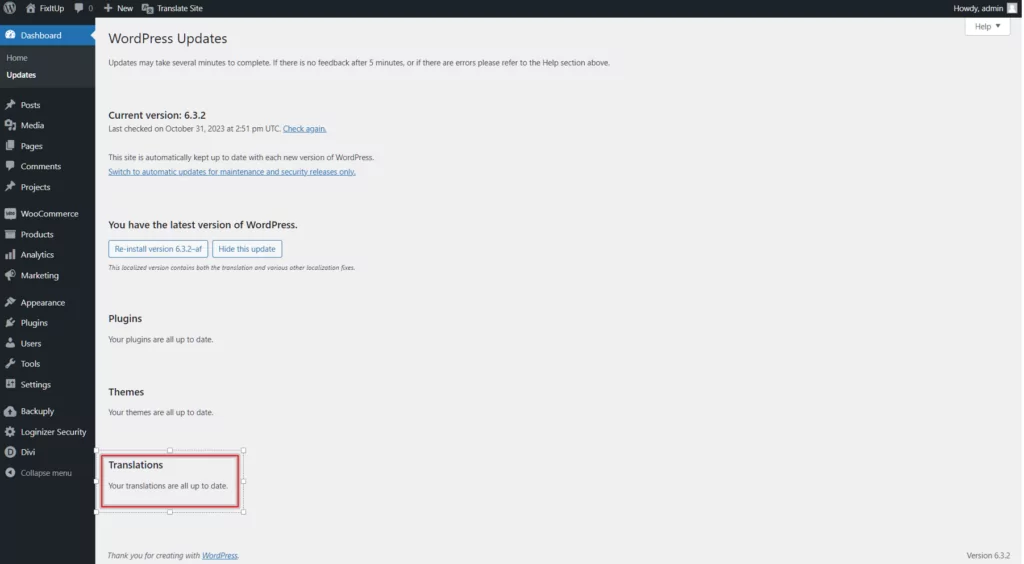
In case it didn’t you can manually download the translation updates. To do this, go to Dashboard → Updates and scroll down to the Translations section. Then, click Update Translations.
Now, WooCommerce will use the language pack that you chose for its front-end content.
And that’s it! You just successfully installed your first language pack. You can repeat the same process to install additional language packs as needed.
Keep reading to learn how to edit the translations in the language pack or install multiple language packs to create a multilingual store.
How to Edit an Existing WooCommerce Language Pack
WooCommerce’s language packs are well-vetted, so you can trust their accuracy. However, you still might have a situation in which you want to edit some of the built-in translations from the language pack.
To achieve this, you can use the free TranslatePress plugin. TranslatePress’s primary function is to help you create a multilingual store. However, even for a single-language store, it can still be useful as it lets you edit the translations in your language pack using a simple visual interface like below.
All you need to do is click on the translation that you want to edit and you’ll be able to override the existing language pack translation with your own:
Here’s how it works:
1. Install TranslatePress and Set Language
To get started, install and activate the free TranslatePress plugin from WordPress.org.
Then, go to Settings → TranslatePress and set your Default Language equal to the language you want to use on your WooCommerce store. If you haven’t done so already, this will also have TranslatePress install the language pack for you.

2. Edit Language Pack Translations in Visual Editor
Next, open a page with translations that you want to edit on the front-end of your site.
For example, if you want to edit translations on your shopping cart page, you should add a product to your cart and then open the shopping cart.
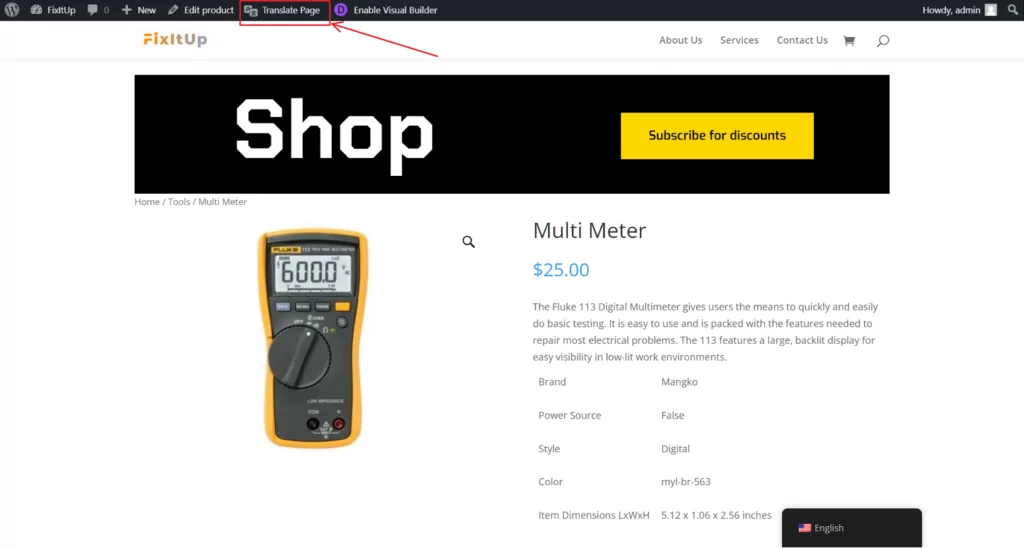
Then, click the Translate Page option on the WordPress toolbar (or the equivalent in your local language):
This will launch the visual TranslatePress editor – you’ll see a live preview of your site on the right and a sidebar on the left.
If you hover your mouse over any WooCommerce content on the live preview, you’ll see a green pencil icon. Clicking that icon will open the translation in the sidebar.
TranslatePress will automatically pre-fill the translation field with the content from the language pack. However, you can override this pre-filled text with whatever translation you want to use:
You can repeat the process to edit additional translations.
How to Install Multiple WooCommerce Language Packs to Create a Multilingual Store
As we mentioned above, the primary function of the TranslatePress plugin is to help you create a multilingual store. You can use it to install multiple language packs and also translate your store’s unique content (such as product descriptions and titles).
Then, your visitors will be able to use a language switcher to choose their preferred languages when browsing your store.
You’ll be able to use a visual translation editor to manage:
- All of the existing translations in however many language packs you install
- All of the translations for your other content, including product descriptions and titles
TranslatePress Multilingual
For a deeper look at this use case, check out our full post on how to create a multilingual WooCommerce store.
Here’s the quick version of how it works…
1. Install TranslatePress and Choose Languages
To get started, install and activate the free TranslatePress plugin from WordPress.org. Then, go to Settings → TranslatePress to choose the languages that you want to use for your store.
The free version of TranslatePress lets you add one new language (two languages total). To add unlimited languages, you can upgrade to the TranslatePress Personal license.
For example, to offer your store in both English and Spanish, you’d configure it like so:
2. Set Up Automatic Translation (Optional)
TranslatePress will automatically install the WooCommerce language packs for your chosen languages, which means that the WooCommerce content will already be translated (if a language pack exists).
However, TranslatePress won’t be able to automatically translate your user-generated content by itself (e.g. product descriptions, titles, etc.).
If you want to use automatic translations for this content, TranslatePress does integrate with Google Translate and DeepL to support machine translation. This is 100% optional – you can also add the necessary translations by yourself.
If you do want to set up automatic translation, you can do so from the Automatic Translation tab. Check out our post on how to automatically translate a WooCommerce store to learn more.
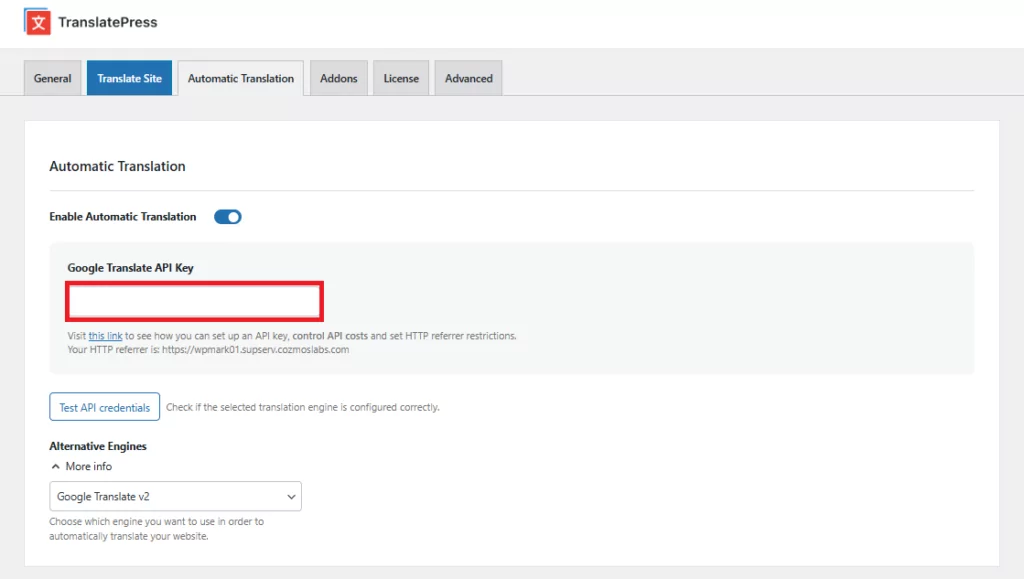
You can use Google Translate with the free version of TranslatePress but DeepL requires you to upgrade to the TranslatePress Business license.
3. Translate Content
Now, you’re ready to translate your store’s content. Again, you’ll be able to both edit the existing translations from the language pack as well as your store’s user-generated content.
To get started, open the page with content that you want to translate on the front-end of your site. Then, click the Translate Page button on the WordPress toolbar:
Now, you’ll be in the visual editor. To translate any content, all you do is hover over the content on the live preview of your site and click the pencil icon. If the pencil icon is green, that means you’re editing a translation that comes directly from the language pack. If it’s blue, that means you’re editing a piece of user-generated content:
You can use this same point-and-click approach to translate every part of your store, including non-WooCommerce content.
For more examples, check out these guides:
- Images
- Editor (Gutenberg) blocks
- Custom fields
- Custom post types
- WordPress forms
- WordPress menus
- Popup content
- Sliders
- WooCommerce products
- Elementor (page builder)
- Divi (page builder)
With the SEO Pack addon, you’ll also be able to improve your site’s multilingual SEO by translating SEO metadata, social media information, image alt text, URL slugs, and more. You’ll also get access to other SEO features, such as creating a multilingual sitemap.
The SEO Pack addon is available in any premium license.
Again, for a deeper look, check out our full guide on creating a multilingual store.
How to Add Your Own Custom WooCommerce Language Pack
Because it’s so popular, WooCommerce has pretty good coverage when it comes to translations. However, it still doesn’t support all languages.
So what happens if you want to install a WooCommerce language pack but there’s no existing translation pack for the language you want to use?
Here, the TranslatePress plugin can help again, whether you’re creating a single-language store or a multilingual store.
TranslatePress gives you the option to add your own custom language and then define its WooCommerce translations. You can add literally any language, from real-world languages such as Hmong or Maori to fictional languages such as Klingon.
We’re not sure why you’d want to install a Klingon language pack for your store, but TranslatePress will let you do it!
Here’s how it works:
1. Install TranslatePress and Add Custom Language
To get started, install and activate the free TranslatePress plugin from WordPress.org.
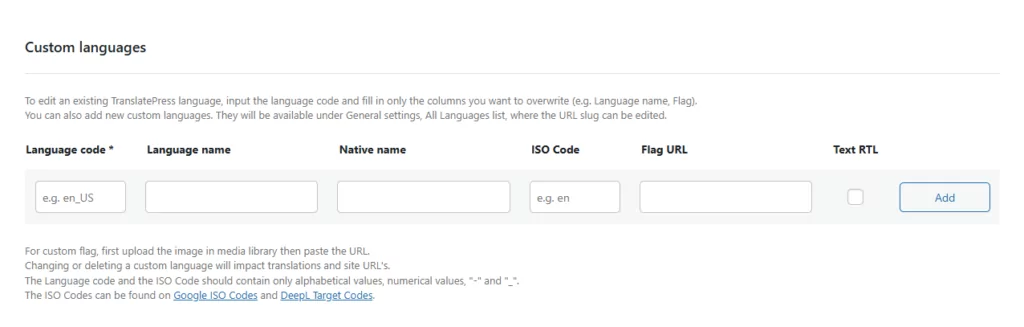
Then, go to Settings → TranslatePress and choose the Advanced tab in the settings area. Now click on the Custom language section.
Here, you can add the details for the custom language that you want to create a language pack for:
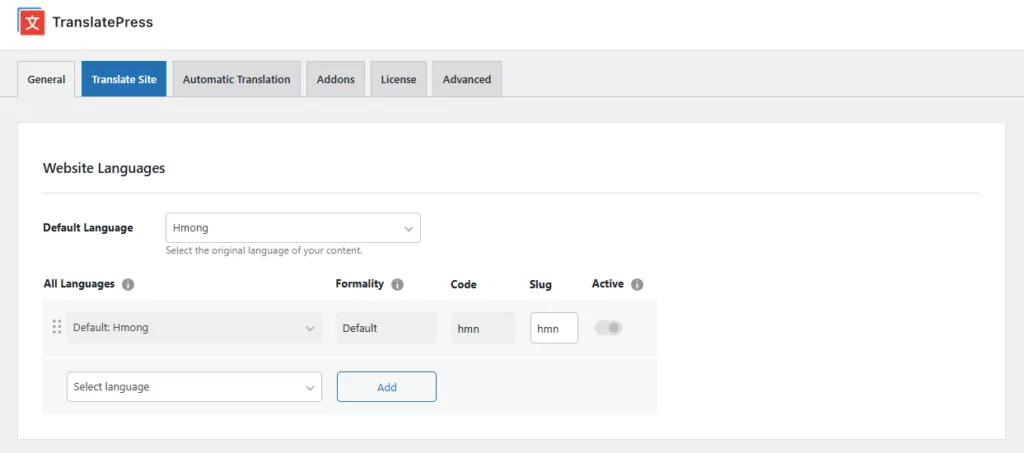
Once you’ve added the custom language, go back to the General tab in the TranslatePress settings area and select that custom language:
- For a single-language store, set your Default Language equal to your custom language.
- For a multi-language store, add your custom language under All Languages.
Single-language:
Multi-language:
2. Add Translations
Now, you need to add the translations to your custom language.
Open a page with WooCommerce on the front-end of your site and click the Translate Page option on the WordPress toolbar.
Then, when you hover over content from WooCommerce, click the green pencil icon to edit that translation. Because there’s no existing language pack for your custom language, you’ll need to manually add all of the translations:
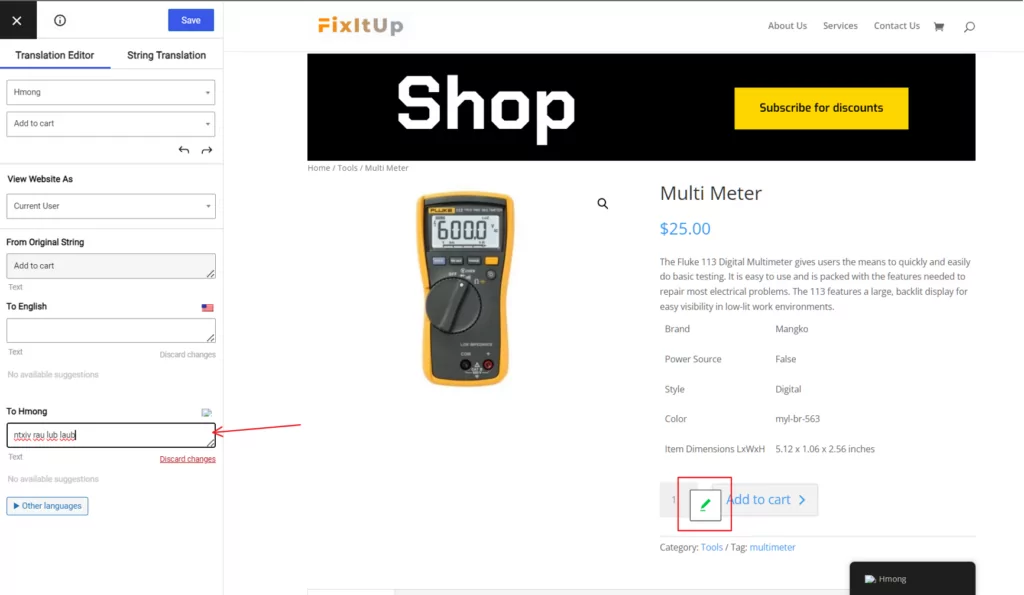
Or, if Google Translate supports your custom language (as is the case for Hmong), you could set up automatic translation from Google Translate to save some time.
Get Started With WooCommerce Language Packs Today
WooCommerce language packs help you create eCommerce stores in languages other than English.
You can install a new language pack for a single-language store from your WordPress dashboard. Then, if you want to edit those existing translations, you can install TranslatePress to access a visual translation editor.
TranslatePress can also help you in other ways. It can help you create a completely multilingual store and translate all of your content, from language pack content to your own product titles and descriptions.
Or, if WooCommerce doesn’t already support the language you want to use, you can also use TranslatePress to create your own custom language pack via its visual editor.
To get started with TranslatePress and access the visual language pack editor, install the free version from WordPress.org today.
Then, if you want to save time and/or create a multilingual store, upgrade to the premium version to access features such as:
- Support for unlimited new languages
- Improved multilingual SEO
- DeepL integration
- …lots more
TranslatePress Multilingual
Still have any questions about working with language packs in WooCommerce? Ask us in the comments!