In this post
In this post
Looking for an easy way to create a WooCommerce multi language store?
Translating your store is a great way to improve your shopping experience and reach new potential customers through your marketing efforts. But if you want to fully translate and localize your store, you’ll need the help of the right plugin.
In this post, we’ll talk about some of the benefits of translating your store. Then, we’ll show you step-by-step how to use a WooCommerce multi language plugin to translate your entire store and let visitors choose their preferred language(s).
By the end of this post, you’ll be able to use a simple visual translation editor like below to translate your entire store:
The Three Big Benefits of Translating Your WooCommerce Store
There are a few general benefits to offering a multi language store, as well as some eCommerce-specific benefits.
1. Better User Experience
As you’d expect, most people would rather browse websites using their native language. In fact, nine out of ten Europeans always use a website in their own language when available, and one in five Europeans won’t even use a website if it doesn’t offer their language.
If your store has a multilingual audience, which is common in many areas, you can offer them a better experience by translating your store into their preferred language.
2. Improved SEO and Marketing
Creating a multi language WooCommerce store isn’t only good for your existing shoppers – it also helps you reach new shoppers by giving you a chance to rank your product and archive pages in Google in new languages.
Basically, by translating your site into just one new language, you double the pool of potential keywords your store can rank for. You’ll see many large eCommerce stores using this to great effect. Etsy is a great example that commonly ranks its category archive pages in different languages.
3. More Potential Customers
Earlier, you learned that most people prefer to browse the web in their native languages and some people just won’t browse in other languages.
Well, the same holds true for eCommerce. In that same survey mentioned above, 42% of respondents also said they never buy products from stores in different languages. That means that, if you ship your products to areas that speak a different language, you could be missing out on potential customers.
By translating your site, you give your store a chance to convert those customers.
So how can you create your multi language store? Let’s get into the actionable how-to next.
What You Need to Create a WooCommerce Multi Language Site
To offer your store in multiple languages, you can use the TranslatePress plugin. TranslatePress lets you translate 100% of your site into one or more new languages, including your entire WooCommerce store. It has an out-of-the-box integration with WooCommerce – there’s no need to mess around with settings or use an extra integration plugin.
You’ll be able to use a simple visual interface like this to manage all of your translations:

You can use the free version of TranslatePress at WordPress.org to follow most of this tutorial. With just the free version, you’ll be able to translate all of your store’s front-end content into one new language. This includes your individual products as well as your shop archive pages.
The free version also gives you the option to use Google Translate to generate automatic translations (which you can then manually refine if needed).
However, there are a few reasons why you want might to upgrade to at least the Personal plan:
- With the SEO Pack addon (premium), you can translate your store’s SEO titles, meta descriptions, URL slugs, and other important elements to optimize your store’s multilingual SEO. Basically, if you want the SEO benefitsDeepL Integration available in TranslatePress of translating your store, you’ll want this add-on.
- You can translate your site into multiple new languages, while the free version supports a single new language. For example, with the free version, you might have English (default) and Spanish (new translation). However, if you want to also add German translations on top of those two languages, you’d need the paid version.
On higher-tier plans, you’ll also get features to:
- Use DeepL for automatic translation (the free version does support Google Translate, though).
- Automatically redirect shoppers to their local language based on browser language and/or geolocation.
- Create entirely different navigation menus based on language (the free version lets you translate your menu items, but you can’t use different menu items – just translated menu items).
TranslatePress Multilingual
How to Create a WooCommerce Multi Language Site
Now, let’s go step-by-step through how you can start offering your store in one or more new languages.
Before starting this tutorial, we’ll only assume two things:
- You already have a working WooCommerce store in your store’s native language. If you don’t even have a store yet, you can follow this tutorial to create your basic WooCommerce store.
- You’ve installed and activated the free TranslatePress plugin from WordPress.org.
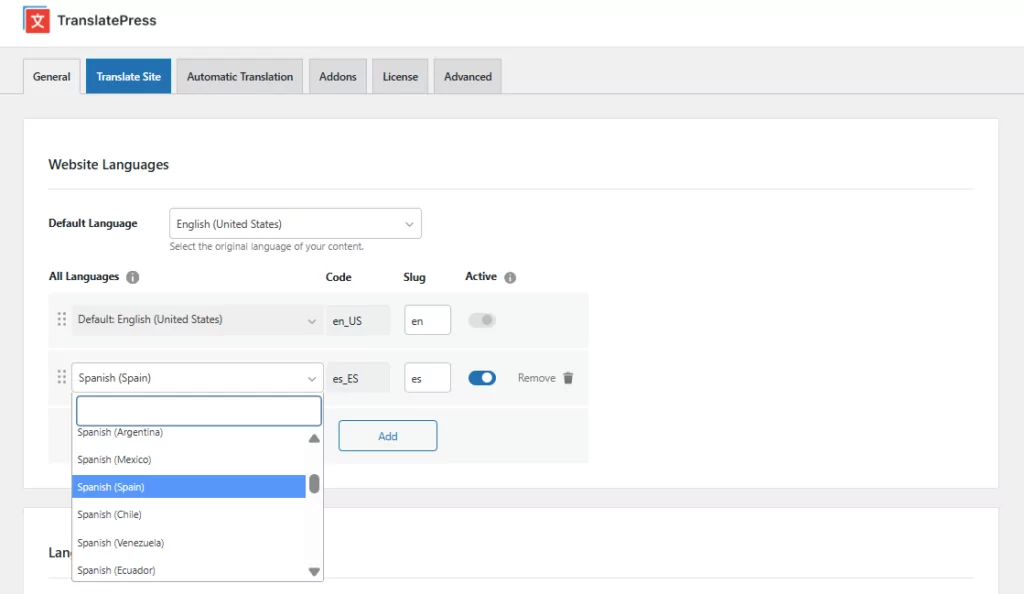
1. Choose Languages
Once you’ve installed and activated the plugin, go to Settings → TranslatePress to choose your desired language(s):
2. (Optional) Set Up Automatic Translation
This step is 100% optional.
If you want to save some time, however, you can use machine translation to automatically translate your WooCommerce store. This will set up your site’s baseline translations. Then, you can always go back and manually edit translations as needed by following the rest of this tutorial.
If you don’t use automatic translation, the rest of the tutorial will also be the same – the only difference is that you won’t have any baseline translations to work with – you’ll need to add every translation from scratch.
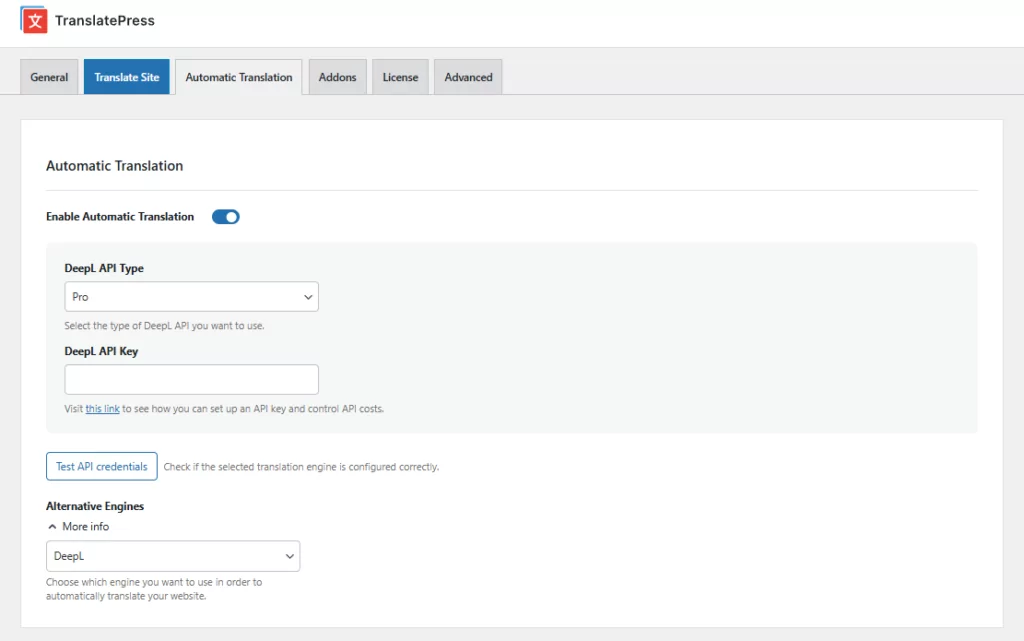
If you do want to use automatic translation, TranslatePress supports two different services:
- Google Translate – available in the free version at WordPress.org.
- DeepL – requires the DeepL addon on the TranslatePress Business plan.
To choose your service and set it up, go to the Automatic Translation tab in the TranslatePress settings:
For more detail on how to configure automatic translation, check out these guides:
- How to automatically translate WordPress
- How to set up Google Translate with TranslatePress
- How to set up DeepL with TranslatePress
3. Configure Your Store’s Language Switcher
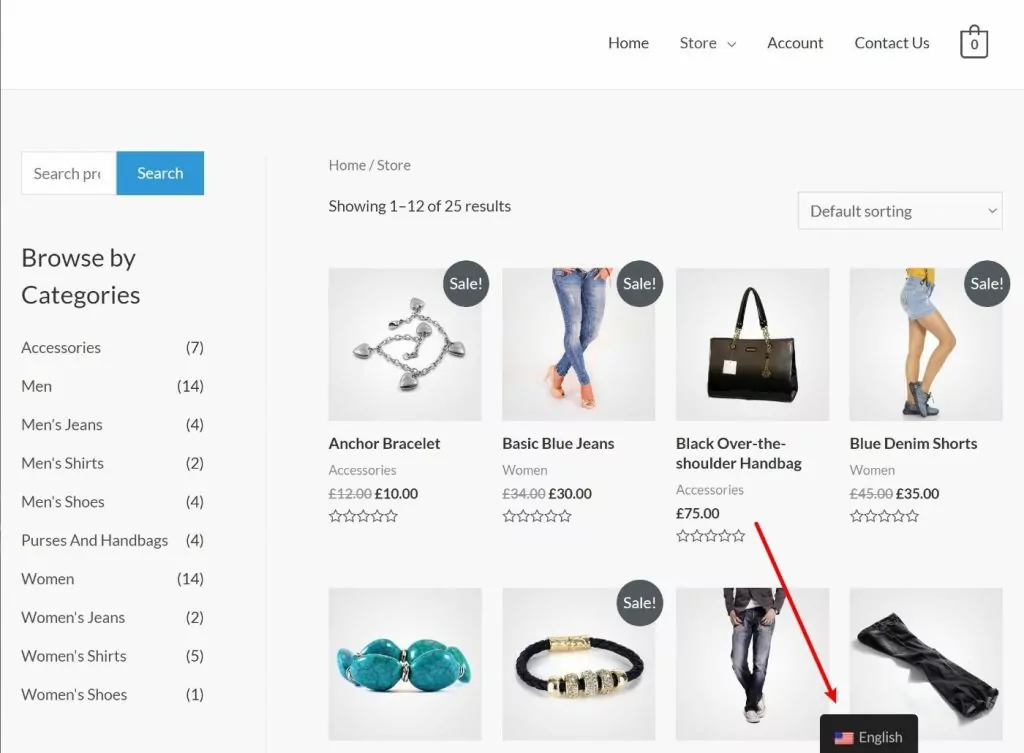
To help your shoppers choose their preferred languages, TranslatePress makes it easy to add a front-end language switcher to your store.
By default, TranslatePress adds a floating language switcher in the bottom-right corner – here’s an example of what it looks like:
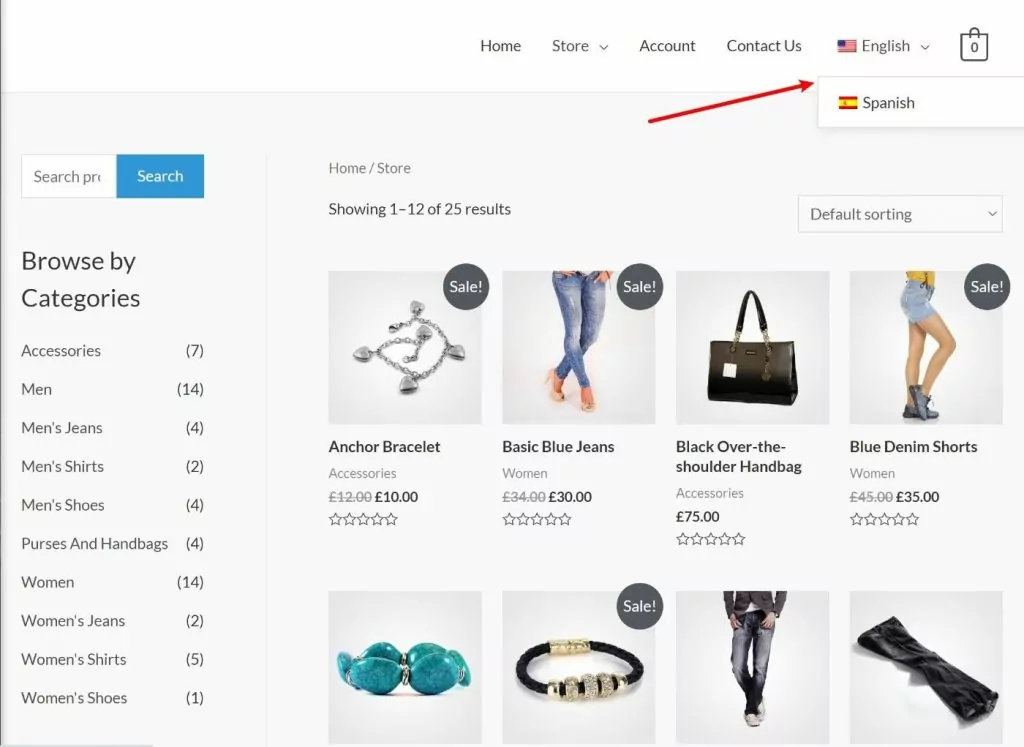
If you want to, you can also place this language switcher in other areas, such as your navigation menu, your sidebar, or anywhere else. TranslatePress comes with a dedicated option in the WordPress menu builder (Appearance → Menus) and a dedicated widget (Appearance → Widgets).
Here’s an example of what it might look like with a menu language switcher instead:
Or, you can also manually place your language switcher using a shortcode or PHP function.
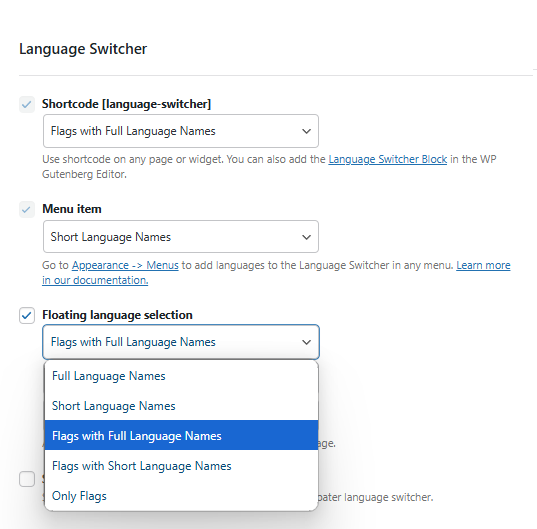
You’ll also get settings to control the language switcher’s appearance in the General tab of the TranslatePress settings. For example, you can show/hide country flags, choose between using language names or two-letter language codes, and more:
4. Translate Your Store’s Content
In this section, we’ll first show you the basic process for how it works to translate any type of content with TranslatePress, from blog posts to eCommerce products, page builder landing pages, and more. Then, we’ll show you how to apply this editor to specific parts of your store (though the basic process will be the same).
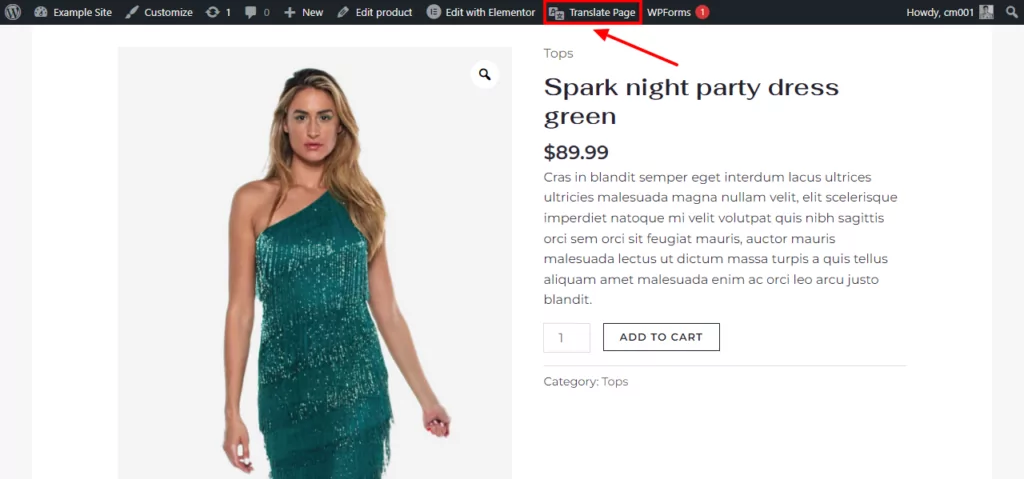
To open TranslatePress’ visual editor, you’ll first want to visit the page that you want to edit on the front-end of your site. This could be a single product, your shop page, your homepage, etc.
Then, click the Translate Page button the WordPress toolbar:
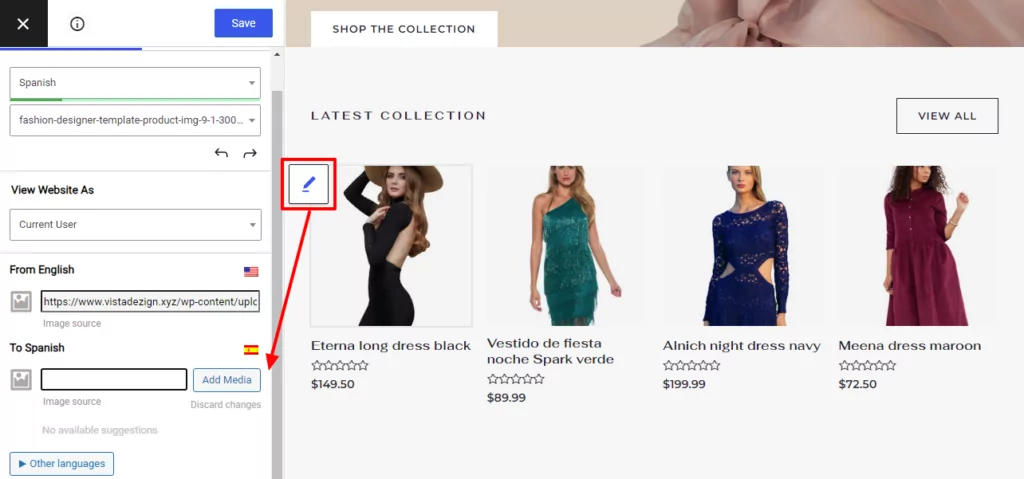
This will launch the visual translation editor, which looks a lot like the WordPress Customizer:
- You’ll manage translations in the sidebar on the left.
- You’ll see a live preview of your WooCommerce store on the right.
To translate any content, all you do is hover over it on the live preview and click the pencil icon. That will open the translation in the sidebar. From there, you can enter your desired translation. Or, if you used automatic translation, the translation will be pre-filled from your translation service:

And that’s pretty much all there is to it! You’ll use the same basic approach across your entire store. Let’s look at some specific examples…
How to Translate a Single Product
We already showed you how to translate a single product’s title in the example above. You can use that same approach for the rest of the single product text.
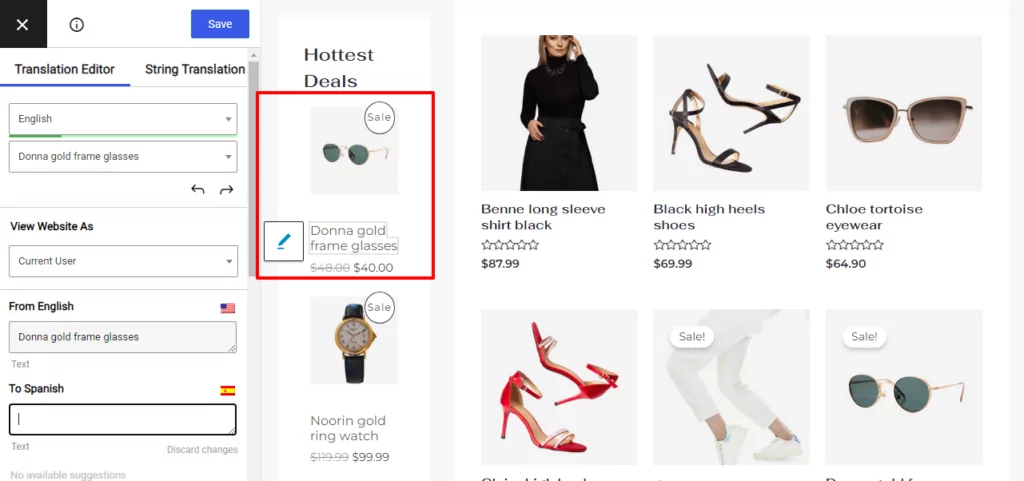
One notable thing, though, is that you can also “translate” your product images, which might be useful if your product images contain text or otherwise need to be localized. Just as you do with text, you can hover over the image that you want to translate and click the pencil icon:
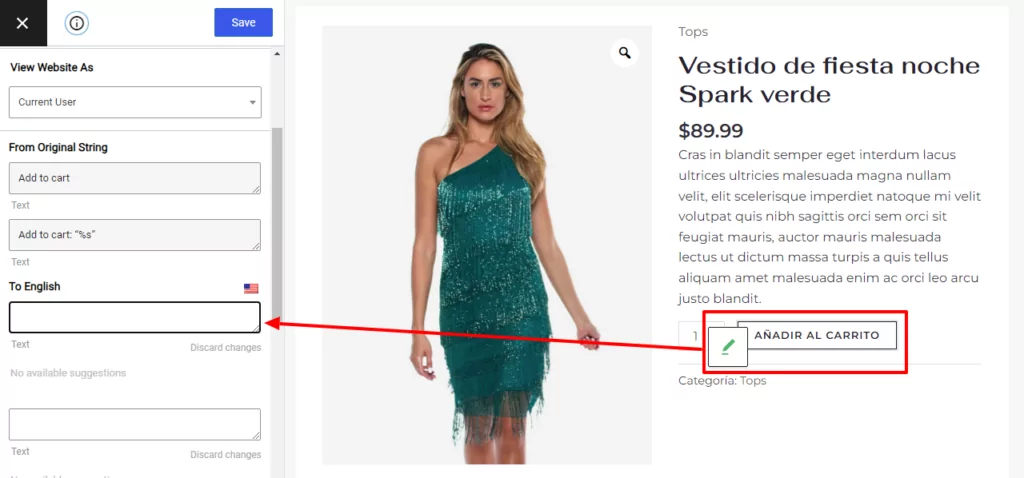
How to Translate WooCommerce gettext (Add to Cart, Shopping Cart, Checkout, Etc.)
Your WooCommerce store will have certain strings that repeat across your store. For example, the “Add to Cart” button appears on every product page, as do other strings like sales notifications, category headings, product detail headings, etc.
You’ll also have your core pages, like the meat of your cart and checkout pages.
These strings come straight from WooCommerce and are what’s known as gettext strings. The nice thing is that once you translate these gettext strings one time, those changes will automatically apply to all instances.
Additionally, if you’re using a language that WooCommerce already supports, TranslatePress will automatically pre-fill those translations from the WooCommerce language pack, which saves you some time.
When editing these gettext strings, the only differences are that:
- TranslatePress will mark them with a green pencil icon (rather than the regular blue icon).
- You can edit the text in both your original language and your destination language(s).
Your shopping cart and checkout also use these gettext strings, which means that TranslatePress will automatically pre-fill their translations from the WooCommerce language pack (if available). You can still go through and manually edit them if desired, though.
How to Translate WooCommerce Shop Page
To translate your shop page and other archive pages, you can open the TranslatePress editor just as you did before.
You’ll notice that, if you already translated a single product, TranslatePress will automatically translate the product title in all instances, including on your archive pages. That is, you don’t need to duplicate any of your work.
You can see that our “lemon shirt” example is already using the Spanish-language translation from when we edited its single product page.
For other text that’s unique to your archive pages, all you need to do is click on it, just like you saw before:
How to Translate SEO Elements
As we covered in the benefits section, one positive outcome of making WooCommerce multi language is the ability to rank your translated product/shop pages in Google.
However, to do this, you’ll want to also translate your store’s behind-the-scenes metadata such as:
- SEO titles
- Meta descriptions
- URL slugs
- Social graph information
While everything that we showed you above is free, you’ll need the SEO Pack addon to translate these elements. You can get access to the addon via the Personal license.
Once you purchase and install the addon, you can translate sitewide SEO options in the regular TranslatePress editor.
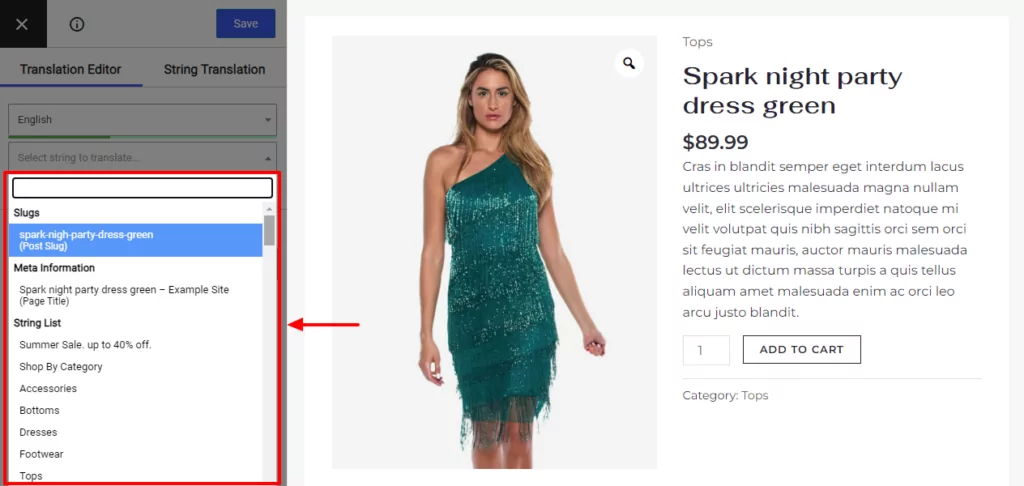
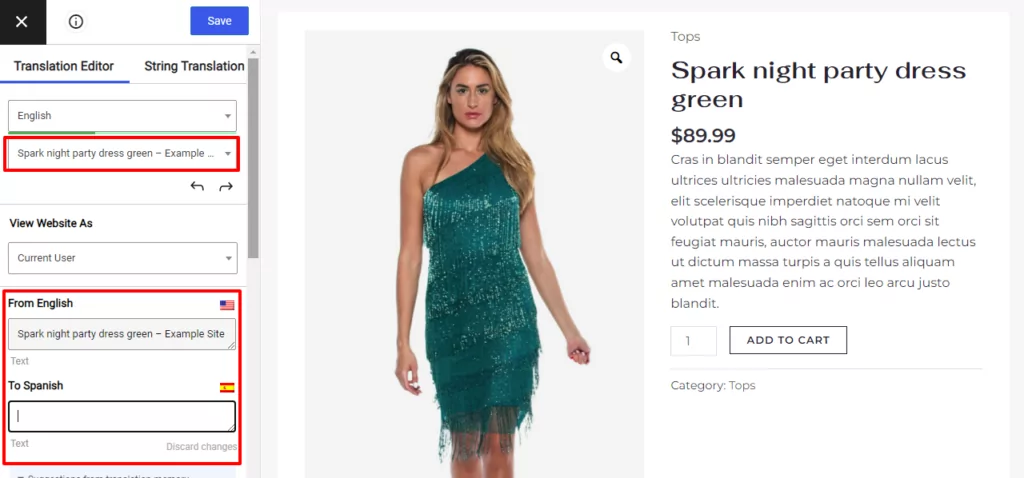
To translate SEO metadata, URL slugs, and social media information for individual products, you can use the regular visual editor. With the SEO Pack addon installed, you can use the Meta Information section of the string translation drop-down to edit this metadata:
That will open the metadata in the sidebar just like your other translations:
You’ll only see this option if you’ve installed the SEO Pack addon.
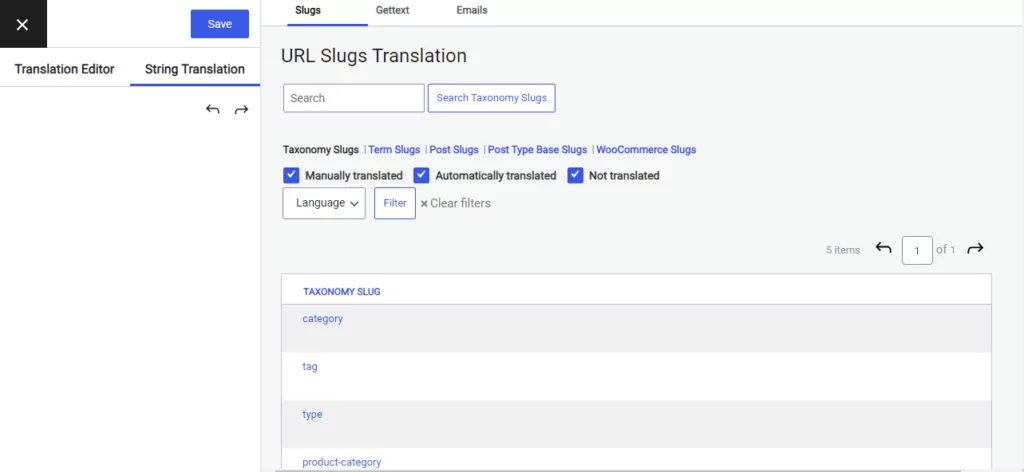
To edit more URL slugs, click on the String Translation tab, as shown below.
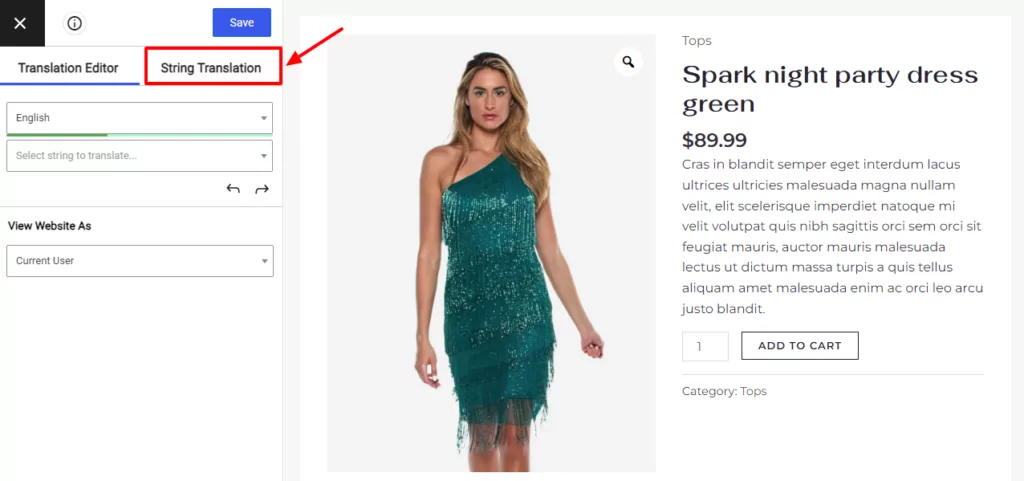
This will open a new interface where you can translate all of the URL slugs for your store:
How to Translate Other Parts of Your Store
Finally, remember that TranslatePress isn’t just limited to WooCommerce. You can also use it to translate other parts of WordPress – here are some examples:
- Editor (Gutenberg) blocks
- Custom fields
- Custom post types
- WordPress forms
- WordPress menus
- Images
- Popup content
- Sliders
Create a WooCommerce Multi Language Store Today!
By translating your WooCommerce store, you can:
- Offer a better shopping experience for existing visitors who would prefer to browse your store in their native languages (and won’t purchase from stores in other languages).
- Reach new visitors by ranking your translated content for new keywords in Google (multilingual SEO) and also opening the chance for your content to get shared in new languages.
To translate your store, you’ll need the help of a WooCommerce multi language plugin like TranslatePress.
TranslatePress lets you translate all of your store’s front-end content into one new language for free – give the free version a try and see how it works for you.
Then, if you want to improve your store’s multilingual SEO, translate your store into unlimited new languages, and gain access to other new features, upgrade to the premium version of TranslatePress.