In this post
In this post
Looking for a way to change the WooCommerce language?
Because WooCommerce is so popular, it’s already been translated into most of the world’s popular languages, which makes it pretty easy to change the language of your store.
However, there are a few different ways that you can change your store’s language, which is why we decided to create this detailed guide to explain exactly what your options are and show you how to configure all of them.
In total, we’re going to share explanations and tutorials for three different scenarios:
- Changing the front-end language of a single-language WooCommerce store.
- Changing your WooCommerce dashboard language without changing the front-end language of your store.
- Offering your front-end store in multiple languages and letting shoppers choose their preferred languages. AKA – a multilingual store.
Let’s get started!
Three Options to Change WooCommerce Language
In this first section, we’ll go over the three different options for changing your store’s language. Then, in the next section, we’ll share the actual how-to tutorials to implement each scenario.
1. Single-Language Store
In this first scenario, you can change the WooCommerce language for a single-language store. That is, a store where the front-end of your store is only in one language.
Because WooCommerce is so popular, it’s already been translated into a ton of different languages – you can view the full list here (look at the Stable column).
When you change your store’s language, WooCommerce will use these existing translations to automatically change the language for all of WooCommerce’s built-in content including details like:
- “Add to Cart” button
- Cart page
- Checkout page
- My Account page
- Etc.
Of course, you would still be responsible for adding the actual content for your products – WooCommerce won’t be able to automatically change that when you change your store’s language.
2. WooCommerce Dashboard Language
In this second scenario, you can change the language for just your back-end WooCommerce dashboard without changing the front-end language of your store.
For example, let’s say that your store targets an English-language audience, so you want to only offer your front-end store in English. However, maybe you (or one of your store admins) are a native Spanish speaker, so you’d prefer to have your store’s dashboard be in Spanish.
WooCommerce lets you do that – you can even allow different users to choose different languages for the WooCommerce dashboard. The dashboard language works on a per-account basis, so you could use your dashboard in Spanish while another user uses it in English.
3. Multilingual WooCommerce Store
In the first two scenarios, we’re assuming you only want to offer your front-end store in one language. However, another option is to create a multilingual WooCommerce store where your front-end store is in multiple languages and shoppers can choose their preferred languages.

To set this up, you can use a plugin like TranslatePress – more on this below.
There are a lot of benefits to creating a multilingual eCommerce store…
First off, when you translate your store and products into new languages, you can rank those translations in Google. Every product page on your site will be able to rank in each language, as will your shop category and tag archives. This gives you a chance to increase your visibility in search engines and get more traffic. In fact, you’ll see this strategy implemented by a ton of popular eCommerce stores, such as Etsy.
Second, creating a multilingual store helps you create a more user-friendly shopping experience for your multilingual customers. According to a Gallup survey in the EU, 42% of respondents don’t buy products from stores that aren’t available in their native language. So if your store targets multilingual customers, creating a multilingual store is essential.
Most importantly, this can happen even in small geographic areas. For example, the US Census Bureau estimates that 45% of California residents speak a language other than English when at home. And as a whole, 22% of the USA speaks a language other than English at home.
While it might seem like a lot of work to translate all of your products into one or more new languages, TranslatePress supports automatic translation via DeepL or Google Translate. So instead of translating your products from scratch, you can use one of these services to automatically generate translations and then just refine them as needed. We’ll show you how this works in the tutorial below.
How to Change WooCommerce Language: Three Methods
Now, let’s get into the tutorials. You can click below to jump straight to the scenario that best fits your needs:
- Change language for a single-language store
- Change WooCommerce dashboard language
- Create a multilingual WooCommerce store
1. How to Change WooCommerce Language for a Single-Language Store
In this first tutorial, we’ll show you how to change the WooCommerce language for a single-language store.
For this tutorial, we’ll assume that your store is currently in English but you want to change it to only Spanish. However, you can easily swap in any other languages that fit your situation.
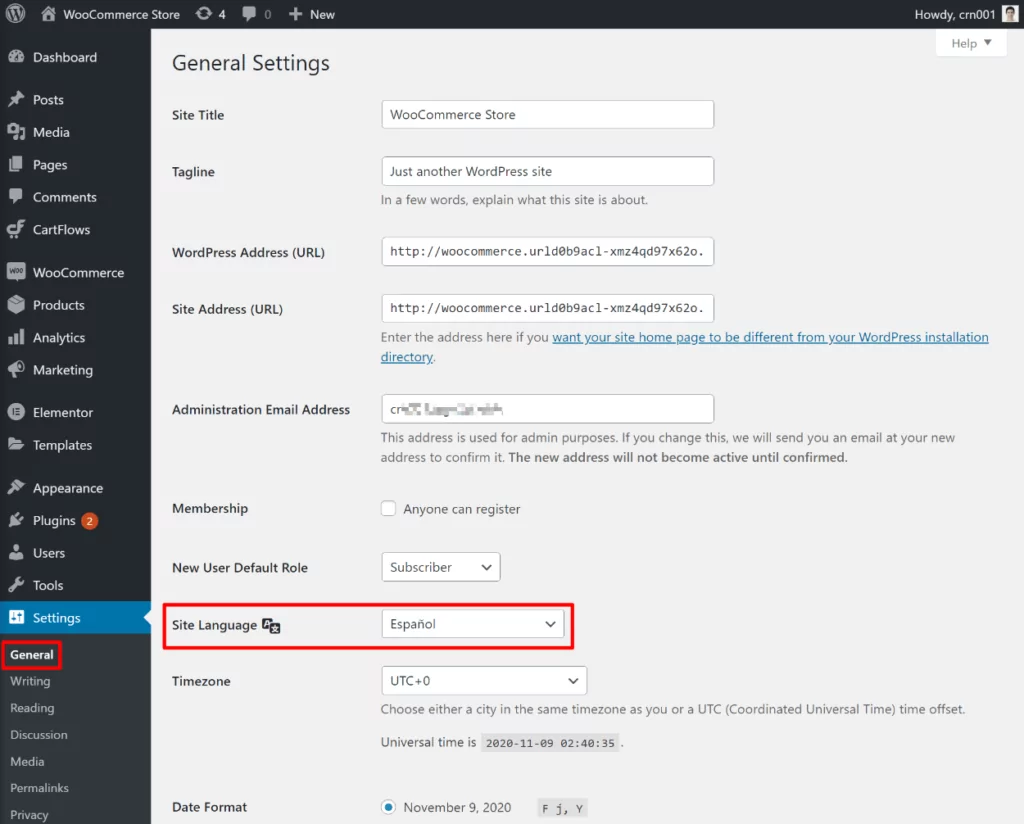
To get started, you first need to change your WordPress site language:
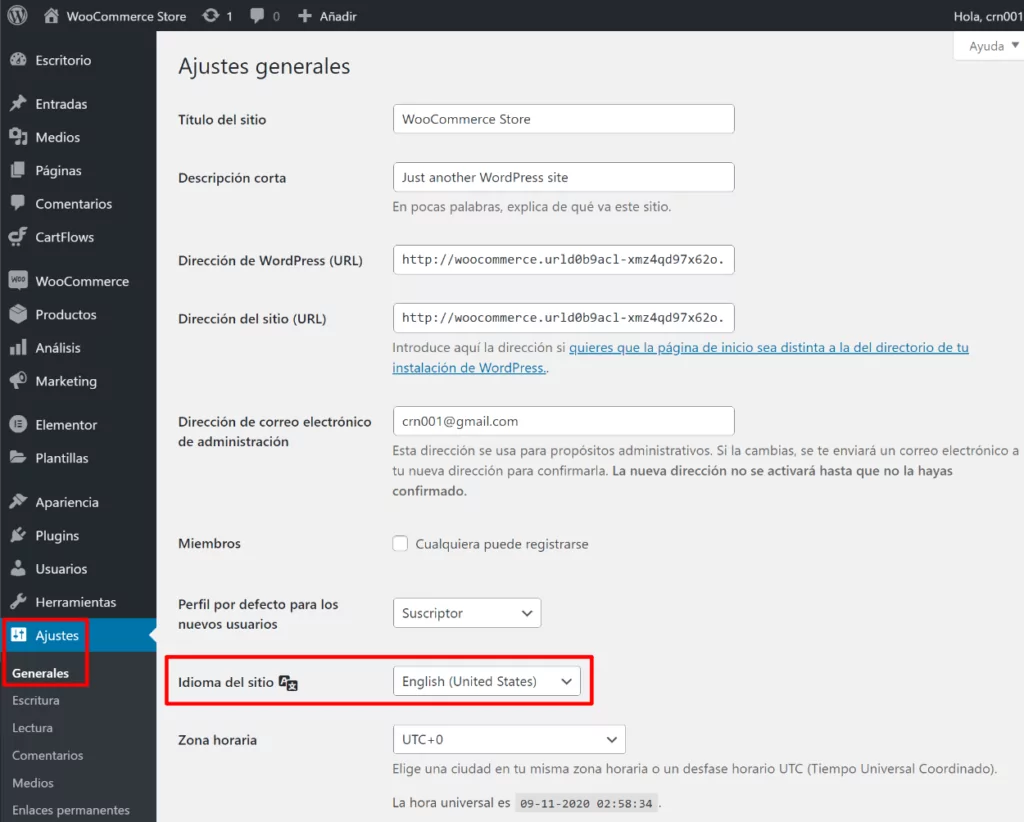
- Go to Settings → General in your WordPress dashboard.
- Find the Site Language drop-down.
- Select the language into which you want to change your WooCommerce store.
- Save your changes.
Once you save your changes, WordPress will automatically change the dashboard language of your WordPress dashboard. If you want to change this back for just your dashboard, you can go to Users → Profile (or the equivalent in the new language) and change your dashboard language (there’s a more detailed tutorial on how this works in the next section). This is optional.
To finish things out, you need to tell WordPress to install the WooCommerce language pack for the language that you chose:
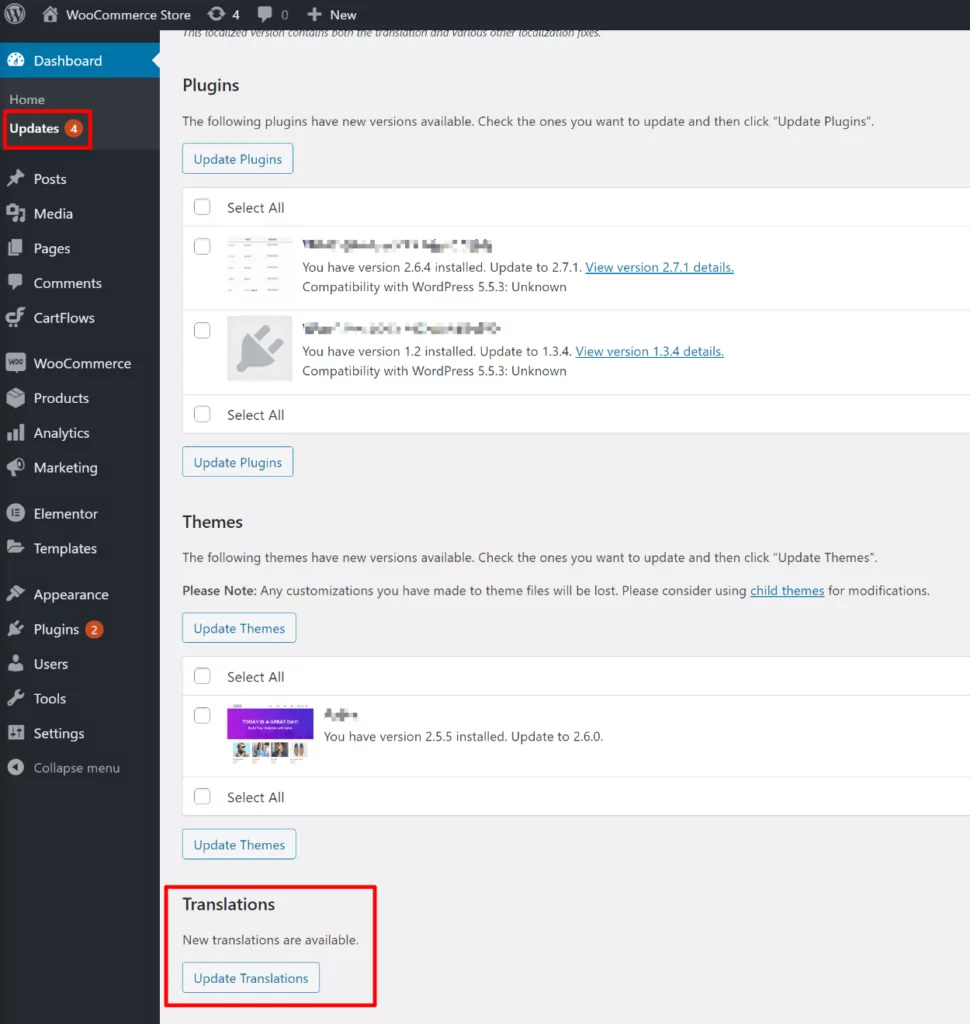
- Go to Dashboard → Updates.
- Scroll down to the Translations section.
- Click the Update Translations button.
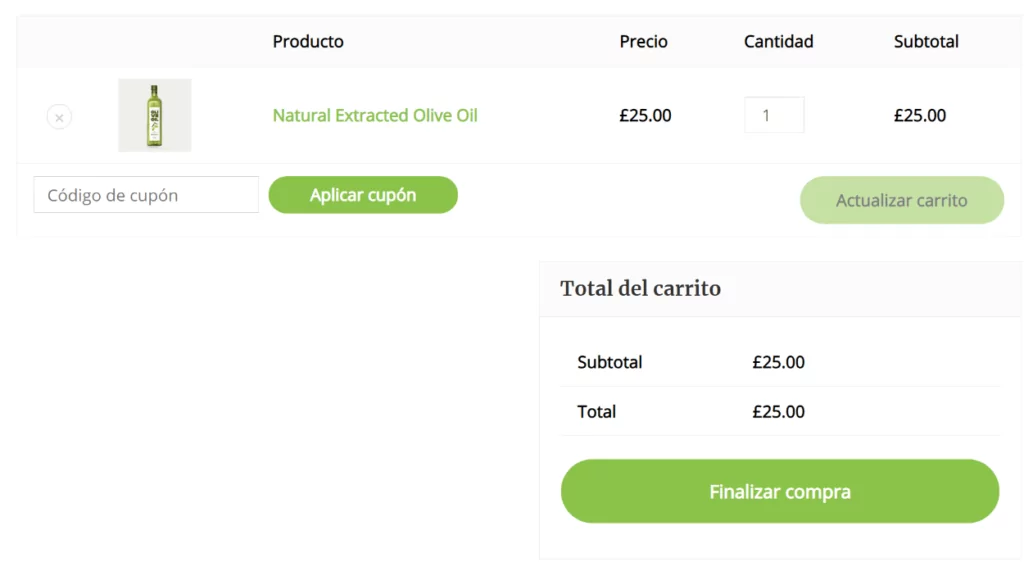
Once you update your translations, your WooCommerce store should start automatically using the new language that you set in Settings → General. Note that this only applies to content that comes directly from WooCommerce, such as the “Add to Cart” button, the checkout page, etc.
For content that you’ve added yourself, such as product titles/descriptions, you would need to manually add/adjust the content in the proper language.
2. How to Change WooCommerce Dashboard Language
In this second tutorial, we’ll show you how to change just the WooCommerce dashboard language for your store, without affecting the front-end language.
For example, offering your front-end store in English but using Spanish for the back-end WooCommerce dashboard.
First, you need to change your WordPress site language (don’t worry, you’ll change it back in a second):
- Go to Settings → General in your WordPress dashboard;
- Find the Site Language drop-down;
- Select the language that you want to use in your WooCommerce dashboard;
- Save your changes.
Next up:
- Go to Dashboard → Updates (or the equivalent in the language that you chose);
- Scroll down to the Translations section;
- Click the Update Translations button.
Now, go back to Settings → General and use the Site Language drop-down to change your site language back to the language that you want your front-end store to be in. For example, you would change it back to English:
To finish things out:
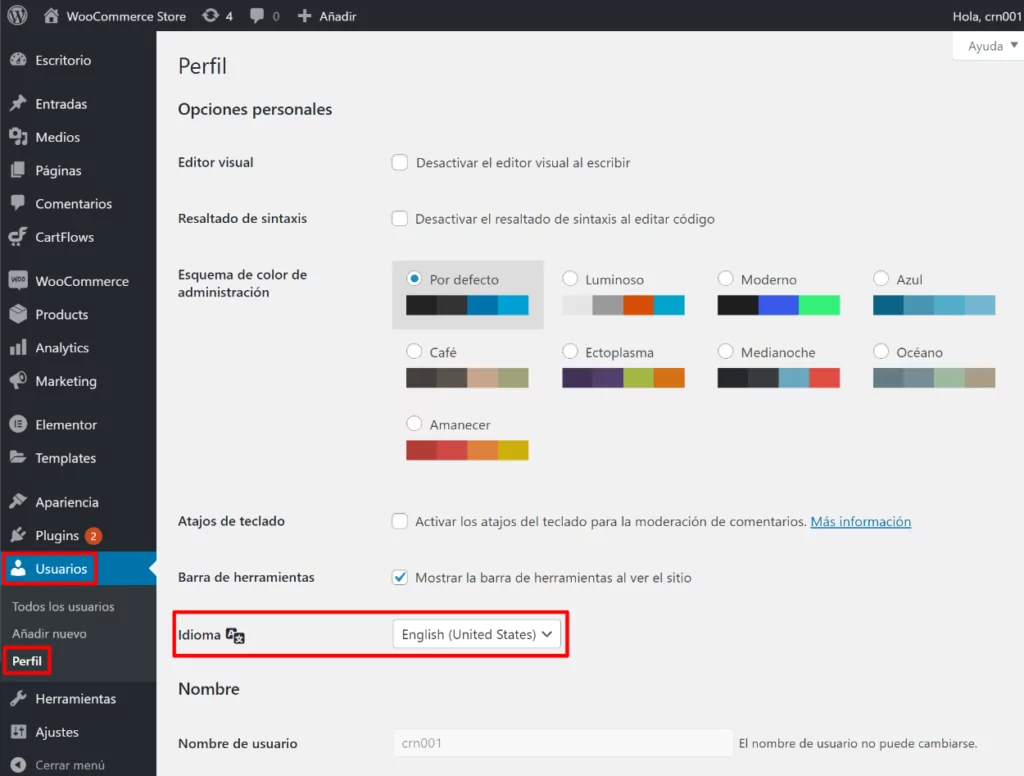
- Go to Users → Profile.
- Use the Language drop-down to select the language that you want to use for just your WooCommerce dashboard (e.g. Spanish).
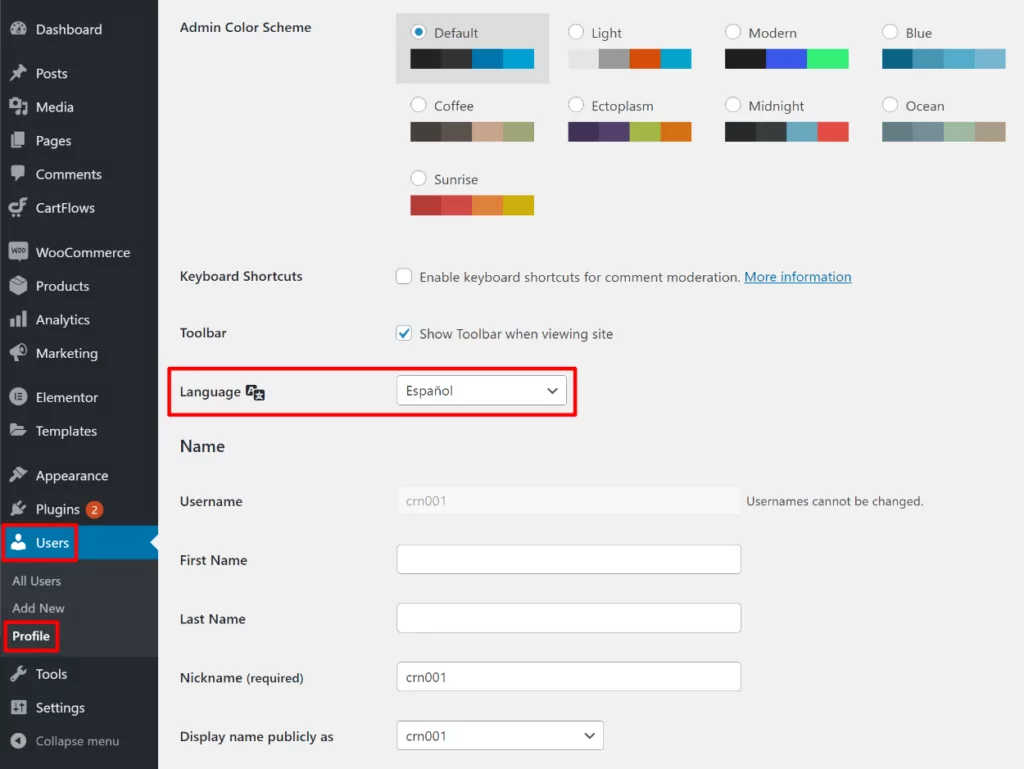
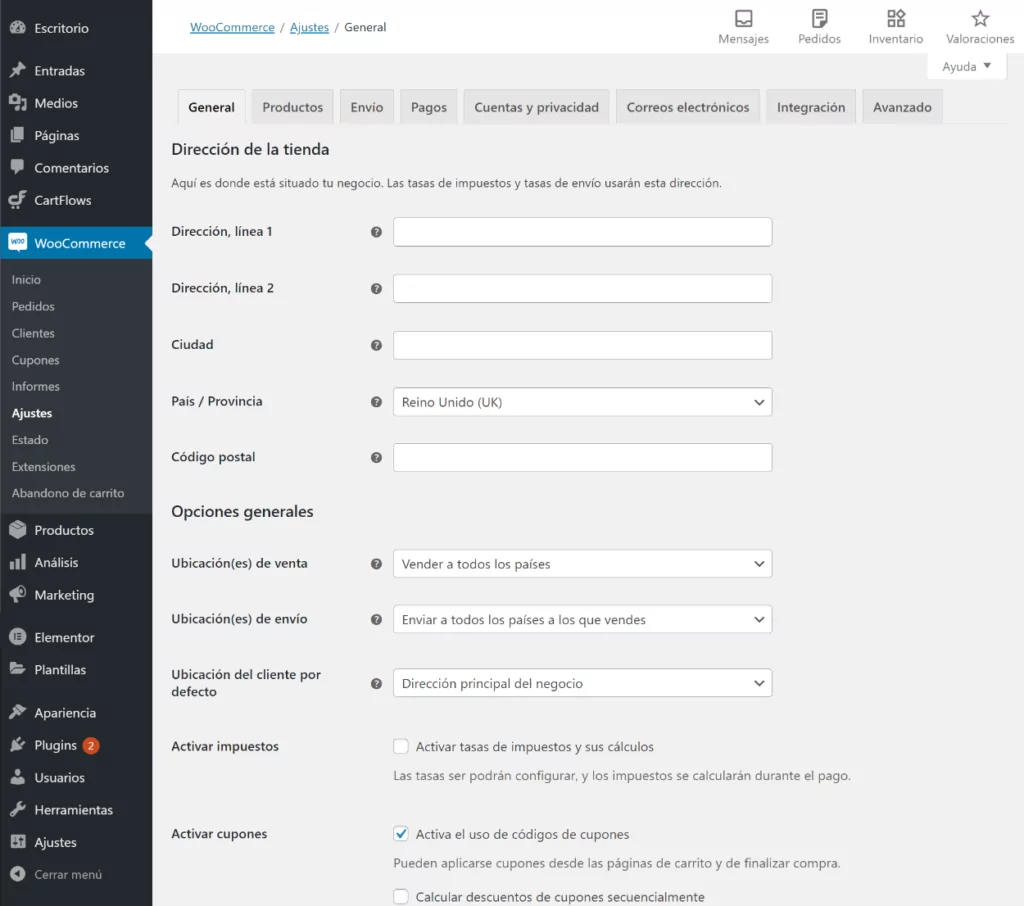
Now, your front-end store will still be in the language that you set in Settings → General (e.g. English). However, when you’re working inside your WooCommerce dashboard, the interface will be in Spanish:
Note that this will only apply to your WordPress account. If other people have access to your WooCommerce dashboard, they’ll also need to select their preferred language in their profile settings. You could even repeat the process above to install more languages that your other store managers can use.
For example, you could have your front-end store be in English, your own WooCommerce dashboard be in Spanish, and another store manager’s dashboard be in German.
3. How to Create a Multilingual WooCommerce Store
In this last tutorial, we’ll show you how to create a multilingual store. That is, a store where you can offer your front-end content in multiple languages and let your shoppers choose their preferred language.
To create a multilingual WooCommerce store, you can use the TranslatePress plugin.
TranslatePress does come in a free version at WordPress.org that you can use to translate your store into one new language (two languages total). However, to achieve the SEO benefits of creating a store in multiple languages, you’ll need at least the premium SEO pack add-on. This addon is available on the TranslatePress Personal license – which you can buy here.
TranslatePress Multilingual
Below, we’ll show you how to set the plugin up. However, we also have several detailed guides written specifically on how to create a multilingual WooCommerce store. If you want a more detailed look, you can click to go to one of these separate guides:
- Ultimate guide to creating a multilingual WooCommerce store
- How to automatically translate WooCommerce
- How to translate WooCommerce products
Here’s how it works…
Install Plugin and Choose Languages
To get started, you’ll want to install and activate the free TranslatePress plugin from WordPress.org. Then, also consider purchasing and installing the following premium add-ons:
- SEO Pack Addon – improves multilingual SEO by letting you translate URL slugs and SEO/social media metadata from plugins like Yoast SEO.
- Multiple Languages Addon – lets you translate your store into unlimited new languages.
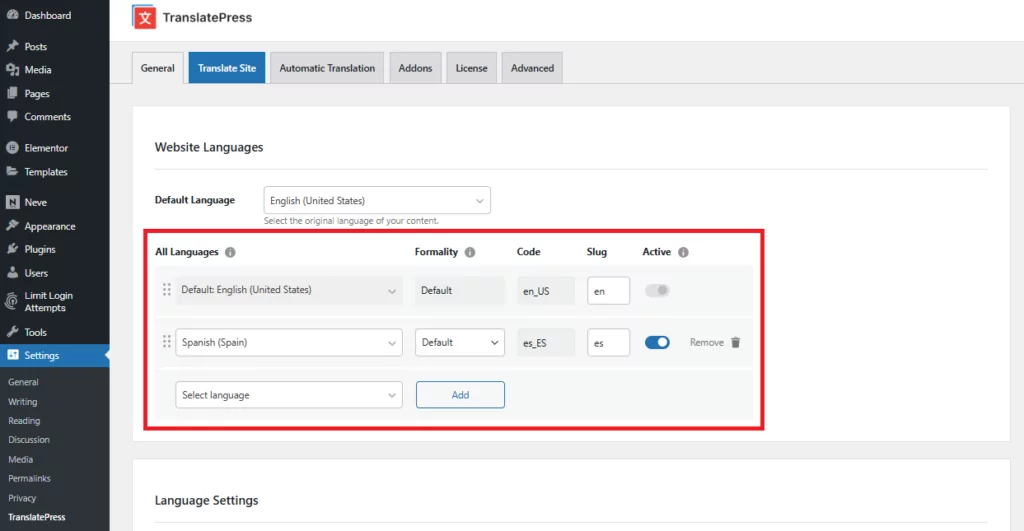
Once you’ve installed and activated all the plugins/add-ons you plan to use, go to Settings → TranslatePress to choose the languages that you want to use on your store:
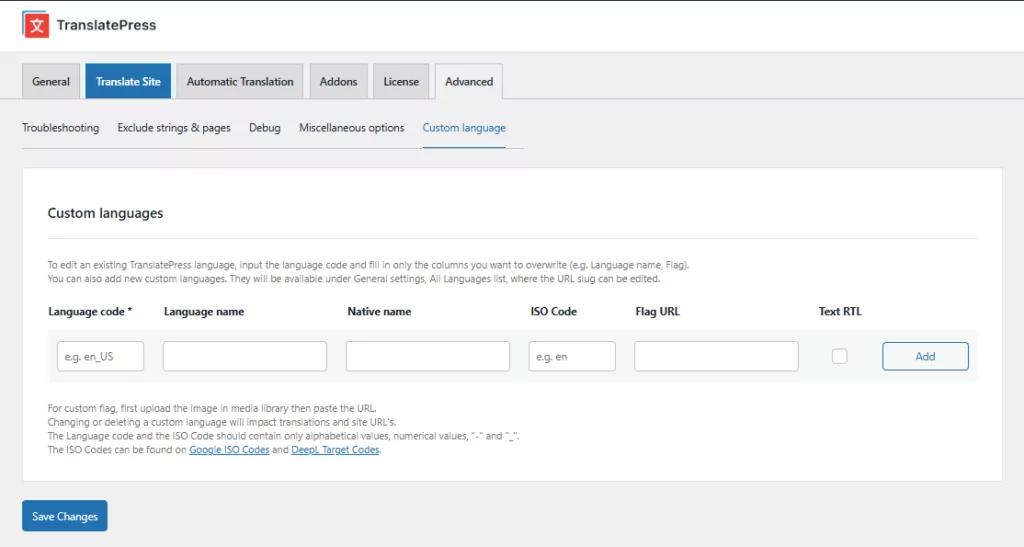
If you want to use a WooCommerce language that’s not found in the All Languages drop-down, TranslatePress also lets you add your own custom language(s). You can do this by going to the Advanced tab in the TranslatePress settings and select the Custom language section:
Set Up Automatic Translation (Optional)
Next, you should decide whether or not you want to use automatic translation. This helps you speed up the process of translating all your content.
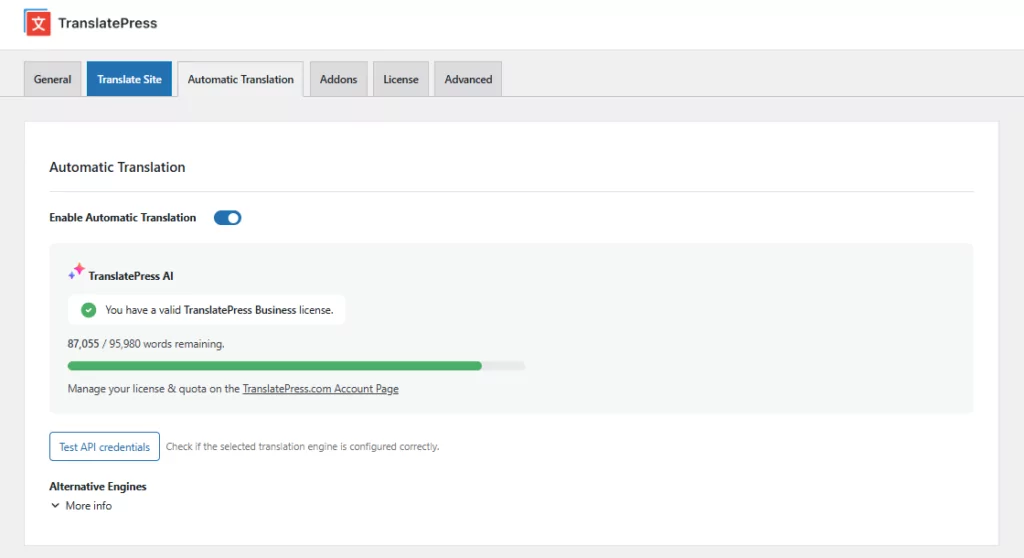
You can use TranslatePress AI to generate your store’s baseline translations or, alternatively, you can also use the Google Translate or DeepL APIs if you prefer. TranslatePress AI is the easiest and smartest option though, as it works instantly, with no setup required and offers the most accurate translations possible.
Even if you use automatic translation, you’ll still be able to manually edit all of your store’s translations. Additionally, automatic translation is 100% optional – you can also just manually translate your store if you prefer.
If you do want to set up automatic translation, go to the Automatic Translation tab in the TranslatePress settings area. For more detailed instructions, check out our post on how to automatically translate WooCommerce:
Translate Store Content
Now, you’re ready to translate your store’s content.
To get started, open the product/store page that you want to translate on the front-end of your site and click the Translate Page button on the WordPress toolbar:
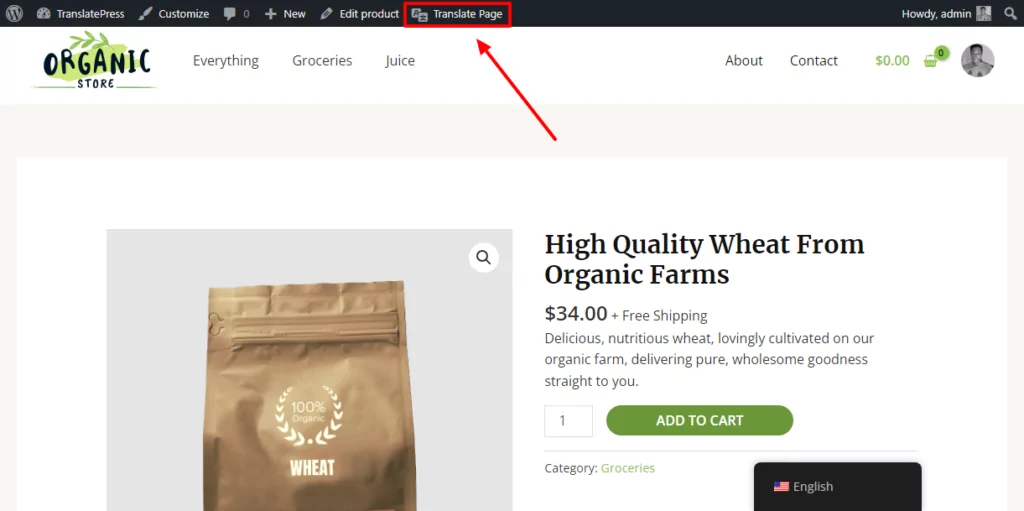
This will launch the visual TranslatePress editor. To translate any part of your store, all you need to do is hover over it on the live preview of your store and click the pencil icon. Then, you can edit the translation in the sidebar:
Then, just repeat the process for all of your content! You can also use the same approach on your shop pages, cart pages, checkout pages, etc.
TranslatePress will automatically pre-fill the translations for WooCommerce content using WooCommerce’s built-in translation files (e.g. the “Add to Cart” button). However, you can also use the same approach to translate this content as well. You can even “translate” your product images.
If you want to see a more detailed look at any part of the process, we have lots of guides on how to translate different parts of WordPress:
- WooCommerce products
- Gutenberg blocks
- Custom fields
- Custom post types
- WordPress forms
- WordPress menus
- Images
- Pop-up content
- Sliders
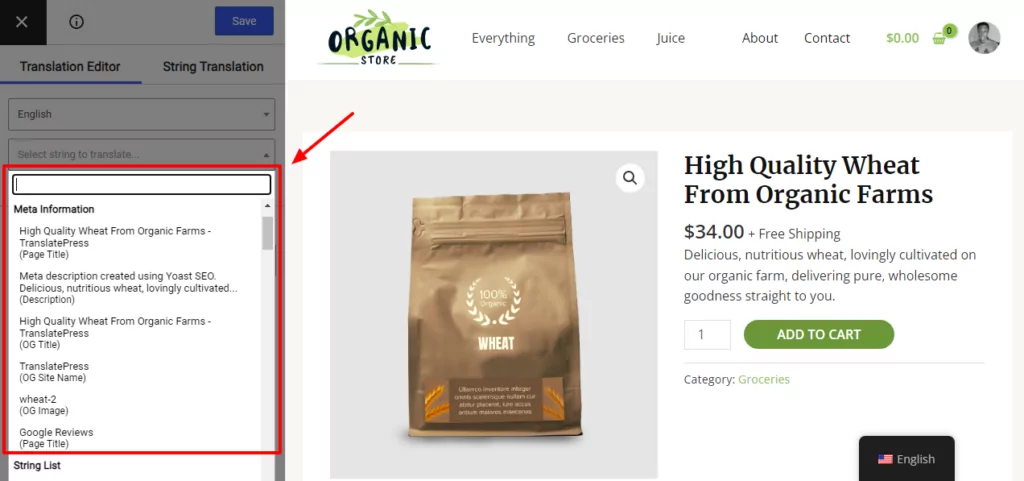
You can also use this interface to translate your behind-the-scenes SEO metadata and URL slugs (if you have the SEO Pack add-on installed): You can activate the SEO Pack add-on after you activate any premium version of TranslatePress (Personal, Business, or Developer). Once installed, go to Settings → TranslatePress in your WordPress dashboard, and then navigate to the Addons tab. Activate the SEO Pack Add-on here.
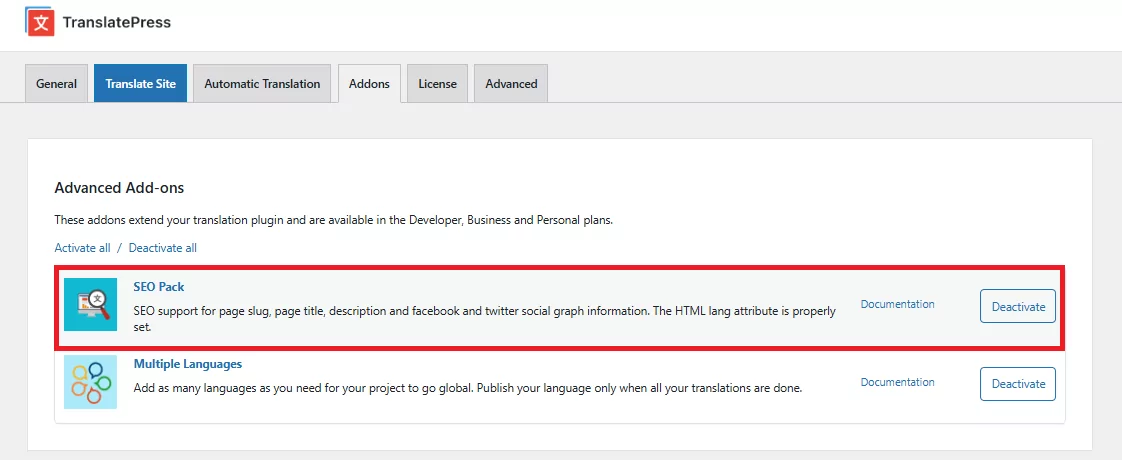
After activation. you’ll be able to:
- translate SEO data, use the drop-down in the sidebar;
- access the URL slug translations, look under the String List section.
Configure Language Switcher
To finish things out, you’ll want to configure the front-end language switcher that your visitors can use to change the language of your WooCommerce store.
By default, TranslatePress adds a floating language switcher to the bottom-right corner of your site. However, you can also place the language switcher in your navigation menu, in a widget (using a shortcode), or anywhere else on your site using a shortcode or PHP function.
You can also configure how your language switcher works by going to Settings → TranslatePress:
Learn more about the language switcher settings.
Change Your WooCommerce Store Language Today
In this post, we’ve covered three different approaches that you can use to change your WooCommerce language:
- Change the language for a single-language store.
- Change just the WooCommerce dashboard language without affecting the front-end language of your store.
- Create a multilingual WooCommerce store where visitors can choose their preferred language.
You can choose the approach that works best for your needs. However, remember that there are some real benefits to using the multilingual store approach:
- You can rank your translated content in Google, which helps you reach more potential customers.
- Your shoppers will have better experiences because they can browse your store in their preferred languages.
If you want to create a multilingual store, install the TranslatePress plugin on your WooCommerce store today.
TranslatePress Multilingual
If you found this post helpful, please check out our YouTube channel, where we constantly upload short & easy-to-follow video tutorials. You can also follow us on Facebook and Twitter to be the first to know each time we post.

Excellent
How about the emails that are sent from woocomerce, how to translate those?
Here’s an article on how to translate WooCommerce emails: https://translatepress.com/translate-woocommerce-emails/