In this post
In this post
Want to use WordPress in two languages?
If you have a bilingual audience, it’s a good idea to offer your content in both languages so that all your visitors have a great experience. Beyond that, translating your content also gives you a chance to reach more people in search engines and on social media, which is another huge benefit.
While WordPress doesn’t have a built-in feature to help you create a multilingual site, you can use a WordPress translation plugin to offer your site in two languages (or even more languages, if needed).
In this post, we’ll show you step-by-step how to offer WordPress in two languages using the free TranslatePress plugin. By the end of this post, you’ll be able to easily translate all of your content using a simple visual editor like this one:
Let’s get started…
What You Need to Offer WordPress in Two Languages
As we mentioned in the introduction, if you want to use two languages on the front-end of your WordPress site (the part that your visitors will see), you’ll need a WordPress translation plugin.
Note – if you just want to use two languages in the backend WordPress dashboard, we also have a guide on how to set that up.
TranslatePress is a WordPress translation plugin that comes in both a free version at WordPress.org and a premium version with some extra features. It lets you translate 100% of your site’s content into one or more new languages.
One of the most unique things about TranslatePress is its visual translation editor, which you saw above.
Another unique thing is that it lets you translate 100% of your site’s content right out of the box. It doesn’t matter whether the content comes from the WordPress editor, a plugin (like a page builder), or your theme…you’ll be able to manage it all right from the visual editor.
While you’ll be able to follow this tutorial and translate WordPress in two languages using just the free version of the plugin, the paid version adds some additional search engine optimization (SEO) features, support for unlimited languages, and lots of other useful additions.
TranslatePress Multilingual
How to Offer WordPress in Two Languages: Step-by-Step
Now, let’s get into the actual tutorial so that you can start using two languages on your WordPress site.
For this example, we’ll show you how to set up your WordPress site in both English and Spanish because this is a common combination. However, you can use the same steps to translate your site into pretty much any language combination.
To get started, all you need to do is install and activate the free TranslatePress plugin from WordPress.org. You’ll be able to follow all of the core steps in this tutorial using just the free version and we’ll note if any features require the paid version.
Here’s how it works…
1. Choose the Two WordPress Languages That You Want to Use
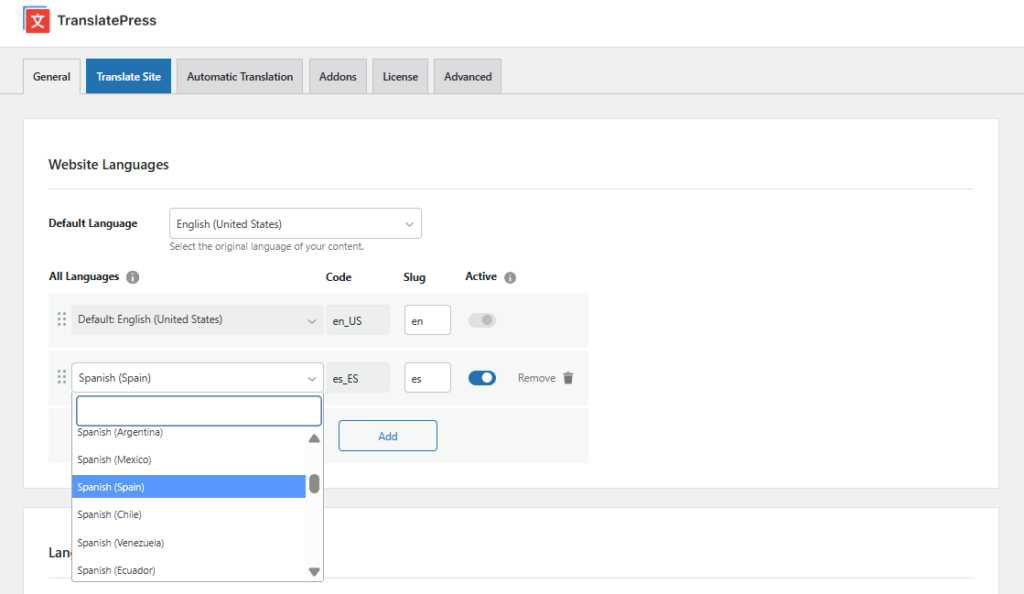
Once you’ve installed and activated the plugin, your first step is to choose the two languages that you want to offer your site in. That is, you’ll choose the current language of your existing content (language #1), as well as the new language into which you want to translate your site (language #2).
To make these decisions, go to Settings → TranslatePress. Here, you can see how we’ve configured it for English (the default) and Spanish (the new language):
2. Set Up Automatic Translation (Optional)
If you have a lot of content, manually translating all of your content into the new language from scratch can be a large undertaking.
To help you save time, TranslatePress supports automatic machine translation via both Google Translate (free) and DeepL (requires the paid version of TranslatePress). These services will automatically generate the translations for your entire site. Then, TranslatePress will save those translations locally.
Even if you use automatic translation, you’ll still be able to go back and manually edit all of your translations, which lets you correct/tweak the machine translations where needed.
However, this step is totally optional – you can also just manually add your translations from scratch (or hire a freelancer/agency to do it for you).
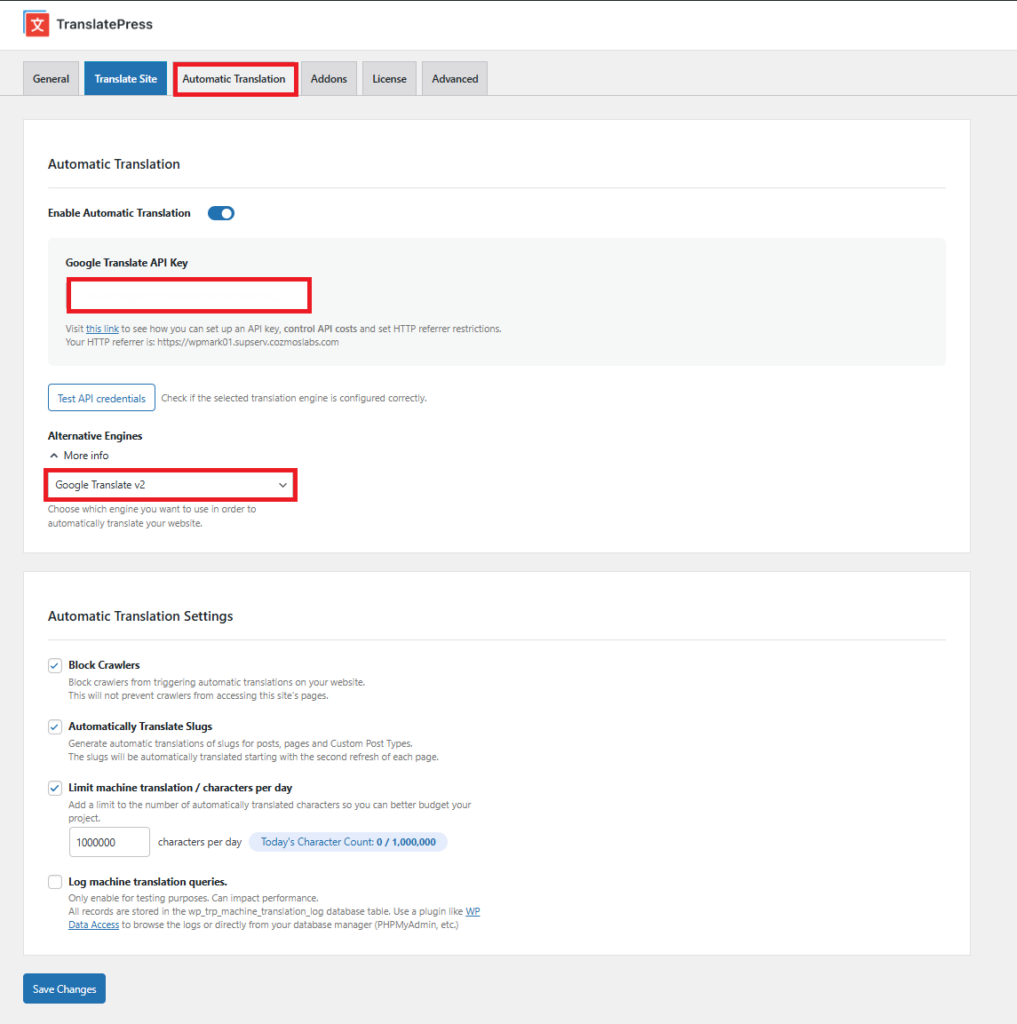
If you do want to set up automatic translations, go to the Automatic Translation tab. There, you can choose your preferred service and set it up:
To help you sync with your chosen translation service, we have two detailed guides for both providers:
3. Translate Your Content
Now, it’s time to either…
- Translate your content (if not using automatic translation).
- Manually edit the automatic translations from your chosen service.
No matter which approach you’re using, you’ll do everything from the same visual interface.
To launch the translation editor, open the page that you want to translate on the front-end of your site. Then, click on the Translate Page option on the WordPress toolbar:
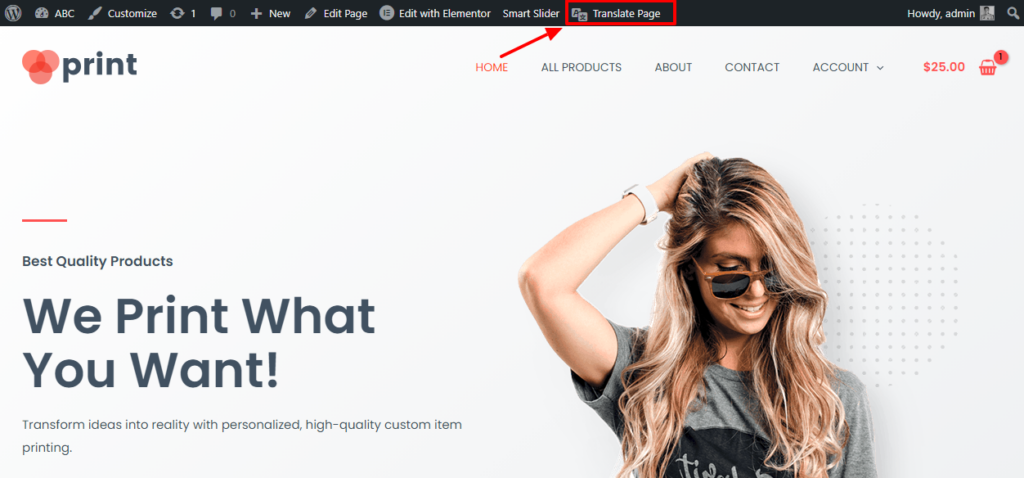
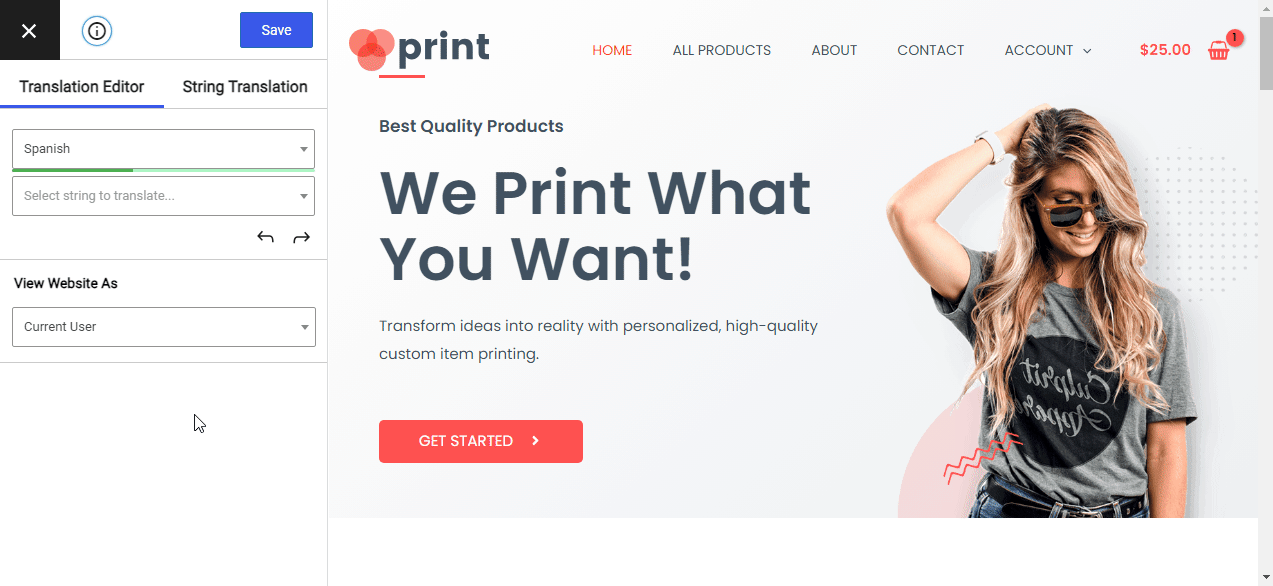
This will open the visual translation editor. You’ll see a live preview of your site on the right and a sidebar on the left where you can manage your translations.
To translate any part of your content, all you do is hover over it on the live preview and click the pencil icon. That will open the content in the sidebar editor, where you can add/edit the translation:

You can use this same basic approach to translate 100% of your content, no matter whether it comes from the WordPress editor, your theme, or plugins. In fact, you can even “translate” images by hovering over an image and clicking the pencil icon.
If you want to see some more examples for different types of content, you can browse the guides below. But again, it’s always the same – just hover, click the pencil icon, and manage your translation in the sidebar:
- Editor (Gutenberg) blocks
- Custom fields
- Custom post types
- WordPress forms
- WordPress menus
- Images
- Popup content
- Sliders
- WooCommerce products
- Elementor (page builder)
- Divi (page builder)
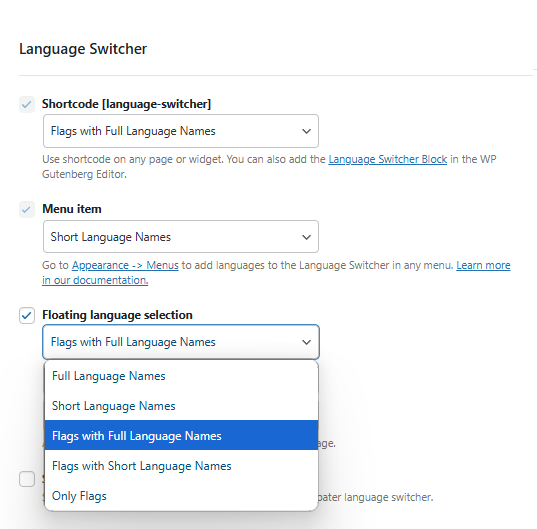
4. Set Up Your Language Switcher
To let your visitors choose between the different language versions of your site, TranslatePress helps you add a front-end language switcher.
By default, TranslatePress adds this language switcher as a floating widget in the bottom-right corner of your site. However, you can also move it to a different position or further customize how it works.
You can change its placement using a…
- Dedicated menu item (Appearance → Menus)
- Shortcode that you can add anywhere on your site (including sidebar widgets)
- PHP function that you can add directly to your theme template files
To view these placement options and change other settings for your language switcher, go to Settings → TranslatePress and scroll down.
5. Optimize Both Languages for Multilingual SEO
At this point, you should have versions of your content in both languages. Google will be able to index and rank both language versions and TranslatePress will also implement some multilingual SEO best practices like the hreflang tag.
However, if you want to further optimize your new translations for SEO, you can purchase the premium version of TranslatePress to get access to the SEO Pack addon.
With the SEO Pack addon, you’ll also be able to use the same simple interface from above to translate the following details:
- SEO titles and meta descriptions (like those from Yoast SEO, Rank Math, or other SEO plugins).
- Social media information (like the titles/descriptions that appear when people share your content)
- URL slugs
It can also help you create a multilingual XML sitemap that you can submit to Google and other search engines.
If ranking both languages on your site in Google is part of your marketing strategy, you’ll want to also translate these elements to get the best return on your translations.
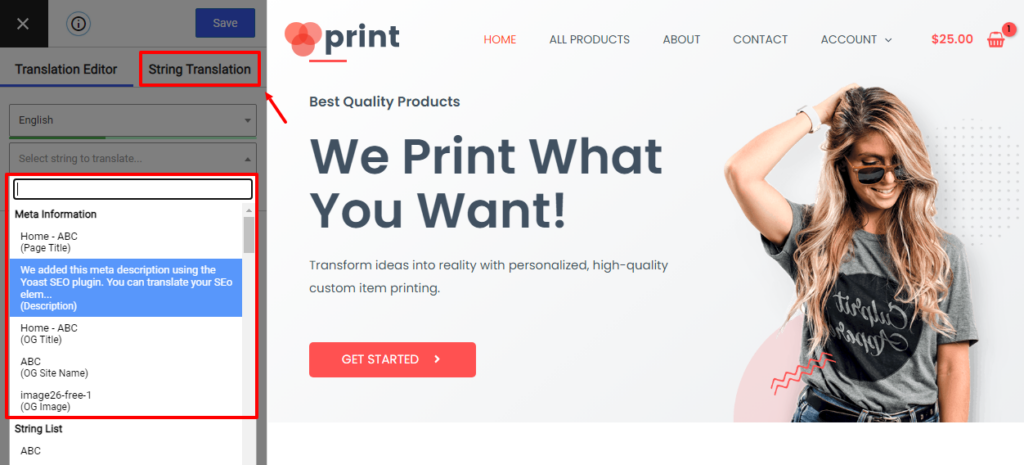
Once you purchase and install the SEO Pack addon, you’ll be able to translate SEO metadata and social media information using the drop-down in the TranslatePress editor. You can also translate URL slugs using the new String Translation option in the editor:
Start Offering WordPress in Two Languages Today
If you have a bilingual audience, offering WordPress in two languages is a great way to create a better experience for your visitors and also reach more of them in search engines and on social media.
However, WordPress doesn’t let you use two languages by default, so you’ll need the help of a WordPress translation plugin to get the job done.
TranslatePress makes a great option here for a few reasons:
- If you only want to offer WordPress in two languages, you can follow this tutorial for free.
- It lets you use both automatic and manual translation (and combine them if needed).
- Your translations are multilingual SEO friendly (especially with the SEO Pack addon), which helps you reach more people in search engines like Google.
To follow this tutorial and get started, you can use the free version of TranslatePress at WordPress.org.
Then, if you want to enhance your multilingual SEO, translate your site into more than two languages, use DeepL for automatic translation, and access a ton of other useful features, upgrade to the premium version.
TranslatePress Multilingual
Do you still have questions on making your WordPress site available in two languages? Let us know in the comments!
If you found this post helpful, please check out our YouTube channel, where we constantly upload short & easy-to-follow video tutorials. You can also follow us on Facebook and Twitter to be the first to know each time we post.