In this post
In this post
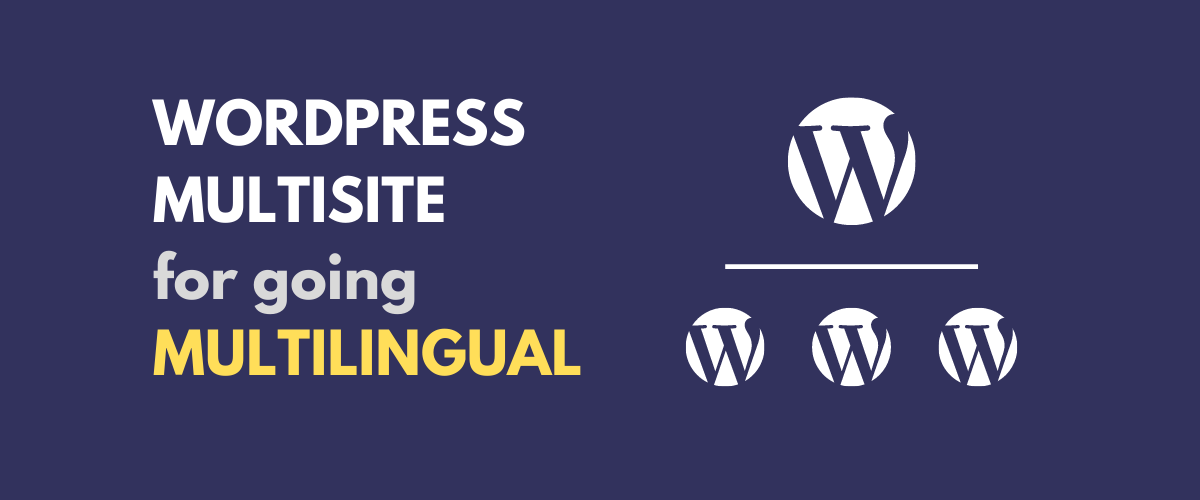
If your website has a global presence, you may be wondering how you can best reach your entire audience and make everyone feel at home. Providing localized content in your users’ native languages may be the answer. One way to go about this is to use WordPress multisite to create a multilingual network.
Multisite enables users to create a network of connected WordPress sites and manage them all from one dashboard. They share many assets, such as plugins and themes, which simplifies building and maintaining all of your sites.
In this article, we’ll introduce the WordPress multisite feature and cover its advantages and disadvantages for multilingual content. Then we’ll walk you through the process of using it to create variations of your website in multiple languages. Let’s get started!
The Pros and Cons of Using Multisite for Your Multilingual Website
Before we dive into how to set up multisite, let’s quickly recap what exactly it is and look at some of the advantages and disadvantages of this approach to creating a multilingual site.
WordPress multisite is a type of WordPress installation that lets users create and maintain multiple WordPress sites from a single dashboard. The consolidation of settings and shared assets such as plugins and themes makes managing the entire network much easier.
When it comes to building a multi language website, the important thing to keep in mind is that multisite is not simply different versions of the same site. It’s actually a network of separate websites in different languages managed from a central location. This setup has many distinct pros and cons.
The Advantages of Multisite for Multilingual Content
The biggest advantage of using WordPress multisite to create a multilingual network is that, since the sites are separate, you can have entirely different content on each one, rather than simply translating the same pages into different languages. This enables you to craft truly localized sites that cater to different cultural preferences around the world.
Another big advantage of multisite is that you can choose how you want to structure the sites. You can use subdomains, subdirectories, or even completely different top-level domains (such as yoursite.ru, yoursite.de, and so on).
This is possible thanks to Domain Mapping, a WordPress feature that can automatically redirect users to different addresses when they visit certain parts of your site. Having distinct URLs for each site makes navigating to the correct page much faster for your visitors.
Also, you don’t need a plugin to set up your multilingual site when using multisite. But this is both a blessing and a curse, so we’ll get back to this later.
The Disadvantages of Multisite for Multilingual Content
The major advantages of multisite mostly revolve around the fact that each site is separate. However, this structure does come with some drawbacks.
The first has to do with ease of use. We’ve mentioned that multisite is more straightforward to manage than multiple WordPress sites. However, it’s also more complex than managing just one site.
For example, while all the sites in the network will share themes and plugins, they typically still need to be activated and configured for each one individually. Not all plugins play nicely with multisite, either.
Similarly, each content change on the primary site needs to be manually replicated on every other site. While there are plugins that can automate some of this, there’s always going to be at least some hands-on intervention required. This goes double for situations where you want your sites to have unique content.
Finally, translating the sites in a multisite network can be a headache. There are a lot of options for making this task easier, but none of them are ideal.
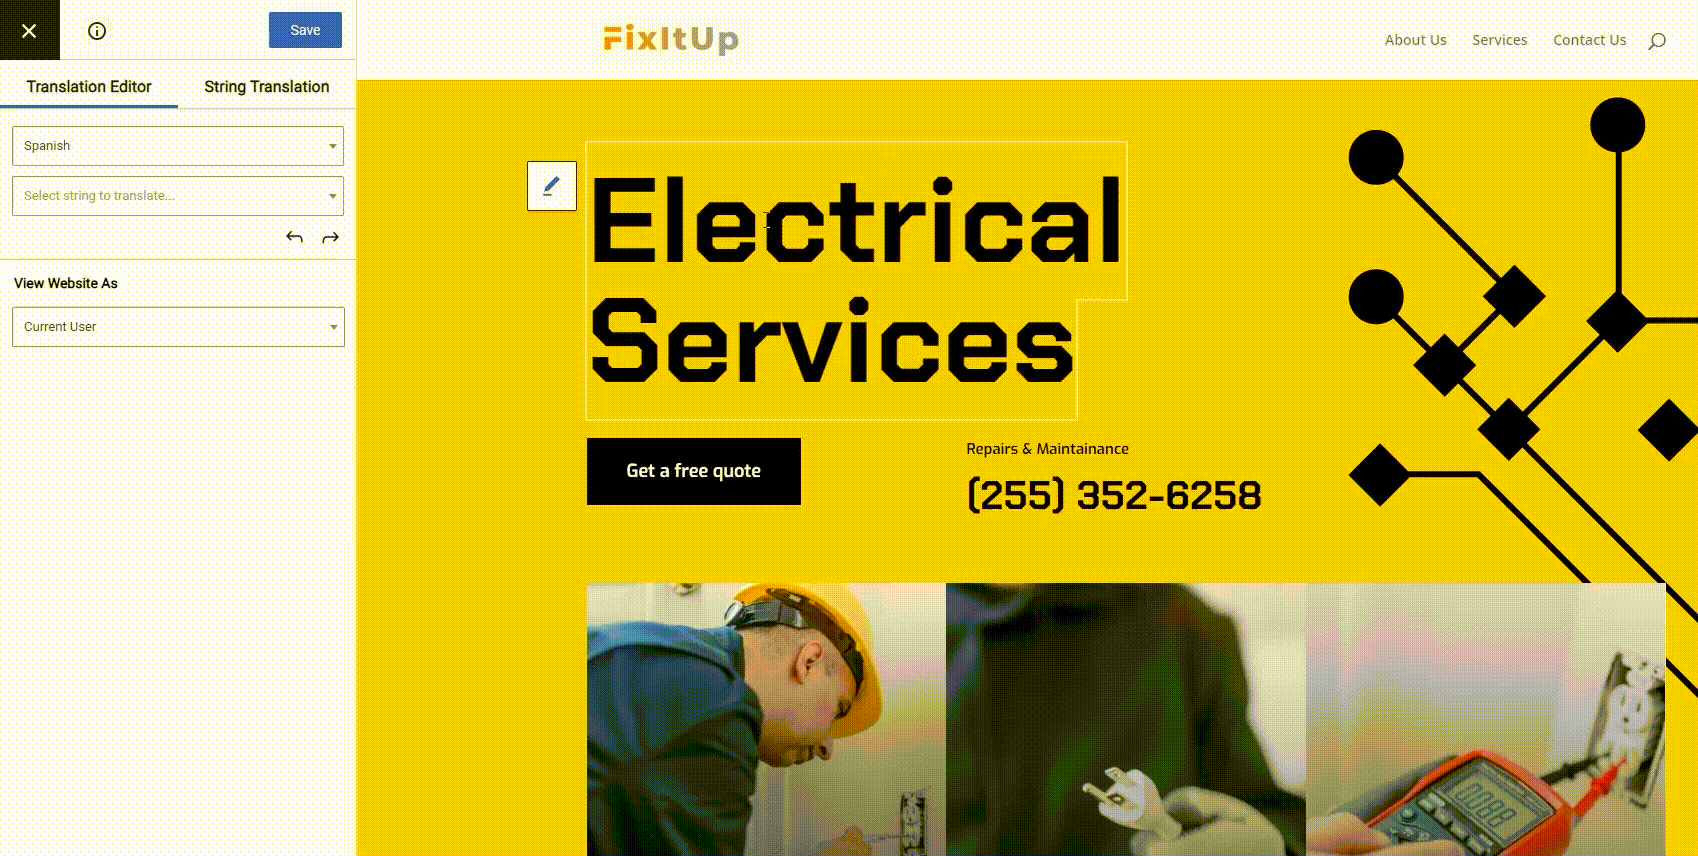
Because of these disadvantages, there are many cases where multisite isn’t the best solution for building a multilingual site. In such scenarios, we recommend looking into a translation plugin such as TranslatePress. This can be a much simpler solution if you don’t need separate sites for each language.
TranslatePress Multilingual
How to Setup WordPress Multisite for Multilingual Sites (In 5 Steps)
If you think using WordPress multisite to create a multilingual network is the best solution for you, we’ve got you covered. The process can be distilled down to the five steps below.
Step 1: Create a Multisite Network
First, you need to create the multisite network that will house your sites. You have two options here, depending on your situation – convert an existing site to multisite or create a new installation from scratch.
Convert an Existing Site to Multisite
If you already have a WordPress website, you can fairly easily convert it into a multisite network. The process does involve working with some code and accessing the WordPress filesystem, but it’s not too advanced.
To get started, make sure that you have a recent backup on hand just in case. You should also disable all of your plugins until the process is complete.
Then, connect to your server using a File Transfer Protocol (FTP) client or your host’s file manager. If you need an FTP client, we recommend FileZilla. Once you’ve accessed your files, open wp-config.php.
Add the following code at the bottom of the file, above the line that says “That’s all, stop editing! Happy blogging”:
/* Multisite */
define( 'WP_ALLOW_MULTISITE', true );
Then save your file. You should now see a new Network Setup option in your WordPress dashboard under Tools. Click on it to open up the network configuration screen:
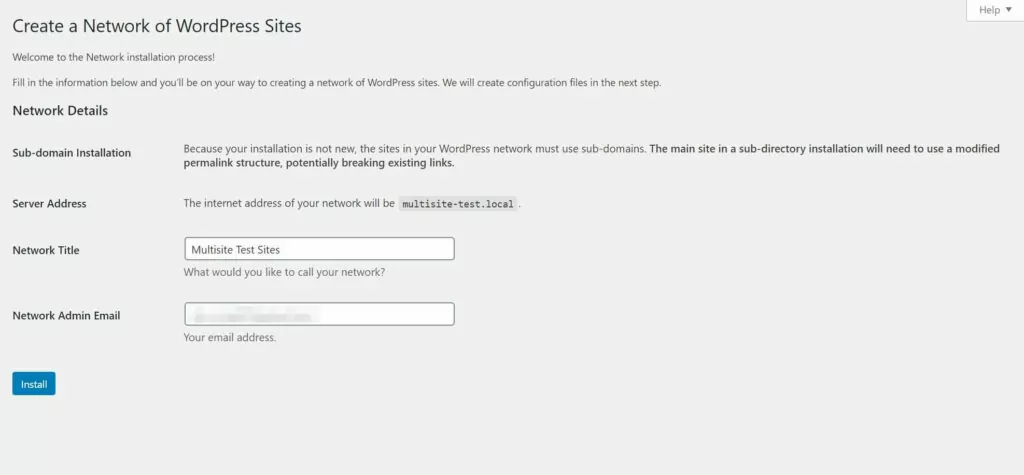
You may see slightly different options on this screen, depending on your setup. Go ahead and fill in or change any fields you need to, then click on Install.
You should now see a screen with some additional instructions. These changes will have to be made manually:
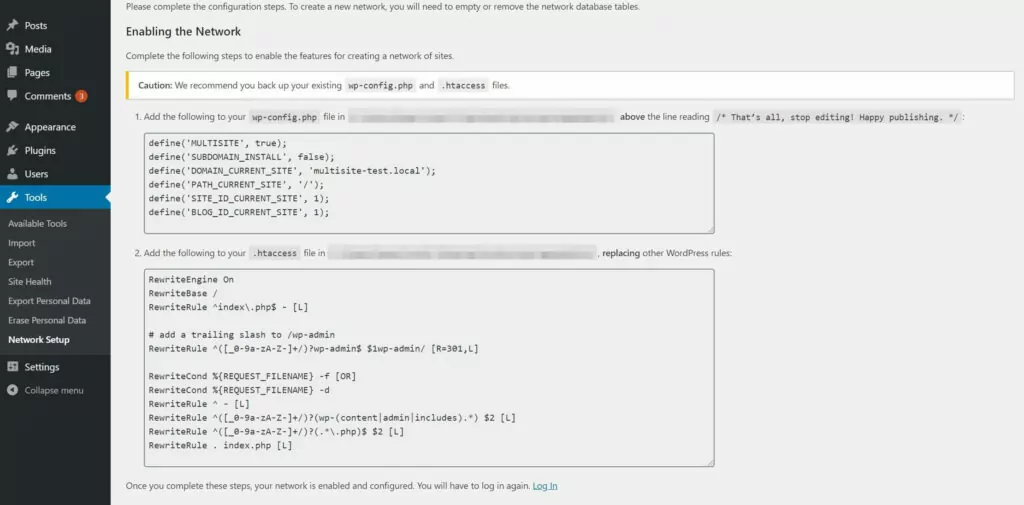
Again, the exact instructions you see may be slightly different, since these code snippets are specific to each install. Go ahead and make the necessary changes, then click on the link to log back into your dashboard.
You should now have a new My Sites item in the sidebar and WordPress toolbar:
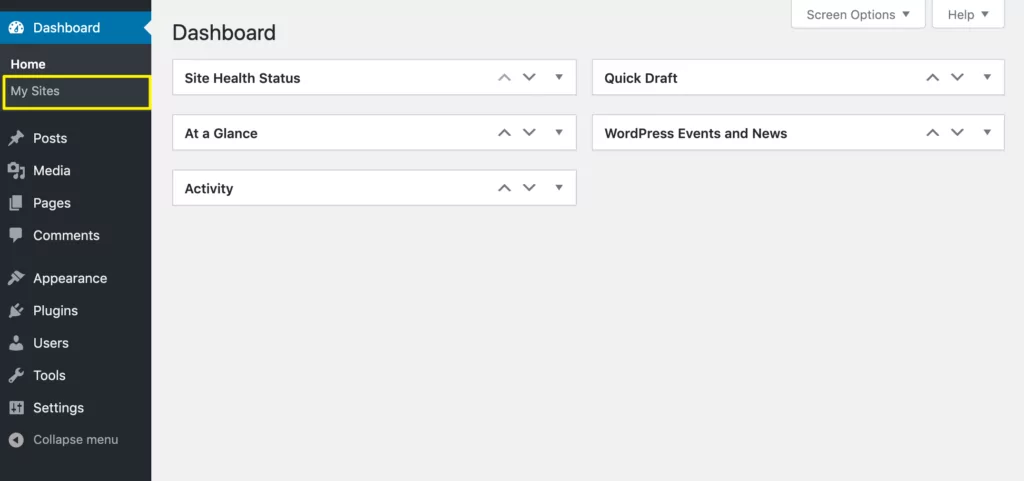
These enable you to access the sites in your network and your Network Dashboard. Don’t forget to enable your plugins again!
Create a New WordPress Multisite Installation
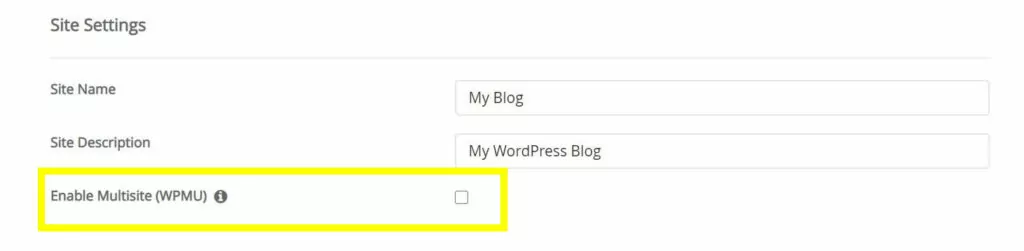
If you’re creating a fresh WordPress installation, the process is much easier. When you’re installing WordPress via the Softaculous installer in cPanel, just check the Enable Multisitebox:
If you’re installing WordPress using a different method – such as a manual installation or one-click process via your host – you can still enable multisite by editing your wp-config.php file as described above.
Step 2: Localize Your Subsites
Now that you have multisite enabled, it’s time to configure each of your subsites. First, if you need to create additional sites in your network, mouse over My Sites in the WordPress toolbar and navigate to Network Admin → Sites:
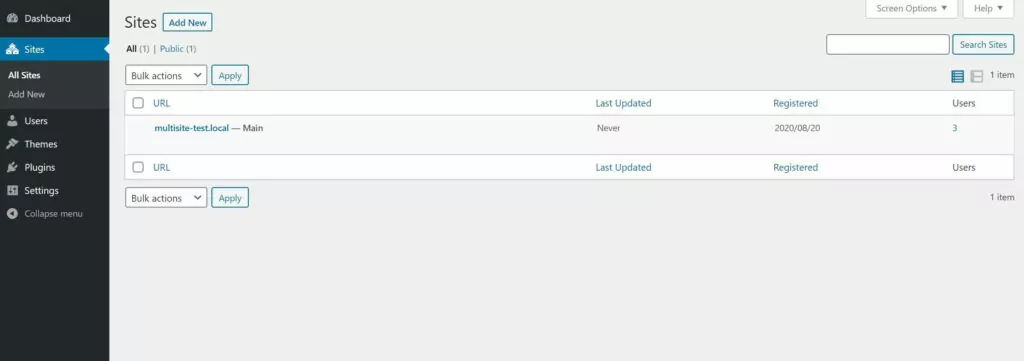
Here, you can see all the sites on your network. If you need to add a new site, just click on the Add New button and fill in the necessary details.
Once all your sites are ready, head to your first site’s dashboard by clicking on its name in the My Sites menu. Then navigate to Settings → General:
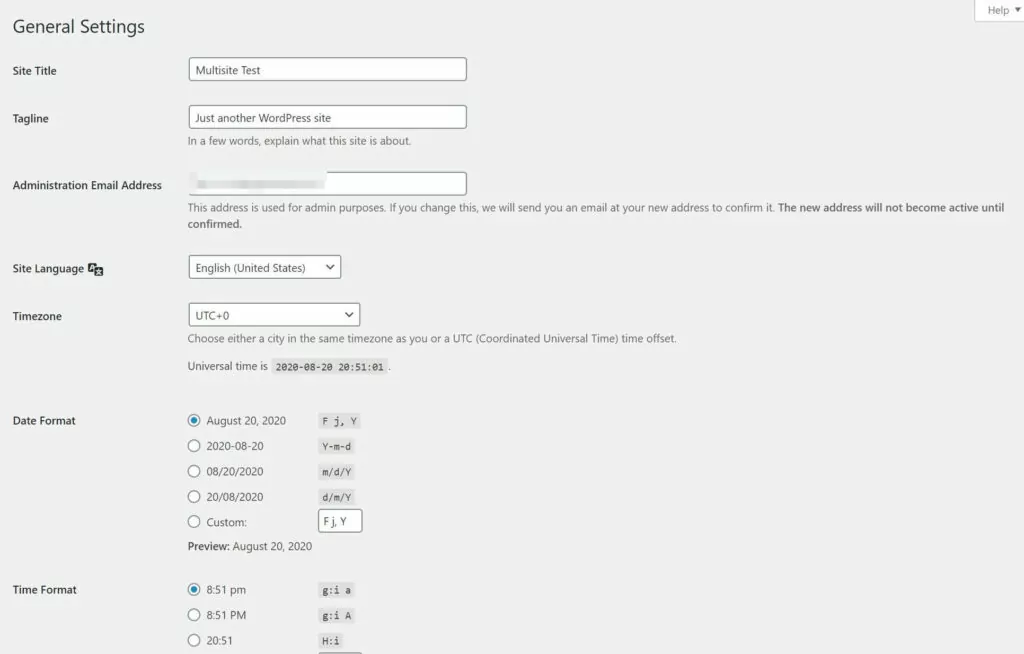
This is where you’ll configure the localization options. You’ll want to make sure the settings match the locale of the visitors you expect at that site. Language is the most obvious option, but don’t forget to change the time and date formats and time zone as well, if necessary.
When you’re finished, make sure to click on Save Changesat the bottom. Repeat this process for each site in your network.
Step 3: Import or Create Your Content
With your new sites added and localized, it’s time to set your theme up. Make sure to look for one that offers multilingual support. The WordPress Theme Directory has a number of free, translation-ready options available.
There are also some excellent premium themes that are ready for multilingual use. Once you’ve installed one that meets your needs, the next step is to import your content. If you don’t yet have any content to import, you can go ahead and skip to the next step.
The best way to go about this is to fill out the primary site in your network first. You can then use that as the starting point for translating the content into other languages.
To import existing content, head to your primary site’s dashboard and navigate to Tools → Export. Here you download a .xml file of your content.
Then, switch to one of your other sites and navigate to Tools → Import → WordPress. Click on Install if necessary, and then click on Run Importer:
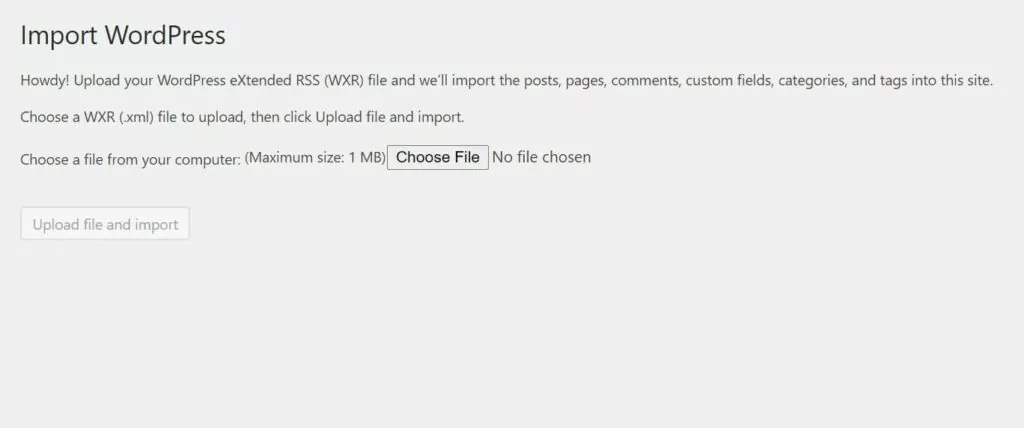
Select Choose File and upload the .xml file you exported, then click on Upload file and import. Follow any prompts you receive, and when the importer is finished, you’ll have your primary site’s content on your new site.
If all your sites will feature the same content in different languages, you can repeat the import process for each to quickly populate them all.
Step 4: Translate Your Content
Once all your sites are populated with content, the next step is to translate each of them. You have a few options here. You can manually translate the content yourself, automate the translation with software, or you can outsource the work to a third party.
Outsourcing is definitely the easiest way to go, but of course, it’ll also be the most expensive. If you can’t find a professional translation service you like, you can also try contracting freelancers via sites such as Fiverr.
For manual translation, there’s really no shortcut; it’s going to be a lot of work. Plus, you’ll have to be fluent in every language you want to translate your content into.
When it comes to software, just be aware that translation quality can vary enormously from one service to the next. No matter which you choose, you should definitely give the content a once-over before publishing it to make sure everything is correct, especially if it’s your first time using your software of choice.
Finally, don’t forget the little things – menus, footer text, widgets, and other small parts of your site are easy to overlook. These elements are essential to creating a cohesive experience, so it pays to be thorough.
Step 5: Set Your Geographic Targets for Major Search Engines
At this point, with translation done, your multilingual sites should be ready to go. However, there’s one last thing you should do. It’s vital to tell search engines which countries you want each of your sites served to.
Search engines try to favor content that will be highly relevant to users. Several factors influence this, including geographic location and language.
If you gave each site in your network a country-specific domain, this will already be taken care of for you. However, if they have generic top-level domains such as .com or .org, you’ll need to specify which country the site is geared toward to search providers.
You can provide this information in each search engine’s webmaster tools (or equivalent). For Google, you’ll find the setting in Webmaster Tools. With that task finished, you’ve officially completed your WordPress multisite multilingual installation.
Conclusion
Having your site available in the native languages of your users can significantly improve their experiences, leading to more engagement and conversions. Multisite makes it possible to serve localized versions of your website to users from all over the globe.
Setting up a multilingual multisite network can be a lot of work, but if you follow these five steps you should be off to a solid start:
- Create a multisite network.
- Localize each subsite in the network.
- Import or create your content.
- Translate your content into the languages you need.
- Set geographic targets to help search engines properly index your sites.
Also, if you’re looking for an alternative to setting up WordPress multisite for going multilingual, check out TranslatePress. The installation and configuration required is minimal and it works like this:
Have you had success using WordPress multisite to build a multilingual network? Share your experience in the comments section below!
If you found this post helpful, please check out our YouTube channel, where we constantly upload short & easy-to-follow video tutorials. You can also follow us on Facebook and Twitter to be the first to know each time we post.