In this post
In this post
One thing’s for certain—WordPress is an awesome tool for building a multilingual website! However, can you actually make WordPress multi language without a plugin?
The short answer is yes, but it comes at a price—and not in monetary terms. Here’s what you need to know:
In this guide, we’re going to show you, step-by-step, how to build a multilingual website on WordPress without a plugin. We’ll also talk about the pros and cons of such a setup, and then we’ll show you how an alternative setup, using a popular translation plugin, can be done.
WordPress Multi Language Without Plugin: How to Set It Up
Before we start, let me give you an overview of the process, and then we’ll cover each step a bit more in-depth:
- Set up WordPress Multisite
- Create separate sites for individual language versions
- Configure them for each language and link them together
- Add content to each site
1. Set Up WordPress Multisite
If you’re not familiar with Multisite, it’s WordPress’ native functionality that lets you run multiple websites on a single instance of WordPress. You can also switch between their dashboards from a central location. Plus, there are practically no limits on how many sites you can run off one Multisite instance.
In order to set up Multisite, you’ll have to tweak a line of code in WordPress’ main config file, and you’ll have to do it by hand.
The good news is that you indeed don’t have to install any additional plugins or upgrades. Your stock WordPress is already 100% capable of going full Multisite.
That being said:
1️⃣ Depending on who you’re hosting with right now, some providers offer built-in tools to turn your site into a Multisite setup. For instance, WP Engine has a simple conversion mechanism, described here. On the other hand, this may come at a price. WP Engine doesn’t allow Multisite in entry-level plans, neither does Flywheel and other managed WordPress hosting platforms. Other hosts—usually shared ones—don’t come with any limitations, but they also don’t offer any helper tools to make the transition easier.
Therefore:
2️⃣ If your host doesn’t offer any easy-to-use transition tools, consider starting your Multisite setup from scratch. If your site uses multiple plugins or custom configurations, it might be safer to start by setting up a blank instance of WordPress. Then, you can turn that new site into a Multisite setup, and import your old site’s content. If your current site is pretty basic, you can turn it into Multisite outright. However, still back it up beforehand just to stay safe.
Here’s how to set up WordPress Multisite
Install WordPress like you normally would. This means either installing it manually or using a quick-install script provided by your web host. Either works.
👉 Here’s a guide on how to install WordPress
Make sure that your site has no plugins enabled/active and that your permalink structure (in Settings → Permalinks) is set to Post name, like so:

Next, connect to your site via FTP.
This can be done either straight from your host’s control panel – cPanel – or by using a third-party tool, like FileZilla.
👉 Here’s how to connect to WordPress via FTP
Download the main configuration file of WordPress – wp-config.php – to your desktop.
Edit this file, and add the following line of code directly above where it says /* That's all, stop editing! Happy publishing. */:
define('WP_ALLOW_MULTISITE', true);Save the file and re-upload it, overwriting the file on the server.
Now, go back to your WordPress dashboard and log in. You’ll see a new section under Tools, called Network Setup:
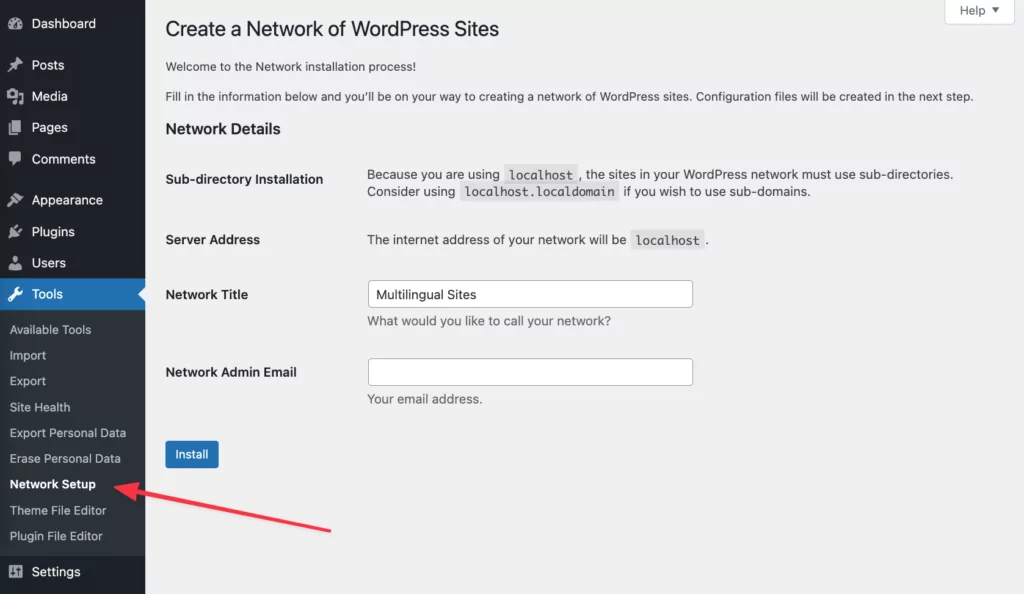
Depending on whether you’re setting up Multisite on a fresh WordPress install, as well as depending on your hosting situation, you might be able to choose whether you want to run Multisite under a subdomain or inside a subdirectory. In some scenarios, there will be no such choice, and you’re going to be locked in with one of these two models.
Click on Install to launch the Multisite network.
As a result, you will be shown another configuration screen with instructions on a couple of more changes that need to be made to your WordPress core files.
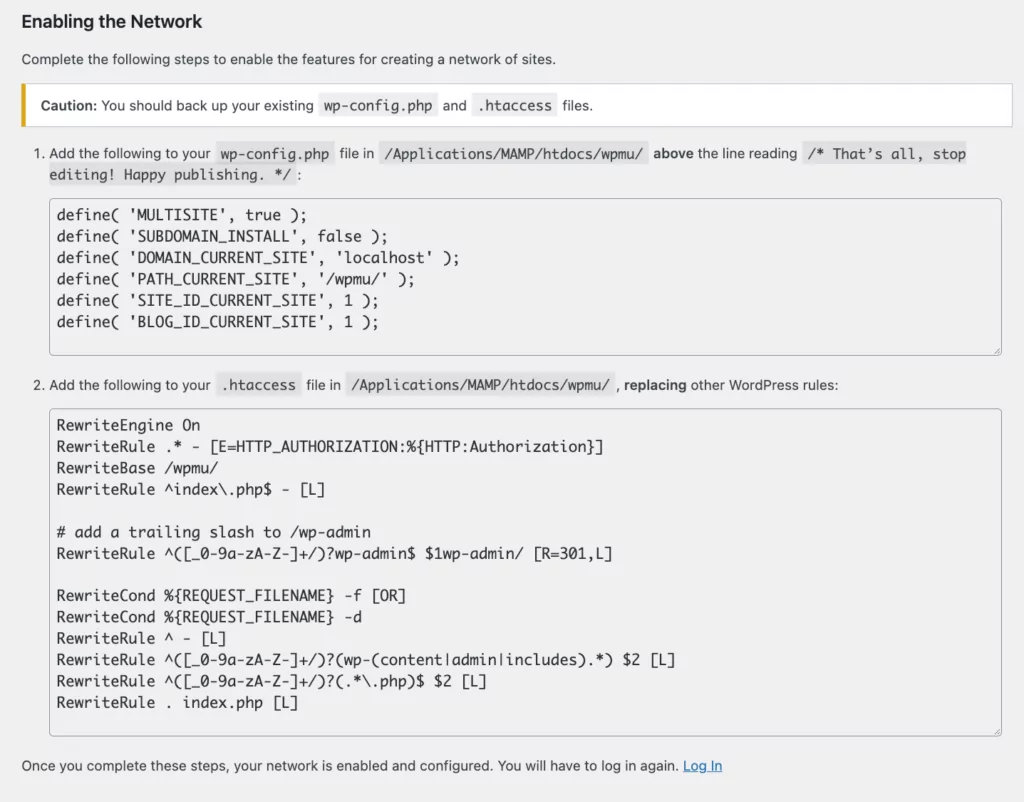
Proceed with what it says on that screen. Specifically:
- Back up your current wp-config.php and .htaccess files;
- Add new code to wp-config.php;
- Replace your .htaccess file.
With this done, you can refresh your WordPress dashboard. You’ll be prompted to log in again.
When you do that, you’ll get redirected to the Multisite network’s main admin. It looks pretty much like the normal WordPress dashboard, but the interface is a bit simpler, and there are some additional options in the top menu.
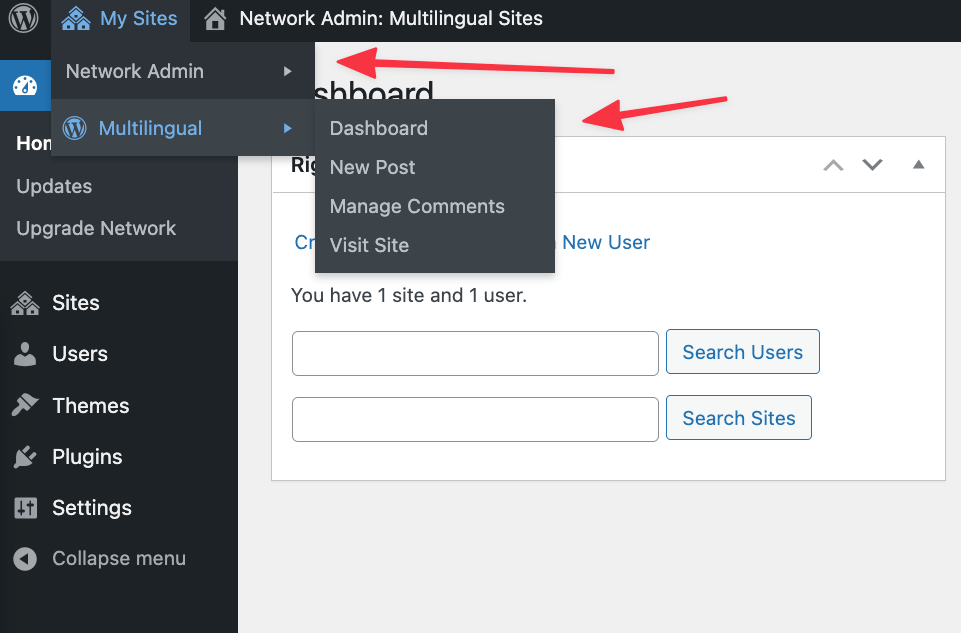
- The Network Admin link leads to your primary Multisite network dashboard;
- The other link leads to your main site’s dashboard—the dashboard of your normal site prior to installing Multisite.
At this stage, WordPress Multisite has been installed and it’s fully operational! 🎊
2. Create Separate Sites for Individual Language Versions
You already have one site as part of your Multisite setup—the site you had before starting this whole process.
It’s best to treat that site as the one that’s in your primary language, whatever that might be.
You’ll now create new sites for all the other language versions that you want to have.
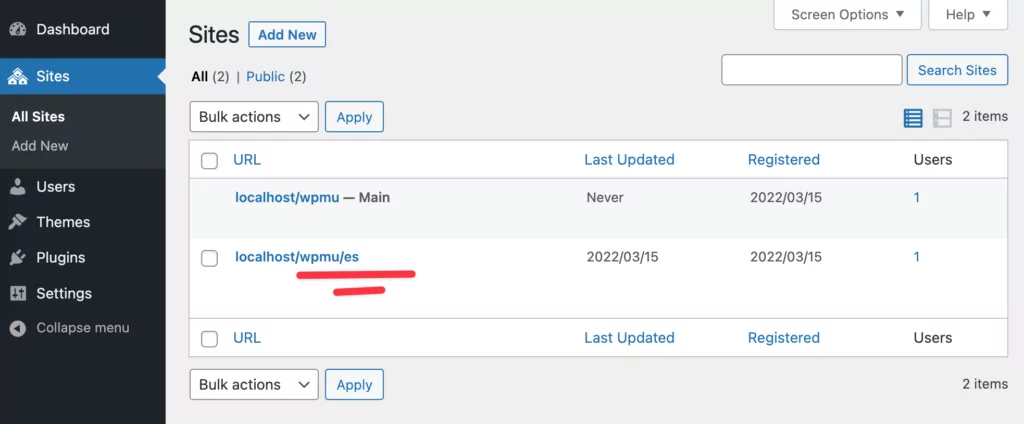
Creating new sites in Multisite is really simple. Go back to the primary network admin through the top menu: My Sites → Network Admin. Go to Sites and click on Add New:
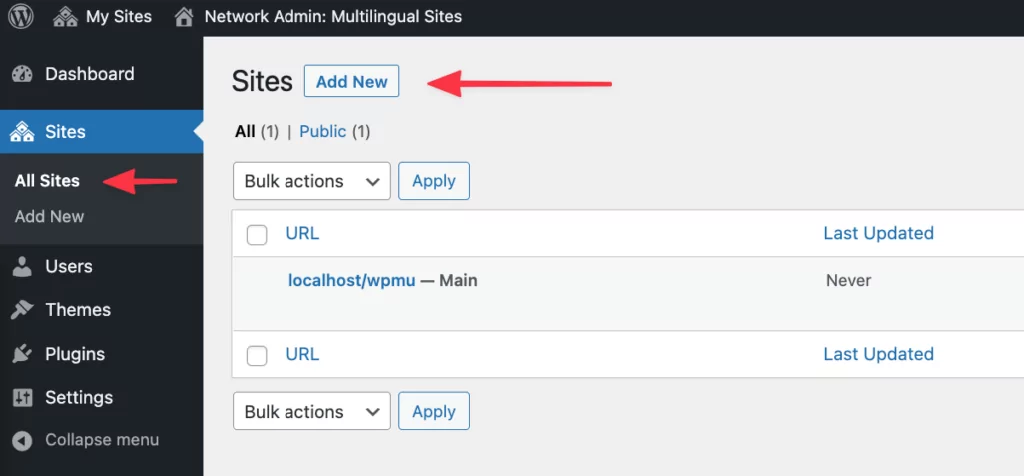
You’ll see the following screen:
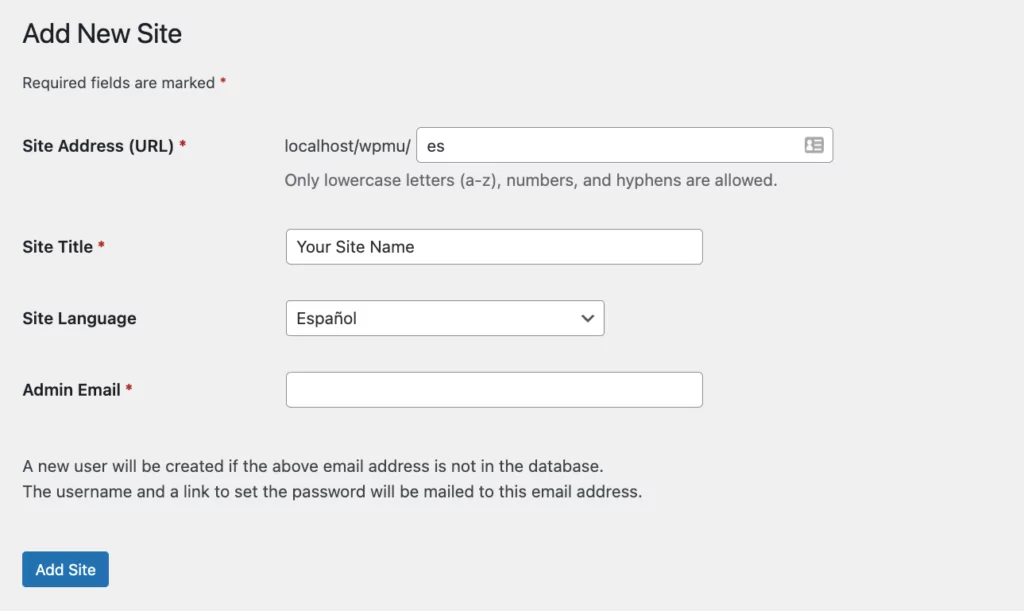
It’s best practice to set:
- Site Address (URL): just use the country code for the language that you intend this new site for. For example, if it’s meant to be the Spanish translated version, you can simply use “es”;
- Site Title: this one is up to you. However, in most cases, you’re going to be okay using your standard site title here;
- Site Language: the language you want to use on this new site;
- Admin Email: you can use the same email you’re using on the main site.
Click on Add Site.
If your Site Address (URL) looks like this:

It means that your hosting provider handles multisite through subdomains rather than folders. You can still use the country code for the language that you intend for this new site. For example: es. But you would also have to configure a new subdomain with your hosting provider.
Here’s how to add a new subdomain
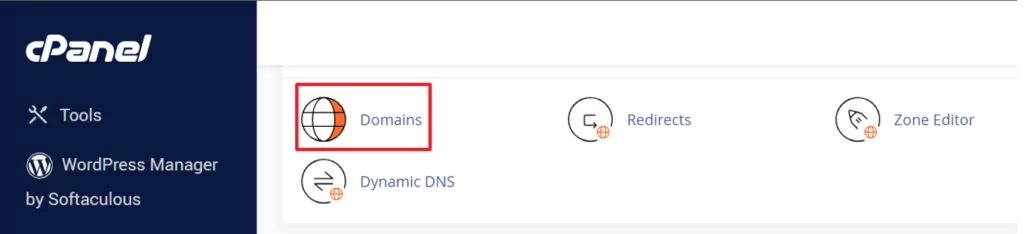
From your cPanel go into your Domains section and click Create A New Domain.
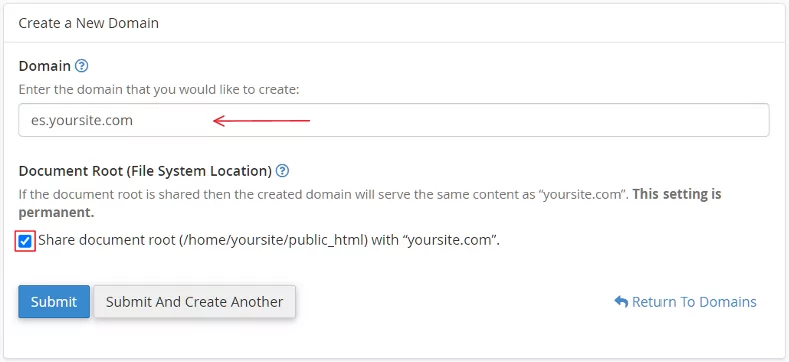
Next you need to enter the same Domain you’ve created in WordPress at the previous step and check the box that says Share document root. Or simply point the new domain to the root folder of your main site.
Just like that, you’ve set up a fresh WordPress site to serve as a separate language version!
Repeat to create additional sites if you need more than two language versions.
3. Configure Your Sites for Each Language and Link Them Together
At this stage, each of your new sites is set to the right language, but it’s also pretty blank in terms of the settings or plugins that you probably need.
This step is all about installing all the missing plugins and setting them up to operate in the same way they do on the primary site.
In most scenarios, you’ll have to do this manually. Meaning, you’ll have to go plugin by plugin and settings screen by settings screen by hand and make sure that you replicate all the settings one-to-one. This can take a while.
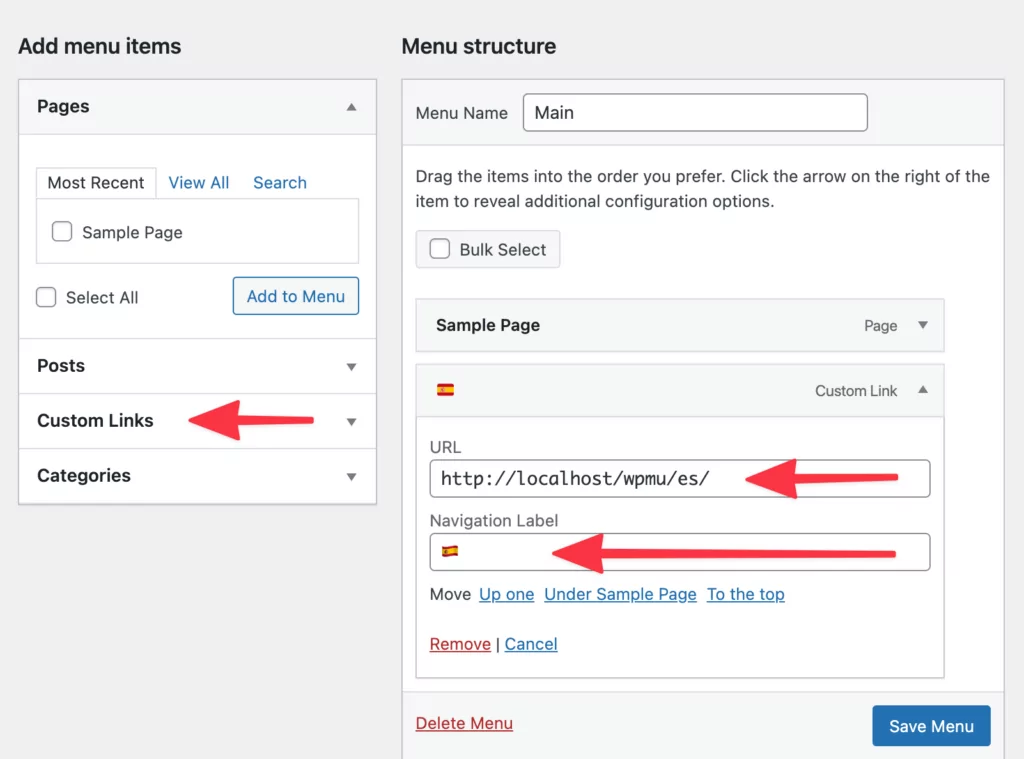
Once you’re done, the last thing left to do in terms of config is to link the sites together—so that the reader can change to a different language version easily.
The simplest way to do this is by adding a standard link to the other language versions in the main menu. To make it look good, you can use a flag emoji to represent the language, like so (Appearance → Menus):
4. Add Content to Each Site
The last step in the process is to populate your new sites with localized content—in each site’s assigned language.
This, again, is something you’ll have to do manually by creating each page and post by hand. Unfortunately, there’s no practical way to speed it up.
With this step taken care of, you now have a setup that achieves WordPress multi language without a plugin!
Pros and Cons of WordPress Multi Language Without Plugin
Since building a multilingual setup without a plugin isn’t something that WordPress was meant to do by default, there are always going to be tradeoffs.
But let’s start with what’s good. Here are the pros:
- 👍 The obvious—you don’t need any extra plugins to make this work.
- 👍 WordPress Multisite is free.
- 👍 You can set however many sites you need for however many language versions.
- 👍 Each site is a standalone site—meaning that each of them can have completely original content, and even a completely original design (if that’s what you want).
Now, the cons:
- 👎 Setting this up requires some manual work, editing core WordPress files—which entails at least some technical knowledge.
- 👎 Launching WordPress Multisite sometimes requires you to bump your web hosting setup to a higher tier—it’ll cost you additional money.
- 👎 The dashboards of each new site will be in the new language as well. This means that you have to be comfortable in each of the new languages to use the site’s dashboard.
- 👎 You have to configure the sites by hand. This means going through the core WordPress settings pages as well as installing new plugins and configuring them.
- 👎 Each site is a standalone site. I’ve mentioned this one in pros, but it can be a con as well—depending on what your idea of a multilingual website is.
- 👎 It’s difficult and impractical to link each individual piece of content to all its language versions. The simple language switcher in the menu that we described above will link to the homepage of each language version, not any of the subpages/content pieces.
Right, so the list of cons is quite sizable. While still a very viable solution, running WordPress multi language without a plugin can certainly be a pain.
As you’re probably guessing, one solution to this problem can be – yes – a translation plugin. Hear me out:
WordPress Multilingual Without Plugin Vs With One
Okay, so we know the pros and cons of going without a plugin for your multilingual setup.
Here are some of the reasons you might want to use a translation plugin after all:
- ☑️ You can build a multilingual website with a translation plugin for free.
- ☑️ There’s no need to edit any of your WordPress files or code—hence, no technical skills are required whatsoever.
- ☑️ You can easily keep the design and the settings uniform across all language versions.
- ☑️ It’s faster to build a multilingual site with a plugin.
- ☑️ You can translate just parts of your site’s content selectively.
- ☑️ The UI is more user-friendly.
- ☑️ You can use automatic translation tools to speed up the whole project.
How to Make Your WordPress Site Multilingual With a Plugin
We’re going to use our own TranslatePress for this quick tutorial.
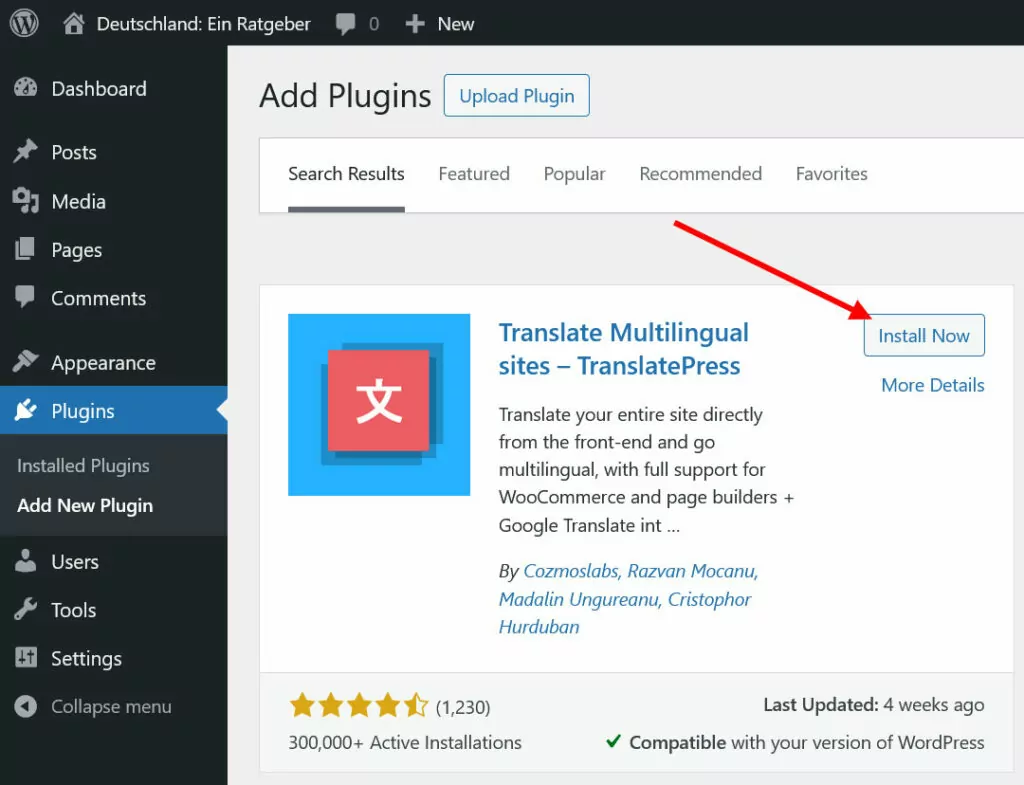
First, TranslatePress installs like any other WordPress plugin—meaning quickly. Just go to your WordPress dashboard, into Plugins, and click on Add New. Enter “TranslatePress” into the search box and click on Install and then Activate.
Next, go to the TranslatePress settings screen in the WordPress dashboard (Settings → TranslatePress) and add your second language.
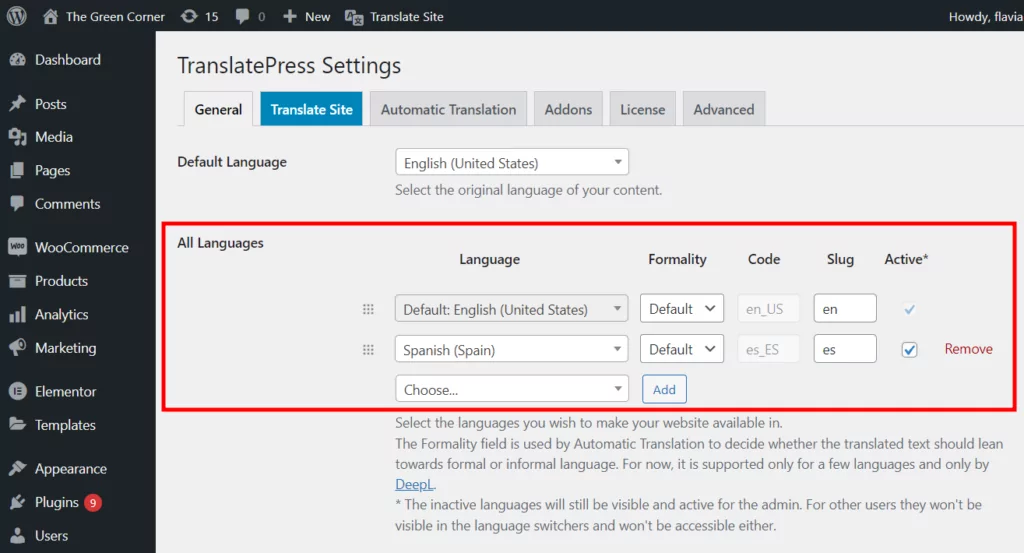
Believe it or not, at this stage, TranslatePress is already fully operational and can be used to translate your whole site (or parts of it—whatever suits you better).
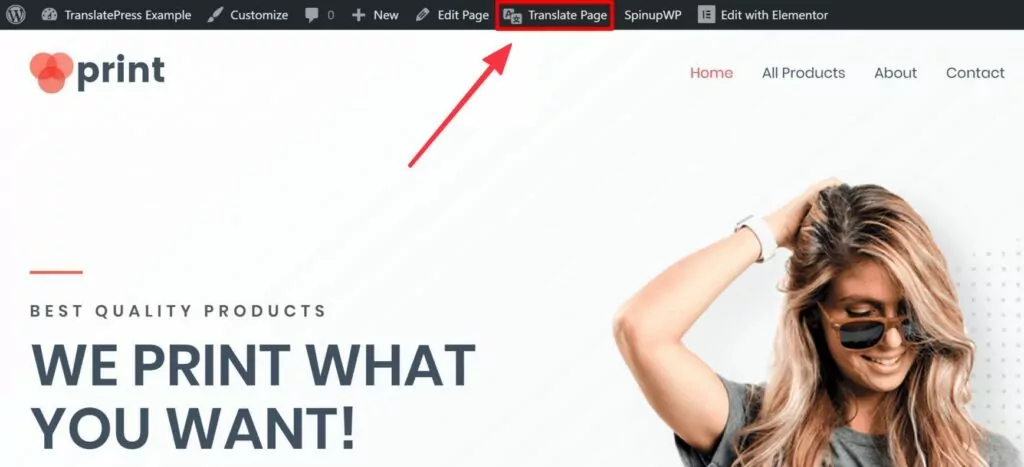
To do the translating, visit your site normally, and click the Translate Page button up top.
Hover your mouse cursor over a piece of text you want to translate—any piece of text—and click on the pencil icon. This will open up a translation box in the sidebar. You can enter your translated text there.

Click on Save Translation when you’re done.
💪 Pro move: To speed up your work, you can use automatic translation with TranslatePress AI, which allows you to translate your website into multiple languages without the manual work or having to generate API keys. You also don’t have to worry about additional costs.
Setting up the whole thing is super-duper easy. You only need to activate your TranslatePress license, choose your languages, and enable automatic translation, as shown below.
And that is it – as simple as A, B, C. Now, if you view your website in the front-end, it is automatically to your chosen languages:
It works like magic with just a few clicks.
Alternatively…
If you’re on the free version of TranslatePress, you can enable automatic translation for free by adding Google Translate to your website.
Note: Generating the Google Translate API key is a bit technical and takes time, which is why I recommend using TranslatePress AI instead. You will also incur translation costs once you exceed the limits of the free tier.
To enable automatic translations using Google Translate, go to the TranslatePress settings in the dashboard and into the Automatic Translation tab. From there, enter your Google Translate API key and enable automatic translation.
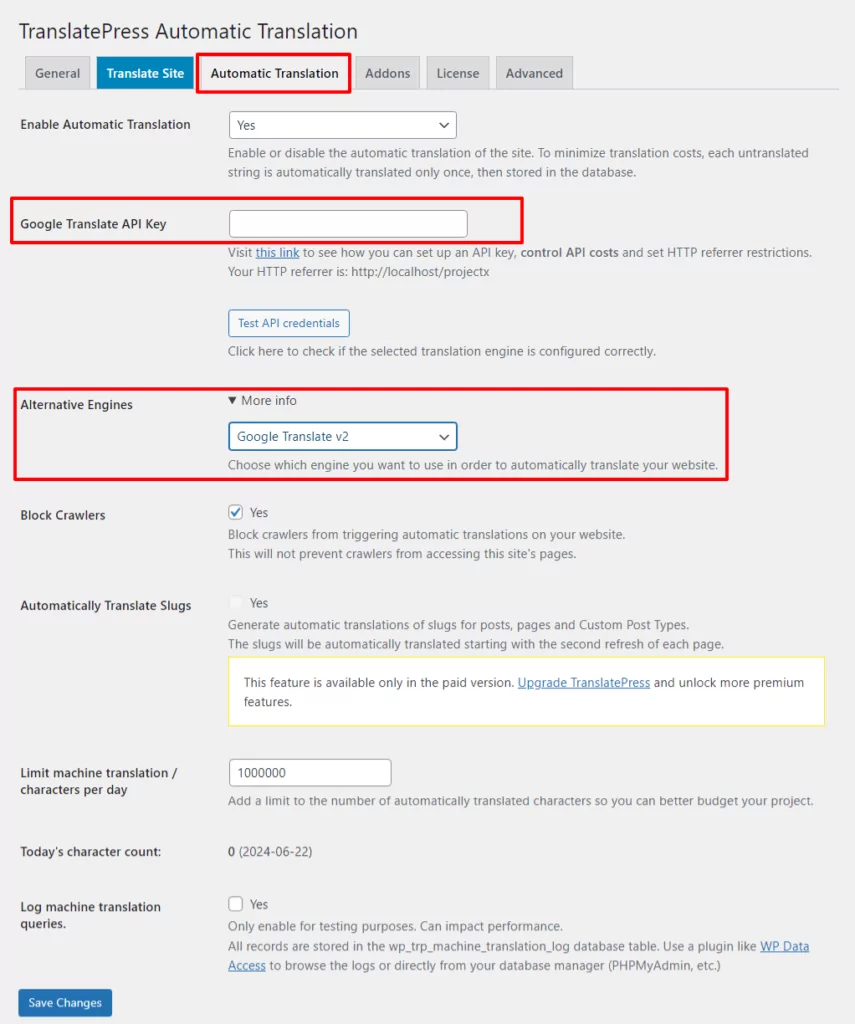
That’s really it. With just a few clicks, you can enable TranslatePress on your site and then use it to translate as much or as little of your site as you want. Note, however, that Google Translate charges for translations once you exceed the limits of their free tier.
👉 To get a more detailed walk-through read this guide on how to create a multilingual WordPress site.
You can use TranslatePress for free to add a second language to your site. If your website project requires more languages or you’d also like to do multilingual SEO, you can upgrade to the pro version of TranslatePress at any time.
TranslatePress Multilingual
Do you have any questions on how to set up WordPress multi language without plugin? Let us know in the comments section below.
If you found this post helpful, please check out our YouTube channel, where we constantly upload short & easy-to-follow video tutorials. You can also follow us on Facebook and X to be the first to know each time we post.

This is a very interesting approach, and might come in handy despite its cons. Thank you for this.
Just a note about one of the cons: “The dashboards of each new site will be in the new language as well” – this can easily be changes in the user’s profile. The dashboard can be set to a different language from that of the site. That might help alleviate the cons a little 🙂