In this post
In this post
Learning how to translate your Spanish website to English can open a lot of doors – hundreds of millions, to be more specific. English is the third most spoken language in the world (right after Spanish). Moreover, it’s one of the primary languages of the web.
Translating a website is usually a massive endeavor. However, since you’re using WordPress, the process is a lot less painful than you might imagine. Using the right plugin, such as TranslatePress, can enable you to translate your website from Spanish to English in record time.
In this article, we’ll talk about why it makes sense to translate your WordPress site from Spanish to English. Then we’ll show you how to do it in five simple steps using TranslatePress. Let’s get to it!
Why Translate Your Spanish Website to English
As we mentioned before, English is among the most popular languages in the world. The only two languages that beat it are Mandarin Chinese and Spanish.
However, that’s when you consider native speakers only. If you consider second languages, English is the first choice for most of the world. By translating your Spanish website to English, you gain access to a truly global audience.
Moreover, translating a website into another language means you get even more chances to show up in the Search Engine Results Pages (SERPs). If you approach multilingual Search Engine Optimization (SEO) correctly, your website will be easier to find, and you’ll start to get more traffic.
Ultimately, more traffic means more conversions. By expanding your audience and reach, you have more opportunities to grow your revenue and increase your profits.
Translating your website enables your site to grow much faster than it might if it were only available in Spanish. It can also give you a competitive advantage. If non-Spanish speakers arrive on your site but cannot understand the content, they’re more likely to abandon it to go to one of your competitors.
Finally, translating your website into other languages isn’t just a smart idea because it lets you reach a wider audience. For certain industries, it’s also a legal requirement. While this may not necessarily be the case with your site, providing multilingual content can help you ensure compliance with certain laws and regulations.
How to Translate Your Spanish Website to English (In 5 Easy Steps)
With the above in mind, let’s talk about how the translation process works in WordPress. To follow this tutorial, you’ll need to set up the free TranslatePress plugin. Some of the tool’s more advanced features, such as automatic user language detection and ability to translate important SEO elements, are only available with a premium license.
TranslatePress Multilingual
You can follow along with most of this tutorial using the plugin’s free version. However, if you want access to those features, we recommend that you consider upgrading.
With TranslatePress, you will be able to use an intuitive visual translation interface to modify all of your pages’ text.
Additionally, the plugin works seamlessly with any WordPress theme or plugin. This includes WooCommerce and page builders, like Elementor or Divi.
If you need help downloading, installing, or setting up the plugin, we recommend referring to the tool’s official documentation.
Step 1: Add the English Language to Your Website
By default, WordPress doesn’t offer support for multilingual websites. Fortunately, with TranslatePress, you can add support for as many languages as you want.
To add English to your site’s languages, go to Settings > TranslatePress > General. You’ll see a drop-down list next to the option that says Default Language. Right now, it should say Spanish.
Below that setting, there’s a menu that you can use to add new languages. Go ahead and select English:
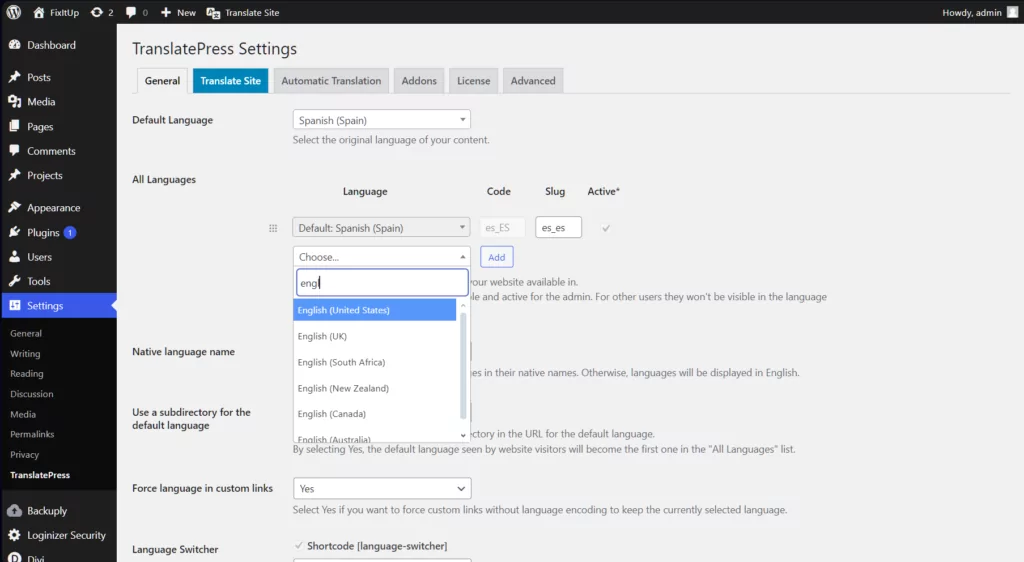
Keep in mind that if there are multiple variations for a language, TranslatePress will enable you to choose between them. In the example above, you can see that we selected English (United States). However, you can choose any variation that you wish to.
Next, you can save the changes to TranslatePress’ settings. For now, nothing’s changed on your site besides the fact that TranslatePress will add a language switcher to it. That means you still have to translate your Spanish website to English, which we’ll do in the next sections.
Step 2: Decide Whether to Use Manual or Automatic Translation
TranslatePress enables you to approach translation using two methods:
- Manual translation: If you go this route, you’ll need to manually translate every string on your website.
- Automatic translation: By using automatic or ‘machine’ translation, you connect your website with third-party services that take care of the brunt of the work.
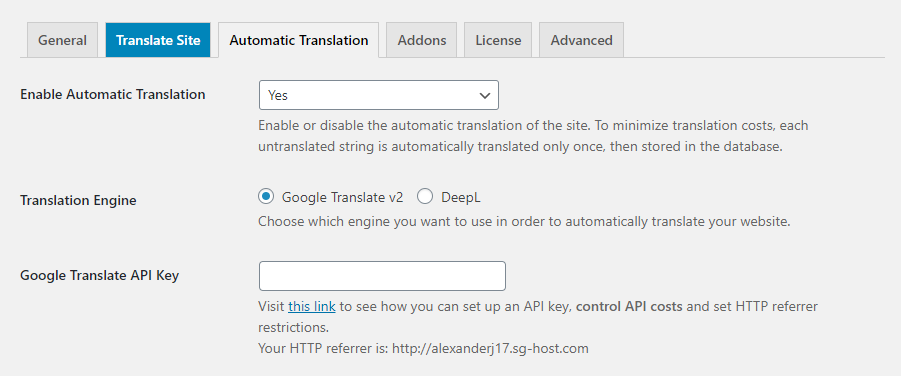
There are pros and cons to both approaches. By using machine translation, you can add a new language to your website in a matter of minutes. However, using services such as Google Translate or DeepL (both of which TranslatePress supports) comes at a cost.
For example, Google Translate charges you $10 for every 500,000 characters that you translate. DeepL, on the other hand, uses a subscription model that works great for websites with ongoing translation needs (i.e., if you keep adding content regularly).
With TranslatePress, all you have to do is connect the plugin with your translation service of choice and enable it to do its work:
Machine translation is far from perfect, though, even for popular language pairs such as Spanish and English. In most cases, you’ll need to review machine translations to ensure that there are no errors, or hire someone to do it for you. Poor translations can make your website look less professional and affect conversion rates, so the review process is essential.
For ‘small’ Spanish websites, doing the translation work manually is often the better option. On the other hand, if you have a massive site with dozens or hundreds of pages of content, machine translation is your best option.
Keep in mind that using the visual translation interface you can always review your machine translations and manually modify anything that sounds off. This will save you a lot of time when translating your entire website.
Step 3: Translate Your Spanish Content to English
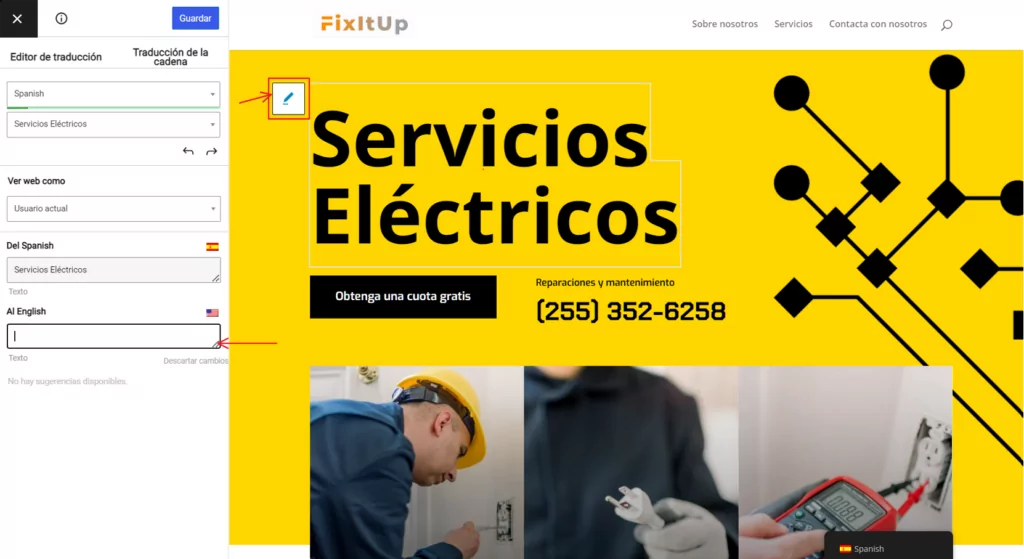
Translating content manually using TranslatePress is fairly intuitive. To get started, click on the Translate Page button at the top of the admin bar:
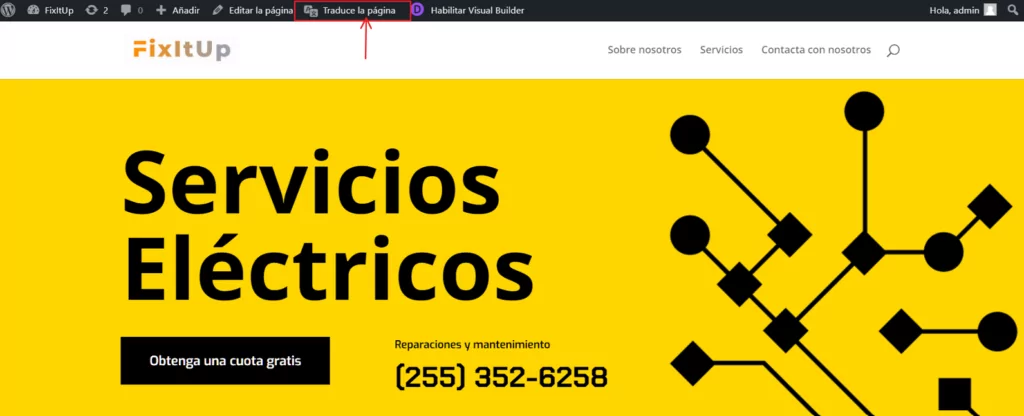
Right away, you’ll see your website with a menu to the left, which includes all the tools that you need to translate each page’s content. To select an element, mouse over it and click on the pencil icon next to the text. TranslatePress will show you the string that you selected on the left, and a field where you can type its English translation:
Now you can repeat that process for every element on your Spanish website. The TranslatePress plugin enables you to select each element on your pages, including the images:
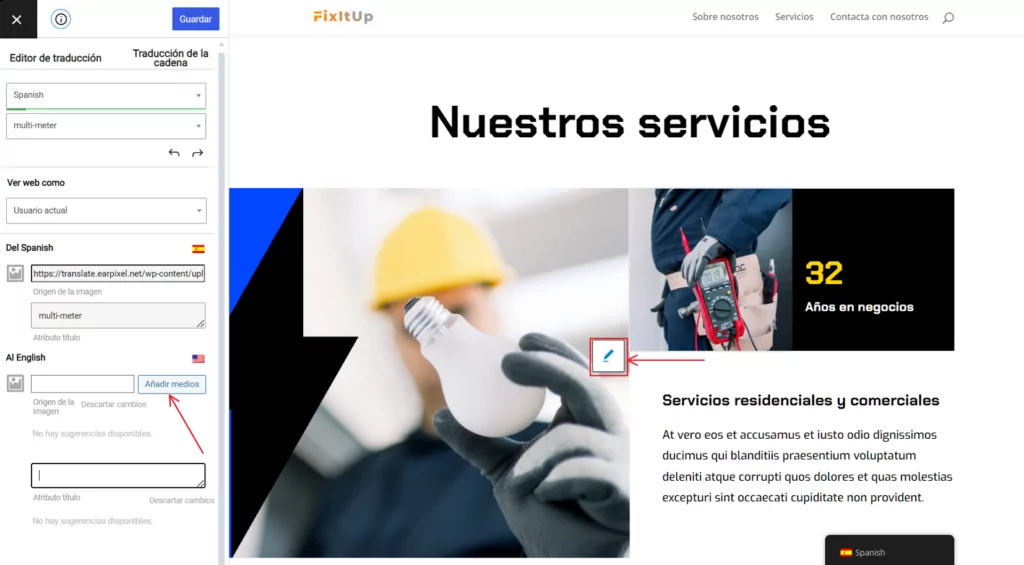
For images, you can set alternate file sources in English in case the original graphic includes text. Additionally, the plugin also enables you to set alt attributes.
WooCommerce products are also translatable. If you translate a product title string, TranslatePress will replace that same string throughout your entire site:
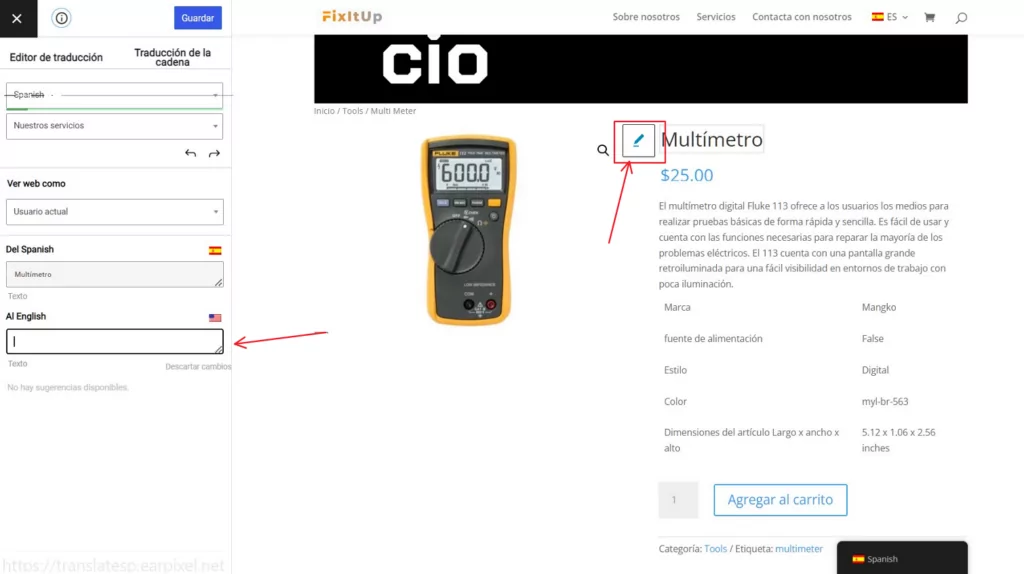
That also applies to other elements such as menu items, forms, and much more. Overall, translating an entire Spanish website into English will still take a little bit of time, but TranslatePress makes that process much more efficient.
In addition to getting the words right, it’s also important to make sure you’re retaining your site’s overall tone. Spanish can be a very complex language, and it has a lot of variations. Getting Spanish idioms right in English might require you to take some liberties during translation. Also, remember that you can save your progress as you go and resume translations at any time.
Step 4: Translate Key SEO Elements
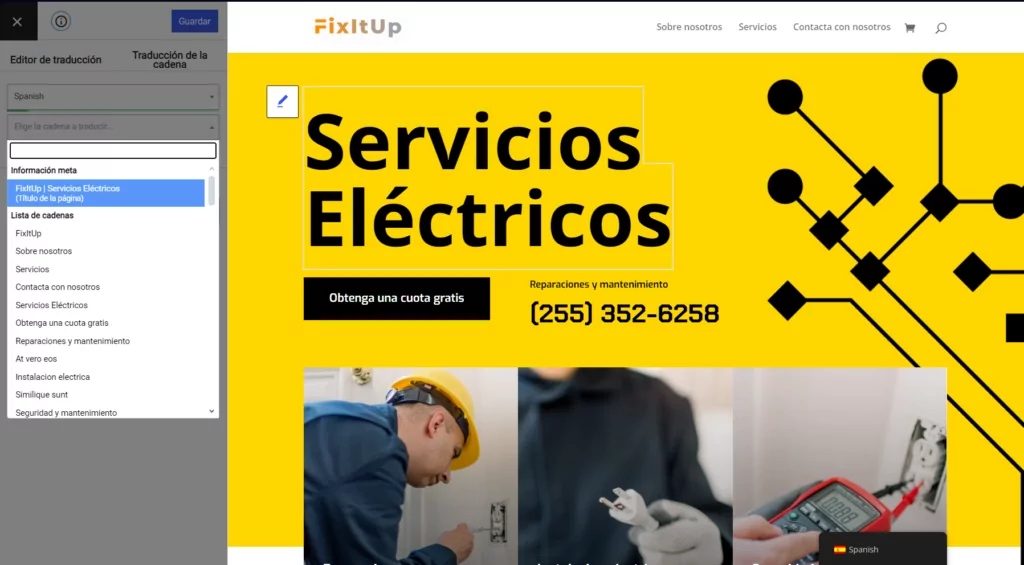
As we mentioned before, one of the advantages of translating your Spanish website to English is that you’ll benefit from an SEO standpoint. However, that’s only true if you also translate some of your website’s most critical SEO elements, such as page titles, descriptions, alt tags, and URL slugs.
TranslatePress lets you do all that with the SEO Pack add-on, which is available with the plugin’s premium license. If you have that extension, you’ll be able to access each page’s metadata by selecting the strings menu under that page’s default language:
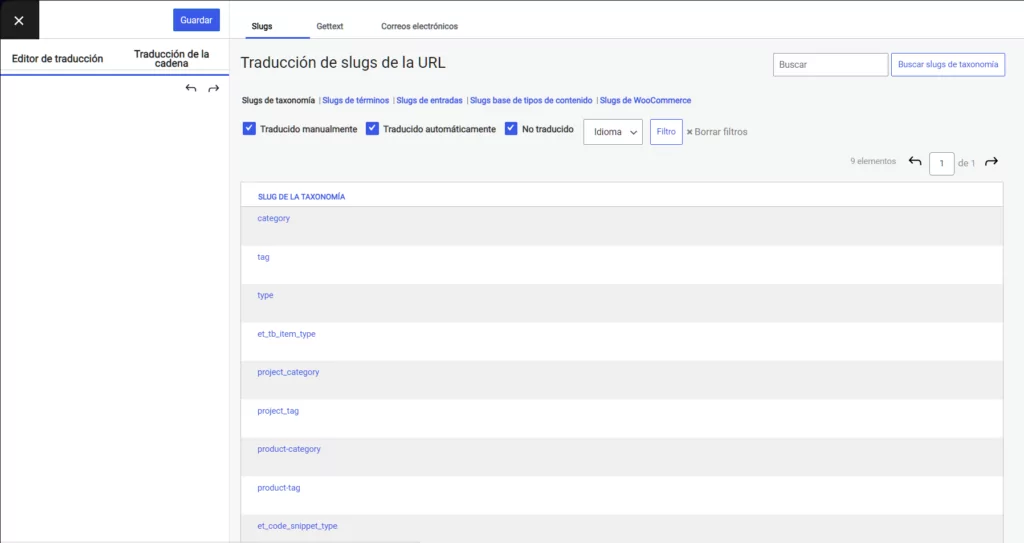
To translate each page’s slugs, you can select the String Translation option at the top of the translation menu. Translating slugs works just the same as it does with other types of strings. You can select the slug you want to edit, and then use the translation menu to enter its English counterpart.
Step 5: Review Your Spanish to English Translation
Although TranslatePress makes the technical process of translating a WordPress website easy, there’s still a lot of work to do on your end to ensure that everything is just right. As we mentioned before, poorly-translated websites often don’t do very well among their intended audiences.
If you’re translating a website to English, it’s doubly important that you ensure all of the content makes sense. After all, it might be the only language that gives many people access to your content.
If you’re translating a website on your own, we recommend reviewing each page thoroughly to ensure that you didn’t make any major mistakes. Another option is to hire a professional translator to review your work. TranslatePress makes it easy to set them up with a translator account on your site and not give them access to the entire website admin. Since they won’t be doing most of the translation, this should be much more affordable than having a translator handle everything from the start.
If you look around on freelancer websites, you’ll find many English speakers willing to review your work, often for great prices. We recommend setting aside a budget to find the right person to help you weed out any errors on your English site.
Conclusion
Learning how to translate your Spanish website to English is easier than you might imagine – at least if you’re using WordPress and TranslatePress together. By adding English as your site’s second language, you can offer up your content to hundreds of millions of users across the globe. Plus, the plugin’s visual translation interface is easy to use and lets your translate everything you see.
As we discussed in this article, you can translate your Spanish website to English using the following five steps:
- Add the English language to your website.
- Decide whether to use manual or automatic translation.
- Translate your Spanish content to English.
- Translate key SEO elements.
- Review your Spanish to English translations.
TranslatePress Multilingual
Do you have any questions about how to translate your Spanish website to English? Let’s talk about them in the comments section below!