In this post
In this post
What’s the best way to translate your website in 2026? This is a popular question among website owners, especially if it’s a business website that you’re running!
In this tutorial, we take you step-by-step through the entire process and show you all the stages of translating your website in its entirety – from menus to content, images, and even SEO.
Let’s get started:
What’s the Best Way to Translate Your Website?
If your website runs on WordPress, then getting it translated is a fairly easy thing to do. However, you still need a translation or multilingual plugin to handle the main task. Here’s why:
You might have heard that WordPress is “translation-ready” or “ready for localization,” which suggests that all the tools required to get your website translated are already there, built-in.
This is partly true.
WordPress being translation-ready only means that it makes it possible for website translation on the code level. In other words, if you’re a web developer, WordPress has some ready-made structures for you in place that add translation capability to your themes or plugins. But this doesn’t help the end-user much, does it?
This is where translation plugins step into the picture.
Translation plugins, such as TranslatePress, take WordPress’ built-in tools, expand on them, add user-facing interfaces, and effectively provide you with the best way to translate your entire website from start to finish.
What’s great about this is that you can translate your whole website without any coding knowledge, and you don’t have to do anything even remotely involving web programming.
We’ll show you how to get this done in the following tutorial. First, let’s get a translation plugin installed:
Step 1: Install and Configure a Translation Plugin
The translation plugin we’ll use is our own TranslatePress. The free version of the plugin gives you access to all the features required to translate a website effectively.
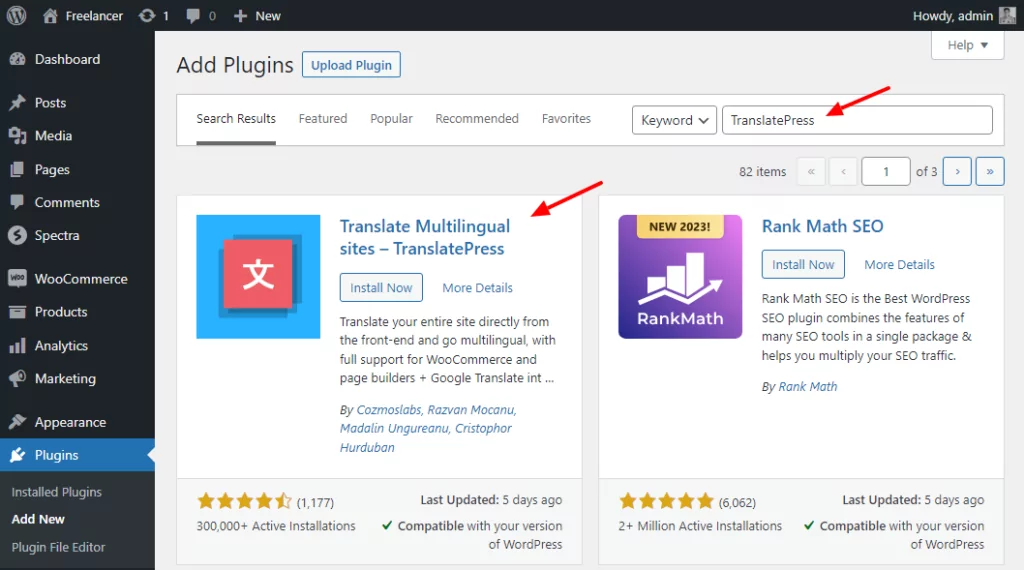
Installing TranslatePress on your website is a straightforward process. Go to your WordPress dashboard, to Plugins → Add New, and put “TranslatePress” into the search field. Click on Install Now and then on Activate next to the plugin’s name.
TranslatePress allows you to add up to two new languages in the free version and multiple languages in the premium version. You can do that in Settings → TranslatePress. Click on the Add button to begin:

Next, let’s decide how your readers will be able to switch between these languages:
Decide Where to Place Your Language Switchers
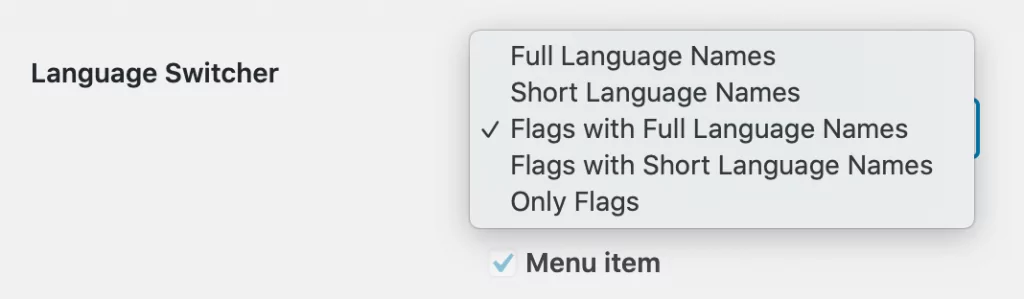
At the bottom of the settings page, you’ll see these options:
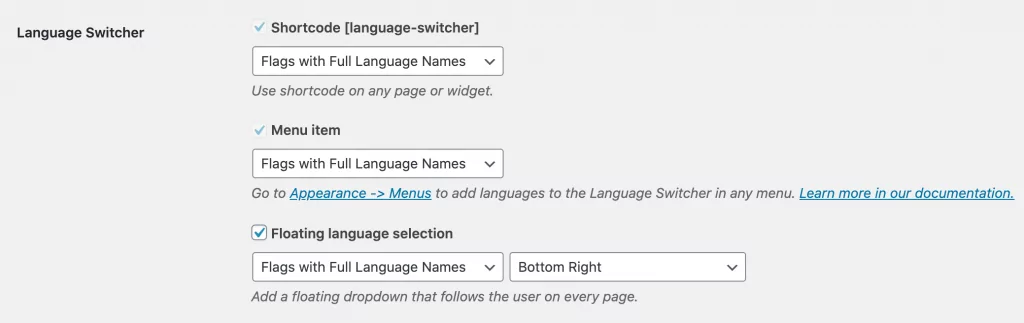
TranslatePress gives you three main language switching mechanisms:
- Shortcode. It’s a unique piece of text that you can add to any post or page. When WordPress sees this text, it will replace it with a live language switcher.
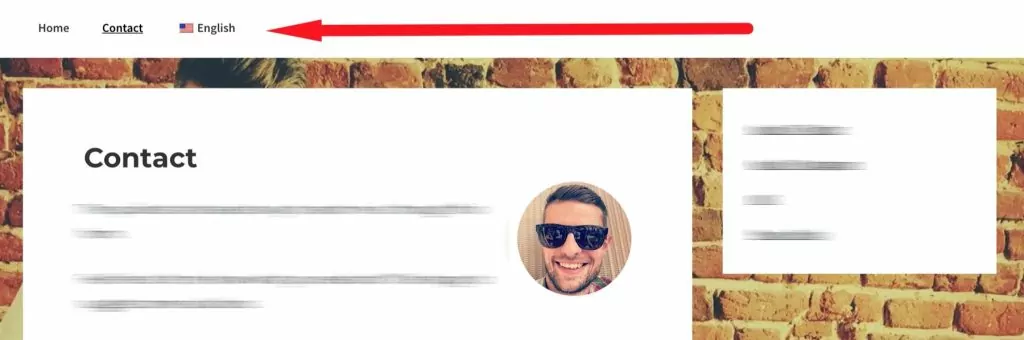
- Menu item. This is the most commonly used type of language switcher. Your visitors will generally expect to see links to other languages in the main menu.
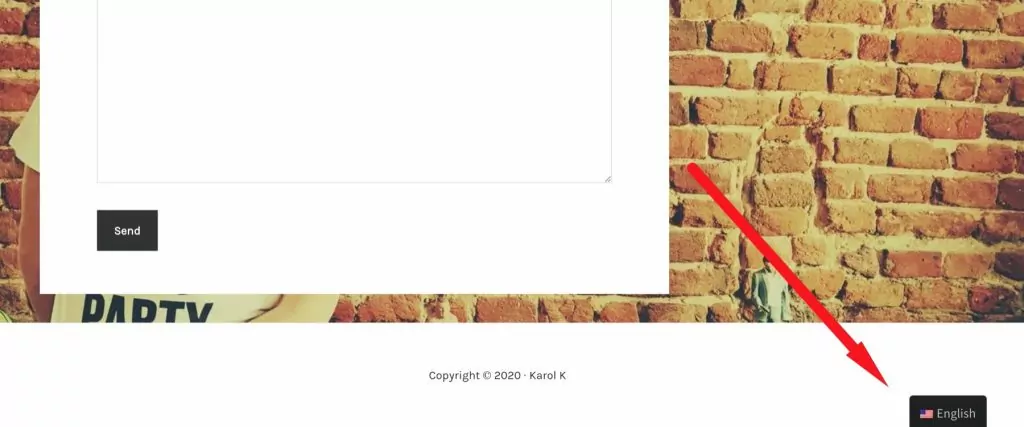
- Floating language selection. The last type of language switcher is a floating box that sits in the corner of the screen, no matter the page that the visitor is currently browsing.
Feel free to pick whichever of these options works best for your site and also configure what you want them to look like.
Apart from the language switcher, I also encourage you to read through the other options on this settings page and fine-tune them to your liking.
Click on Save Changes at the bottom when done.
❔ If you need inspiration on what the best practices are when it comes to language switchers, read this all-in-one guide to language switchers.
Step 2: Translate your Menus
With your new language or languages added to the website, a good place to start working on actual translations is your website navigation – the menus you have on the site.
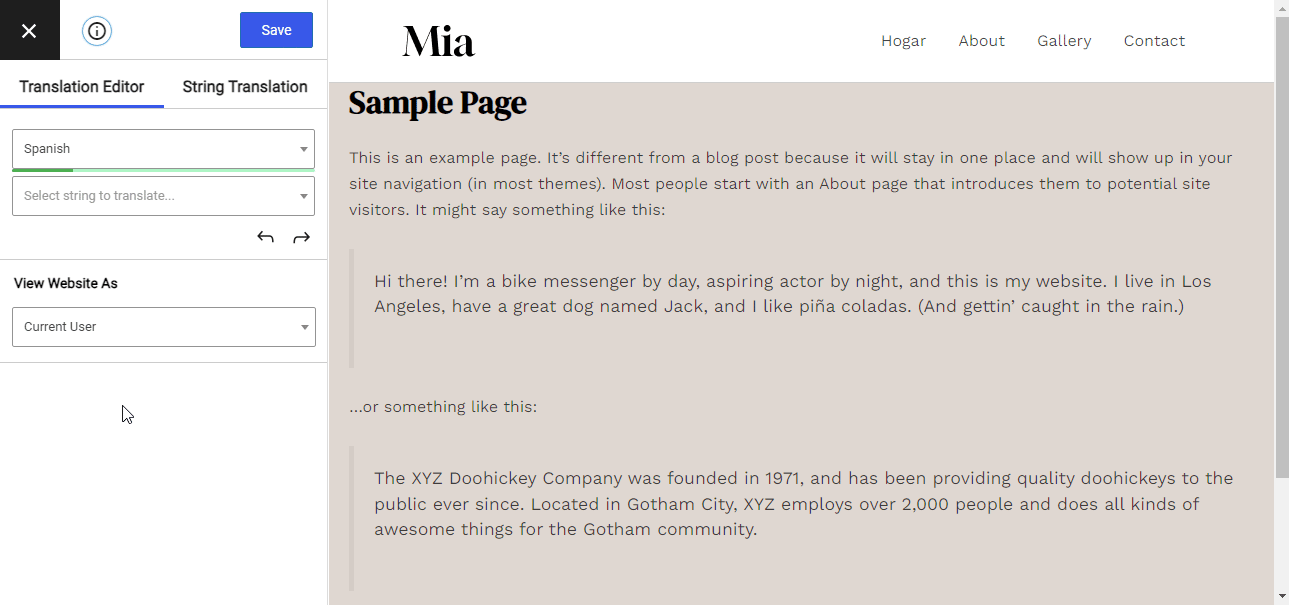
To begin, click on the Translate Page button in the top admin bar.

This will take you to the main translation interface of TranslatePress.
To translate any of your menu links, hover your mouse over them and click on the pencil icon. This will bring up the translation box in the sidebar and allow you to add localized versions of each of your menu links.

Click on Save at the top to approve your input.
Go through your menu links one by one and create new localized versions of them. Keep in mind that we’re only translating the links themselves at this point. We’re going to take care of the actual content that these links lead to later on.
When you’re done with the main menu, go through the same process with the other menus that you have on the page.
Want to Show Different Menu Items for Different Languages?
In some cases, you might want to display a different set of links for each language version on your website. This is easy to do using the Navigation Based on Language add-on (available in the premium versions).
❔ If you’d like to know more, here’s a detailed walkthrough on translating your menus into multiple languages.
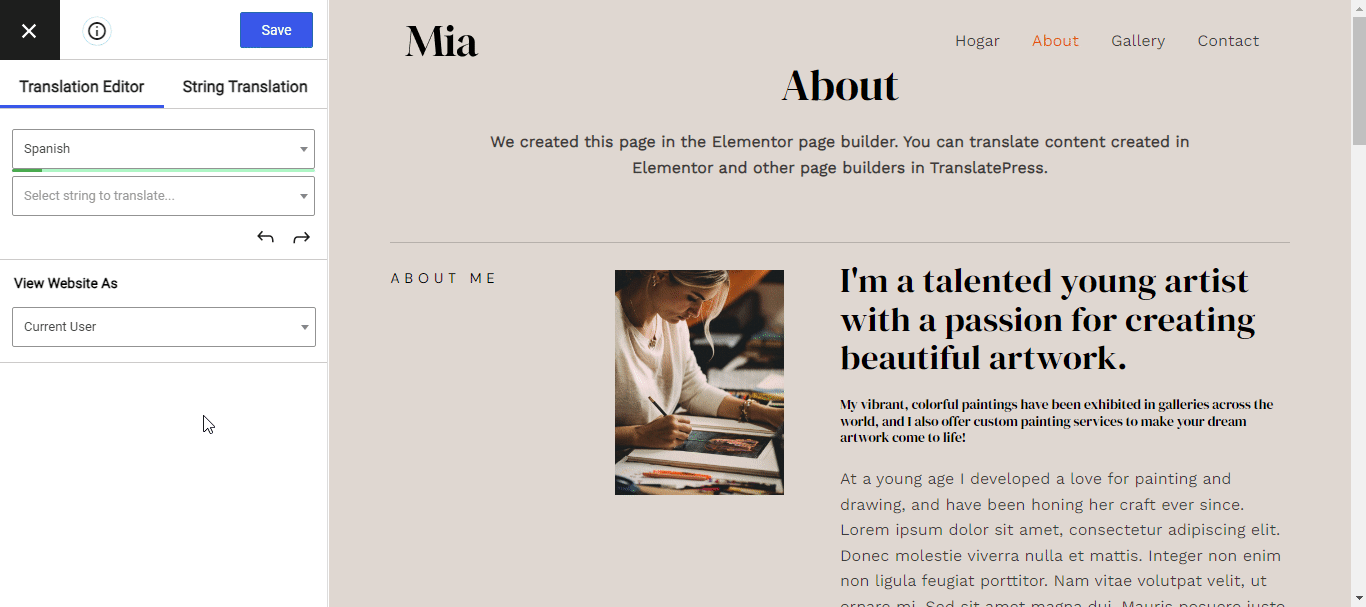
Step 3: Translate your Content (pages, blog posts, CPTs, etc.)
Go to any page that you want to translate and click on the Translate Page button in the top admin bar. This is the same interface we entered when translating the menus.
Hover your mouse over any piece of text that’s on the page and click on the pencil icon. Enter your translation in the sidebar.
Just like that, go from paragraph to paragraph until you have the whole page translated.
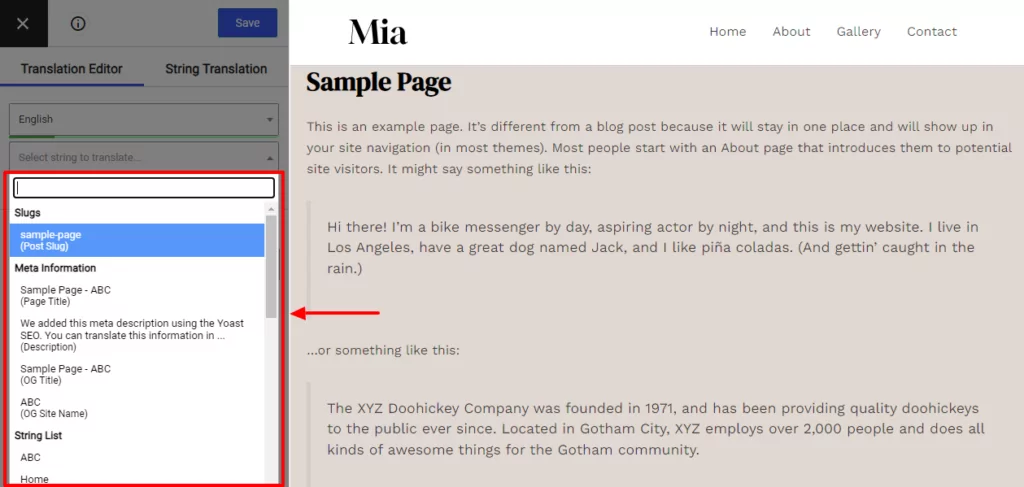
To help you not miss anything important, TranslatePress lists everything that can be translated on a given page inside a drop-down menu in the sidebar. You can go through that list or use the available keyboard shortcuts instead of scanning your page manually.
Repeat this process to translate the other pages on your website.
If this seems like too much manual labor, you can take advantage of the automatic translation module in TranslatePress:
Enabling Automatic Translations
Automatic translations can be a huge time saver – especially if you’re just getting started translating your website and have pages upon pages of content to deal with.
Go to Settings → TranslatePress. Switch to the Automatic Translation tab.

The automatic translation module works with either Google Translate or DeepL (AI translator). Here’s a comparison we conducted between the 2 engines to help you decide what’s the best fit for you.
Getting it hooked up to Google Translate is easier and cheaper to get started with. All that’s needed is obtaining a translation API key. Here’s a detailed guide on how to get the API key.
As soon as you enter that API key and validate it, TranslatePress will get to work and generate your translations automatically.
What’s also important is that you can step in and correct any translations that haven’t turned out ideally.
❔ Here’s our guide to automatic translations if you’d like to learn more about how automatic translations work and how to optimize them best.
Translate Any Page Builder Content
Page builders like Elementor, Divi, or Beaver Builder have been getting really popular lately. And not without reason! They’re a great way to build yourself an awesome-looking page without having to code anything.
You’ll be happy to know that TranslatePress can handle page builder content pretty easily as well. You can translate any page created with a page builder the same way you’ve been working with your standard pages.
Again, just click on the pencil icon next to the text you want to translate and add your translation in the sidebar.
❔ We have separate guides on how to translate Elementor content and Divi Builder content. Give them a read if you need anything clarified.
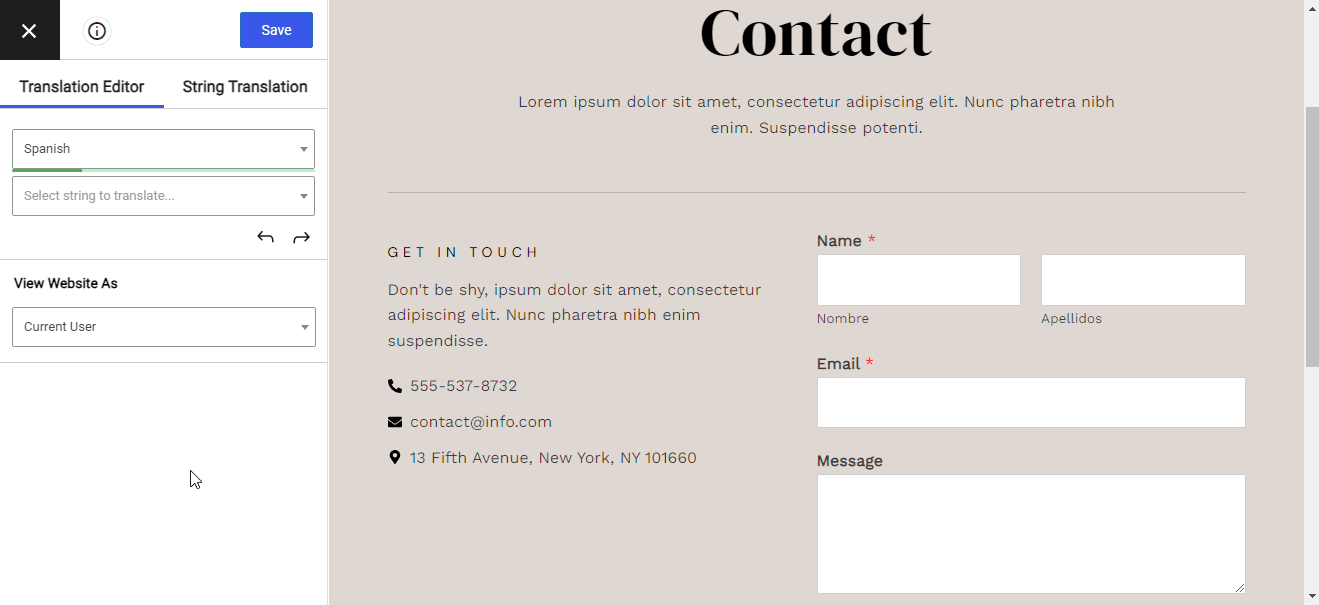
Step 4: Translate your Contact Forms
If you have contact forms on your website, you’ll want to translate them as well. The good news is that no matter which plugin you’re using for the contact form functionality, translating the form won’t be a problem.
Go to the page that has your contact form and click on the Translate Page button in the top admin bar to begin.
Hover your mouse over the elements of your form, such as the “Your Name” field label, etc. Translate all those texts in the sidebar. Remember to click on Save after adding each one. You can also translate your send button in a similar way.
With the main form texts done, you should also take care of any of the error and success messages that your form script generates after a visitor makes a submission attempt.
The easiest way to trigger those is to actually click on the send button yourself and see what happens. You’ll see something like this:
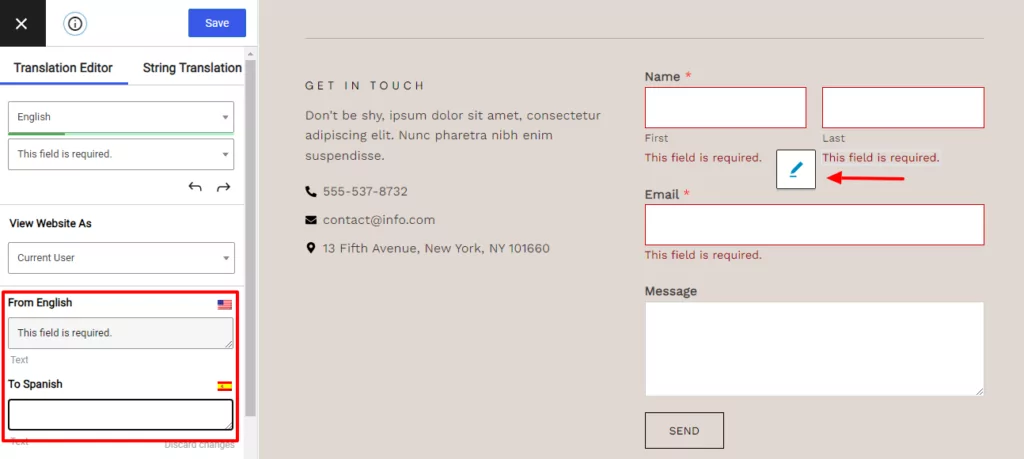
You can click on any of these texts and translate them in the sidebar.
With the errors done, now fill out the form with example info and click on the send button again. This will show the success message. Translate it as well.

Translate that success message as well.
❔ Here’s a more detailed guide on how to translate your contact forms.
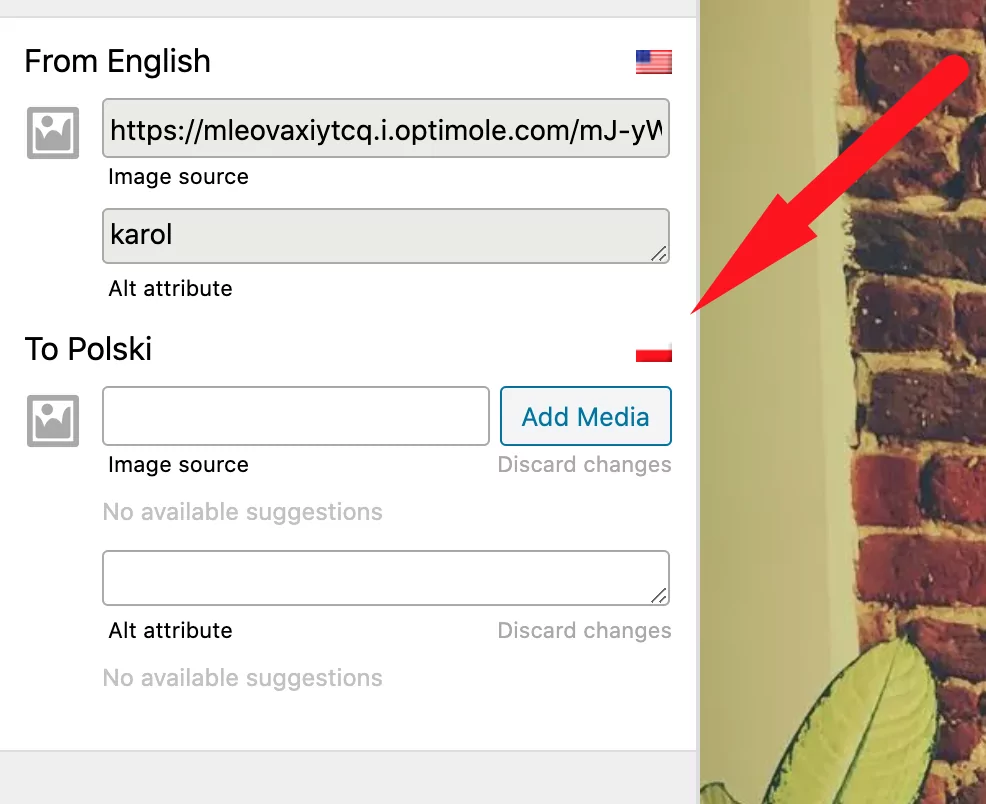
Step 5: Translate Images Containing Text
Not all website owners do this, but some like to show different images for different languages. This is especially valid if you like to put text in your images.
Consider the following example:

If you have an image like that on your homepage, you probably don’t want it to show for languages other than English.

Here’s how you “translate” any image on your site:
As with any of the previous steps, click on the Translate Page button in the top admin bar.
Hover your mouse over the image that you want to replace and click on the pencil icon.
In the sidebar, you will be able to pick a new image for each additional language version.
❔ Here’s more on translating images and how to best go about doing it.
Step 6: Translate SEO Elements
If you want your translated pages to rank well in Google, you should also translate their meta strings and URLs.
These strings are what Google looks at when determining what your page is about and where it should sit in the rankings.
You can translate all SEO elements on a page using the SEO Pack Add-on for TranslatePress. It’s a separate plugin that installs alongside TranslatePress. This add-on integrates with all popular SEO plugins such as Yoast SEO, Rank Math, All in One SEO Pack, and others.
With the add-on active on your site, you’ll be able to access the new SEO options by clicking on the Translate Page button in the top admin bar, and then clicking into the drop-down menu of the available translations. Like so:

❔ To learn more about how multilingual SEO works and what steps to take when trying to rank your content for multiple languages, read this guide.
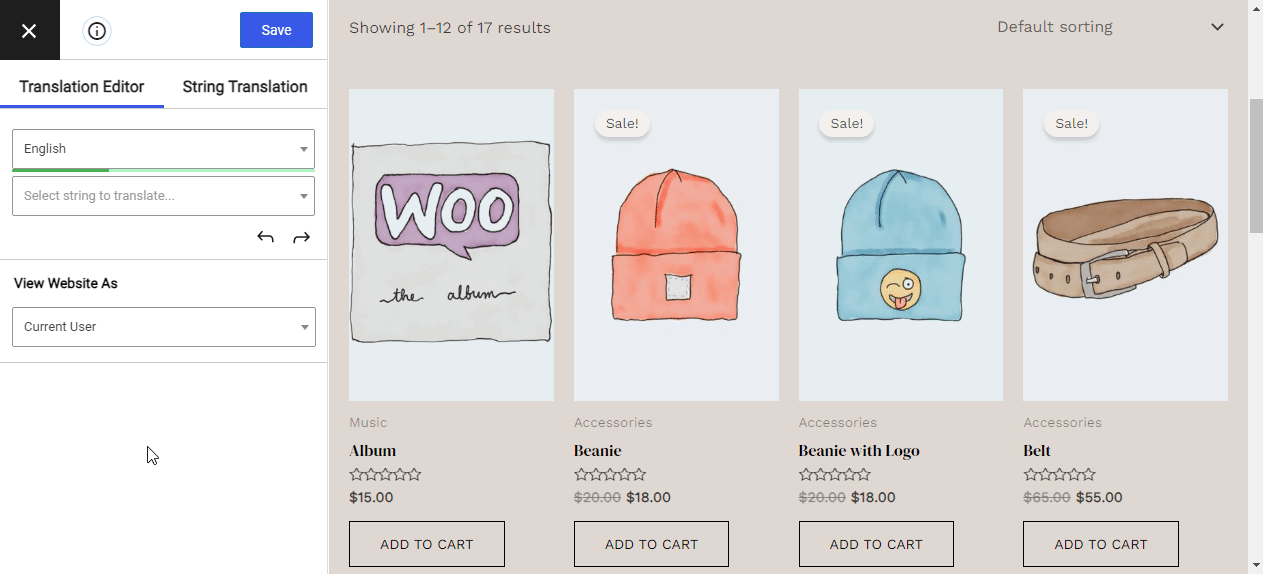
Step 7: Have a WooCommerce Store?
If you have a WooCommerce store running on your WordPress site, translating the products in your catalog might be something you’re interested in.
Taking care of basic translations in your store works just the same as it does for any other page.
For starters, visit your main shop page and click on the Translate Page button in the top admin bar. Go from product to product and translate their names, descriptions, and the other details associated with them. Simply click on the pencil icon next to a given piece of text and add the translation in the sidebar.
Your main shop catalog and individual products are not everything. Don’t forget about your shopping cart page, the checkout page, and the customer profile page as well.
We cover WooCommerce translations in much more detail in this guide. Read it to go full pro with your WooCommerce store and translate it from top to bottom.
What’s Next?
This guide is your roadmap to the easiest and also the best way to translate your website.
That said, there’s a lot more you can do to make your site truly multilingual and get advanced features like automatic user language detection, custom navigation for individual languages, translations for logged-in users, and more. All this comes standard with the premium versions of TranslatePress. Check it out.
TranslatePress Multilingual
Do you still have questions on the best way to translate your entire website? Let us know in the comments below!
If you found this post helpful, please check out our YouTube channel, where we constantly upload short & easy-to-follow video tutorials. You can also follow us on Facebook and Twitter to be the first to know each time we post.