
En esta publicación
¿Por qué molestarse en hacer un sitio web bilingüe?
Nadie dijo nunca que fuera fácil crear contenido para tu sitio web; es un trabajo duro. Se invierte tiempo y esfuerzo en cada una de las piezas de contenido que creas. El investigación exhaustiva, resolviendo problemas, y respondiendo preguntas hace que sea increíblemente difícil desarrollar algo único y digno de mención.
Hazlo tú, sin embargo, porque valoras el contenido, el clientes potenciales que puede generar, el ventas potenciales, y por supuesto, visibilidad para tu empresa o marca.
¿Y si te dijéramos que puedes hacer aún más? En una fracción del tiempo, ¿sin crear una publicación o página completamente nueva?
Hoy vamos a mostrarles cómo maximizar el tráfico a tu contenido recién creado (o contenido existente), abre nuevos canales en los motores de búsqueda, y atraer nuevos clientes potenciales / clientes. Al crear una página web bilingüe, ¿Cuánto te costaría?
Nada, salvo por un rato.
¿Por qué un sitio web de WordPress bilingüe y no multilingüe?
La respuesta breve es: el tiempo. En primer lugar, tiene sentido traduce tu página web a otro idioma.
Por su propia definición, Bilingüe significa hablar dos idiomas con fluidez, Multilingüe, bueno, como habrás adivinado, más de dos.
Crear una versión bilingüe de su sitio web impulsado por WordPress es una excelente manera de probar el terreno, crecer y aprender de la experiencia.
Para este ejemplo, estamos viendo un sitio web en inglés y configurando una versión en idioma rumano. Para que conste, no hace falta que hables rumano con fluidez para que esto funcione.
¿Es fácil crear una página web bilingüe?
Usando el versión gratuita de TranslatePress, podrás crear una página web bilingüe con facilidad. Te explicaremos todo el proceso, te daremos consejos y te guiaremos en cada paso.
Si quieres seguir esta guía, no dudes en descargar la versión gratuita de TranslatePress y mantén esta guía abierta en una pestaña del navegador que prefieras.
Instalación de TranslatePress
En la pantalla de administración de WordPress, ve a Complementos entonces Añadir Nuevo. Aquí introduce el término TranslatePress en la barra de búsqueda como se indica a continuación:
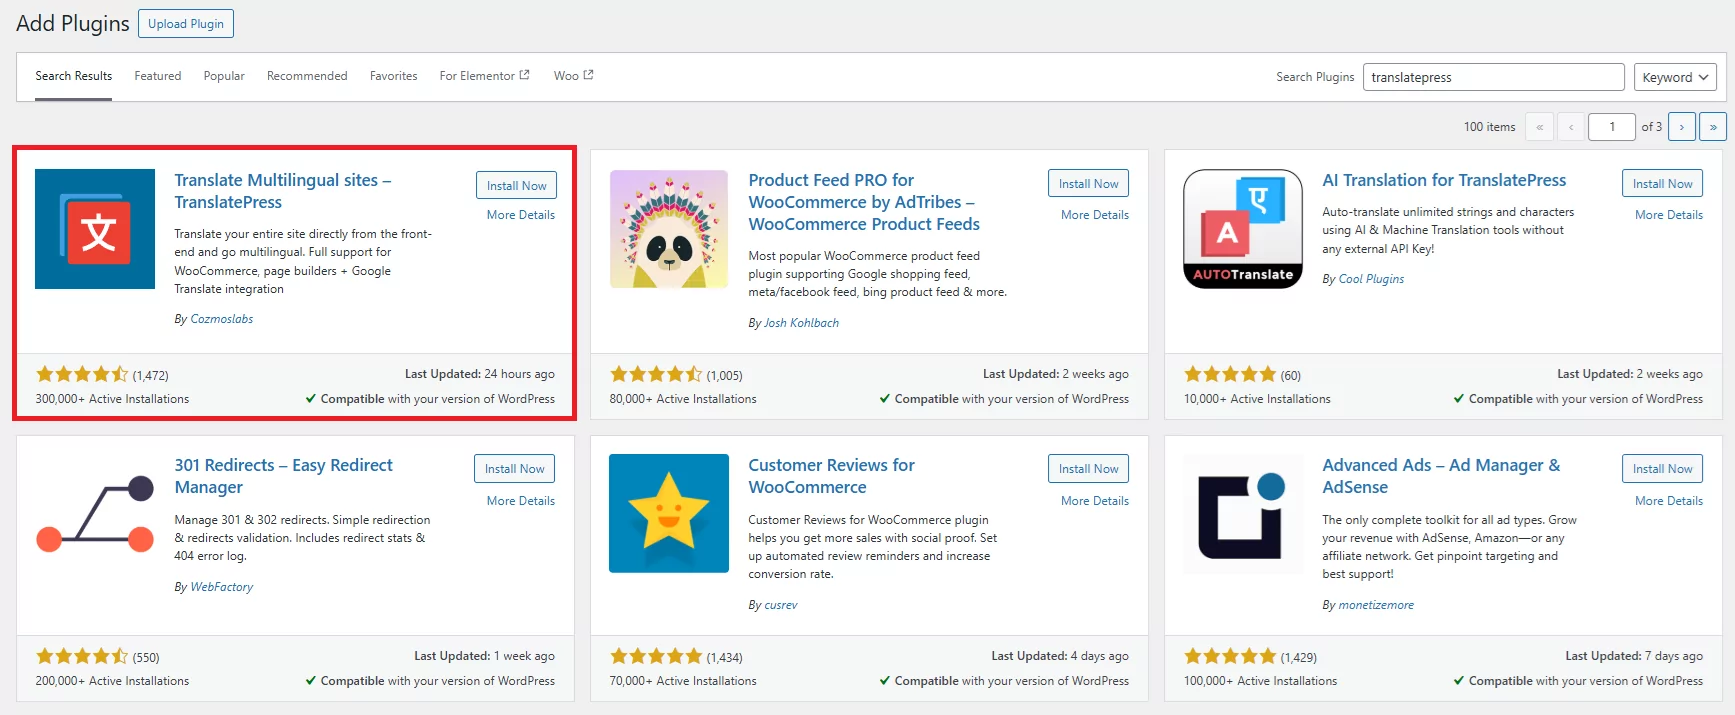
Golpear Instalar ahora, entonces Activar. Felicitaciones, estás a unos pocos pasos de crear tu primer sitio web bilingüe con WordPress.
Primeros pasos con la configuración de TranslatePress
Para empezar, tenemos que indicar a TranslatePress qué idioma queremos utilizar para nuestra página web bilingüe. Puedes introducir un idioma manualmente o desplazarte por la lista como se muestra a continuación:
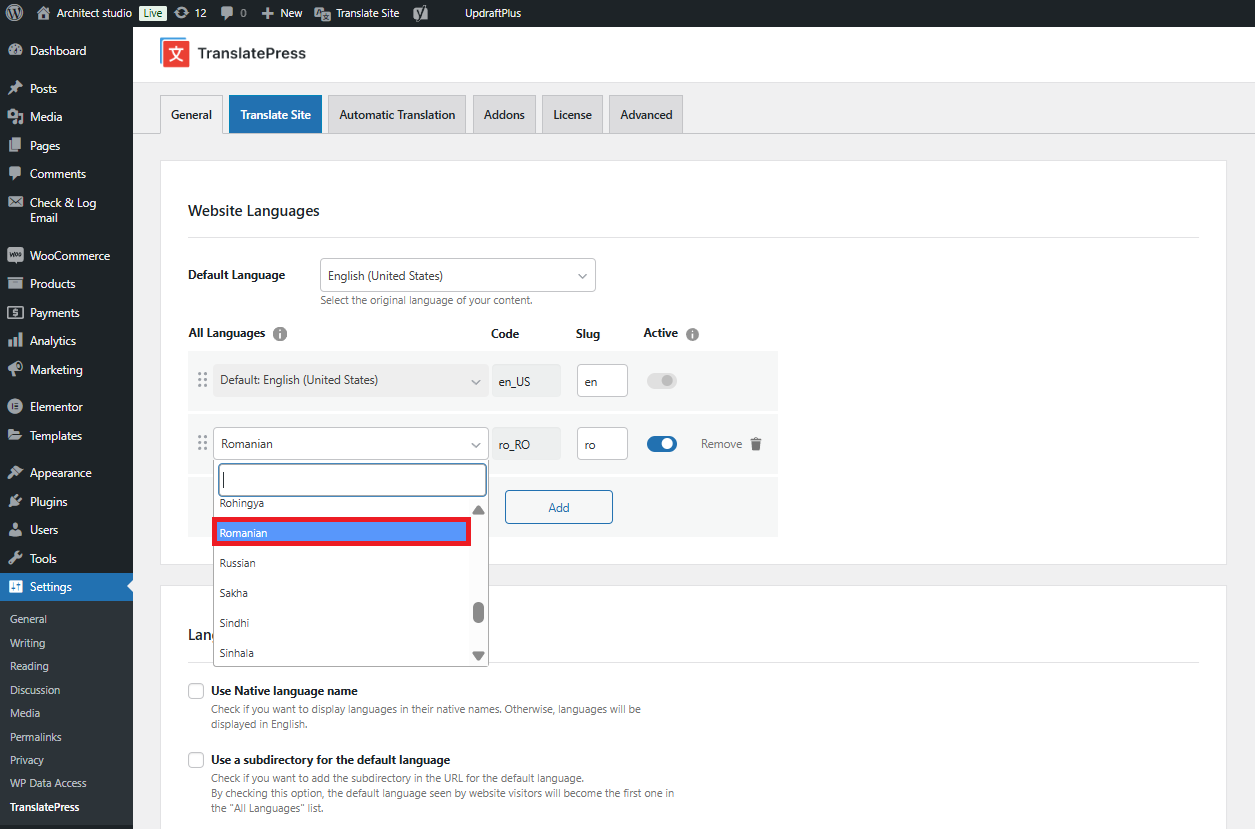
Hay algunos ajustes más que hay que revisar en TranslatePress; en la siguiente captura de pantalla verás que se ha añadido el rumano:
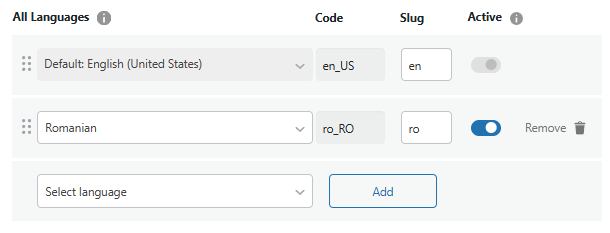
Como hemos seleccionado el rumano como idioma adicional, notarás que la URL en el extremo derecho dice ro.
Dondequiera que haya una instancia de una página traducida, como su página "Acerca de", entraría en juego la siguiente estructura de URL:
mysite.com/ro/about/
A su vez, ayuda a los usuarios y diferencia entre la versión en inglés y la versión en rumano y, por supuesto, lo que es más importante, a los motores de búsqueda.
Configuración adicional para su sitio web bilingüe
Hay unos cuantos ajustes más a su disposición; una vez configurados aquí, no tendrá que preocuparse por ellos.
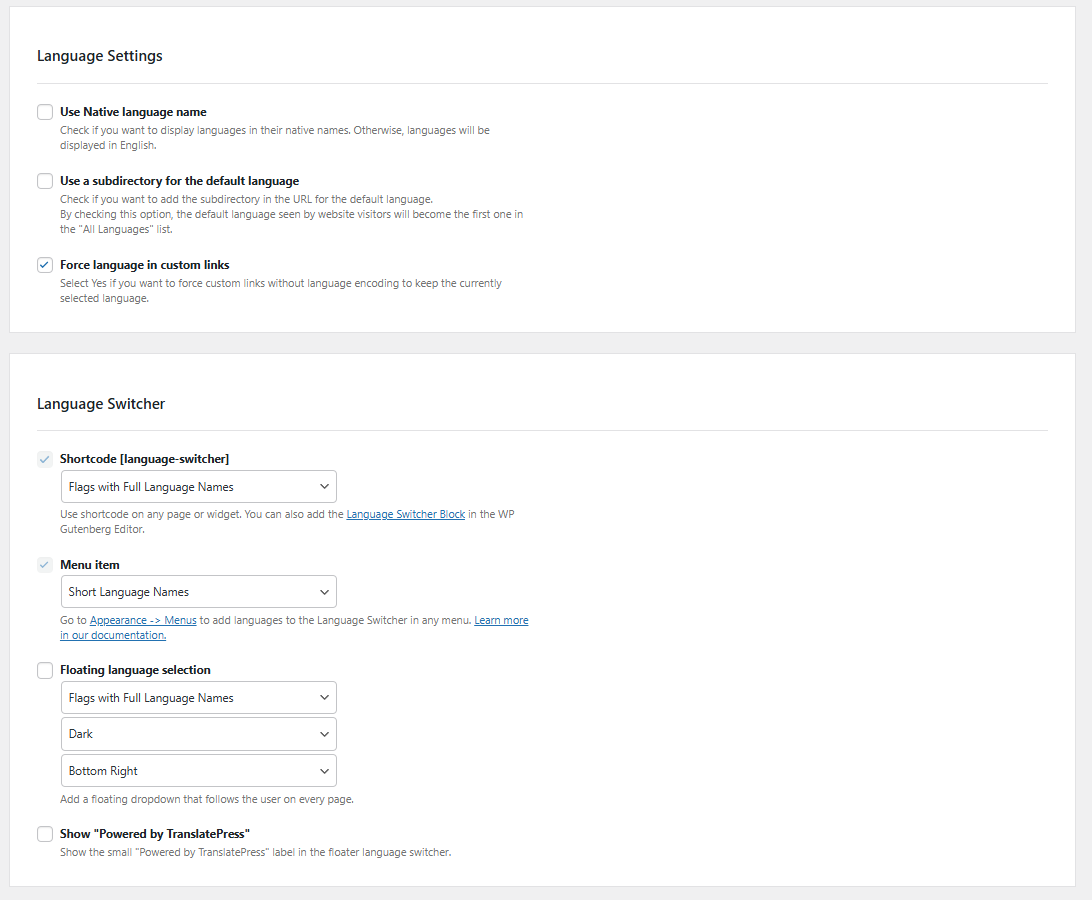
Nombre del idioma nativo
Si desea mostrar los idiomas en su nombre nativo, use el menú desplegable y seleccione Sí para mostrarlos en inglés, déjalo configurado en No.
Usar un subdirectorio para el idioma predeterminado
Dos opciones aquí Sí o No. Supongamos que le gustaría mostrar su idioma predeterminado, en este caso, el inglés, en un subdirectorio. Elija Sí, hacer esto significará la siguiente estructura de URL:
mysite.com/es/
Todas las páginas posteriores seguirán el mismo formato:
mysite.com/es/acerca-de/
Elección Sí significa que el primer idioma del Todos los idiomas la configuración se aplicará; si es necesario, puedes reordenar estos elementos como se indica a continuación mediante la función de arrastrar y soltar:
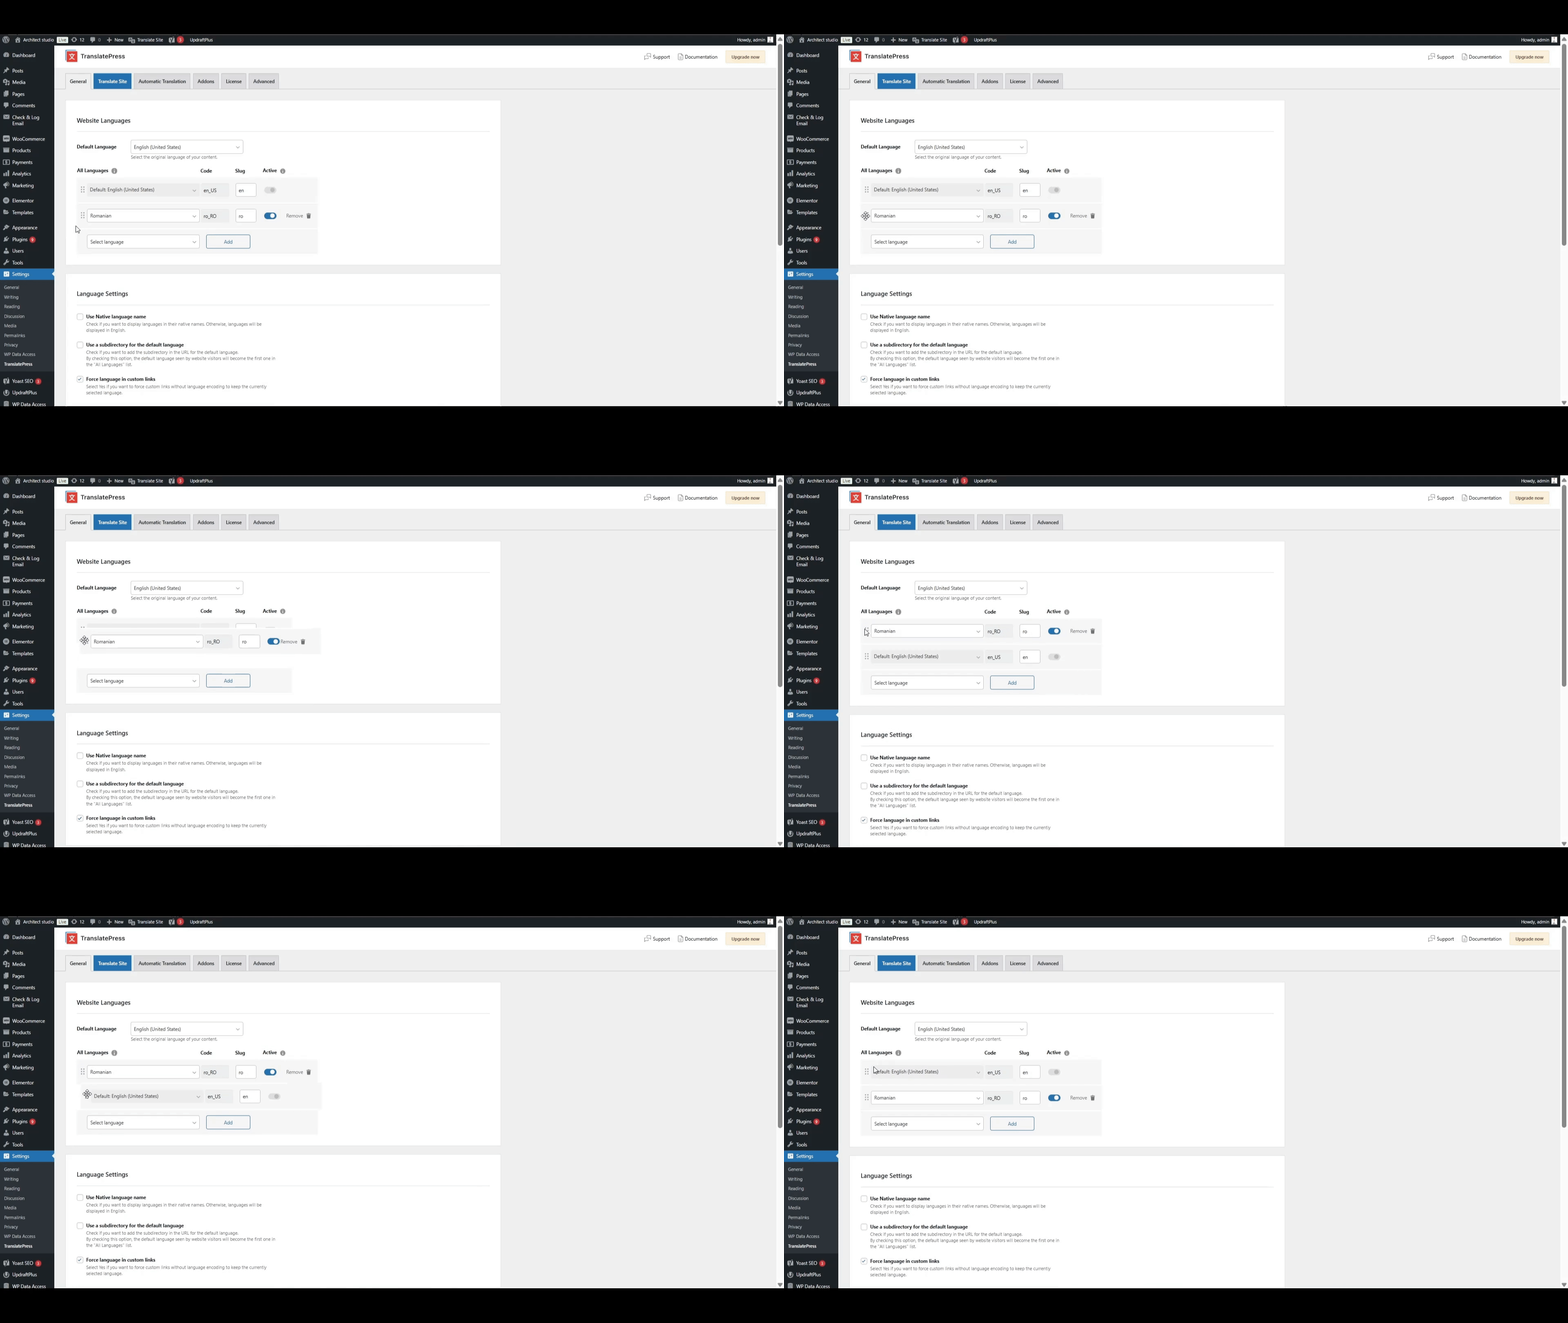
No necesitarás hacer lo anterior; vale la pena señalarlo si decides agregar más idiomas para convertir su sitio en un Multilingüe uno en lugar de un Sitio web bilingüe.
Forzar idioma en enlaces personalizados
Este ajuste va a hacer tu vida más fácil. Como propietario de un sitio de WordPress, sin duda tendrás muchos enlaces internos y navegación de menú hacia otros contenidos para mantener a los visitantes en tu sitio.
Te daremos un ejemplo; en este caso, tenemos contenido donde una frase específica tiene un enlace interno:
“Plugin de traducción de WordPress” – enlaces a una página interna mysite.com/translation-plugin/
Si un visitante está en la versión en idioma rumano de su sitio y hace clic en ese enlace seguirá estando:
mysite.com/translation-plugin/
Lo cual estoy seguro de que coincidirá en que no beneficia en nada al usuario. Usando el Forzar idioma en enlaces personalizados la configuración cambiará la URL para que enlace a la instancia rumana de la página, no a la inglesa.
Al seleccionar Sí, esto garantizará que:
mysite.com/translation-plugin/
se convierte
mysite.com/ro/translation-plugin/
TranslatePress puede ayudarte ahorrarte mucho tiempo necesario, especialmente si tienes una estrategia de enlaces internos y necesito mantener todo coherente.
Añadir un selector de idiomas a su sitio web para los visitantes
Con cualquier guía, es imposible saber cuál es tu configuración. Tanto si utilizas una barra lateral para las entradas y las páginas como para todo lo demás, lo sabemos; por eso hemos desarrollado TranslatePress para cubrir todos los aspectos de mostrando un selector de idioma.
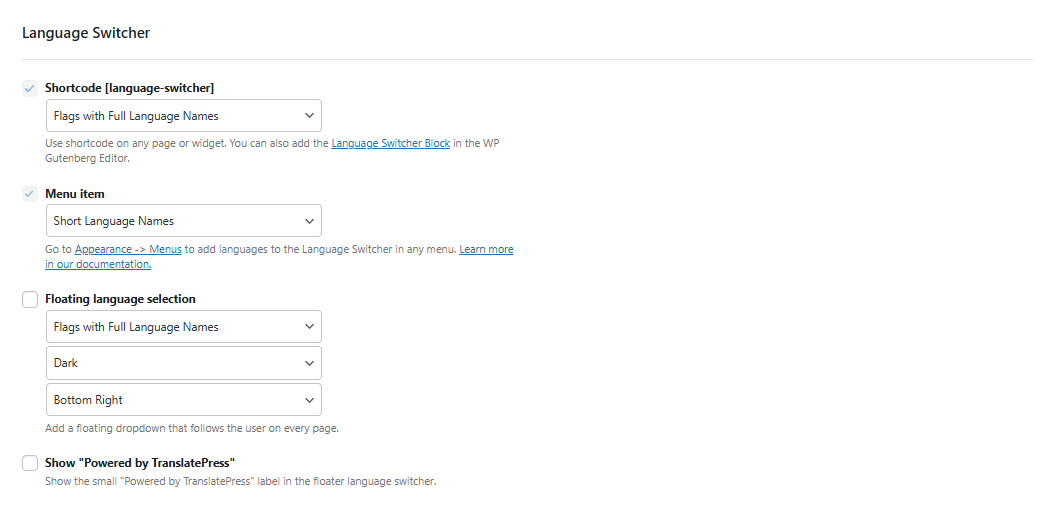
Uso del selector de idiomas en una barra lateral
Si el diseño de tu contenido utiliza una barra lateral, es posible que desees mostrar el selector de idiomas en su interior.
Usando el siguiente código corto:
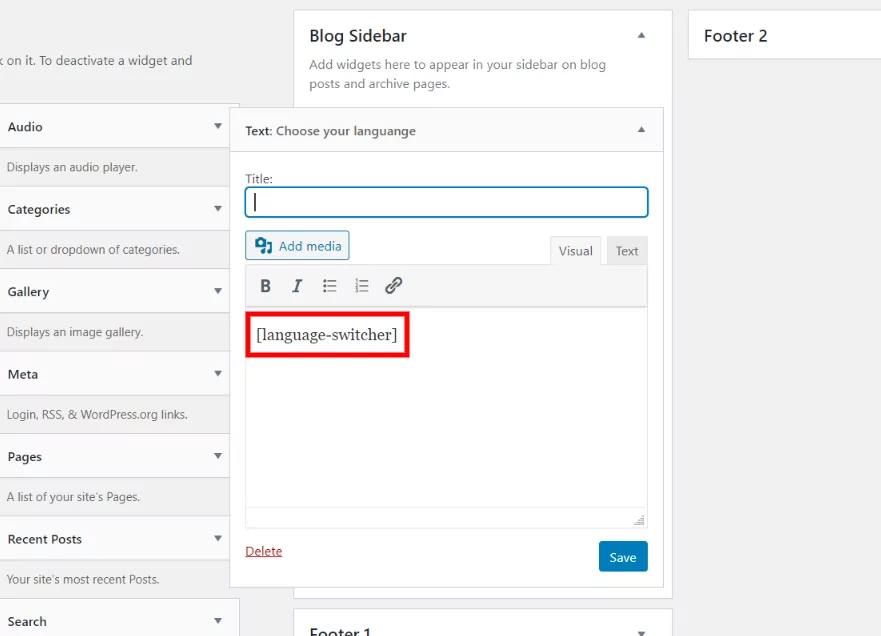
Una vez hecho, presione Guardar.
Añadir el selector de idioma como elemento del menú de navegación
Si prefieres añadir el selector de idioma como un elemento de menú, puedes hacerlo parte de tu navegación principal, o dondequiera que se encuentre tu navegación. Dirígete a Apariencia en tu administración de WordPress, luego haz clic Menús.
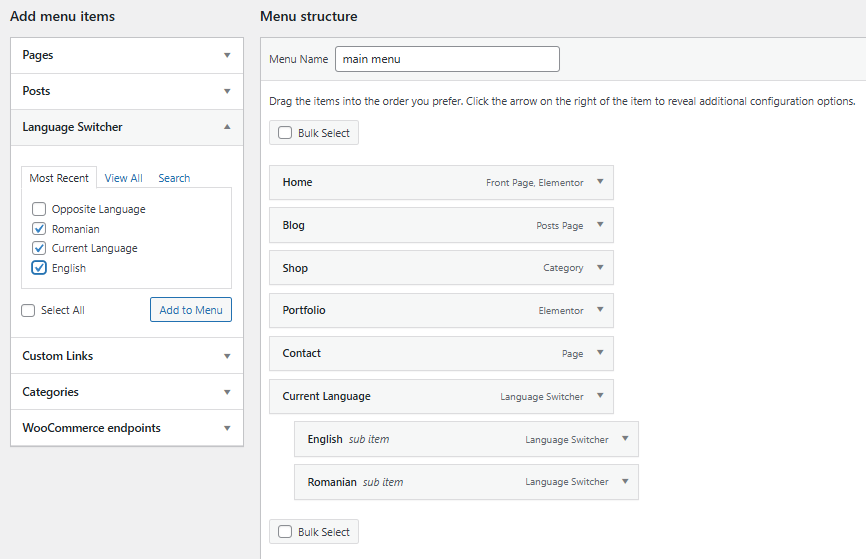
Como puede ver en el ejemplo anterior, utilizando el elemento de menú Selector de idioma, añada el Idioma actual y, a continuación, los elementos de menú en rumano e inglés. Seleccione todos o solo los que desee añadir.
Es fundamental asegurarse de agregar los elementos de menú en inglés y rumano como submenús de Idioma actual, y organizarlos mediante arrastrar y soltar para que tu idioma principal sea el primer elemento.
Completar el paso anterior generará un elemento de menú en la interfaz pública de su sitio web:
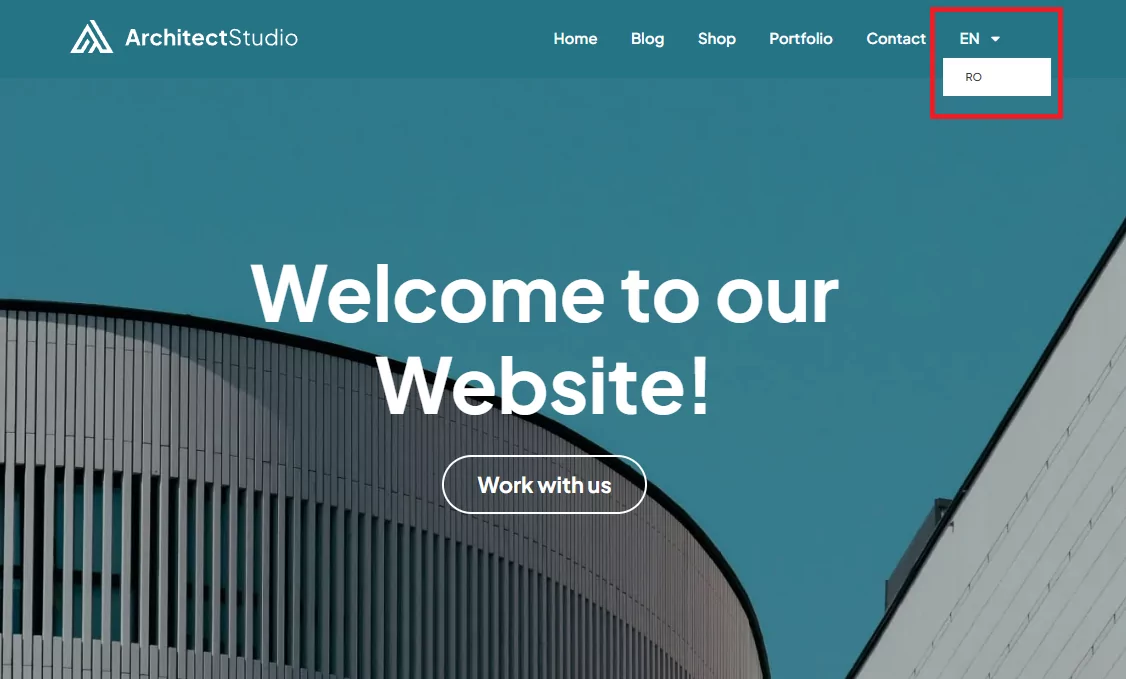
Lo que sea idioma El contenido constante de su sitio web se mostrará al visitante.
Adición de un selector de idiomas flotante a su sitio bilingüe
Si ninguno de los ejemplos anteriores se adapta a sus necesidades, siempre queda Selector de idioma flotante.
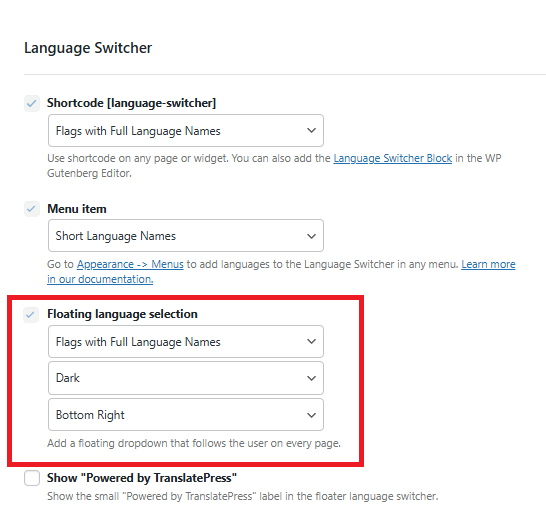
Esta opción mostrará un menú desplegable flotante en todo su sitio web; aquí puede elegir entre Abajo a la derecha, Abajo a la izquierda, Superior Izquierdo, y Arriba a la derecha. Vea a continuación un ejemplo de Arriba a la Derecha:
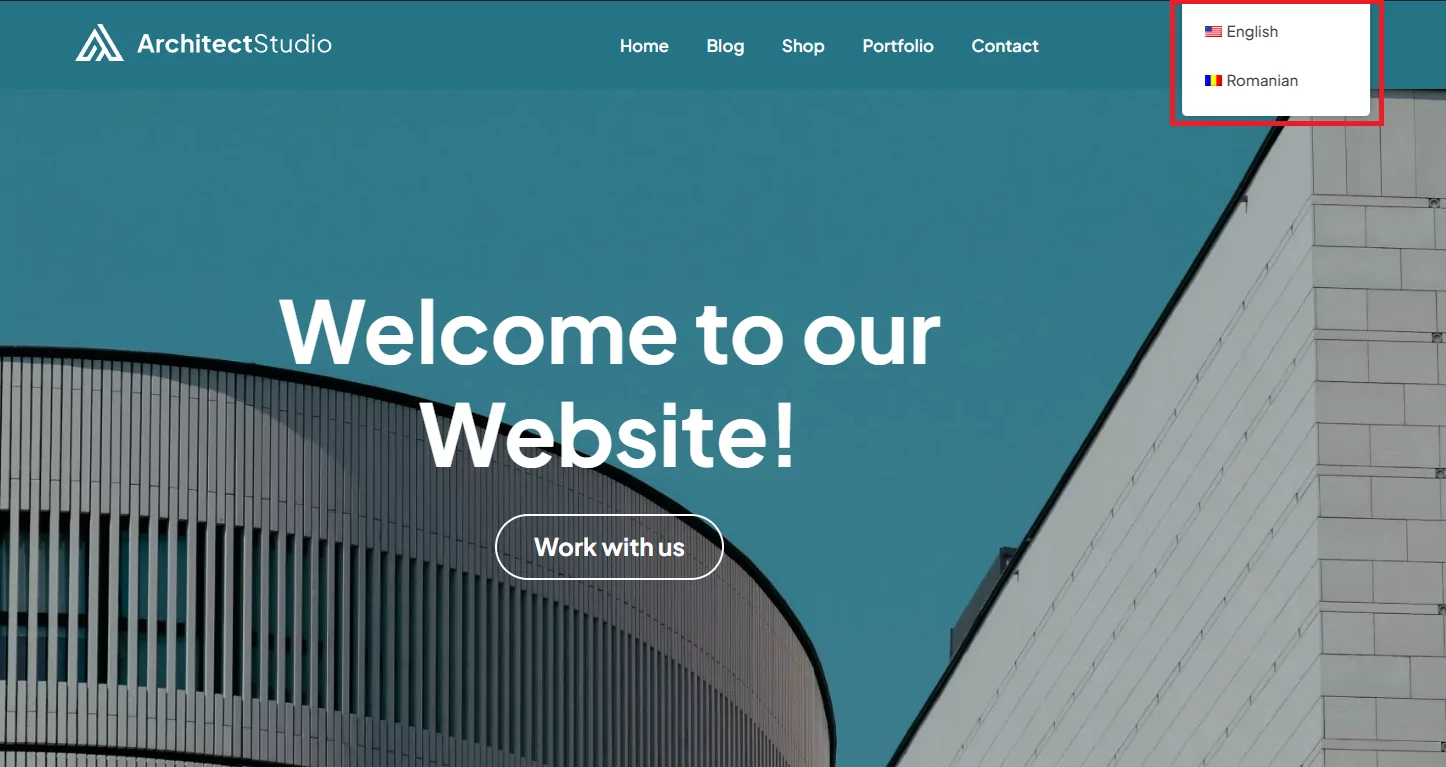
Útil para quienes tienen llamadas a la acción en su sitio web o un botón para volver arriba, ya que le permite elegir dónde desea mostrar su Selector de Idiomas flotante, para que no entre en conflicto con tu estética.
Configuraciones útiles si tienes espacio limitado
Si tienes espacio limitado en tu sitio web y necesitas cambiar la forma en que se muestra el selector de idiomas, los siguientes ajustes podrían interesarte:
Sin importar qué opción decidas que es la adecuada para ti; ya sea un selector de idiomas flotante, un elemento de menú o una barra lateral, puedes adaptar la visualización a tus necesidades:
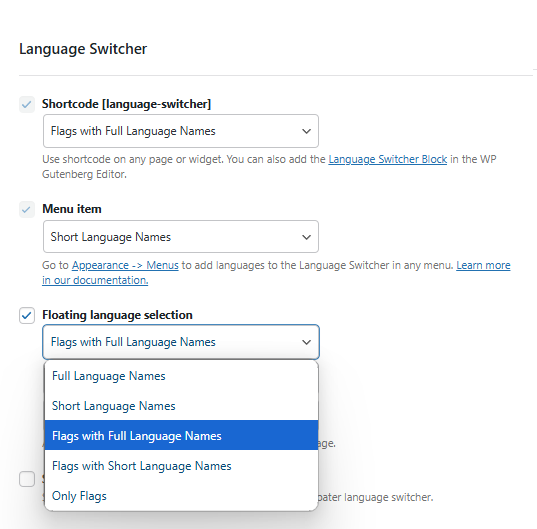
A través del menú desplegable, elige un método de visualización que te funcione:
- Nombres completos de idiomas: Muestra el nombre del idioma, nada más.
- Nombres cortos de idiomas: Muestra la forma abreviada, es decir, EN y RO, respectivamente.
- Banderas con nombres de idiomas completos: Pequeña bandera específica del país y nombre del país.
- Banderas con nombres de idiomas cortos:- Pequeña bandera y forma abreviada.
- Solo banderas: Muestra solo las banderas asociadas al idioma, nada más.
Traduciendo Tu Contenido – ¿Qué Puedes Traducir?
Hemos cubierto la configuración para crear su sitio web bilingüe; ahora pasamos al los detalles esenciales de la traducción del contenido real.
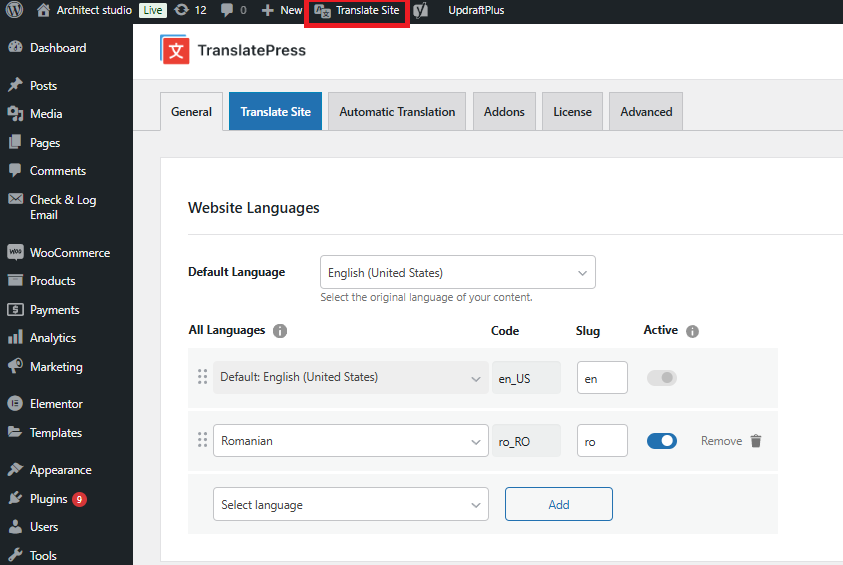
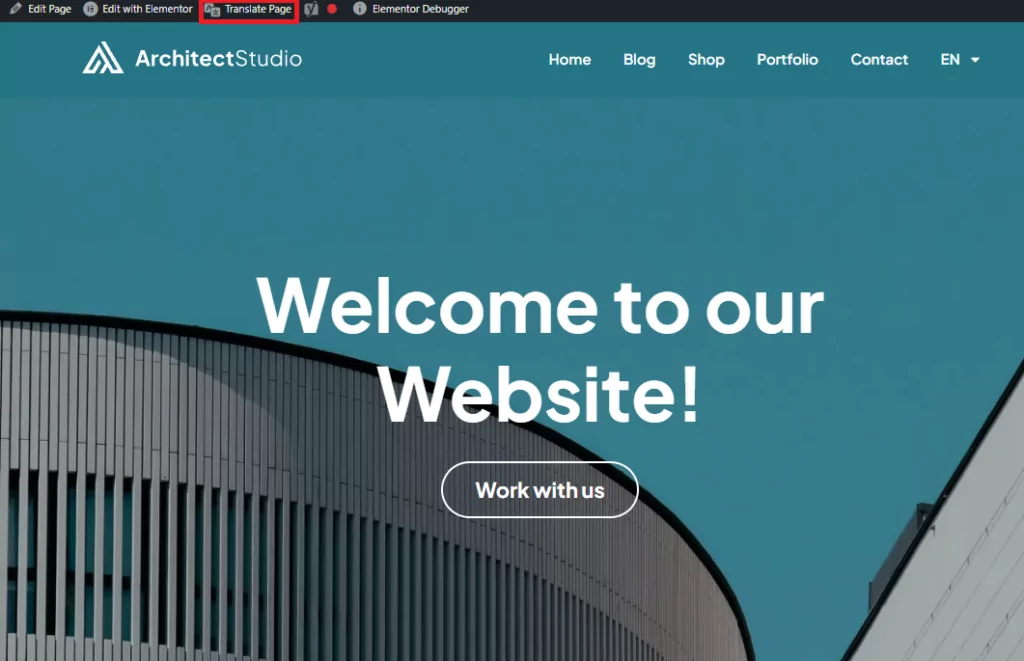
Para traducir tu sitio, puedes hacerlo de una de estas dos maneras desde el panel de administración de WordPress y hacer clic en Traducir sitio, o si estás en la interfaz pública en una publicación o página específica, haz clic en Traducir página:
Una vez que hayas hecho clic en Traducir página, verás las opciones de edición en la interfaz a continuación:
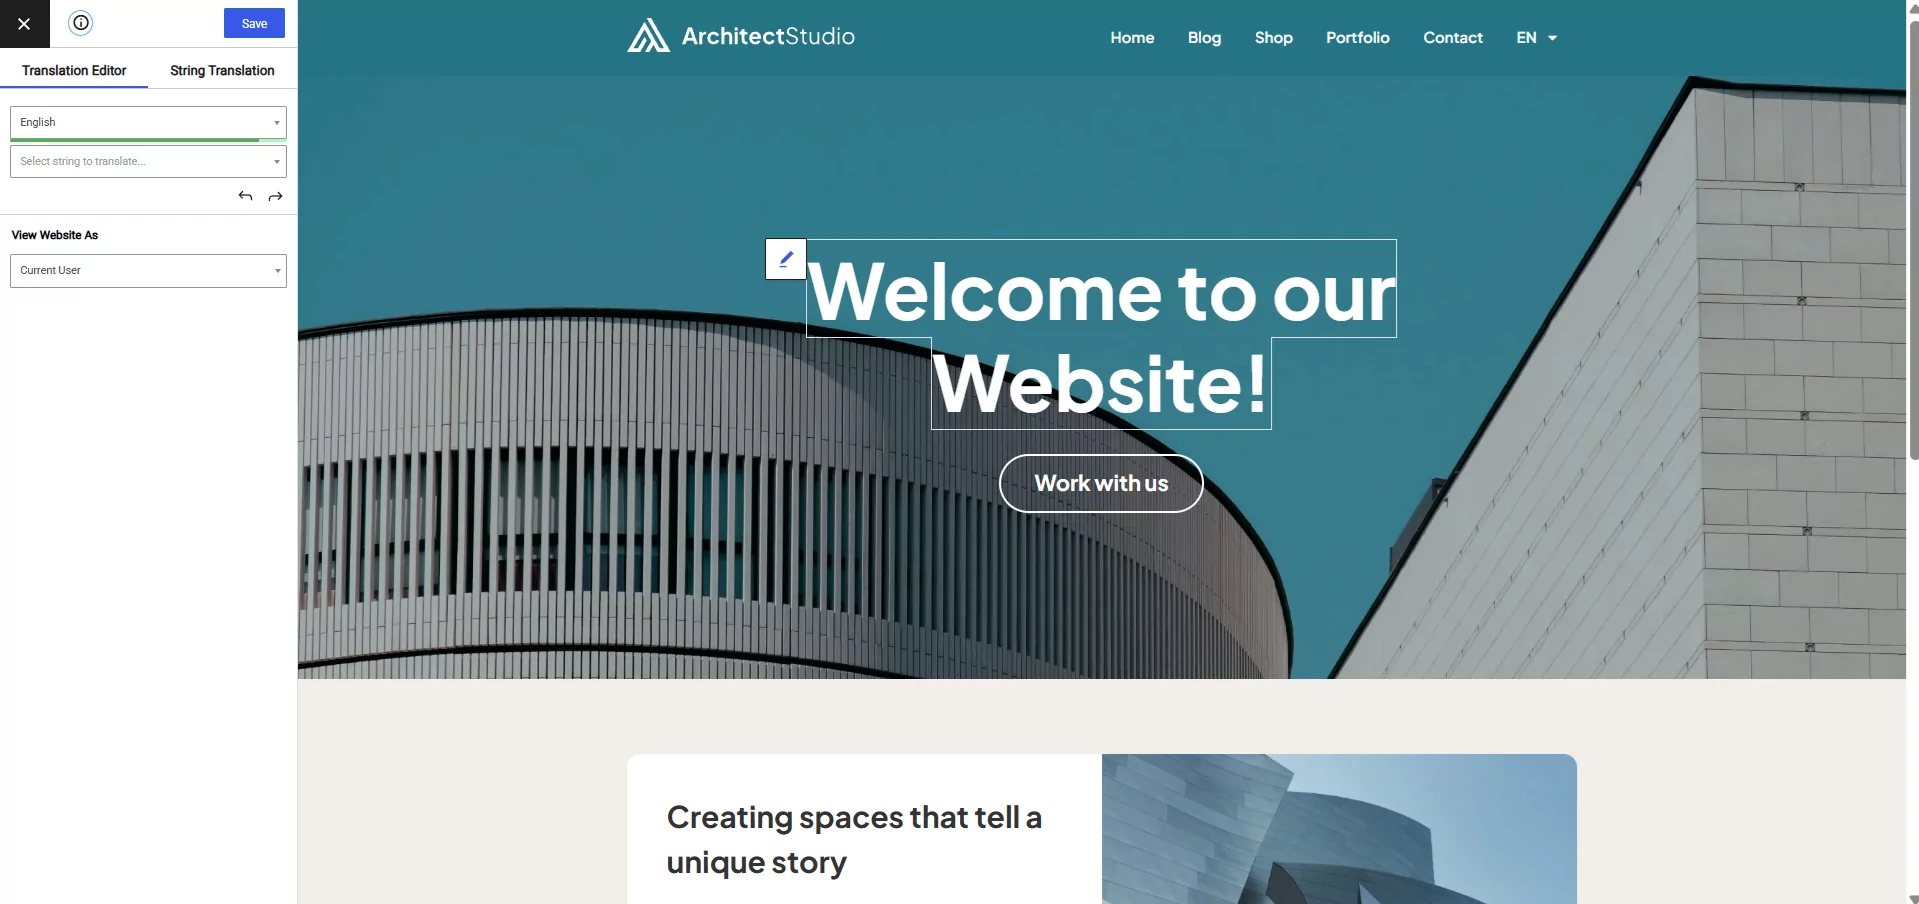
Esto abre una interfaz de traducción visual, similar al Personalizador. No hay que entrar y salir de las publicaciones ni actualizar para ver si los cambios han surtido efecto.
Toda la edición es en la interfaz, lo que significa que verá un ejemplo real de su contenido traducido para el idioma que elija.
Primero, para empezar a traducir y ver un ejemplo del mundo real, necesitamos cambiar el idioma actual:
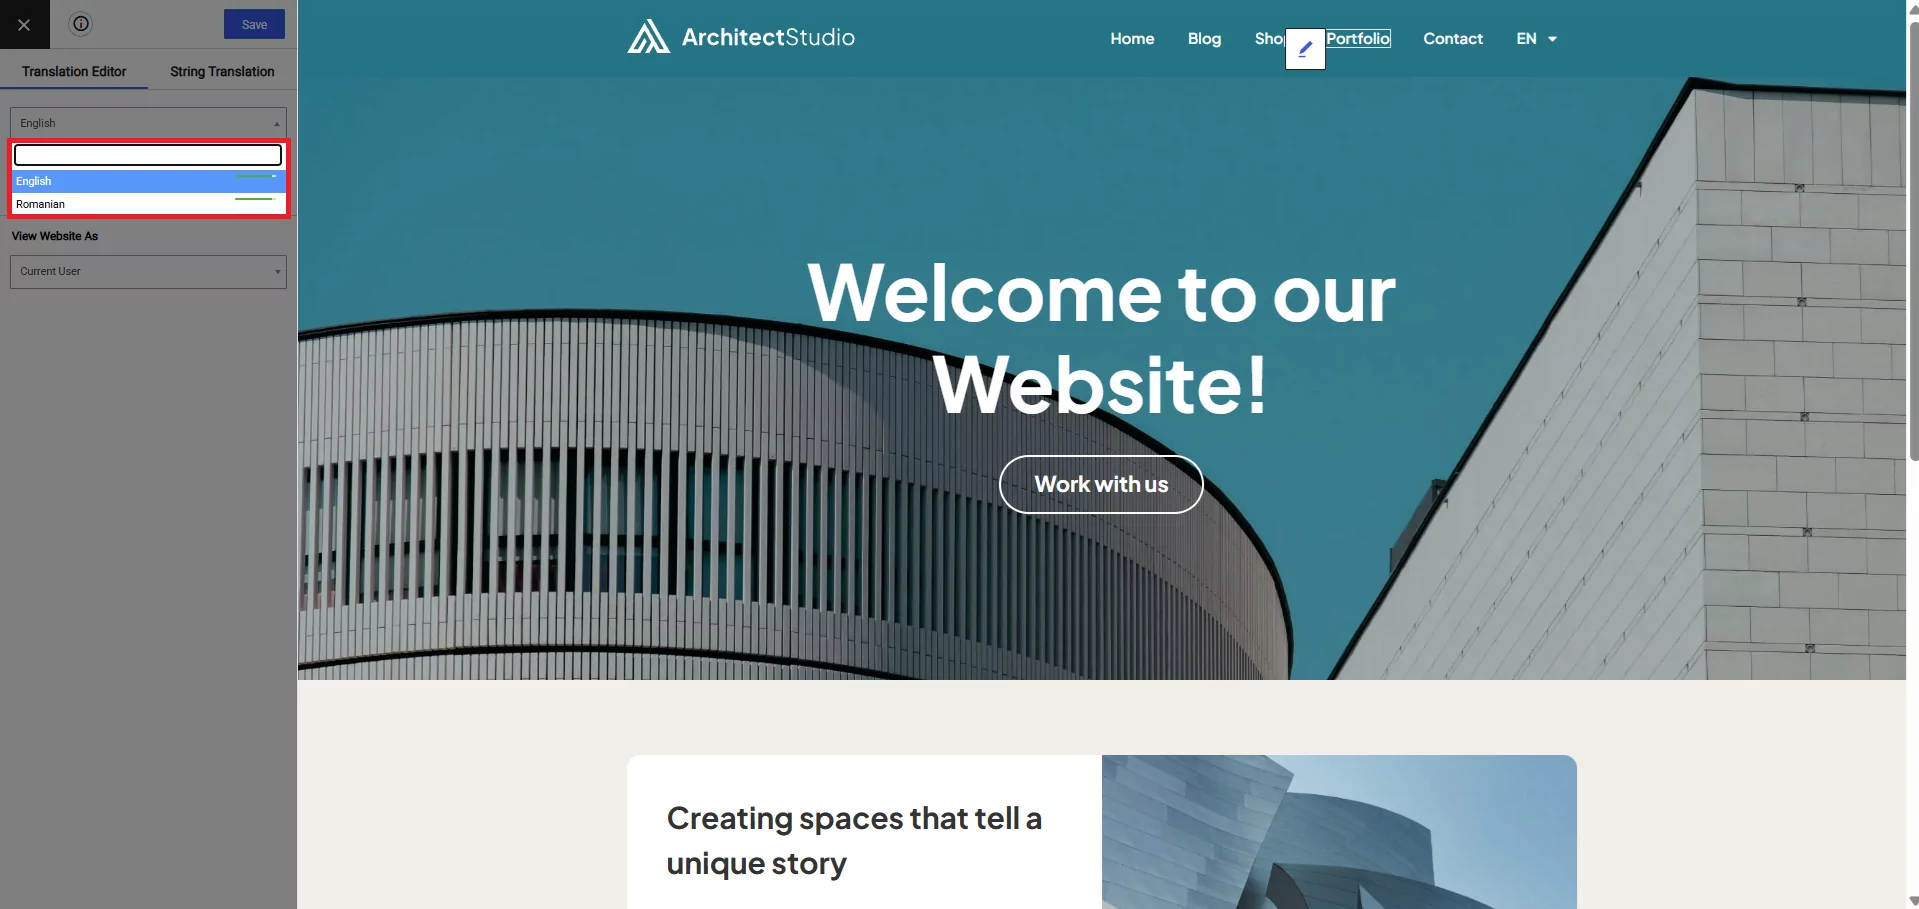
Seleccionar rumano significa que puedes ver el contenido como si lo estuvieras leyendo como un visitante de Rumanía. Lo que te facilita las cosas como editor.
Recordarás de antes en este tutorial; no es necesario hablar rumano con fluidez (o el idioma que decidas usar) para que tu sitio web sea bilingüe. Usando el Traductor de Google en una nueva pestaña/ventana, puedes traducir fácilmente del inglés al rumano, cortar y pegar a tu gusto.
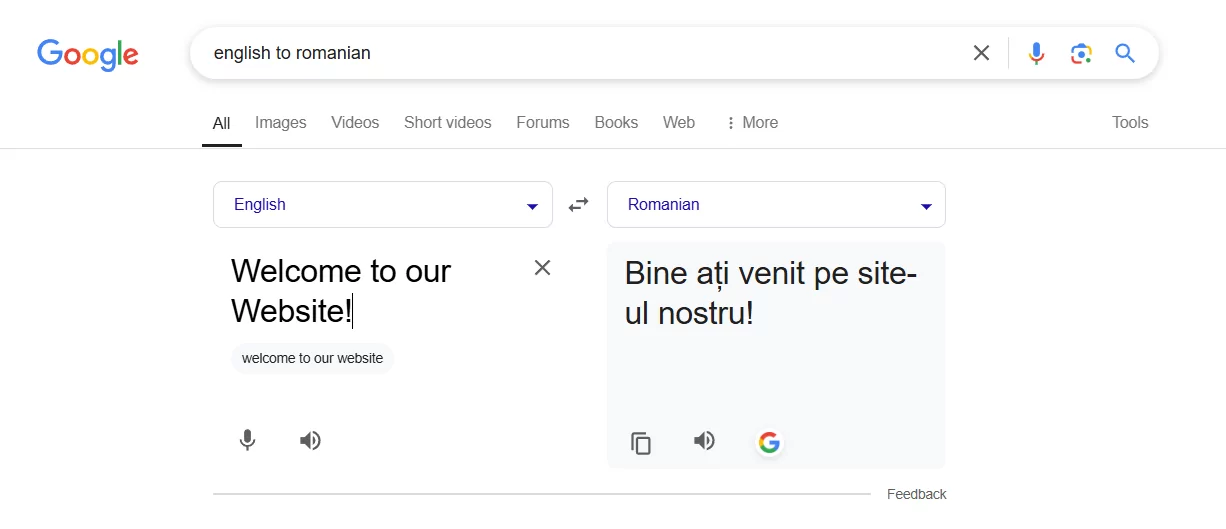
Pero, ¿cómo sabes qué partes puedes traducir? Con TranslatePress, el proceso es sencillo. Con el texto recién copiado de Google Translate, lo único que tienes que hacer es pasar el cursor por encima del título de tu entrada o página, luego pega de la siguiente manera:
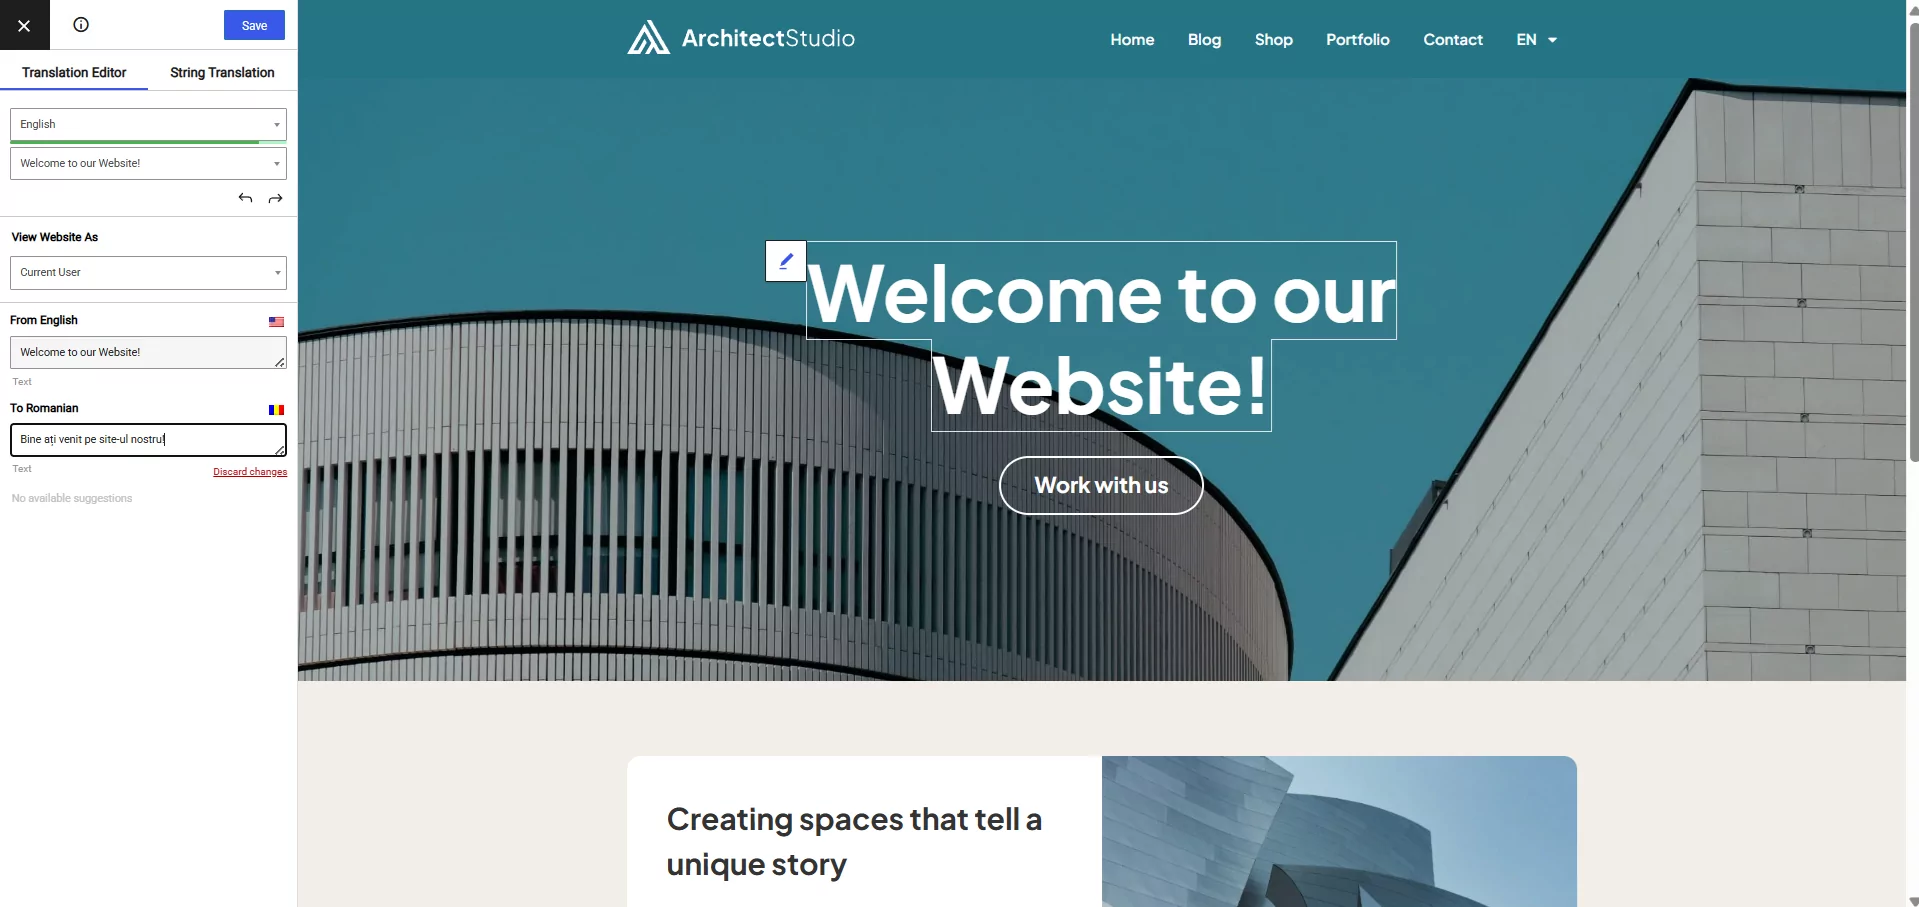
¿Notas el icono del lápiz azul en la imagen de arriba? Al editar contenido para tu sitio web bilingüe, todo lo que tienes que hacer es pasar el cursor sobre cualquier texto que desees cambiar. Aparecerá un icono, ya sea azul o verde.
La diferencia entre ambos es simple:
El Azul el icono de lápiz te permite traducir el texto que has creado, y el Verde El icono de lápiz es Gettext. Gettext es texto de cadena, utilizado en temas y complementos; vea a continuación un ejemplo:
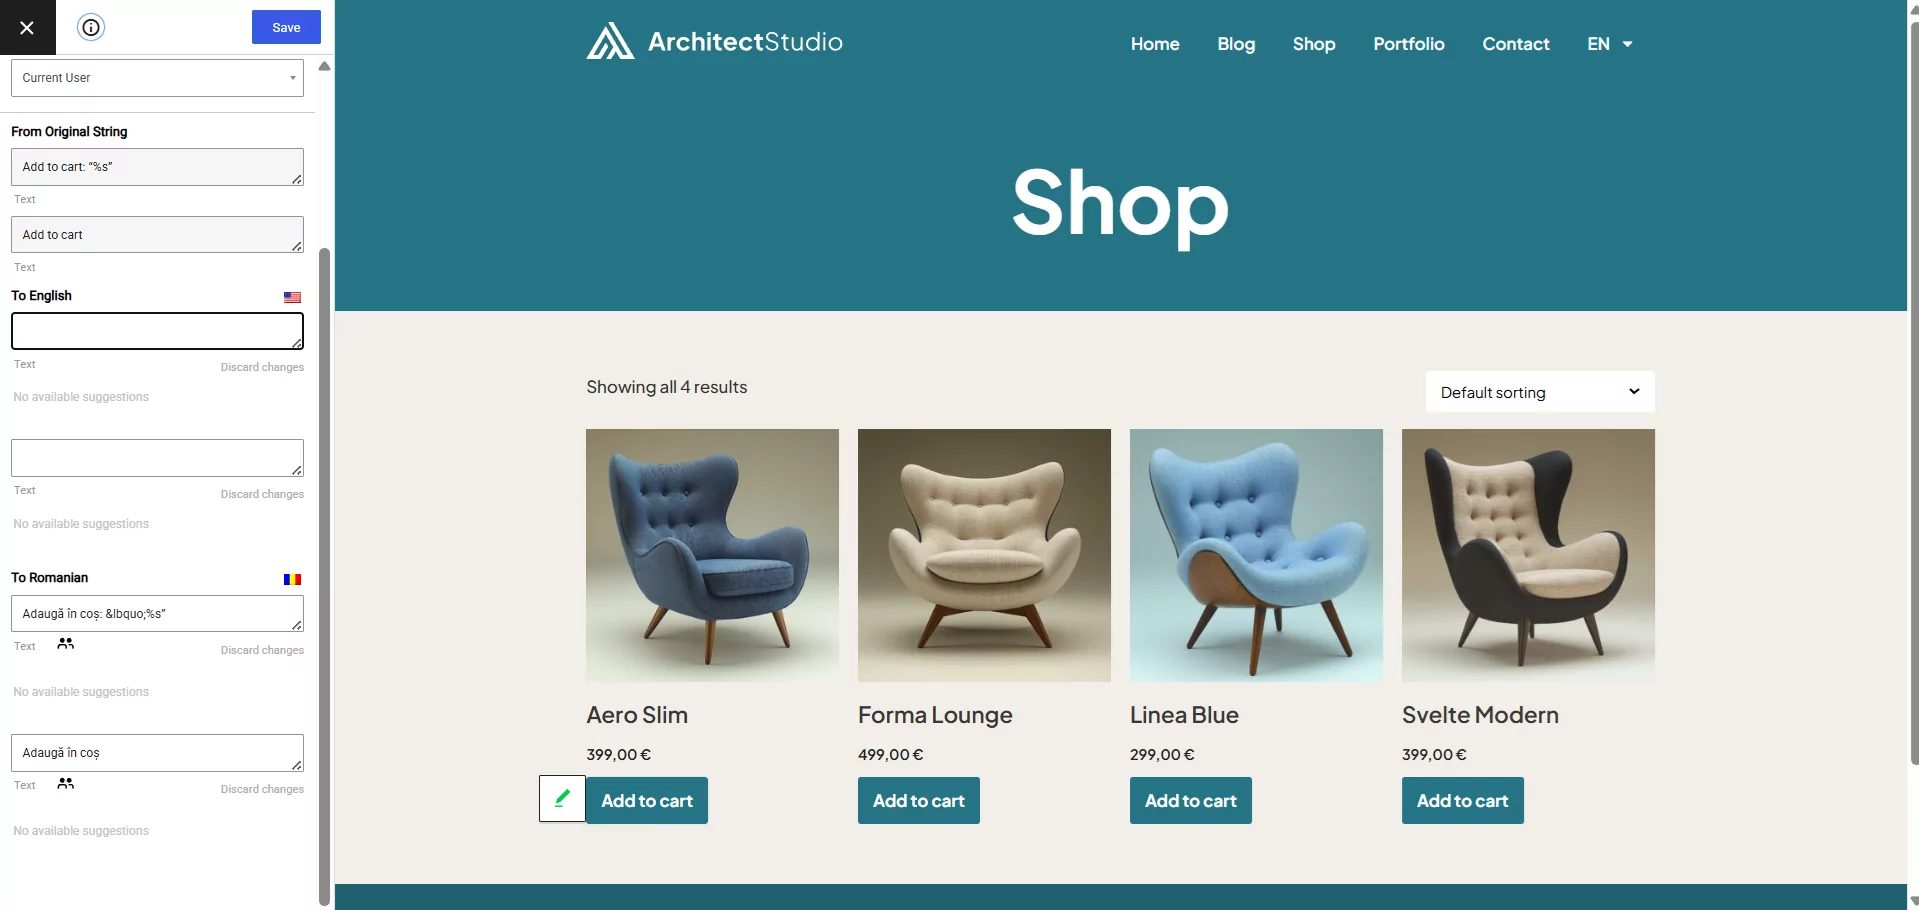
Para traducir su publicación/páginas, resalte la sección que desea traducir, haga clic en el ícono, luego corte y pegue su traducción y presione Guardar.
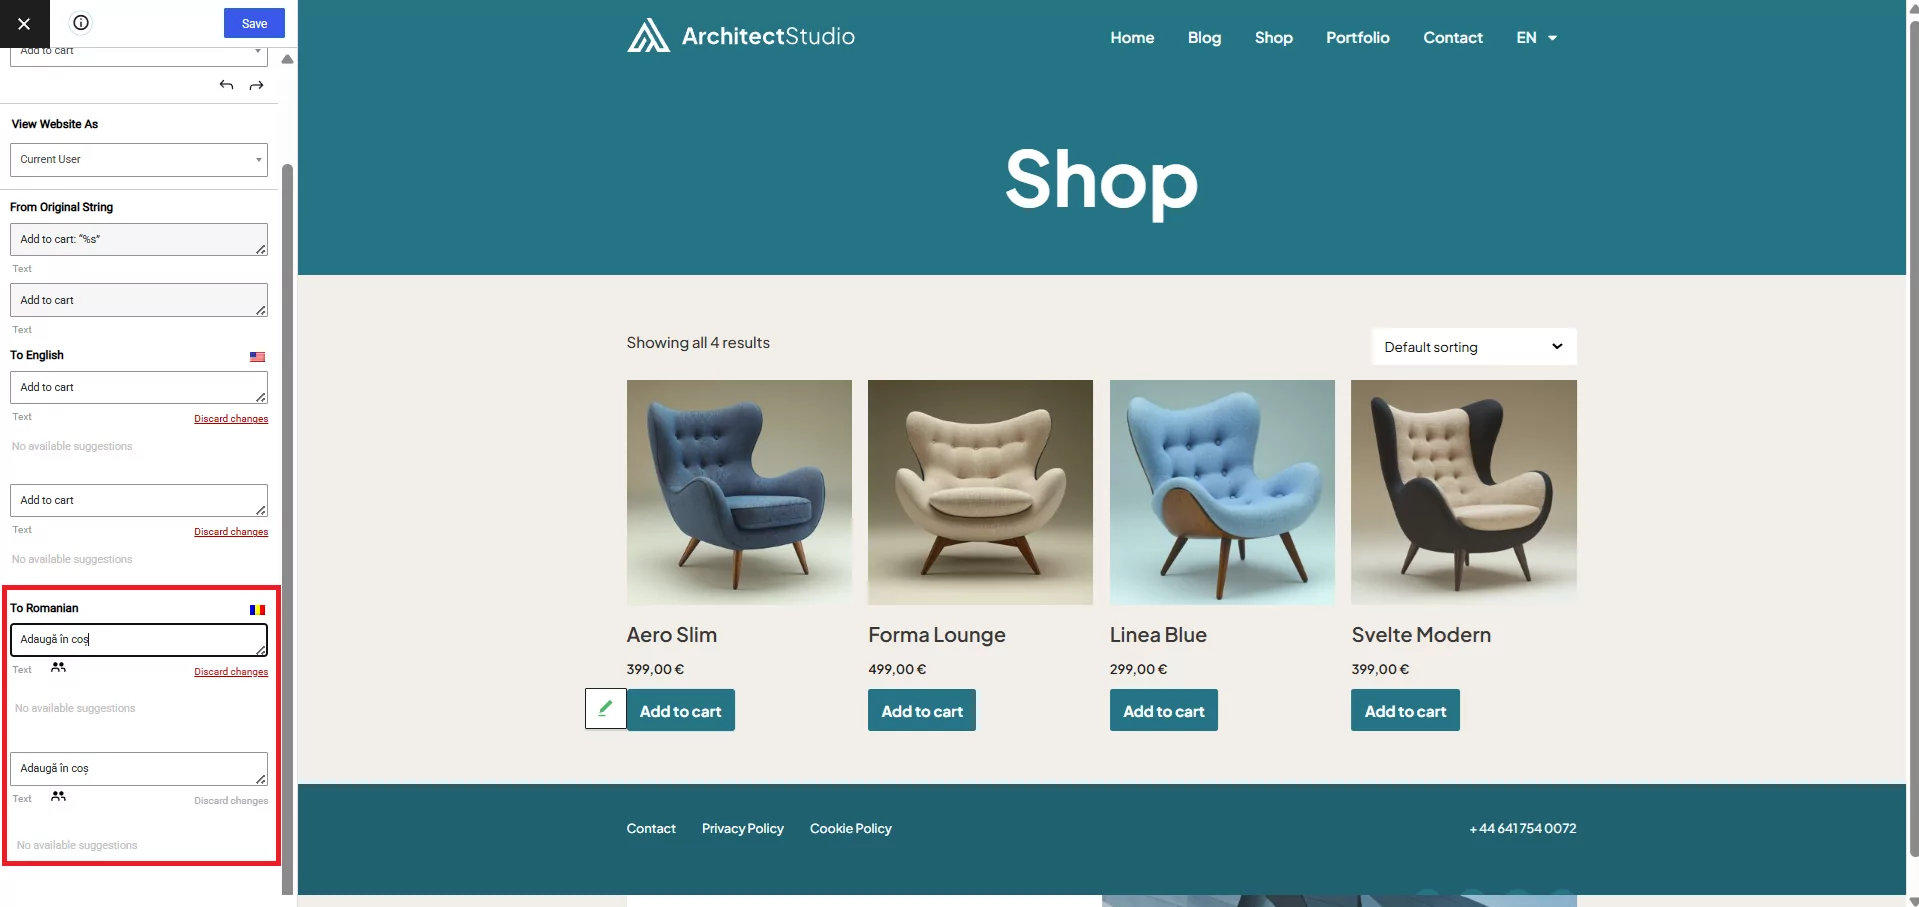
Una vez guardada, la página o entrada en cuestión se recargará para mostrarte cómo se ve, nuevamente ahorrando tiempo en el proceso de traducción. Utilizando el método anterior, puede convertir su sitio en bilingüe de forma rápida y sencilla.
Traducción automática de su contenido
En el versión gratuita de TranslatePress, apoyamos plenamente el uso de Google Translate a través de una clave API, lo que significa que puedes traducir automáticamente tu contenido:
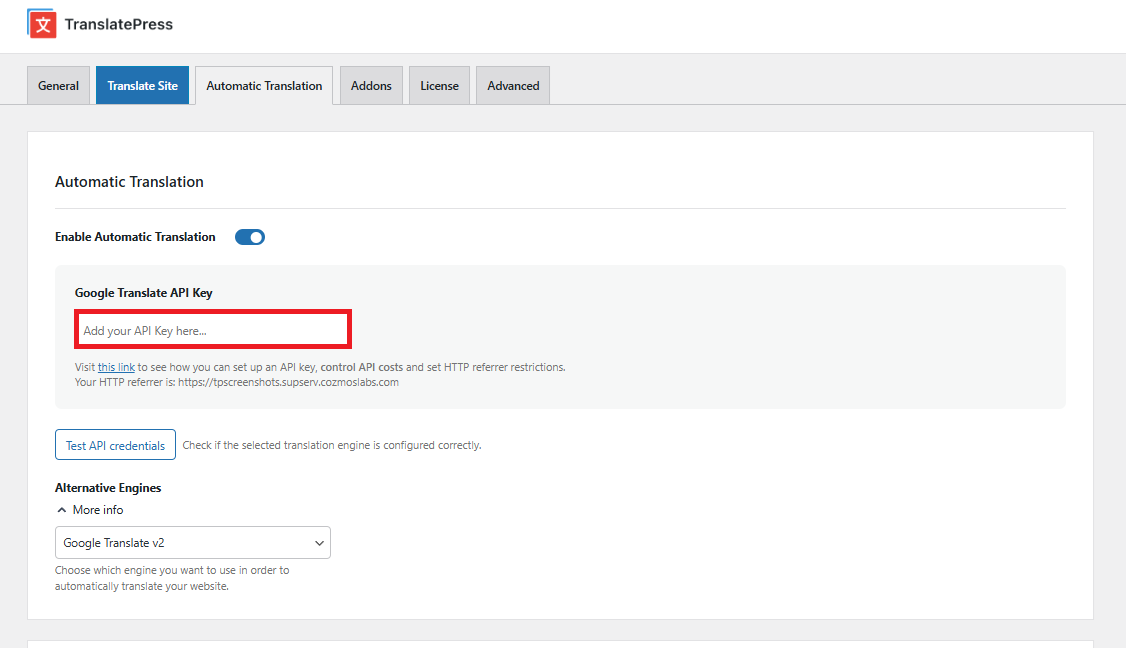
Hemos elaborado una guía para que sepas cómo traducir tu contenido automáticamente con Google Traductor, llevándote a través de todo el proceso.
DeepL es otro popular servicio de traducción, reconocido por sus traducciones automáticas de alta calidad, que está disponible en el versiones premium de TranslatePress.
Beneficios de crear un sitio web bilingüe
Hay un montón de razones para crear una página web bilingüe; estas son algunas de las ventajas:
- Al traducir tu contenido, en la práctica estás abriendo tu página web a un público completamente nuevo en otro idioma.
- No todo el mundo hablará tu idioma nativo; traducir tu contenido/sitio y formularios de contacto podría atraer una gran cantidad de nuevos clientes y visitantes hacia tu negocio.
- Ayuda a mejorar la experiencia del usuario para los visitantes que hablan el idioma al que has traducido.
- Con TranslatePress, podrás añadir idiomas adicionales a medida que tu sitio web crezca gracias a las visitas internacionales. Es la forma más fácil de aumentar el tráfico multilingüe.
Concluyendo
Si quieres mejorar aún más tu página web bilingüe, disponemos de una gama de complementos premium para que te resulte aún más cómodo.
- Complemento SEO Pack:– editar slugs de URL sincronizar idiomas, etiquetas ALT de imágenes, modificar los metadatos OpenGraph por idioma, compatibilidad con mapas de sitio multilingües o bilingües (funciona con todos los plugins de SEO de WordPress).
- Complemento multilingüe:- Si necesitas más de dos idiomas, este complemento es compatible con más de 221 idiomas.
- Complemento de navegación basada en el idioma:- Mostrar diferentes elementos del menú según el idioma.
- Complemento de traducción automática de DeepL: Traducción automática del contenido de su sitio web mediante la API de DeepL.
- Detección automática del idioma del usuario: Redirigir automáticamente a los usuarios al contenido traducido correspondiente en su idioma.
TranslatePress Multilingüe
Ahora que ya conoces todos los pasos para convertir tu página web en bilingüe o multilingüe, empieza hoy mismo y disfruta de las ventajas de que tu contenido esté disponible en más idiomas.
¿Todavía tienes alguna duda sobre las páginas web bilingües? ¡Cuéntanoslo en los comentarios!
Si encontraste útil esta publicación, por favor visita nuestro Canal de YouTube, donde subimos constantemente tutoriales en video cortos y fáciles de seguir. También puedes seguirnos en Facebook y Twitter ser el primero en enterarte cada vez que publicamos.