
In this post
In this post
Looking for a simple way to translate an Elementor site and go multilingual?
Elementor is one of the most popular WordPress page builders for a reason – it lets you use a visual, drag-and-drop interface to design beautiful content without requiring any special technical knowledge.
You can create landing pages, popups, and even design your entire WordPress theme or WooCommerce shop with the premium version.
One thing that you cannot do with the Elementor plugin, though, is offer your website in multiple languages.
In this post, we’ll show you how to fix that with TranslatePress, a WordPress translation plugin that follows the visual style of Elementor. Just like Elementor lets you design your content using a visual interface, TranslatePress lets you translate all of your Elementor content using a simple visual translation interface like this:

All you do is click on the Elementor widget that you want to translate and you can edit its translation in the sidebar. Better yet, this method also works perfectly with Elementor Theme Builder and Popup Builder, as well as all of the other content on your WordPress site.
You can translate your site from scratch manually or use the built-in TranslatePress AI service to leverage machine translation from multiple top services, such as Google Translate, DeepL, and Microsoft Translator.
Ready to learn how to set it up? Here’s how to translate an Elementor site with TranslatePress.
What You Need to Translate an Elementor Site on WordPress
To translate an Elementor site, you only need to use one tool: TranslatePress.
TranslatePress Multilingual
TranslatePress is a freemium WordPress translation plugin that works with Elementor right out of the box – no need to mess with workarounds or compatibility settings.
As you saw above, TranslatePress gives you a visual interface from which you can manage all of your translations.
It works with all Elementor content and widgets. For example, you can translate sliders, popups, forms, theme builder templates… anything! You can even translate the images and URLs in your Elementor designs so that visitors get different images or URLs based on their chosen language.
You can either manually translate all of your Elementor content. Or, you can start by automatically translating your content with the built-in TranslatePress AI service and then manually refining those translations as needed. In addition to TranslatePress AI, you also have the option to connect your Elementor site directly to Google Translate or DeepL.
Finally, the translated versions of your Elementor content are fully SEO friendly, which means Google can index and rank them. TranslatePress also implements other multilingual SEO best practices like hreflang tags and multilingual sitemaps.
Below, we’ll show you exactly how to translate Elementor, and the rest of your WordPress website, using TranslatePress.
How to Translate an Elementor Site: Step-by-Step Guide
Here’s a bird’s eye view of the different steps that we’ll take you through:
- Create your content with Elementor (if you haven’t already done so)
- Install TranslatePress and choose the language(s)
- Set up automatic translation (optional)
- Open the visual translation editor and start translating Elementor
1. Create Your Content With Elementor
Note, if you’ve already completed the Elementor content/design that you want to translate, you can click here to skip ahead to step two.
To get started, you’ll want to create the design for your Elementor content in your native language. This could be a:
- Regular post or page design.
- Theme template using Elementor Theme Builder.
- Popup using Elementor Popup Builder.
For this first example, we’ll just create a regular page using an Elementor template, but later on, we’ll show you how things work with popups, Theme Builder templates, and some specific Elementor widgets.
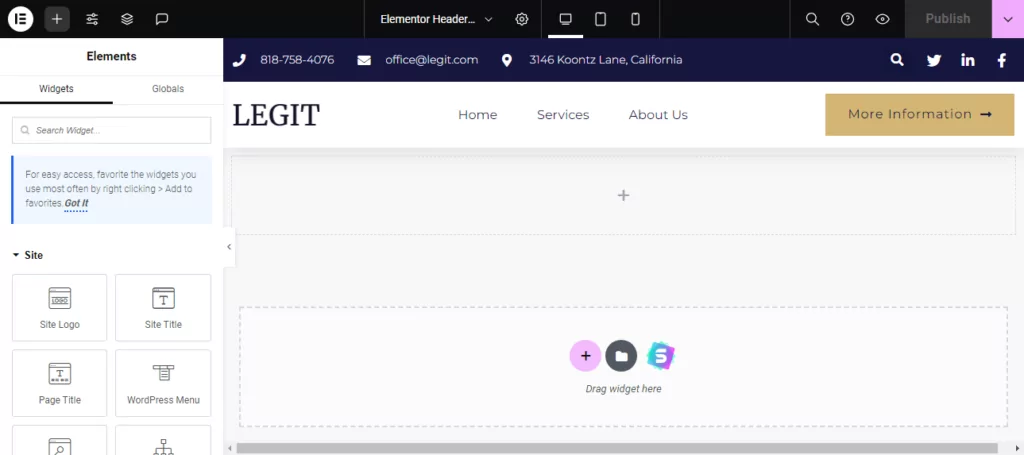
We’re using the Elementor Canvas template, which gives us a 100% blank canvas with no content from our theme. However, you can also just use a normal template because TranslatePress will also let you translate your theme content and even edit strings coming from any other plugins that you’re using.
Here’s the pre-built Elementor template that we chose:

2. Install TranslatePress and Choose Language(s)
Once you’ve created your Elementor content in your site’s native language, you’re ready to install TranslatePress and choose the language(s) into which you want to translate your Elementor content.
To get started, install and activate the free TranslatePress plugin from WordPress.org.
Once you’ve activated the plugin, go to Settings → TranslatePress to choose the language(s) that you want to use.
First, choose the Default Language, which is the language that your Elementor content currently exists in. Then, add the new languages that you want to offer using the drop-down:
With the free version of TranslatePress, you can translate your Elementor content into one new language, while the premium version of TranslatePress lets you use unlimited languages.
In this settings area, you can also configure a few other important settings like adding and customizing a front-end Elementor language switcher. By default, TranslatePress adds a floating language switcher button in the bottom-right corner of your site which follows you as you navigate the site, but you can disable it if you want to use some other type of switcher.
3. Set Up Automatic Translation (Optional)
This step is 100% optional – TranslatePress does not force you to use automatic translation and if you prefer to translate all of your Elementor content manually from scratch, you can click here to skip ahead to the next step. Even if you do use automatic translation, you can always go back and manually edit all of your Elementor translations.
If you want to save time and ensure comprehensive translations, TranslatePress gives you the option to use automatic machine translation on your site’s content.
The fastest and easiest way is to use the built-in TranslatePress AI service, which automatically finds the best translation from multiple top translation services. You get a free amount of usage with any TranslatePress license and you can also top up your usage if you ever need to exceed that.
Or, TranslatePress also lets you connect directly to Google Translate or DeepL. You can use Google Translate with the free version of TranslatePress while DeepL requires the paid version.
If you do use one of these services to translate your site’s content, TranslatePress will locally store the finished translations which means that you:
- Don’t have to connect to the external service for each visit, which improves page performance;
- Can edit those translations as much as you want and save your changes;
- Only need to pay the external translation service one time*.
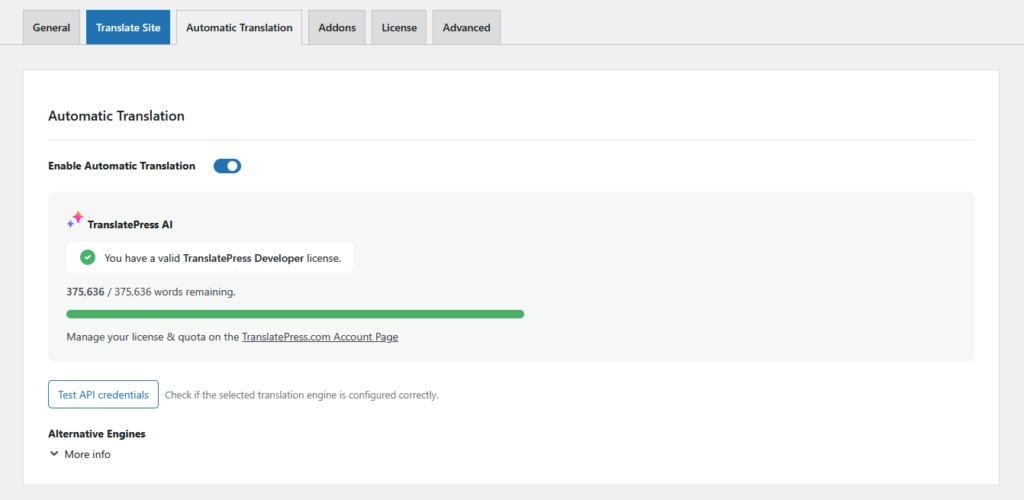
If you want to enable automatic translation:
- Go to the Automatic Translation tab in the TranslatePress settings.
- Use the drop-down to turn on automatic translation.
If you’re using TranslatePress AI with any paid TranslatePress license, your site will already be connected via your TranslatePress license key. Just click the Save Changes button and TranslatePress AI will start automatically translating your site.
If you want to connect directly to Google Translate or DeepL, you’ll need to create an API key for those services and then add it to this settings area.
4. Open the Visual Translation Editor and Start Translating
At this point, you’re ready to start translating your Elementor content (or editing your machine translations, if you opted to use TranslatePress AI in the previous step).
To access the TranslatePress visual translation editor, open the Elementor design that you want to translate on the front-end of your site. Then, click on the Translate Page option in the WordPress toolbar:

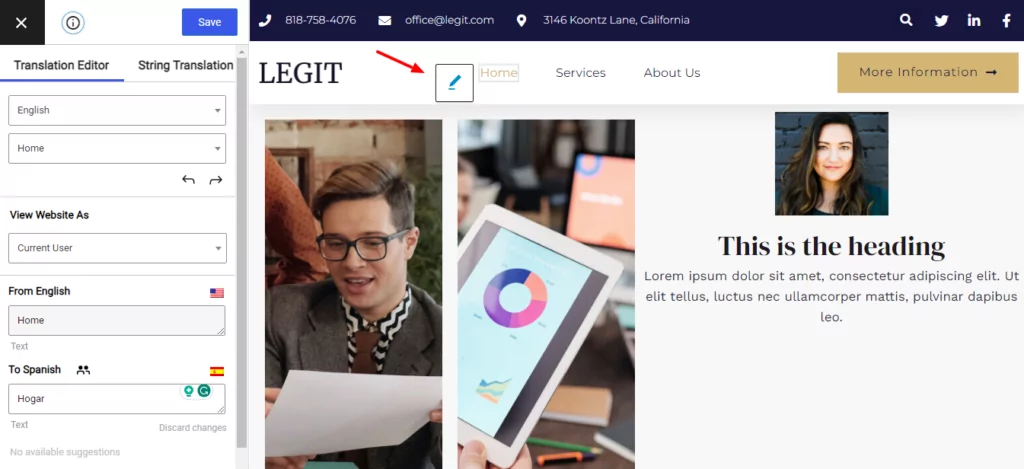
In the visual translation editor, you should see a live preview of your Elementor content on the right and a translation sidebar on the left.
To translate a piece of Elementor content, hover over it on the live preview and click the pencil icon. That will open the translation in the sidebar, where you can make your edits:

If you used automatic translation, the translations should already be there. Otherwise, you’ll see an empty field for content that you haven’t translated yet.
And that’s it! You now know how to translate an Elementor site into different languages. Next, let’s look at how to translate specific Elementor widgets or features.
Examples of How to Translate Specific Elements in Elementor
At this point, you know how to translate an Elementor website at a high level, but there are a lot of different content types and editing options in Elementor. So next, let’s look at how you can use TranslatePress with specific parts of your Elementor content/designs.
Here’s what we’ll cover:
- Images
- URLs
- Sliders
- Forms
- Theme Builder templates
- Popups
- WooCommerce Builder designs
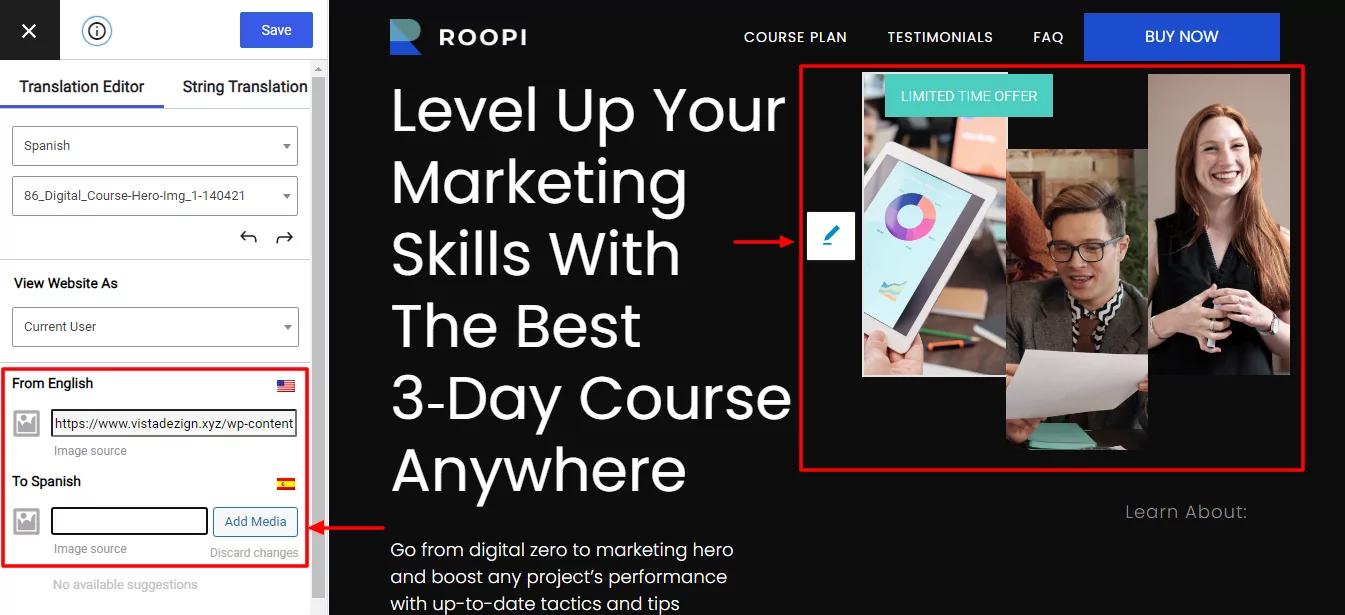
How to Translate Elementor Images
In order to fully localize your Elementor designs, it’s not enough to just translate the text – you also need to make sure that the images you use make sense in each language.
To help you do that, TranslatePress lets you “translate” your Elementor images so that you can display different images based on a user’s chosen language.
To do this, hover over an Elementor image and click the pencil icon. Then, you can select a different image in the sidebar:
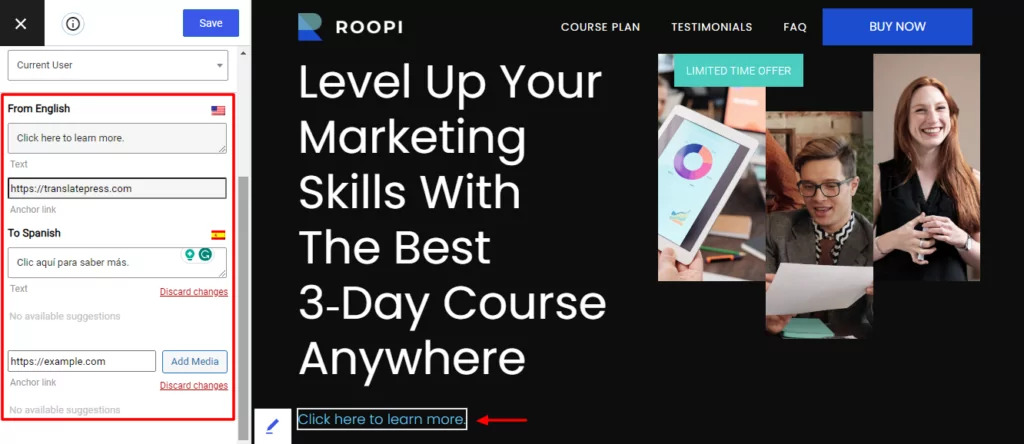
How to Translate Elementor URLs
Translating the internal and external URLs in your Elementor content is another important part of localizing your designs. For example, you might want the destination URL of a button to go to a different page based on a user’s language.
TranslatePress automatically rewrites internal links to use the proper language and you can also change external URLs when you edit a button or link. Here’s what it looks like:
How to Translate Elementor Sliders
You can use the same approach to translate the content in a slider that you create with the Elementor Slides widget:

You can even translate the URLs in your Elementor slider.
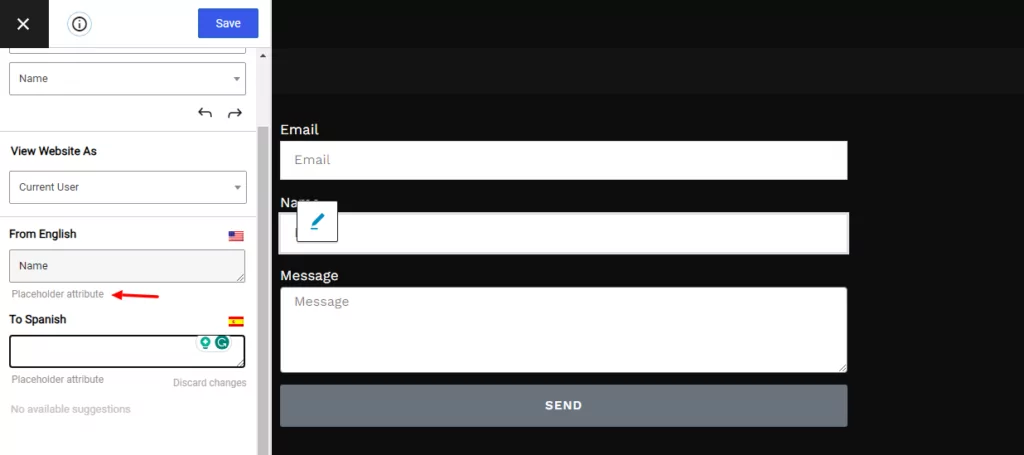
How to Translate Elementor Forms
If you’re using the Form widget to create forms with Elementor, you can use TranslatePress to translate forms:
- Labels
- Placeholder text
- Buttons
TranslatePress will even tell you whether you’re translating regular text or a placeholder attribute:
How to Translate Elementor Theme Builder
Next, let’s shift over from specific widgets and look at how you can translate the templates that you create with Elementor Theme Builder or Popup Builder.
Here’s a pre-built header template from Elementor:
To translate the header, you can open the TranslatePress editor on any page where the header template is active:
Then, you can translate the header content just like normal. Once you translate it once, TranslatePress will automatically apply those changes to all the pages where the header is active – you do not need to translate it each time.
The same approach works for other types of Elementor Theme Builder templates, too.
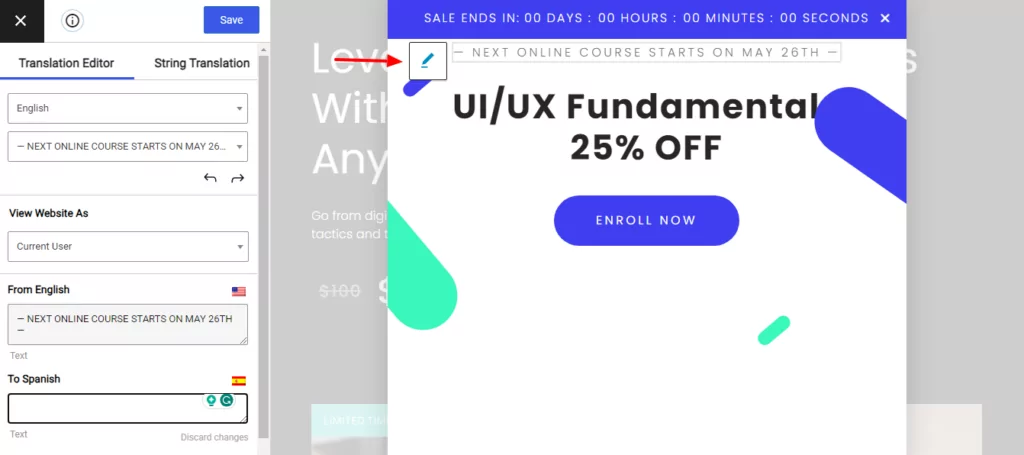
How to Translate Elementor Popup Builder
If you’re using Elementor Pro to create popups, you can also use TranslatePress to translate those popups.
To access a popup’s translations, open the editor for the popup template. Then, click the Preview Changes button:
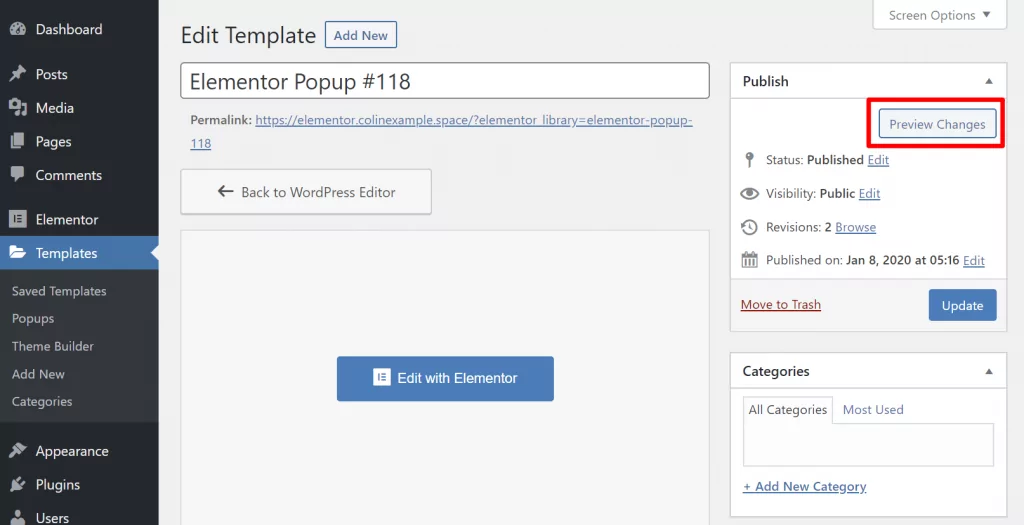
On the front-end live preview, click the Translate Page button on the WordPress toolbar.
Then, you can translate your popup just like you would any other Elementor content:
How to Translate Elementor WooCommerce Builder
If you’re using Elementor to design your WooCommerce store, you can also use TranslatePress to translate WooCommerce and any designs/templates you create with Elementor WooCommerce Builder.
For a deeper look here, you can check out our guides on how to translate WooCommerce products or create a multilingual WooCommerce store.
How to Exclude Elementor Widgets or Sections from Certain Languages
Now that we’ve seen how to translate different types of content on your multilingual Elementor site, let’s look at a different scenario.
There will be situations where you’ll need to display certain content in a certain language only, and hide it on all the others. Or pick the languages where it shouldn’t appear.
TranslatePress integrates with Elementor, making this easy to achieve directly from Elementor’s visual interface.
Restrict Elementor Content to a Certain Language
Let’s look into how to restrict any Elementor widget or section to a certain language.
For this simply click on the widget or section you’re looking to restrict, then go to the Advanced tab, where you’ll find the Restrict by Language option. Set the option to Yes and select the language in which you’d like to show the selected element.
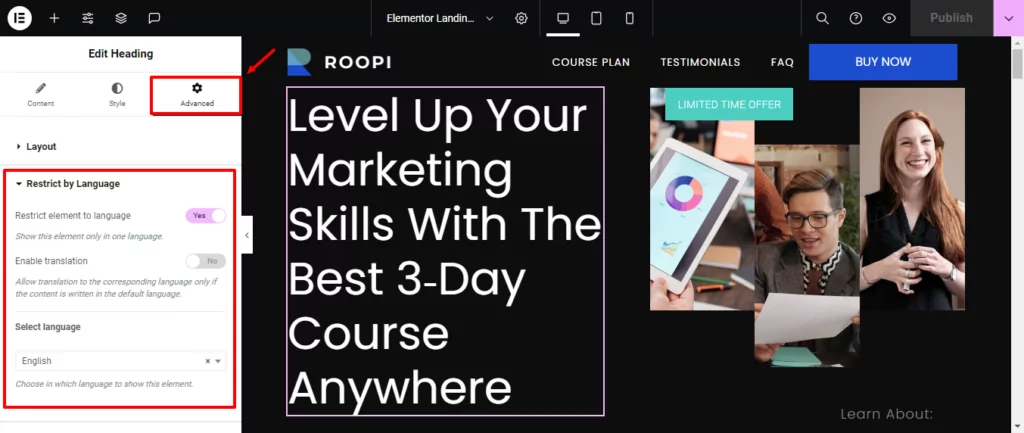
The element will now display only on the selected language.
Exclude Elementor Content from One or More Languages
If you’d like to display a widget or section in all languages, except for some, you have another extra option, called Exclude from Language.
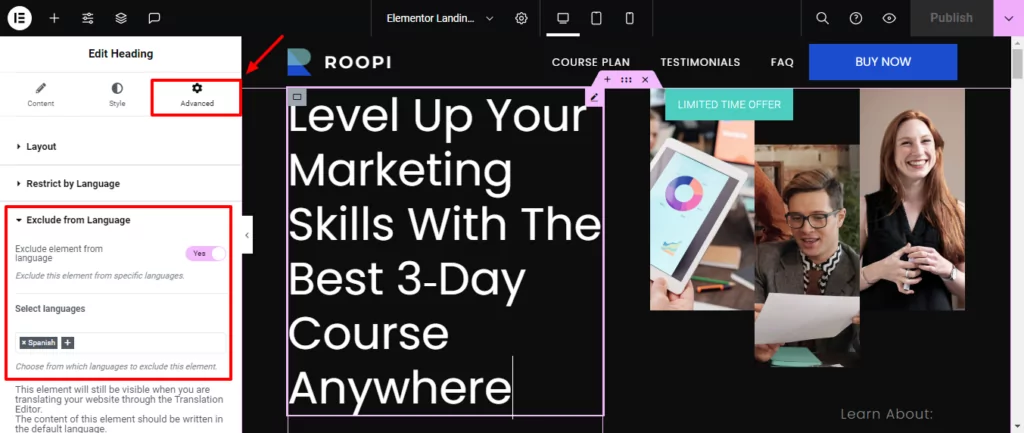
Both of the options mentioned above add a lot of flexibility when it comes to displaying different types of content for different languages. They come out of the box when you’re using Elementor together with TranslatePress.
You can also watch this video for a short and concise step-by-step tutorial on how to use TranslatePress with your Elementor website:
Reasons to Upgrade to TranslatePress Premium
Other than automatic translation with TranslatePress AI, you can do everything that you saw with the free version of TranslatePress at WordPress.org.
If you want a little more functionality or flexibility, though, you can consider upgrading to one of the paid versions of TranslatePress. Here’s what you get:
- TranslatePress AI – you’ll get a certain amount of free usage with your license and you can also manually add more credits if needed.
- Improved multilingual SEO – while the free version creates SEO-friendly indexable versions of your translated content, the paid version enhances the plugin’s multilingual SEO capabilities. For example, you can translate URL slugs and SEO meta, create multilingual sitemaps, and more.
- Multiple translation languages – you’ll be able to translate your Elementor site into unlimited new languages.
- DeepL support for automatic translation – the free version lets you connect directly to Google Translate for automatic translation, but you’ll need to go Pro if you want to connect directly to DeepL.
- Translator accounts – create dedicated translator accounts for people to manage your multilingual content.
- Browse as user roles – browse your content as different user roles to translate restricted content.
- Navigation based on user language – show entirely different menu items for different languages (versus just translating the same set of menu items like you can with the free version).
Translate Your Elementor Site With TranslatePress Today
With TranslatePress, you can translate an Elementor site using the same visual approach that you love so much in Elementor.
TranslatePress Multilingual
All you do is point and click and you’ll be able to translate Elementor widgets, templates, popups, and more.
To get started, you can install the free version of TranslatePress from WordPress.org. Then, upgrade to one of the premium versions to get the most from your multilingual Elementor website.
If you found this post helpful, please check out our YouTube channel, where we constantly upload short & easy-to-follow video tutorials. You can also follow us on Facebook and X to be the first to know each time we post.
Thanks. It is very detailed
Such a detail guide. I’m using Elementor for my site and intend to offer multiple languages on my site. TranslatePress is a really useful plugin that I think I will try.
Hello! I am thinking about using this plugin for my multi language WordPress site the only thing I need to know is if there is possible to translate the content also I have in the backend of my site.
What I mean by this is the fact that I have a business listing directory website and use ACF plugin and Custom post types as well to create the listing pages.
The text and paragraphs of any business listing directory page I create are with the Gutenberg editor on the backend. And after that, I create and save an elementor pre-made template to do make my customization, dynamically.
The problem that might come up, is that I really don’t know if it’s possible to translate the post content widget (of elementor) to the other language, or this is something I need to use on the backend area of my original content text (that I create with Gutenberg blocks).
Because of the fact that I create the post content with Gutenberg editor maybe not let me use the translation plugin to edit it in the frontend…
I don’t know if you know what I mean!
Please let me know if there is any solution to this…
Thanks.
Hi Dimitri,
As long as the content is displayed in the front-end, you should not have any troubles translating it using TranslatePress.
From what you’re describing it looks that all custom fields & post types content will be displayed in the front-end, so it should work.
Hey I am trying to use this with my site using Elementor but I am not getting any pencil icons on my content.
What could be preventing the pencil icons from appearing?
Thanks!
Benjamin
Turns out that it works just fine I must’ve missed saving the second language. 🙂
Hello there,
We are using Deep Theme with Elementor, Would it be ok to use TranslatePress? and do you have live chat support ?
Yes, if the theme is translation-ready, you should have no problem using TranslatePress to translate Elementor content & more.
Dear All,
I would like to have my website to have an English version (currently it’s in my native language and I’m using WordPress with Elementor). My question is, that once I translate all the content, how would it be displayed? Would there be a button somewhere which would say English, or how will my visitors be able to switch to the English version?
Thanks in advance!
Hi Kata,
Once you translate all your content, you can set up a language switcher (and customize its looks) to allow users to navigate your website in the language they want: https://translatepress.com/docs/settings/#language-switcher
Hello, great post ! very useful.
However, you are not showing how to translate the custom messages of Elementor forms: success message, error message, etc… you know ?
“An error occured.”
“This field is required.”
“There’s something wrong. The form is invalid.”
And I can’t find how to do that. The only one I was ale to translate was the success message when simulating to register when translation is on going, but that’s it ! can you help ?
You simply trigger those and translate them directly from the front-end. So submit the form without a required field and you’ll get the error, which you can then translate.
Do the translations run on their own sub domains
Each translation, except for the default language is in a separate subdirectory. /en, /fr, /es and so on.
You can use a subdirectory for the default language as well.
Hi,
How to avoid changin the layout, for example Ar will change writing mode, but i want to keep just one writing mode while.
Lets say English is default, i want to keep english mode for AR, but the languge should be AR.
Is this possible?
Hello! Unfortunately, the layout changes are dependent on the theme your site is using and not the TranslatePress plugin. It all depends on whether that specific theme supports RTL languages or not. If you need more help with this, don’t hesitate to reach out to our support team here: https://translatepress.com/support/