In this post
In this post
Are you wondering how to use Poedit to translate WordPress? If so, you’re in the right place.
Translating a WordPress website (and its associated plugins and themes) involves a lot of work. Without the right tools, you won’t even be able to access the files and content that you want to translate.
Fortunately, there are a lot of options when it comes to tools for translating WordPress. This applies whether you want to translate plugins and themes as well as your site’s content.
In this article, we’re going to talk about WordPress translation in general, then introduce the Poedit tool. We’re going to show you how Poedit WordPress translations work, and also discuss some alternatives. Let’s get to it!
An Introduction to WordPress Translation
Translating a website is almost never as simple as opening an HTML file and changing the text within. In practice, if you want a multilingual website, you need to translate all of your site’s components and use specific files to store the information.
WordPress uses dedicated language files to store translations of your site’s content (or strings of text) in other languages. Those files come in two formats:
- Portable Object (PO) files: You need a unique PO file for each language you add to your site, and includes manual translations.
- Machine Object (MO) files: These translation files are machine-readable (i.e. they can be read by WordPress) and are generated from PO files.
Usually, the WordPress translation process starts with a PO file for each language you want to add. This file includes every single translated string. If you miss any text, your website will display the information in its original language, which you obviously want to avoid.
When you see plugins and themes that boast they’re ‘translation ready’, it means they include a Portable Object Template (POT) file. This includes all of the strings of the plugin or theme in a format that’s easy to read and translate into individual PO files. POT files usually look something like this:
“Language: English\n”
“MIME-Version: 1.0\n”
“Content-Type: text/plain; charset=UTF-8\n”
“Content-Transfer-Encoding: 8bit\n”
“Plural-Forms: nplurals=2; plural=(n != 1);\n”
msgid “Hello”
msgstr “”
Once you have a PO file for your target language (including a full translation), you can compile it into an MO file. In theory, you can go through the entire process using a text editor and the command line. However, there’s little reason to do so when you have plenty of tools to help simplify the work.
One such tool is Poedit. This lets you create PO and POT files, edit them, and compile MO files. This is all done through a user-friendly interface. Let’s check out how it works next.
How to Use Poedit to Translate WordPress Manually (2 Steps)
Using Poedit to translate your WordPress themes and plugins is remarkably simple once you’ve installed the tool. For this tutorial, we’re going to be using the free version of Poedit. There’s also a premium version available, including translation ‘suggestions’ and semi-automatic localization. However, if you just want a tool to simplify manual translations, the free version of Poedit will do.
Step 1: Create a POT File for Your Plugin or Theme
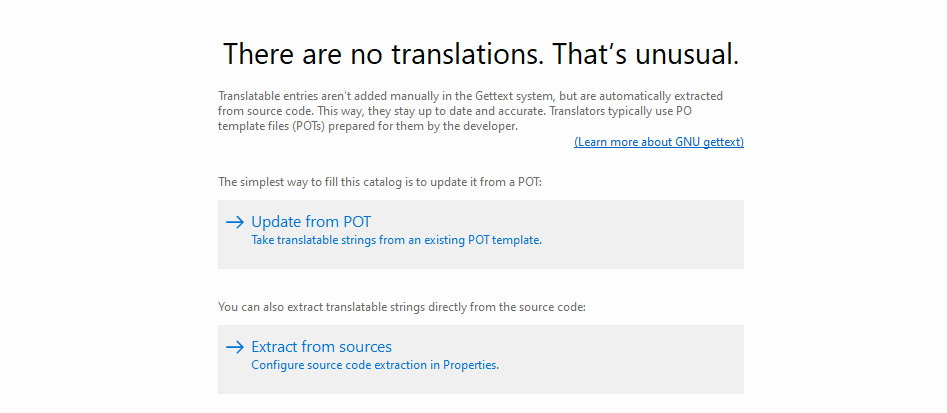
You can use Poedit to pull all the strings from any plugin or theme you’re working on and use this to generate a POT file. To do so, open Poedit and go to File → New.
The program will ask you to select the language you want to generate a new file for. Once you’ve done this, on the next screen click on Extract from sources:
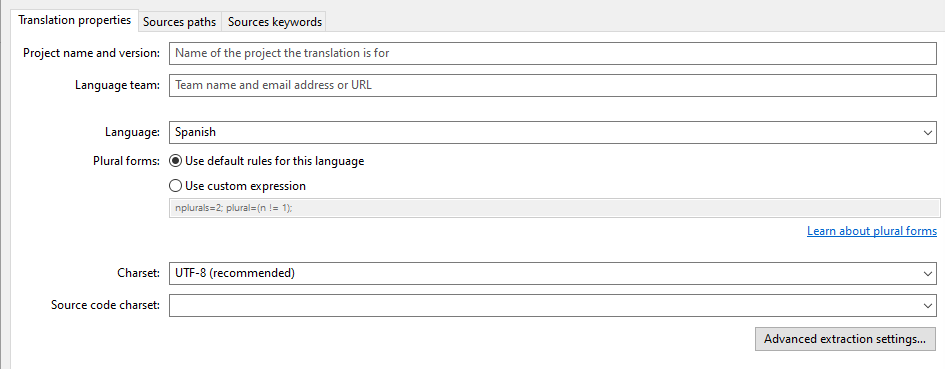
From here, set a name for your project under Translation properties and confirm the language you chose earlier:
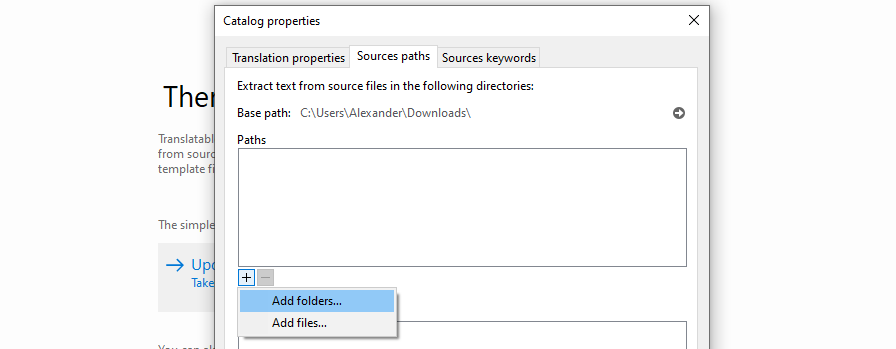
Confirm the changes to the project, then go to File → Save. Poedit requires you to save the project before you can move on. After you do so, reopen the Extract from sources window and this time, go to Sources paths.
Here is where you tell Poedit which files and folders to look into to extract their text strings. Your plugin or theme should have its own folder, so click the + icon under Base path and select it:
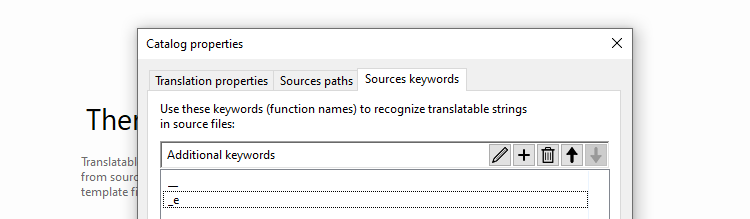
After you select your theme or plugin’s folder, go to the Sources keywords tab and look for the + button there. Click it and add the following two keywords:
- __
- _e
The selection should look similar to the following:
Click on OK and Poedit will start extracting all the text strings it can find. Once the process is complete, you’ll end up with a list similar to the following:
In the next step, we’ll show you how to translate this text. Before moving on, close Poedit and find the project file you just set up. It should be a PO file, but you’ll want to rename it to a POT file.
This is because we want to use the file as the source for all your translations. Poedit will be able to open it just the same, but when you do so, it will ask you what language you want to create a translation for, before generating new PO files for those.
Step 2: Open an Existing PO File
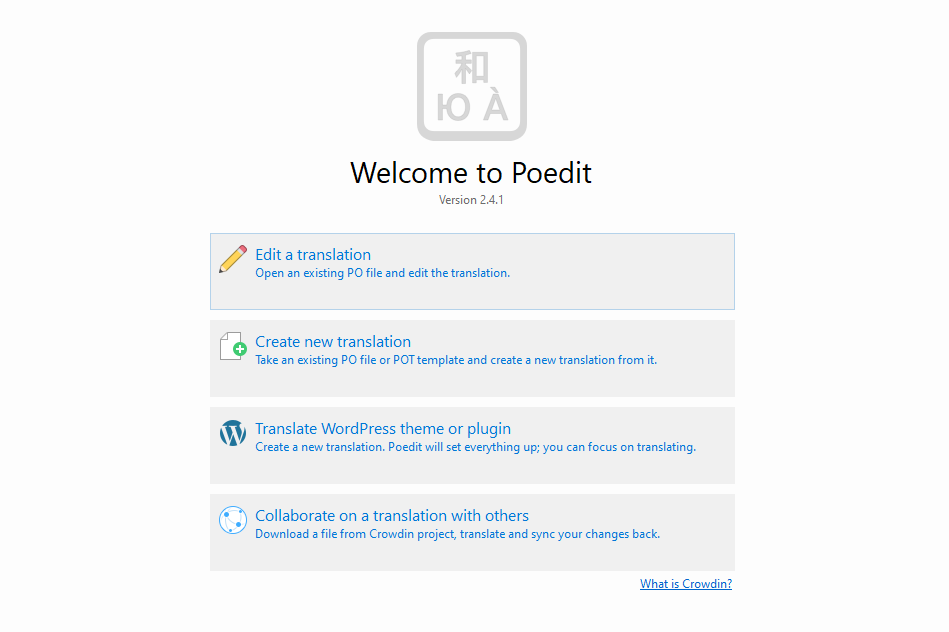
As soon as you launch Poedit, you’ll see the options to either edit or create translation files:
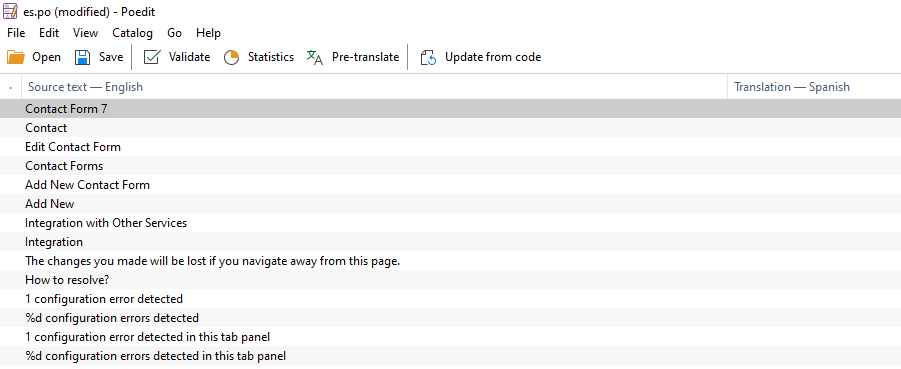
Opening a PO or POT file is very straightforward. Simply select the top option, find the file on your computer, and that’s it! As long as the file is formatted, you’ll see a list of all the strings it contains:
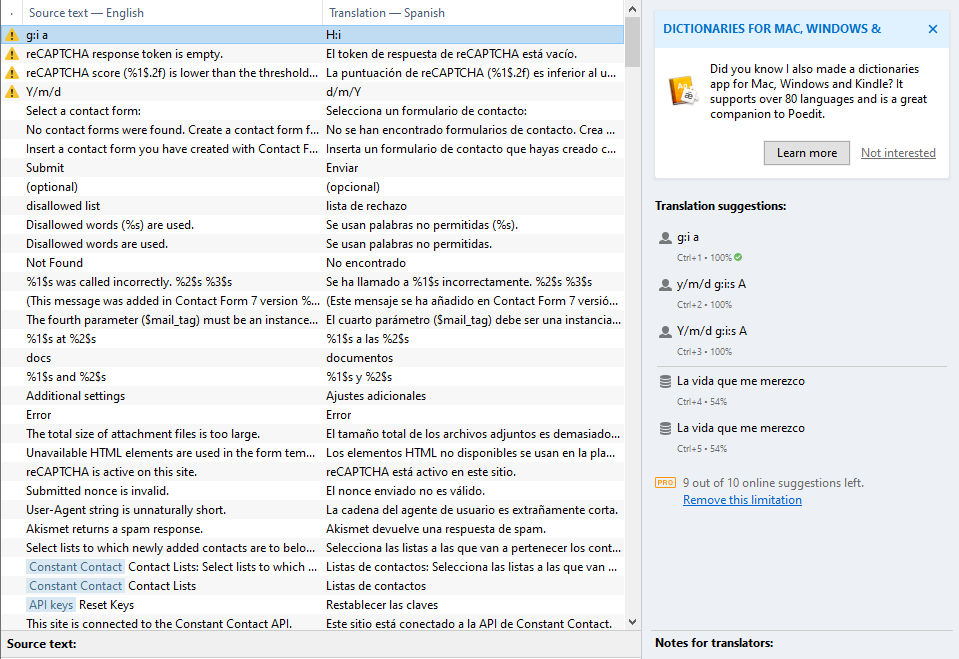
The example here uses a Spanish PO file for Contact Form 7. To translate the plugin, you need to click on each available string in its original language, then use the Translation field at the bottom to enter your translation:
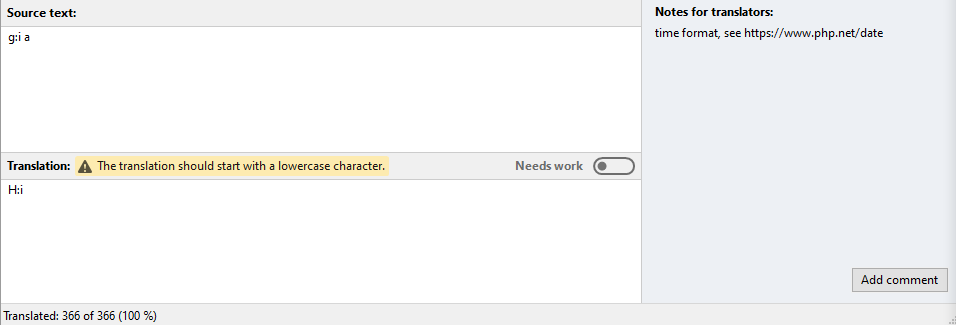
Notice that you can add notes for other translators using the Add comment button on the right. Poedit also includes suggestions from Microsoft Translator, which can help you localize strings. The free version of Poedit limits you to only 10 suggestions though, which run out pretty quickly in our experience.
As you progress through translating a PO file, you can save the changes you’ve made at any time. When you’re completely done with translating, you can open the file menu and select the Compile to MO option.
In our experience, compiling an MO file should only take a few seconds. When it’s done, you’ll have a file that WordPress can interpret and pull data from. However, given that we’re talking about a machine-readable file, if you try to open it using a text editor, you’ll see something like this:

Unless you’re a computer, this won’t make any sense. In any case, it’s data that WordPress can easily interpret.
When You Should Use a Translation Plugin Instead
Although Poedit works just fine, it’s not necessarily the easiest way to translate a WordPress website. For one, it doesn’t provide you with a way to translate content, only the strings within your plugins and themes. This is a great solution for admin work, but not so hot if you want to create a multilingual website. In this case, you’ll want to use a plugin such as TranslatePress:
TranslatePress Multilingual
TranslatePress enables you to translate your website both manually and automatically using TranslatePress AI or services like Google Translate and DeepL. However, for this section, we’ll focus on manual instead of automatic translation.
First, you can use the free TranslatePress plugin to add languages to your site, but there’s also a premium version available. This adds features such as being able to translate your site into multiple languages, automatic language detection for users, TranslatePress AI, and much more.
To get started, install and activate TranslatePress. Then, go to Settings → TranslatePress on your WordPress dashboard, and look under the All Languages section. You’ll see your site’s default language here, along with an option to add new ones:
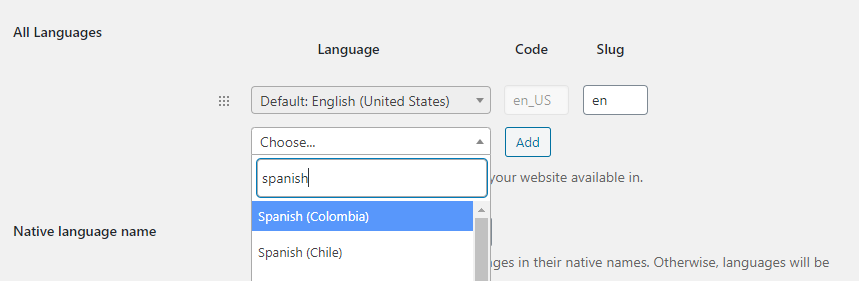
Here, select the language you want to translate your site to, and click the Add button. Now save the changes to the plugin’s settings and look for the Translate Site option on your admin menu at the top of the screen.
Clicking this button will open a new window with the TranslatePress translator to the left, with your site to the right. Now, you can click on any text element on your site and you’ll see its string appear on the editor to the left:

If you switch your site’s language using the menu to the left, you’ll be able to see translated strings appear on your site as you edit them. Take a look at the example below:

This is one of the primary advantages of using TranslatePress. With a basic text editor, you can translate as many strings as you want. However, you won’t see how the text looks on your website until you carry out a time-consuming save and compile of your PO files into the MO format. Also, you might miss context, since you can’t be sure where each string is located. TranslatePress makes sure everything you translate is within context since you see all text as it appears on the final website.
Another advantage is that TranslatePress lets you edit plugin and theme-generated strings, as well as your own content. This means it provides a one-stop solution for translating all the text users see when they visit your site.
If you want to localize the plugin and theme text you see on your dashboard, you can use Poedit to help you. However, most popular plugins and themes come with translations in multiple languages. TranslatePress will automatically recognize these translations (based on the selected language) and load them correspondingly. This means you might not need to localize strings manually unless you’re working on a project of your own.
Conclusion
Translating a WordPress website is a significant undertaking, particularly if you have a large library of content. If you’re going to add more languages to your website, you’ll want to use a tool that makes the work easier (for your own sake).
You can use both TranslatePress and Poedit to tackle those translations. TranslatePress is ideal for translating all the text elements that your users will see, including themes, plugins strings, as well as content in general. In contrast, Poedit can primarily only help you translate plugin and theme interfaces.
TranslatePress Multilingual
Do you have any questions about how to use Poedit to translate WordPress? Let’s talk about them in the comments section!
If you found this post helpful, please check out our YouTube channel, where we constantly upload short & easy-to-follow video tutorials. You can also follow us on Facebook and Twitter to be the first to know each time we post.


Thanks for this great tutorial, I use a plugin that use Poedit fro translations, I configured it easily with this tutorial.
A very useful explanation. Thanks.