
In this post
In this post
There are a lot of fantastic WordPress form plugins you can use. However, Gravity Forms remains one of the most popular premium options on the market. One of the only downsides to using this plugin is that it doesn’t enable you to set up multilingual forms out of the box.
However, you can quickly resolve this issue by using TranslatePress. Our plugin enables you to quickly and accurately translate as many custom forms as you want into as many languages as you need to reach your international audience.
In this article, we’ll talk about why you need to translate the forms on your website. Then we’ll show you how to make Gravity Forms multilingual with TranslatePress in four simple steps. Let’s get to it!
Why You Should Translate Your WordPress Site’s Forms
Forms are a vital element for most websites. They enable you to interact with and engage with your audience in key ways. Some of the most common examples you can find on the web include:
- Contact forms. These forms provide fields for users to send you messages, usually for customer support purposes. However, they can also be useful for scheduling, custom ordering, and more.
- Lead capture forms. In exchange for access to exclusive content, you can ask visitors to input their email addresses into a lead capture form. This enables you to reach out to them in the future with promotional offers and other marketing messages.
- Email signup forms. Especially if you have a regular newsletter, a form where users can enter their email addresses to receive more information or content from you is key.
- User registration forms. If users can create accounts on your site, a registration form is necessary to collect key information such as their usernames and passwords.
- Order checkout forms. On e-commerce sites, forms are used to collect customer information for payment processing and shipping.
WordPress form builder plugins are one of the easiest ways to add forms like the ones listed above to your site. Unfortunately, even high-quality ones such as Gravity Forms don’t include multilingual fields by default.
Forms are never decorative. You want as many visitors as possible to use them, which means they need to be easy to understand and interact with. If your users see a form in a language they don’t know, they probably won’t fill it out.
To successfully translate your WordPress website into other languages, you can’t overlook any elements, forms included. Otherwise, you probably won’t be able to achieve the same conversion rates on your translated pages as you do on the pages in your site’s original language. Ultimately, this means you’re missing out on a chance to generate more revenue.
How to Make Gravity Forms Multilingual with TranslatePress (In 4 Steps)
As we already briefly mentioned, Gravity Forms is one of the best WordPress form builder plugins:
It includes more than 30 pre-built fields you can use to design custom forms for your site. On top of that, it can integrate with most popular email marketing platforms to automate some of your workflows, implement conditional logic for complex forms, and comes translation ready.
However, that doesn’t make Gravity Forms multilingual out of the box. You still have to translate it in order to display your forms in languages other than English.
That’s where our TranslatePress plugin comes in. Below, we’ll walk you through how to use it to make Gravity Forms multilingual. Before you get started, just make sure you have both plugins installed and activated on your site.
TranslatePress Multilingual
If you haven’t translated a website before, you may want to check out the free version of TranslatePress first. It enables you to translate most key elements on your website, including strings, shortcode outputs, and of course, forms.
Step 1: Set Up a Basic Form
As we said, Gravity Forms includes a broad number of pre-built form fields and templates you can use on your website. You have options for a wide range of use cases, including contact forms, account signups, e-commerce checkouts, job applications, and more:
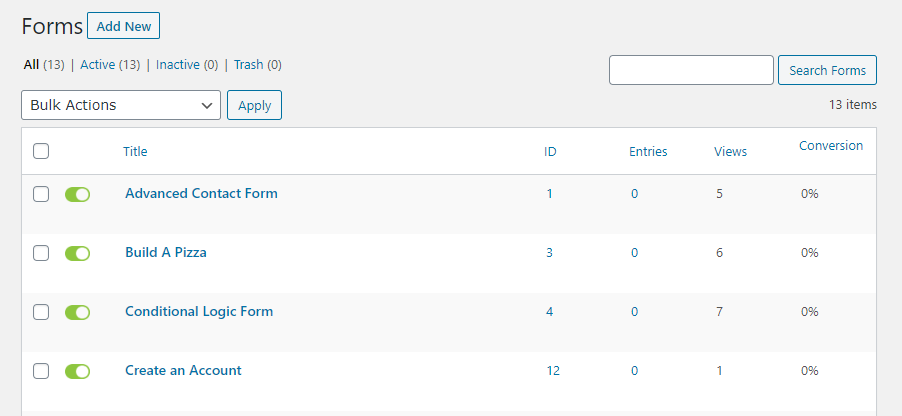
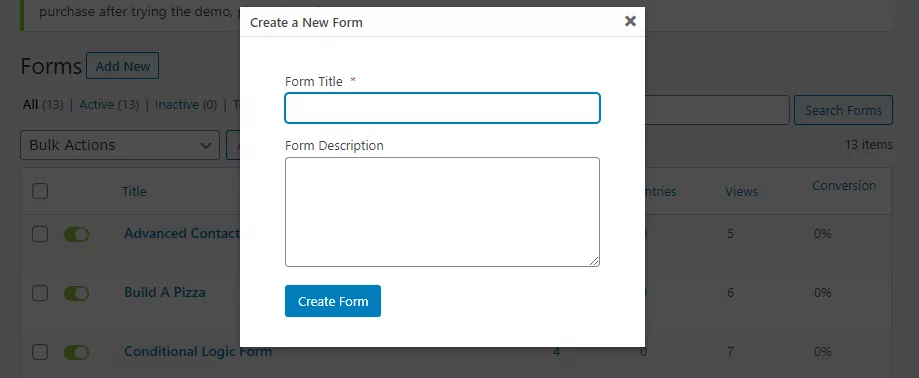
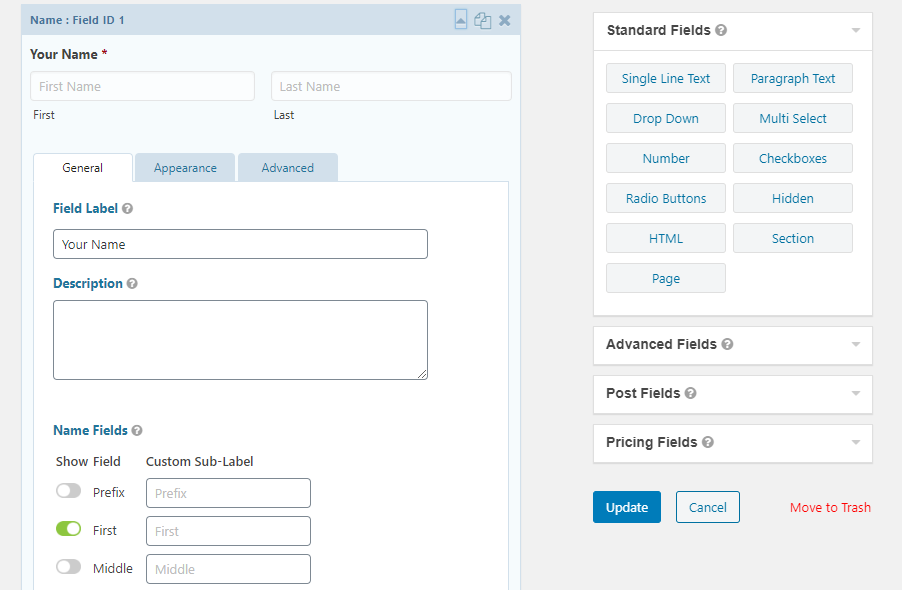
To start, you can choose any of those templates or build a form from scratch by selecting the Add New option under the Forms tab. At this stage, you can set a name and description for your new form:
Gravity Forms enables you to use an advanced drag-and-drop form builder to add and reorder dozens of ready-to-go fields:
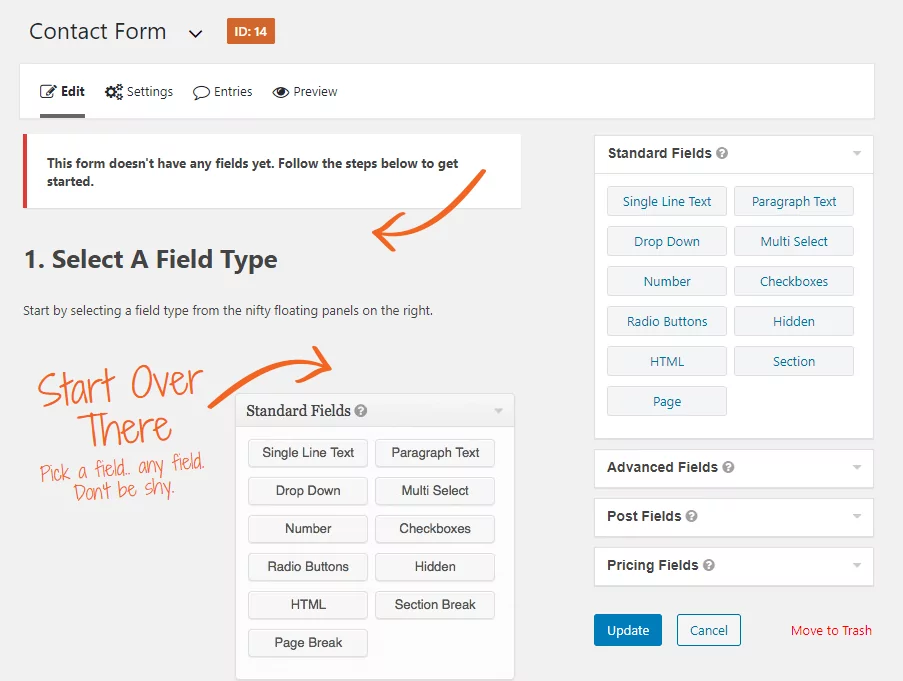
You can drag elements from the right-hand menus to the left and re-arrange them at will. Once all the items you want are in, you can customize them. Gravity Forms enables you to change field labels and descriptions, as well as select what information you want to require users to include:
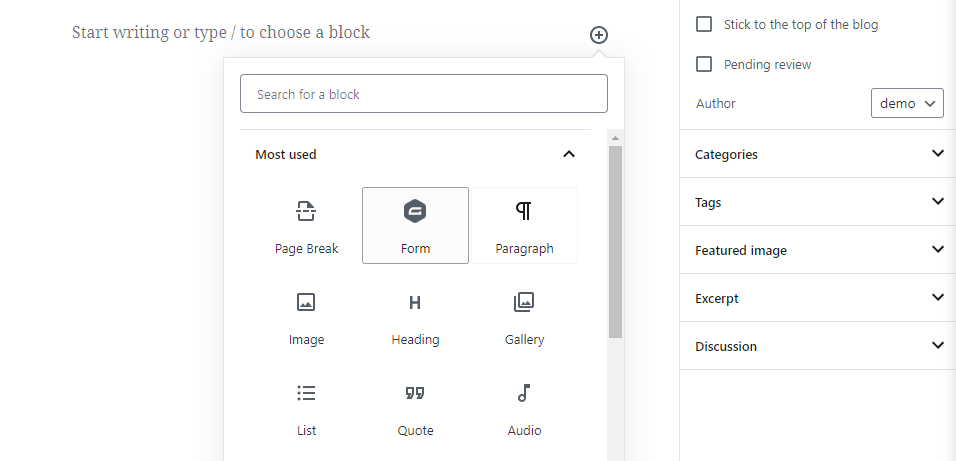
Once your form is ready, it’s time to publish it on your website. To do this, open the Block Editor for the page where you want to display it. Then look for the Gravity Forms block under Embeds or your Most Used section:
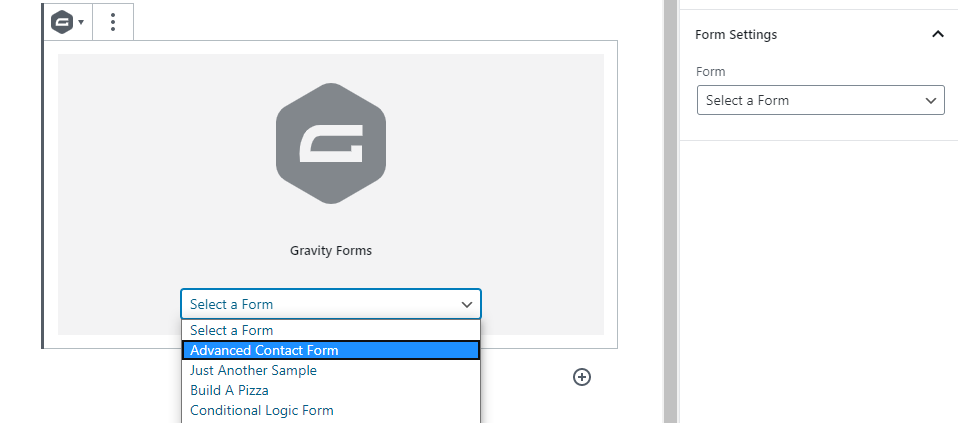
The block will display a dropdown menu you can use to choose between all the forms you’ve created so far:
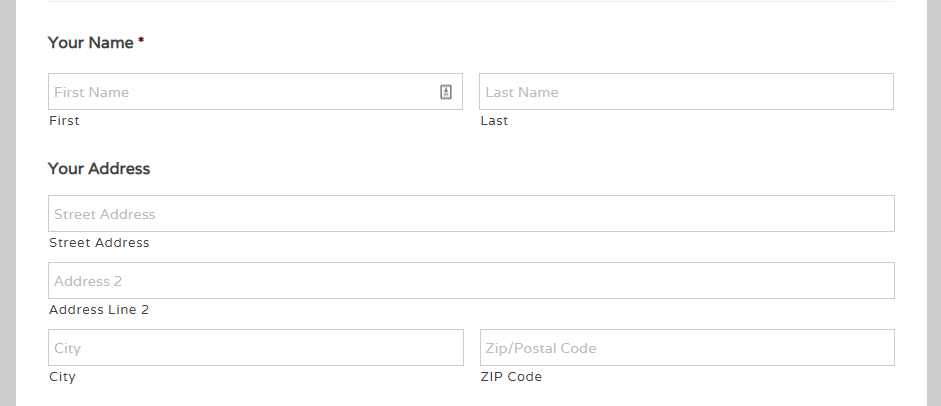
Although the form itself won’t display in its entirety within the editor, your visitors will be able to see it on the front end as soon as you publish or update the page:
Now that you have an active form, it’s time to translate it.
Step 2: Add a New Language to Your Website using TranslatePress
Next, go to Settings → TranslatePressand look for the All Languages section:
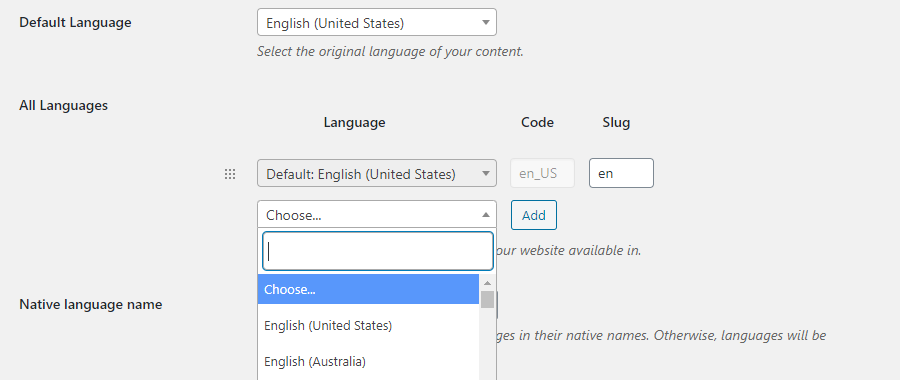
Here, you’ll see your default language listed. To add another language to your site, use the dropdown menu to choose from the available options. Then click on the Add button.
That’s it! Now there’s a new language option available for your site, which visitors will be able to switch to on the front end. However, before you start publicizing your new multilingual website, you need to translate its content, including your forms.
Step 3: Translate Your Form’s Fields
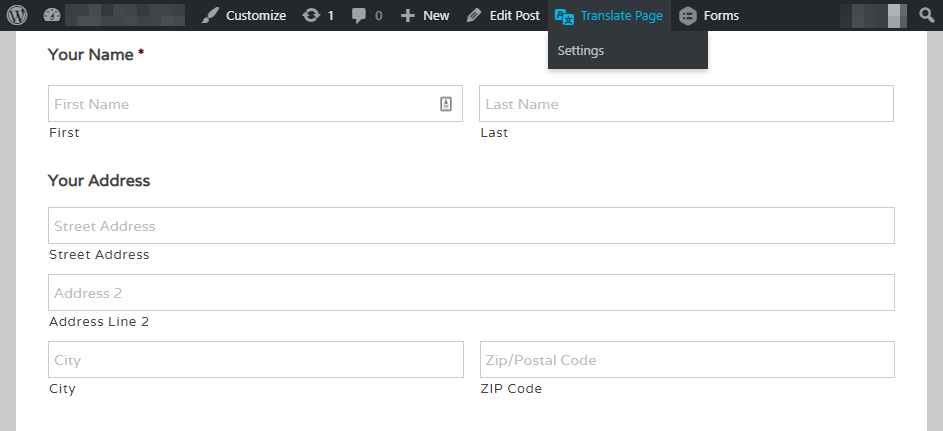
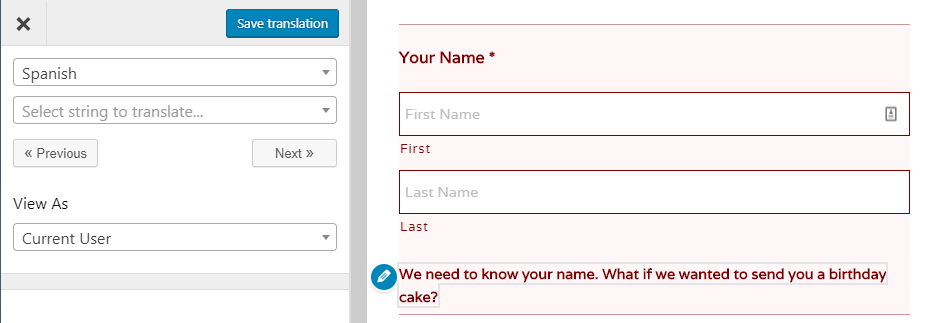
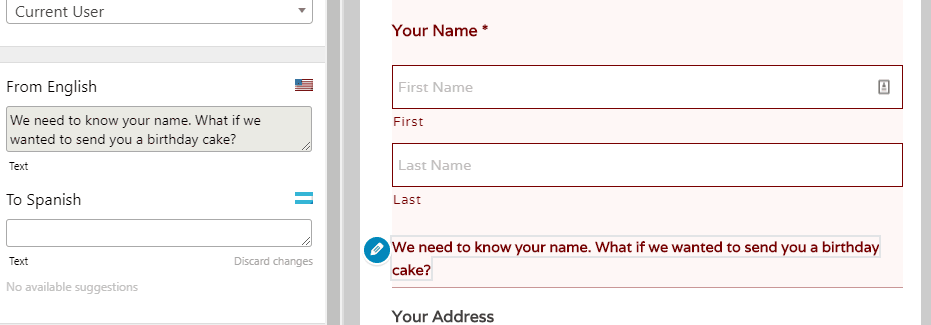
TranslatePress enables you to translate any of your WordPress pages using a simple editor. To get started, go to the page where the form you want to translate is, and click on the Translate Page button in the admin toolbar at the top of the screen:
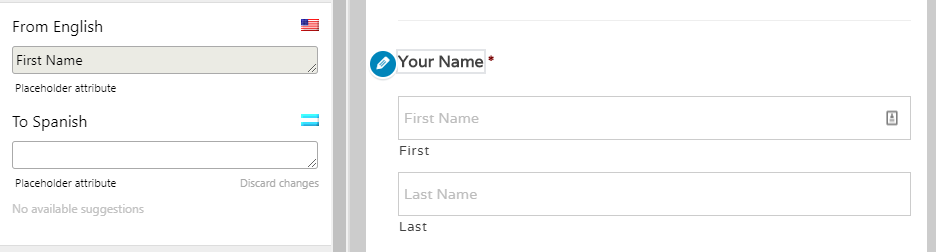
That button will launch the TranslatePress editor. To use it, simply select the field that you want to translate in the front end preview on the right:
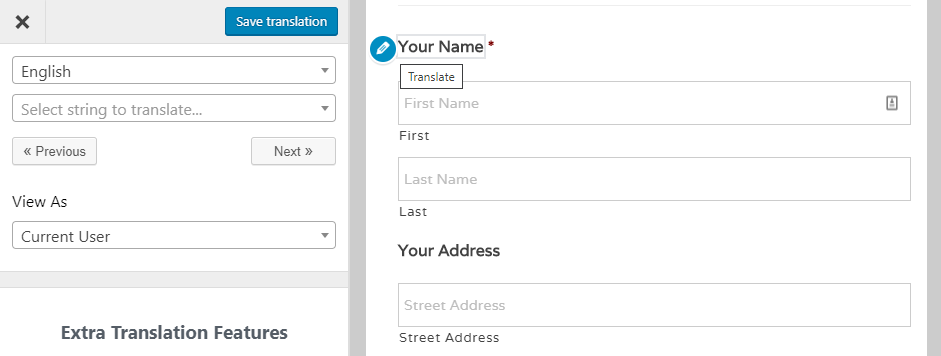
In the lefthand sidebar, select your target language, then enter the string you selected in that language:
Then, repeat that process for all the strings and form fields you want to translate. Here’s a quick example of how it works in practice:

TranslatePress enables you to jump between strings and save translations using keyboard shortcuts to speed up the process. Even the simplest forms often have a lot of text, so anything that can save you time is welcome.
Step 4: Modify Your Validation and Success Messages
Keep in mind, translating Gravity Forms isn’t just about replacing the text within and outside each field. Most forms also include success or error messages, and it’s important you don’t miss those.
For example, say you set up a form that includes required fields and a user attempts to submit it without filling them in. They should see an error message like this one:
Error messages are often overlooked during the translation process because you’re well aware of how your own forms work, so you may not see them. Visitors, on the other hand, may run into them more often, so it’s essential you find and translate them all:
Go through your form once more, making sure you find any error messages that might pop up. If everything works out, you should see a success message once you submit the form:
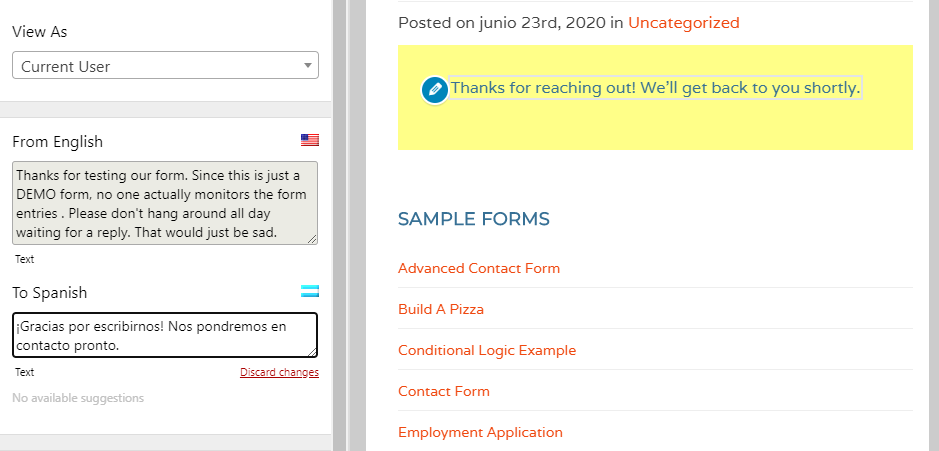
Make sure you translate that success message as well. Then your form should be ready for users to view your site in its new language. If you want to translate the same form into additional languages, the process works just the same – simply choose a different target language when you launch the TranslatePress editor.
Make Gravity Forms multilingual today!
If you’re running a truly multilingual website, every element needs to be translated. That includes text, images, SEO metadata, menus, and even forms. The latter is crucial when it comes to collecting leads, processing payments, and staying in touch with your visitors or customers, so it’s important to make your forms as easy to use as possible.
You can use TranslatePress to make Gravity Forms multilingual in as few as four simple steps:
- Set up a basic form;
- Add a new language to your website using TranslatePress;
- Translate your form’s fields;
- Modify your validation and success messages.
Do you have any questions about how to make Gravity Forms multilingual? Leave them in the comments section below!
TranslatePress Multilingual
If you found this post helpful, please check out our YouTube channel, where we constantly upload short & easy-to-follow video tutorials. You can also follow us on Facebook and Twitter to be the first to know each time we post.


it does not translate the dropdown of gravity form.
Hello,
The plugin can translate dropdown options just fine. The only catch is that you can’t really select these as you select normal strings, you will have to search for them in the Strings list from the Translation Interface.
Regards.
Hi there,
How can I distinguish languages after a form is submitted? Is there a string or a default value I can use to do it?