In this post
In this post
If you spend any time on the internet these days, you will need to translate webpages at some point. Maybe you’re shopping at an online store hosted in another country, or there’s a white paper written in another language. Or, if you run your own site, you may want to make it more accessible to a global audience.
I’ll show you a few different ways to translate web pages in this article. They’re all easy and free.
Methods to Translate Webpages
First, let’s talk about the two different methods for translating a web page: dynamic and static. Each scenario has its use, and understanding the difference will help you choose the best method for your needs.
Dynamic translation means that it’s temporary. For example, when you come upon a web page written in another language and want to understand it. In this case, you would use a dynamic method to get a quick translation.
A static translation is more permanent. Suppose you want to translate a page on your own website to share with someone else. You can send them a link to your translated page that they can access anytime. Another example is if you’d like to translate your entire website, making it multilingual. This would be part of a process called website localization.
Now that you understand the basics, I’ll walk you through the steps for translating web pages both dynamically and statically.
1. How to Dynamically Translate Any Webpage Quickly
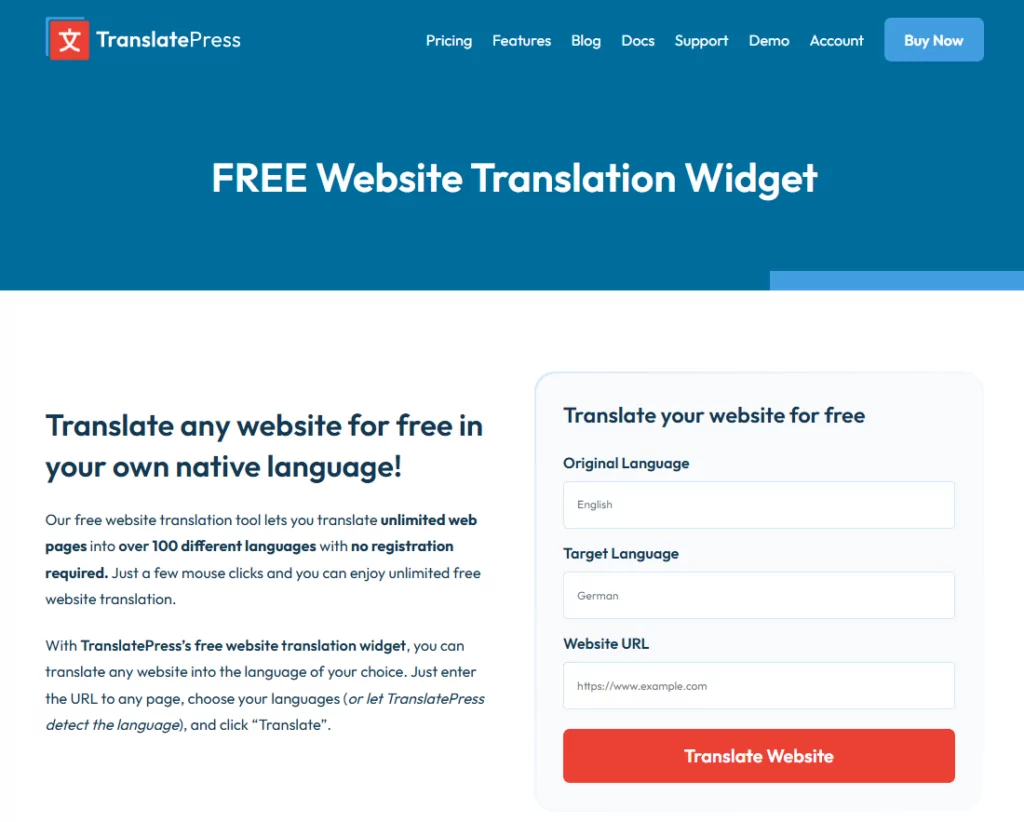
There are multiple methods for dynamically translating parts of a web page so you can read them. A smooth and easy way to do this is to use the free Website Translation Tool from TranslatePress.
Using this free tool, you can translate unlimited web pages without signing up for an account. There are over 100 languages currently available. It’s super easy to use, and it’s instantaneous.
Type or paste in the URL of the page you want to translate. Choose the Original language and the Target language, then click the Translate button. The translated page will open in a new tab. You’ll notice that it uses the Google Translate engine to manage translations. If you want to send the page to someone, copy the URL in your browser window. When they open the link, they’ll be viewing the pre-translated page. It’s that easy!
2. How to Translate Webpages of your Own Site
The free Website Translation Tool is great for dynamic, one-page translations. But what if you want to translate pages on your website and make them static?
The solution is to host your website using WordPress and the TranslatePress plugin. Let’s walk through the basic setup, from installation to configuration.
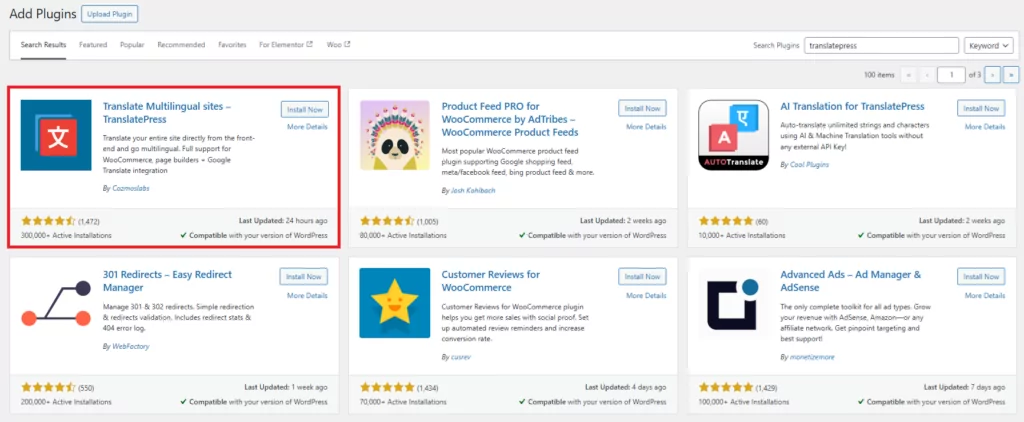
Find and Install TranslatePress
There are a couple of places to find TranslatePress. If you want the full plugin with all its pro features and add-ons (including unlimited languages and multilingual SEO), you can download it directly from the website.
After you’ve downloaded the plugin zip file, navigate to the Admin Dashboard of your WordPress site. Select Plugins → Add New. Click Upload Plugin and browse for the .zip file you saved. Click Install Now, then activate it.
But if one additional language is enough for your site and you’d prefer not to spend any money, you can go for the free version of the plugin. In this case, you can search for the plugin from within your WordPress dashboard. Select Plugins → Add New, and, in the search bar, look for “TranslatePress”. You’ll see it appear as an option. Click Install Now, then activate it.
In your WordPress admin dashboard’s left-side menu under Settings, you’ll see a new item called TranslatePress. This is where you’ll find all the options for the plugin.
Now that we have TranslatePress installed let’s walk through some configuration settings.
Configure TranslatePress
The first tab you’ll see in the TranslatePress Settings is the General tab.
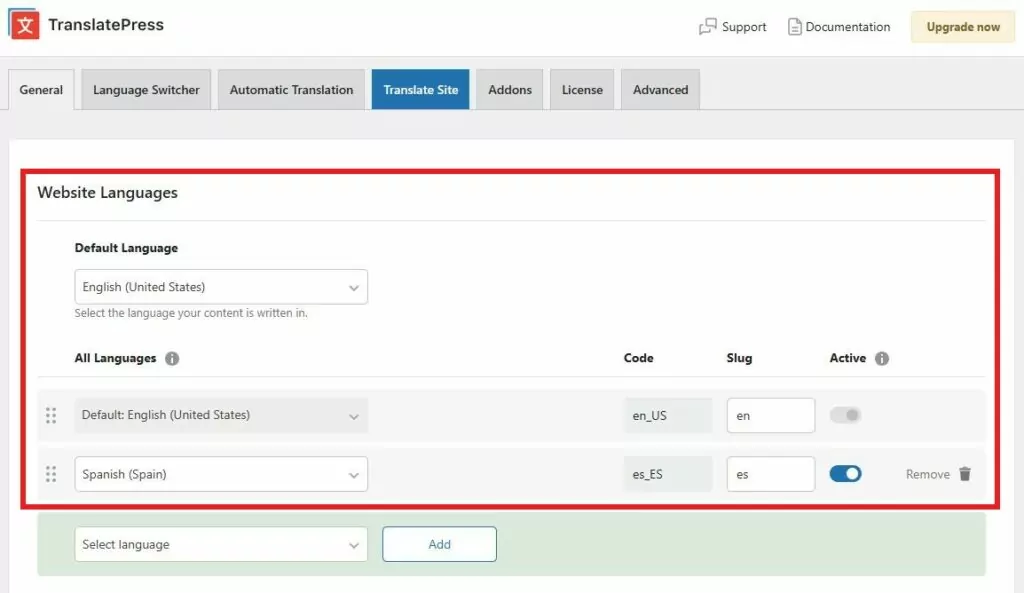
In this area, you can set your default language and add any languages you’d like to use for translation. To add a language, click on Select language and in the language list, select the language you want your site translated to, then click Add.
Moving on to the next tab, you’ll see more language settings. These options will determine how the translation tool appears to your site’s visitors.
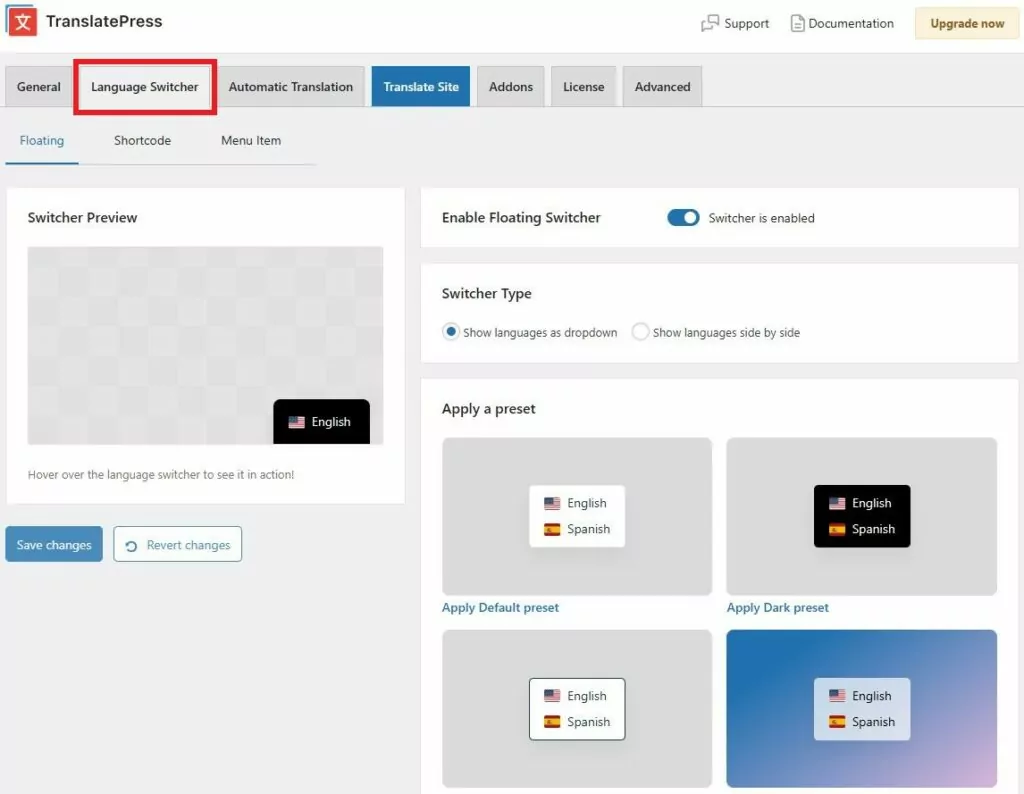
For example, you can decide if the Language Switcher should be displayed as a floating button, within a specific area of a page using a shortcode, or even as a menu item.
Remember to click Save Changes once you’ve made your choices.
That’s it for installation and basic setup! Now, let’s start translating your pages.
Translate Your Web Pages Permanently
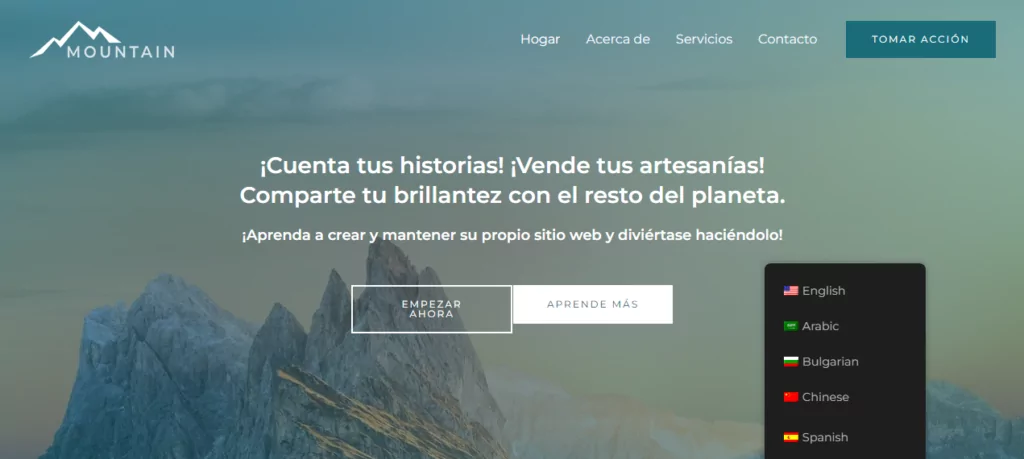
TranslatePress will allow you to translate any page on your site and store the translated version in your database. That way, the translation will be ready to go when a visitor wants to convert a page. The page will only show the translated version to the current visitor. New visitors arriving at your site will see it in the default language. From there they will have the chance to switch to the translated version using the language switcher.
There are two ways to accomplish website translations: manually and automatically. Let’s start with the manual method.
Manually Translate Your Webpages
As long as you’re logged into your WordPress site, you’ll see the Translate Site or Translate Page menu item in your top toolbar.
Clicking that will open up a visual translation editor. You’ll see a translation sidebar on the left of your screen, and a live preview of your page on the right. You can select any text string on the page either by clicking it or from the second dropdown menu on the left.
Once your string is selected, move to the field for the preferred language to which you want to change it. Enter the translated text in the field, then click the Save button at the top.
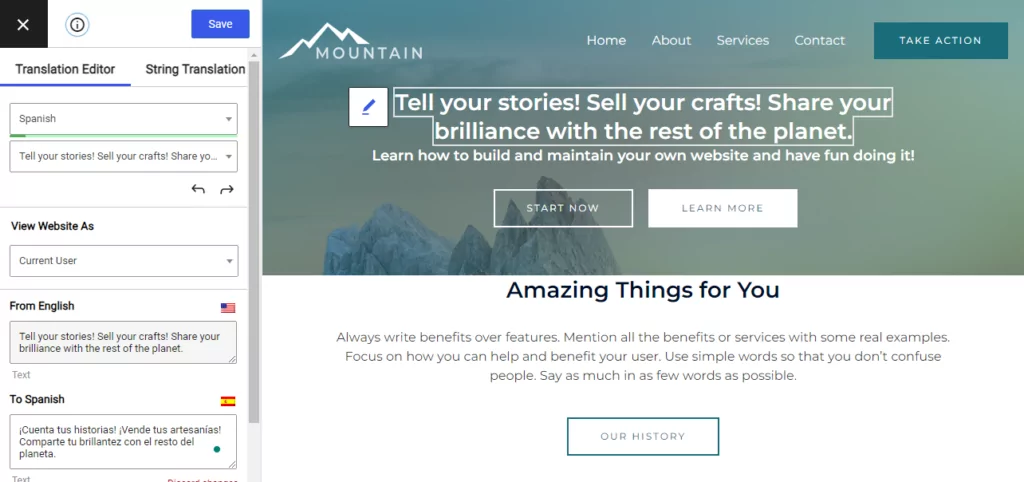
Close the editor to go back to your site’s front end. Now, when you click the Language Switcher on the page and choose the preferred language, you’ll see that the text string has changed. Presto!
You can continue with this method for any pages or strings of text you need to translate on your site. You may think this could take a while — particularly if you don’t know the preferred language. And especially if you have a lot of pages or text, you might want to automate the process.
Let’s go over how to do this automatically!
Automatically Translate Your Webpages
Going back to the WordPress admin dashboard, navigate to Settings → TranslatePress and open the Automatic Translation tab. Make sure Enable Automatic Translation is switched on.
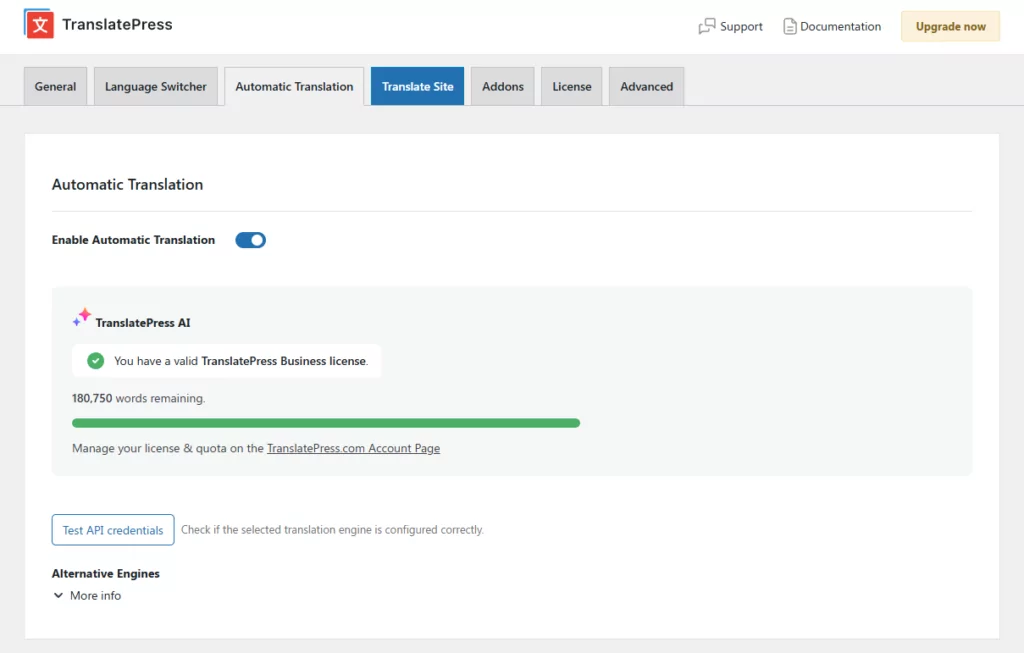
The simplest option: TranslatePress AI
TranslatePress AI is the built-in translation engine — and it’s the easiest way to get automatic translation running because there’s no API key to set up and no external account needed. All plans come with a set amount of AIwords to use with the engine, including the free license. However, in order to get your free license, you do have to sign up here.
Once you enable automatic translation and select TranslatePress AI as your engine, your site will start translating immediately after you save. Visitors can then click the language switcher and the page will appear in their chosen language — with translations stored in your database, so there’s no repeated translation cost each time someone visits.
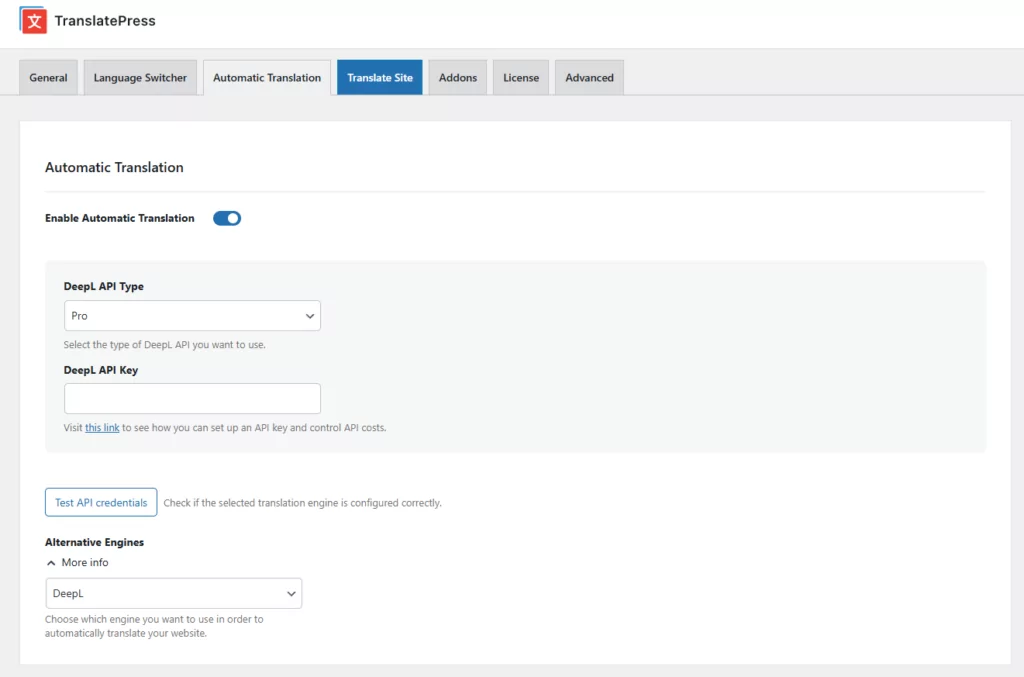
Prefer an external translation API?
TranslatePress also supports Google Translate and DeepL as alternative engines, found under Alternative Engines in the Automatic Translation tab:
- Google Translate — available on all plans, including the free version. You’ll need to create a Google Cloud account and generate an API key. Here’s how to do that.
- DeepL — available on Business and Developer plans. You’ll need a free or Pro DeepL account and an API key. Here’s the DeepL setup guide. There’s more detail on DeepL’s advantages in this DeepL Translator review, and a full Google Translate vs DeepL comparison if you’re weighing the two.
For the external APIs, TranslatePress doesn’t charge anything on top of whatever Google or DeepL charge for their own usage. Both offer a free tier, and TranslatePress lets you set a daily character limit to keep costs predictable if you’re on a paid API plan.
Translate Your Webpages for All Visitors
Now you can see how easy it is to translate web pages quickly and also how to make your own website accessible to anyone around the world. The methods I’ve shown you are all free and don’t take much time to set up. You don’t have to know how to code, and you don’t even have to know multiple languages to make your site available for a global market.
Using WordPress and the TranslatePress plugin, your site can be multilingual and serve a much wider audience.
TranslatePress Multilingual
Still have questions about how to translate webpages? Let us know in the comments!
If you found this post helpful, please check out our YouTube channel, where we constantly upload short & easy-to-follow video tutorials. You can also follow us on Facebook and X to be the first to know each time we post.