This tutorial highlights how to create multilingual forms built using Contact Form 7 together with TranslatePress.
How to Translate Widgets in WordPress + Show Different Widgets based on Language
Contact Form 7 is the most popular contact form plugin for WordPress. It’s free and powers over 5 million websites.
Translating forms built with Contact Form 7 allows you to offer a single form that will be available in multiple languages. No need to set up multiple forms with different field names for each language.
Below we’ll look into how to translate forms created with Contact Form 7 using TranslatePress.
How to Translate Contact Form 7
We’ll start by setting up a new contact form using Contact Form 7. After installing and activating the plugin, you’ll notice a new menu item “Contact“.

We’ll select the Contact Forms submenu item, then click the Add New button for setting up our first contact form.
Here we can set up the form and control things like:
- edit the form template and select the fields you want the form to contain;
- edit the email template that the admin receives when a form is submitted;
- modify the validation and success messages.
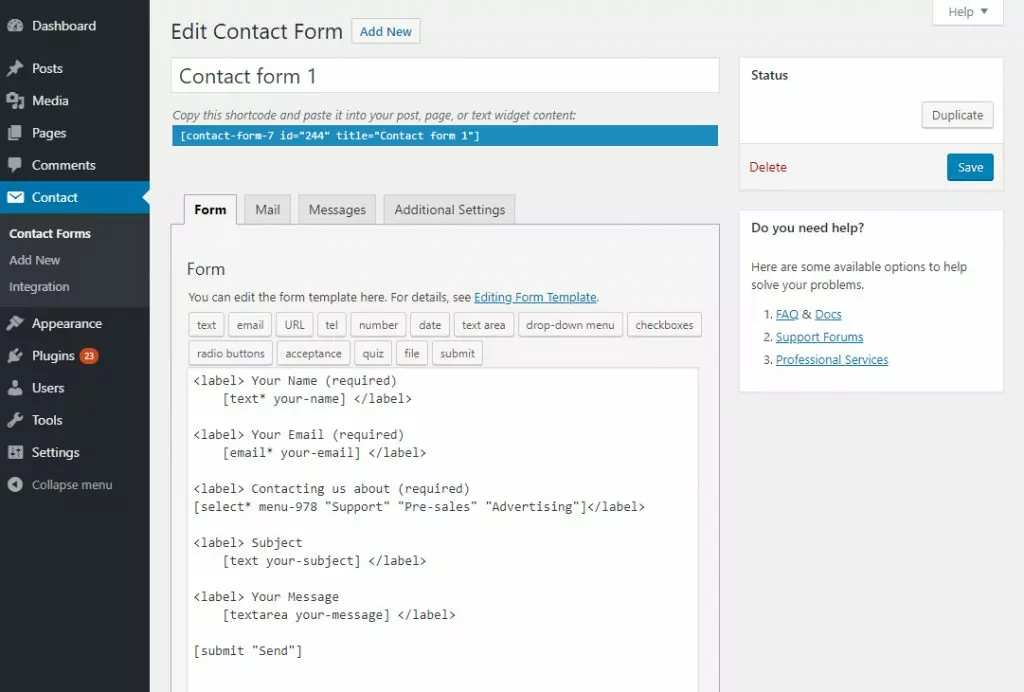
After you finish editing the form template, click Save. A shortcode will be displayed which you can place on a page or widget, for outputting the form.
We’ll place it inside a newly created “Contact Us” page.
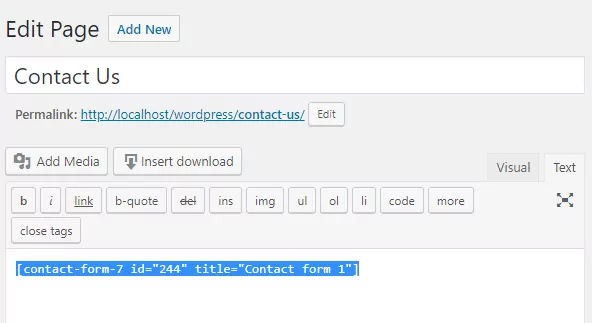
After saving the page, let’s have a look at what the form looks like on the front-end:
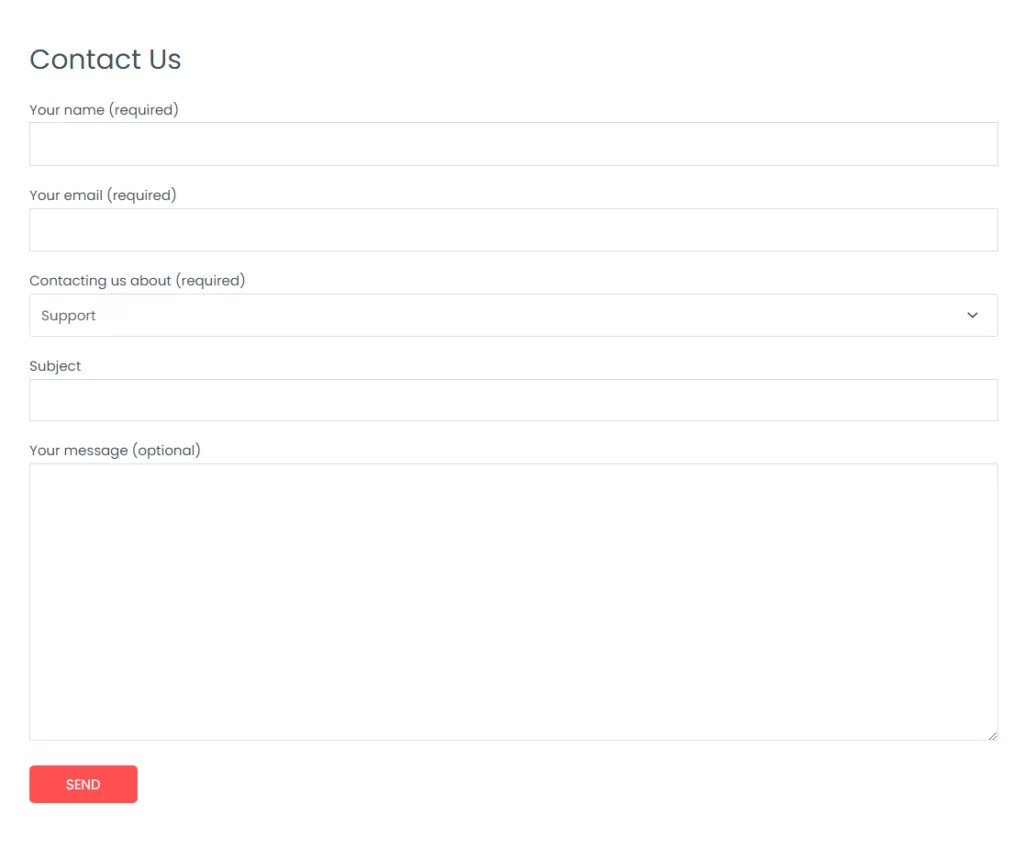
Next, we’ll proceed with installing and activating TranslatePress for translating Contact Form 7.
After activating TranslatePress, you’ll notice a new Translate Site item added in the admin bar.

Just hover over it and click Settings. This will take you to the TranslatePress Settings page.
Here we can add the languages in which we want to translate the contact form. We’ll use two languages for this tutorial.
English is our default language, and we’ll also add Spanish. You’ll notice there are a few other settings (like Google Translate integration for automatic translation or customizing the language switcher), but we’ll skip them for now and click Save Changes.
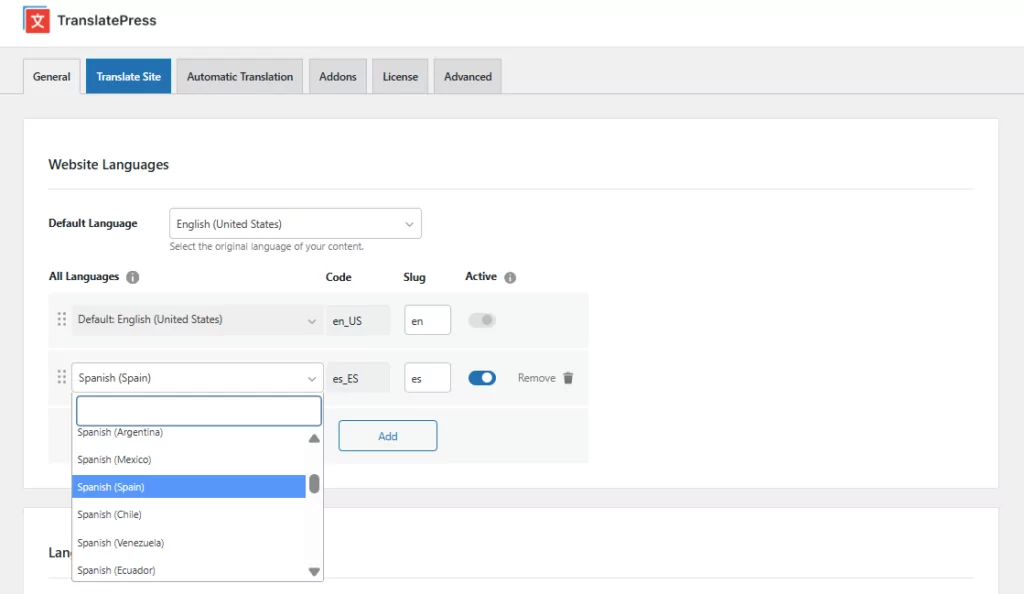
We’re now ready to translate our form built with Contact Form 7.
Translate Contact Form Fields
To start translating the contact form fields we’ll simply navigate to the “Contact Us” page (where the form is located), then click the Translate Page button from the admin bar.
This will open up a front-end translation editor where you can translate every string on a page and see the changes in real-time.
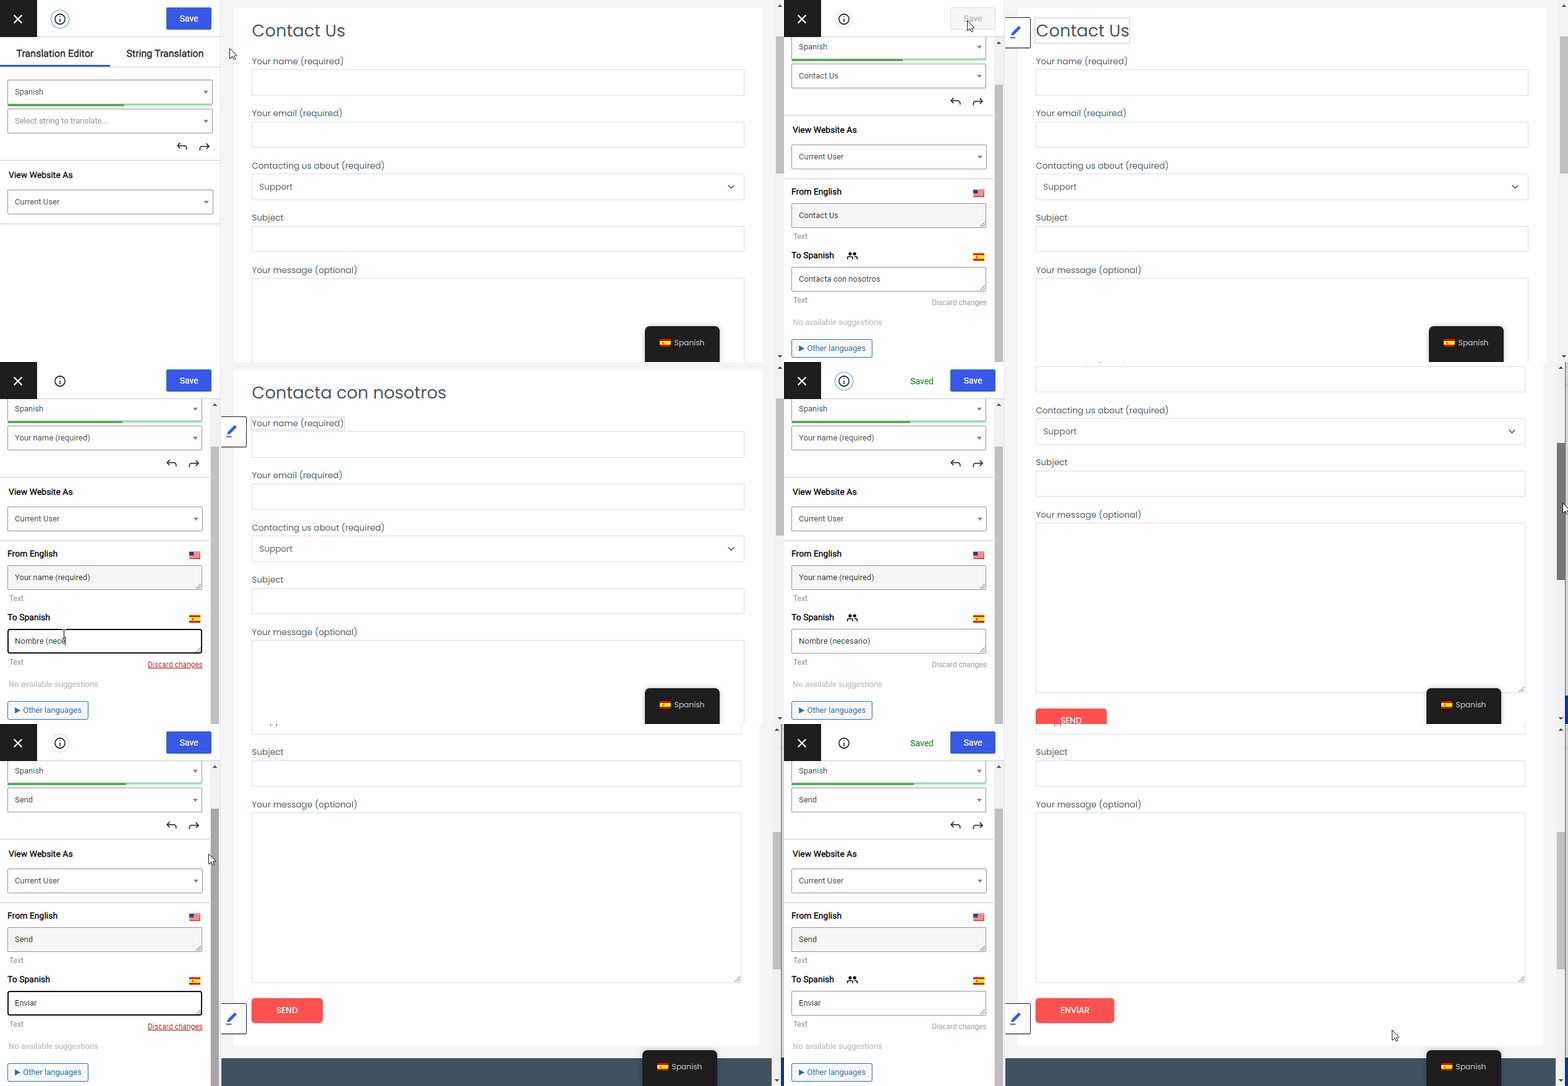
Once you hover over a certain field label a pencil icon will appear. Clicking it will allow translating that certain string. Enter the translation and click the Save button.
This way you’ll be able to translate each form field and description, including the “Send” button text.
Option values for select, checkbox, radio, etc. are all found in the String list dropdown on the left. This contains all the strings found on that page so you can use it to translate strings that don’t have the pencil icon showing up.
In this case, let’s select and translate the options from “Contacting us about” dropdown.
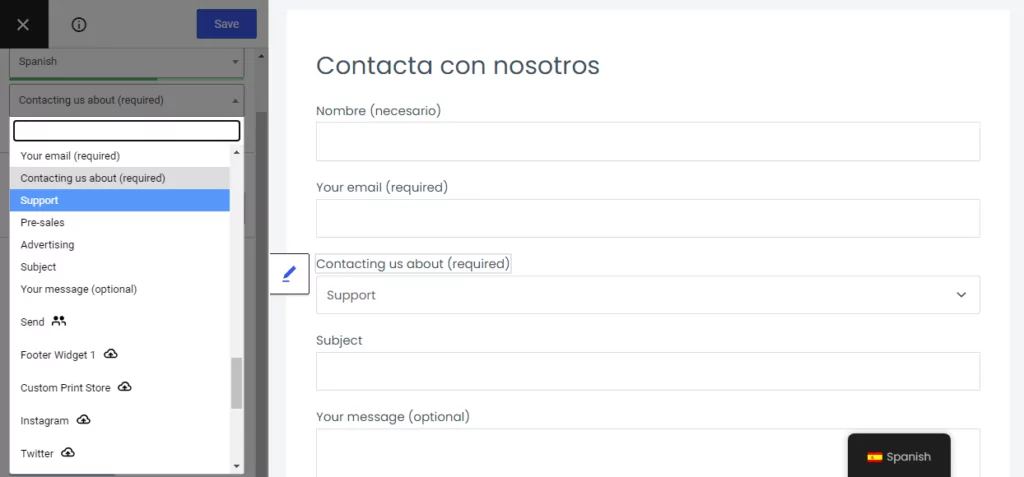
This concludes the contact form fields translation.
Translate Contact Form Error and Success Messages
Next, there are certain messages a contact form displays after clicking the submit button. Things like validation, errors, or successful submission messages.
For Contact Form 7, they are all located under Messages tab, when editing or adding a new form. Have a look at the list of messages and see which ones apply to your form.
In order to translate these with TranslatePress, we need to first trigger them in the front-end. Then, once they’re visible we can select and translate each one of them.
For validation messages, trigger the form submission by clicking the Send button. Once the errors are displayed click on them and add the translation.
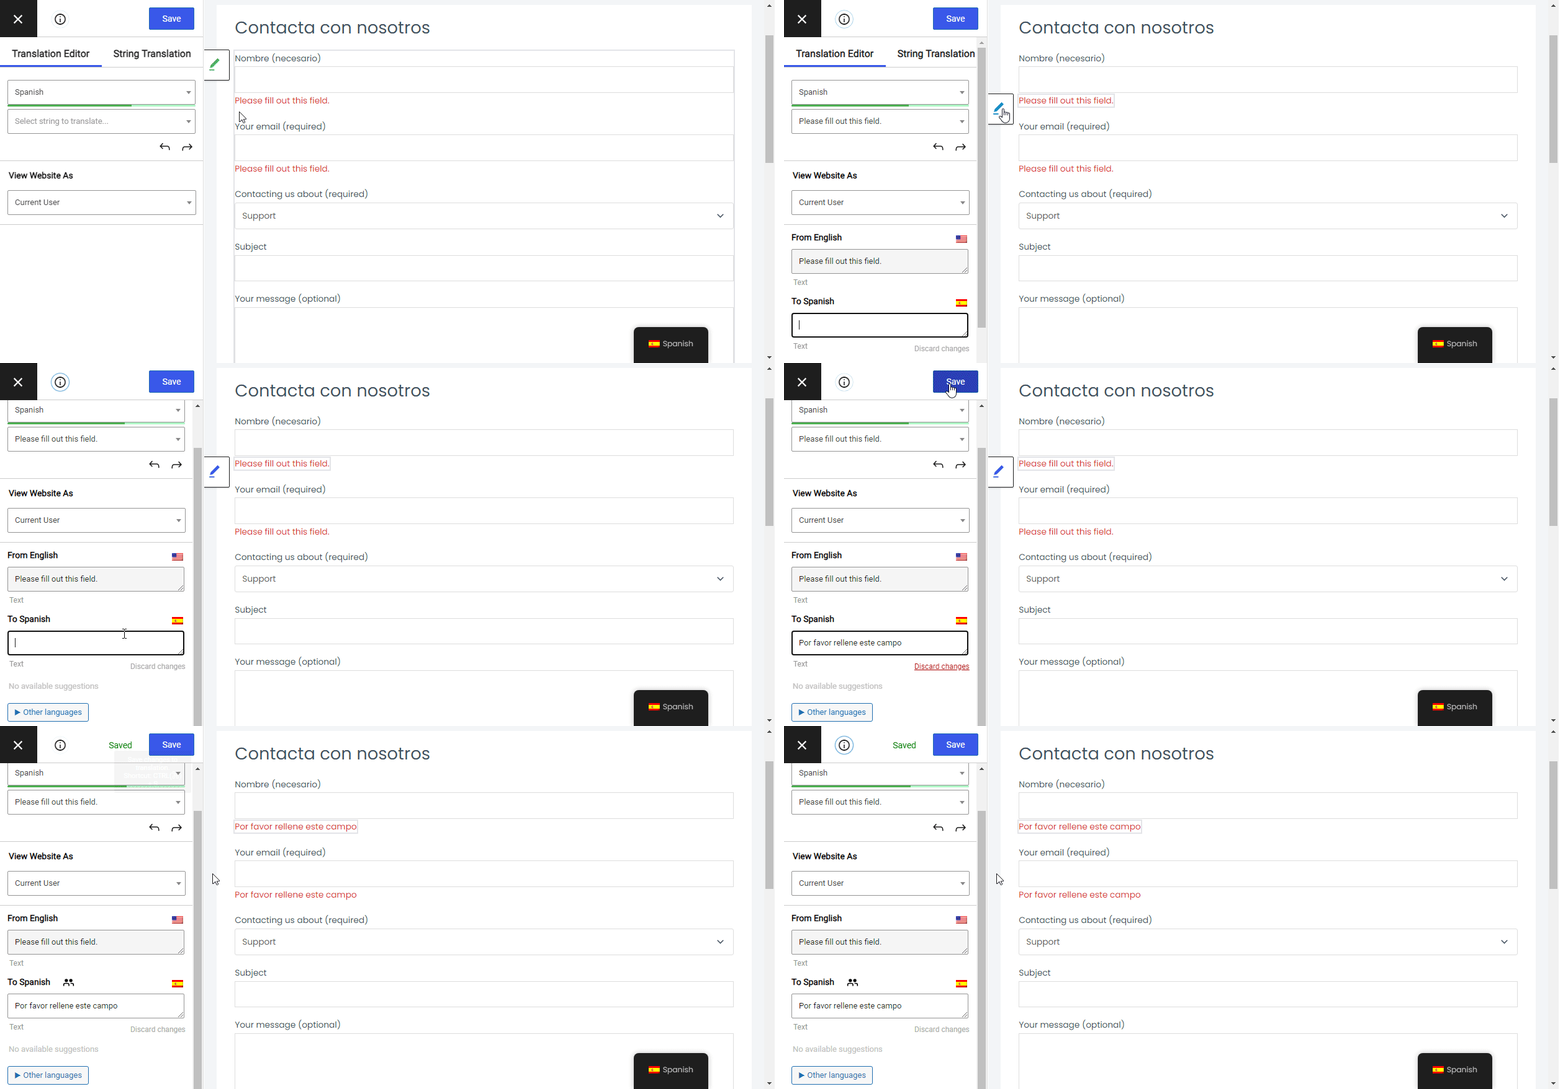
Do the same for success messages and you’ll have your contact form fully translated.
Wrapping It All Up
Creating multilingual contact forms using Contact Form 7 with TranslatePress is really straightforward due to the intuitive front-end translation approach.
Using tools like automatic user language detection available in TranslatePress, you can display automatically the translated version of the contact form to visitors in their own language.
TranslatePress Multilingual
If you want to see TranslatePress in action, make sure to play with our demo.
Do you still have any questions about translating Contact Form 7? Let us know in the comments!
If you found this post helpful, please check out our YouTube channel, where we constantly upload short & easy-to-follow video tutorials. You can also follow us on Facebook and Twitter to be the first to know each time we post.


