In this post
In this post
Google Search Console is an invaluable source of information for website owners, including those running multi-language websites. The tool tells you a lot about your site’s health, indexing status, performance in search, problems, and more. Most importantly, it informs you if the right people see the right language version of your website.
This guide is for WordPress site owners who already have, or are planning, a multi-language website and want to track performance accurately in Google Search Console.
Setting up Google Search Console to do this job on a website with more than one language requires some extra attention. In this post, we’ll cover what’s different, the setup process, and how to use Search Console to monitor your multi-language website.
Google Search Console on Multilingual Websites: Important Considerations
Setting up Search Console on websites with more than one language requires a different approach than for single-language sites. You need to ensure a clear division between languages to be able to monitor them separately. Only then can Search Console tell you if individual translations experience issues that require your attention.
What does that look like?
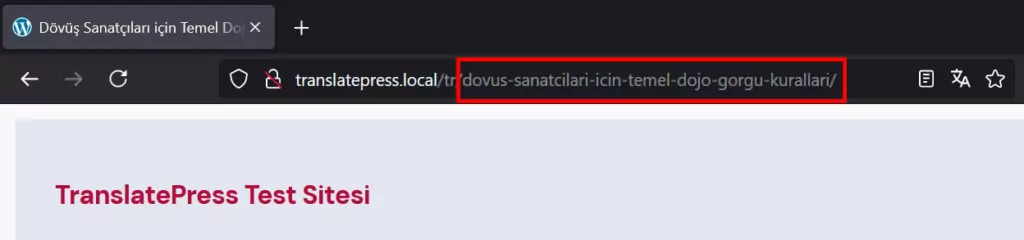
- Use different URLs for different language versions: This can be in the form of a subdomain (e.g. de.yourdomain.com), subdirectory (yourdomain.com/de/), or a completely different domain (yourdomain.de). Additionally, adopt a search-friendly URL structure and avoid URL parameters like
?lang=fr. - Set up hreflang tags: This lets Google and other search engines know which content is aimed at what language and locale. That way, they can rank and serve the correct content version to the right users.
- Use one language per page: Google uses the page content itself to determine a page’s language. Avoid translation solutions where translated content is placed side by side and displayed conditionally. Ensure key navigation elements (headers, footers, and menus) are also translated.
- Give visitors the option to switch languages: Avoid automatic language redirection. Instead, provide an easy way for users to change languages themselves, e.g. through a language switcher. Use “x-default” tags to tell Google where to send users when no specific language match is found.
Subdirectories vs Subdomains vs Separate Domains
It makes sense to discuss which URL format makes the most sense to use for your multi-language site. We already have articles on subdomain vs subdirectory and different domains per language setups from an SEO standpoint. But it also makes a difference for the use of Google Search Console, specifically when it comes to verification and sitemap usage.
As you will see below, both subdirectory and subdomain verification are automatic, if the main domain has already been verified. Separate domains, on the other hand, need individual verification.
When you use subdirectories, you can submit a sitemap for a subdirectory both in the main domain property or the specific subdirectory property. For subdomains and separate domains, it’s mandatory to submit sitemaps for individual properties, not the main domain.
Keep that in mind if you have a new site and have not yet chosen your language version format.
How to Set Up Google Search Console on a Multi-Language Website
To use Google Search Console with your multilingual site, you first need to connect the two. The process is slightly different for subdomains and subdirectories versus a completely different domain. However, both approaches start off the same.
1. Register the Main Domain
If you have already registered your website’s primary domain in Search Console, skip right ahead to the next step.
Registering the main domain first establishes a “parent” property that aggregates data across all protocols and subdomains. Once verified, it also makes the setup of sub-properties much faster.
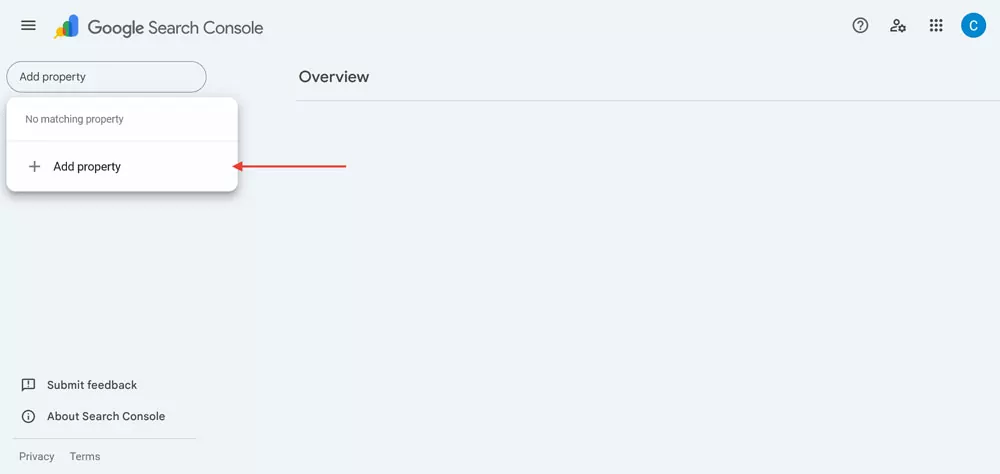
To get started, go to Search Console and sign in with your Google account. Click on the property selector drop-down menu and select + Add Property.
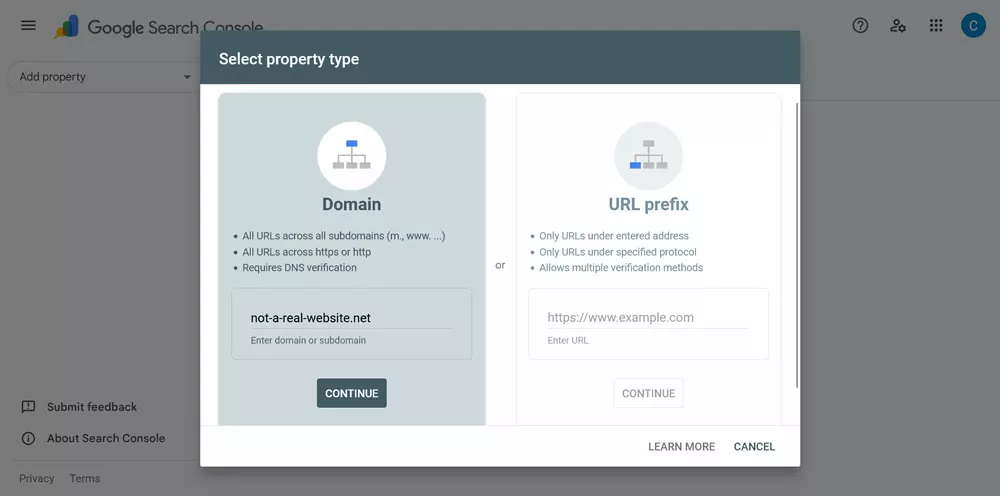
In the menu that follows, enter your website’s main domain (without http:// or https://) in the Domain part, then continue.
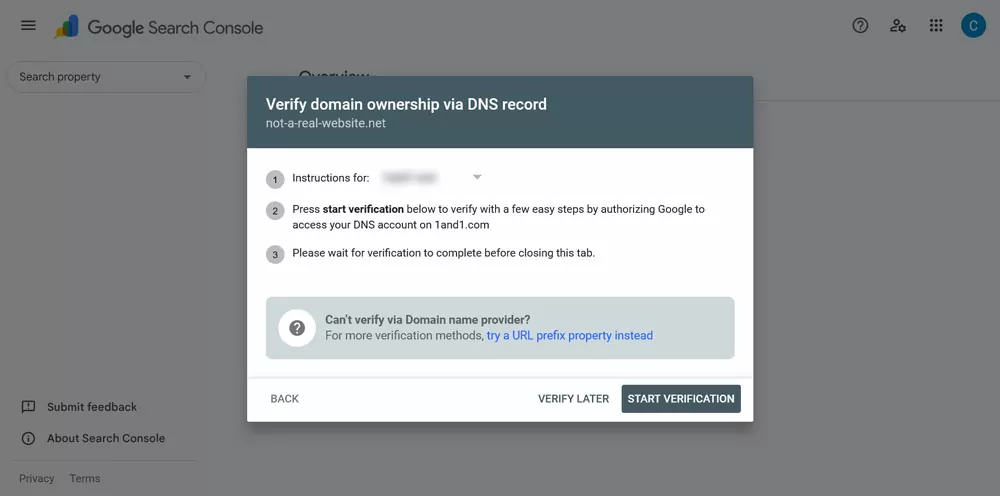
You’ll be asked to verify that you own the domain. There are different ways to do so, simply follow the instructions Search Console provides.
2. Set Up Additional Language Properties
The process for adding other language versions of your site depends on your setup.
If your languages all have their own domain, you simply need to repeat the process above until you have added and verified each one in Search Console. They are all treated as different sites and will appear in the webmaster tools as such.
However, if you have arranged the multi-language versions of your site as subdirectories or subdomains, add another property, choose URL prefix this time, and enter the base address for the language version.
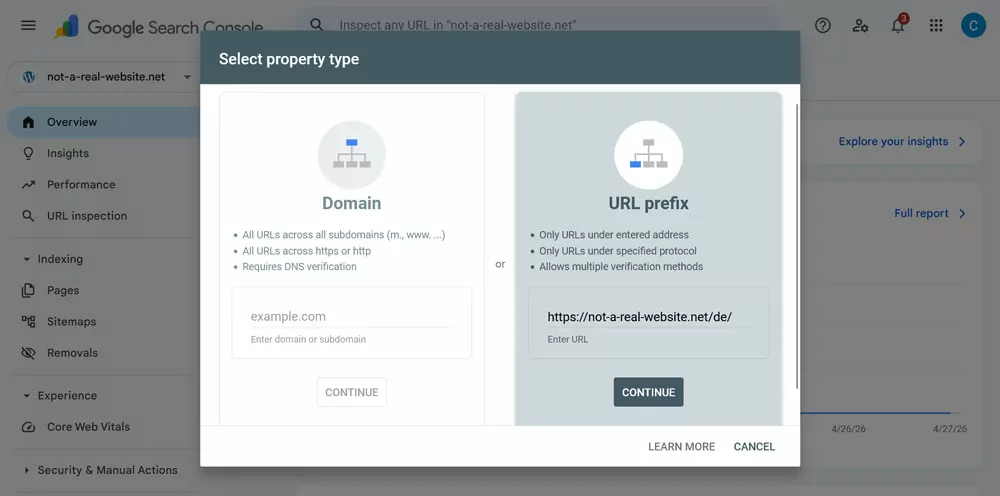
A URL prefix property only covers the exact URL you enter, and it is sensitive to how you type it. That means https://yoursite.com and http://yoursite.com are treated as separate properties as are addresses with and without a trailing slash. Therefore, pay attention to the exact address you use.
If you have already registered your main domain, verification should be automatic and the different language properties should appear under the main domain in the list.
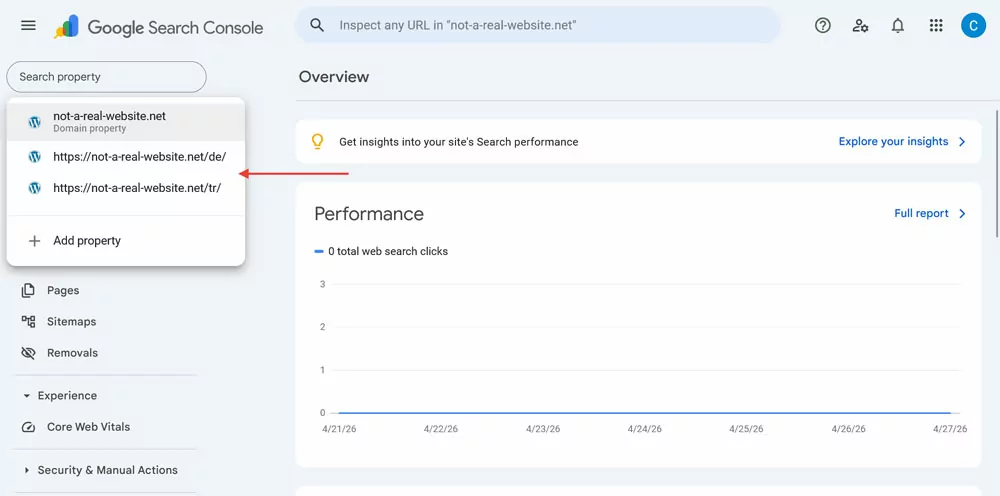
This setup gives you both the big picture in the Domain property and the per-language detail in each URL prefix property.
How Do You Monitor Search Performance Per Language in Search Console?
One of the most important parts of Google Search Console is the Performance menu. It tells you how your website is doing in Google search results, including keywords your rank for, number of clicks, impressions, click-through rate, and average position both globally and on a per-page basis.
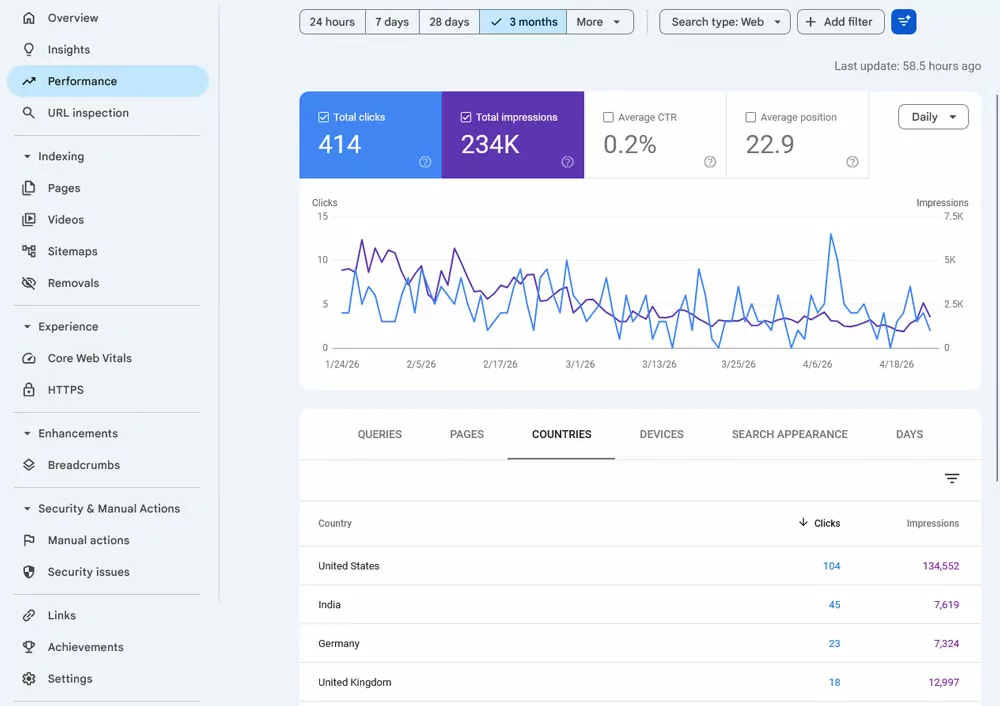
You can compare different timeframes, see your performance in individual countries, on different devices, and more.
Filtering Results by Language
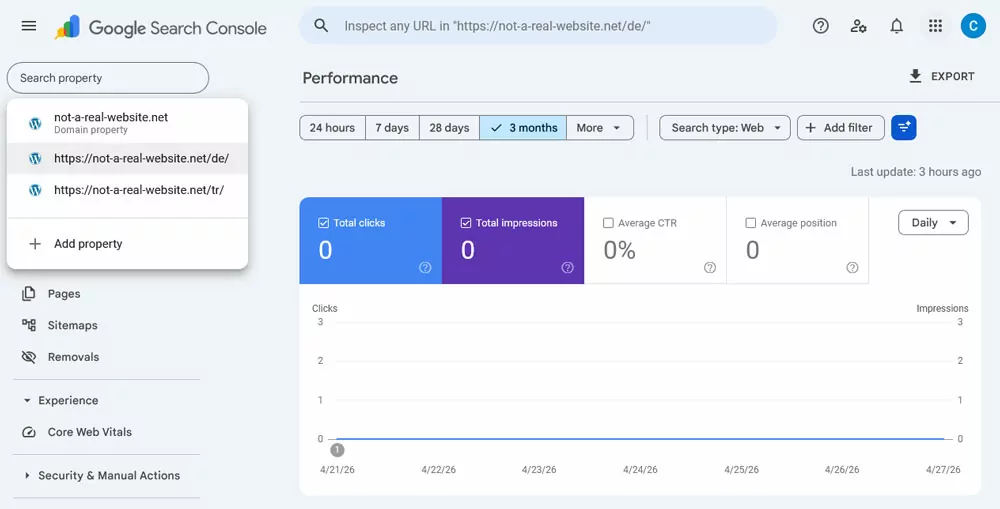
If you want to see your search performance per language, depending on your setup, you have the following options. The first, and easiest, is to check the individual properties created earlier. Simply pick them from the Properties list.
If your setup consists of a main domain and several URL prefix properties, another option you have is to filter the performance data in your main property. For that, click on + Add filter → Page and paste the URL of your subdirectory language version in the field that appears.
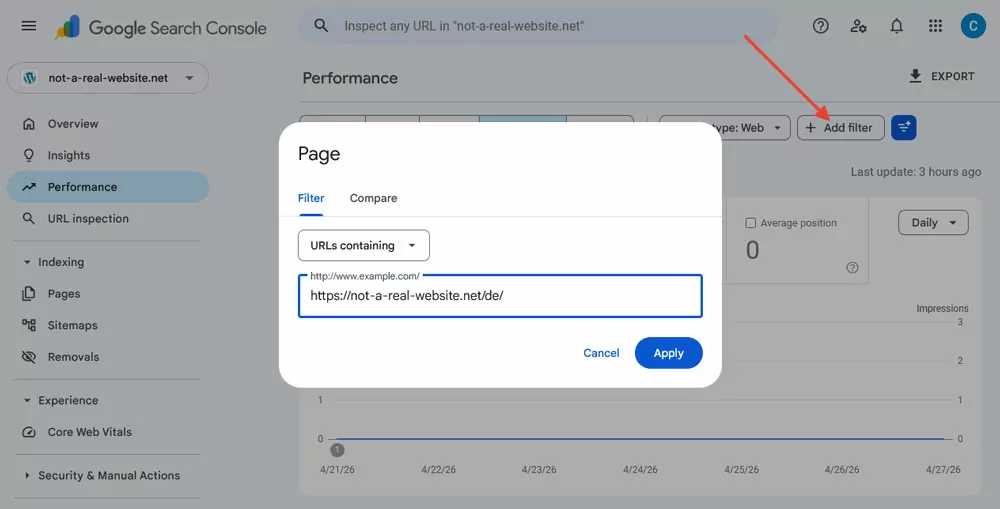
When you now click Apply, you should see only the data for that language. This also allows you to directly compare different language versions in the same report, via + Add filter → Page → Compare.
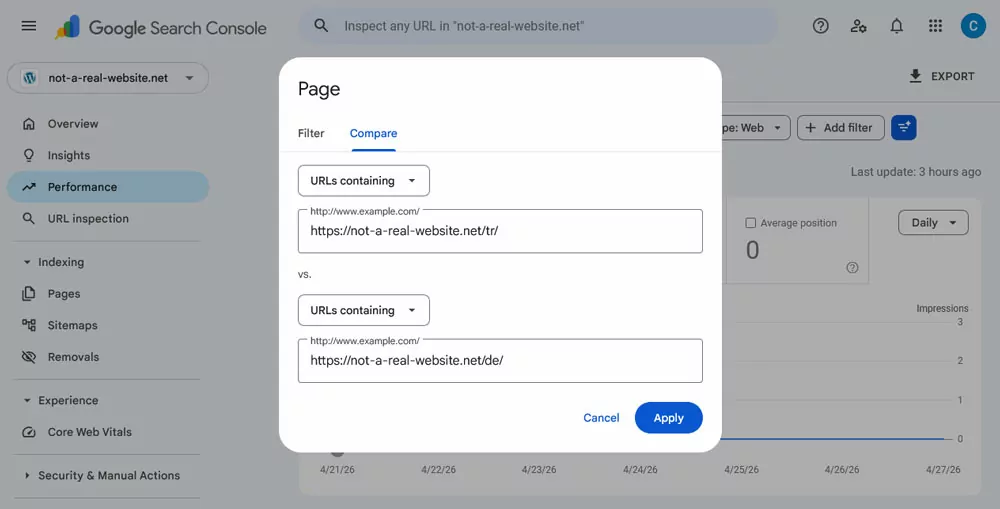
Search Console then shows the performance data for both properties next to each other.
Ensure Localized Content Ranks for Intended Countries
As mentioned, hreflang tags not only let you determine the language of your pages, but also what locales to rank in. It’s the difference between just translating your content and targeting a specific language market with it.
You can understand if your localization efforts are working by checking the Countries panel in the Performance report to see if you site’s language versions rank in the countries they are aimed at.
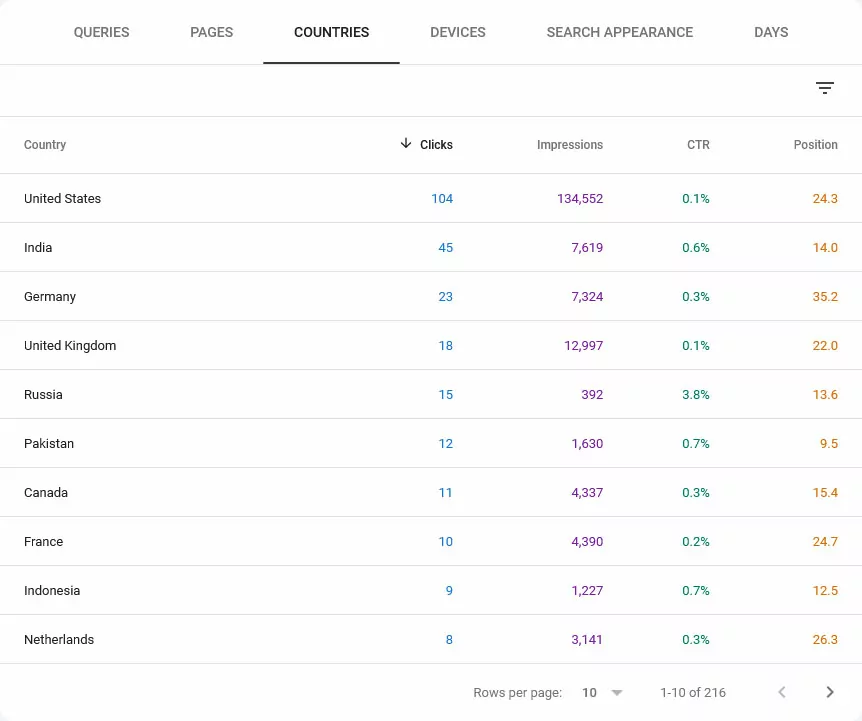
For example, if your reports reveal that your Spanish (Spain) content is accidentally outranking your Spanish (Mexico) pages in Mexican search results, it’s a sign that your regional targeting is failing. That’s an indication to go back and check your hreflang tag implementation and sitemaps.
Submitting Multi-Language Sitemaps in Google Search Console
A sitemap is a file that lists all the content on your website. It allows you to inform Google of its existence so it can be indexed and ranked. There are many sitemap plugins you can use to create one.
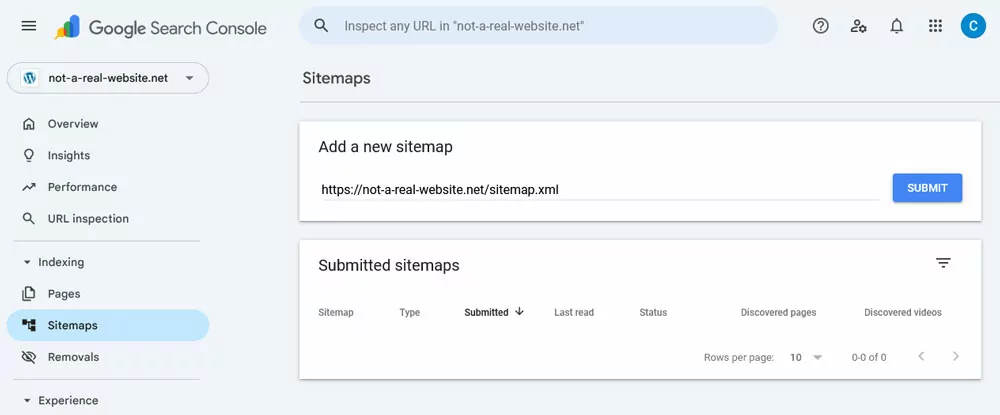
Once ready, you can submit it to Google Search Console in the Sitemaps menu. Just enter the address of its location (usually something like yourdomain.com/sitemap.xml) at the top and click Submit.
As mentioned earlier, if you have your language versions set up as subdirectories, you can submit one sitemap in your main account. Submitting language-specific sitemaps to individual subdirectory properties is also possible to get cleaner coverage data. Make sure all different language versions of your pages are marked with hreflang tags.
If you use separate domains or subdomains for your website languages, you also need to submit separate sitemaps for each version, hreflang tags included.
Individual sitemaps allow you to see at a glance if one language has a significantly lower indexed to submitted ratio than others. This helps pinpoint technical issues like slow server responses, crawling problems, or translation quality issues that might be blocking Googlebot in specific regions.
How Do You Find and Fix Indexing Issues for Translated Pages?
Another important menu in Search Console is Indexing → Pages. It shows you how many of your pages are in Google’s index, how many aren’t, and why.
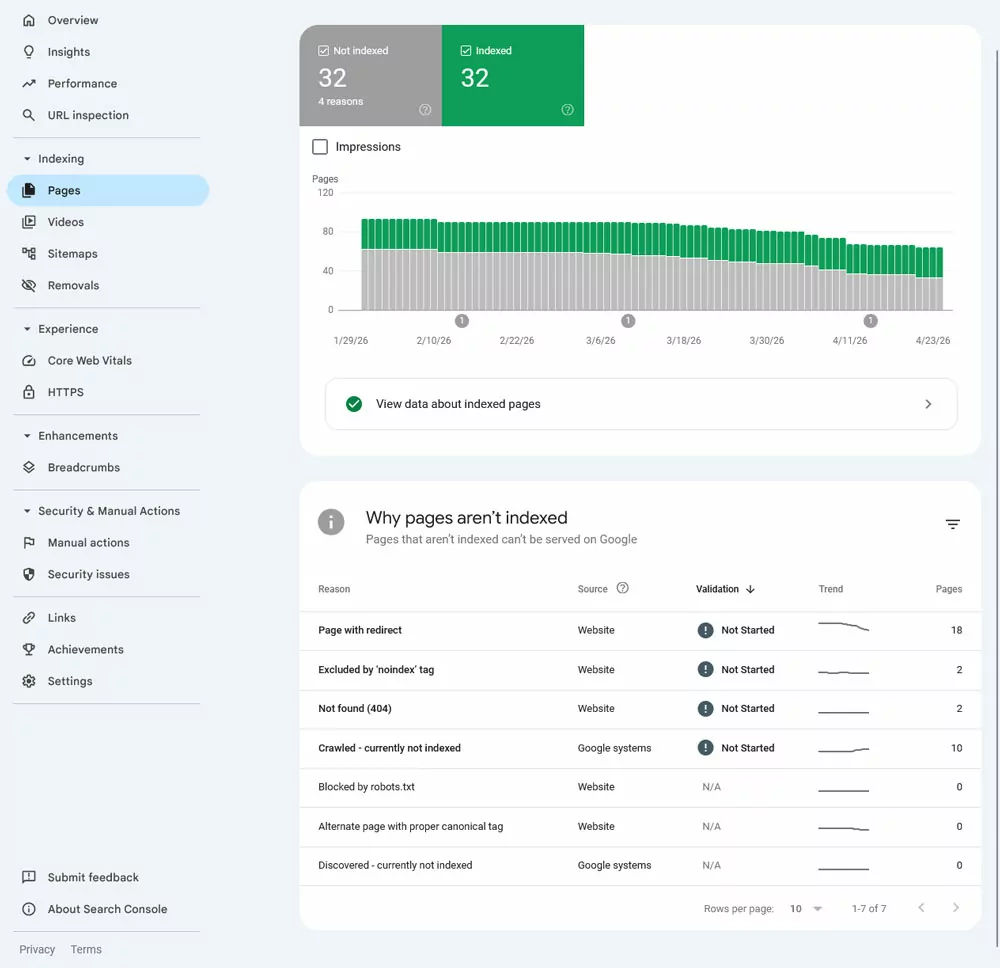
Before you panic, it’s normal to have a bunch of pages on your site that are not indexed. For example, some of your pages may:
- Be redirected
- Have a noindex tag attached to them
- Be considered unimportant
The goal of this report is to ensure there aren’t any pages in that group that shouldn’t be there. Click through each of the categories of non-indexed pages for each of your languages and see if there are any pages you’d prefer to have appear in Google.
Specifically monitor for “Duplicate, Google chose different canonical than user” messages. If your translated pages appear here, it means Google thinks your versions are too similar and is de-indexing your localized content in favor of the primary version.
Use the Inspect URL tool to learn more about individual pages. It appears when you hover over a list item and looks like a magnifying glass. You can also input a page URL into the bar at the top of the dashboard.
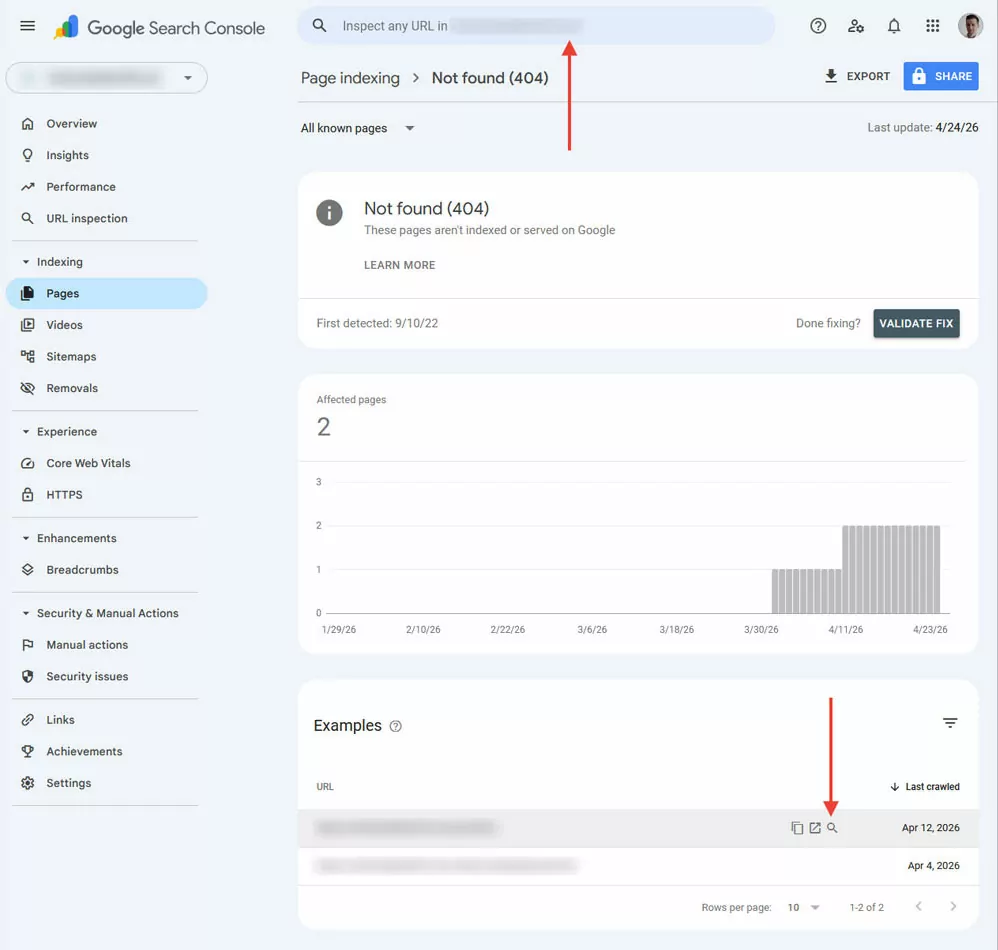
URL inspection shows you what Google actually sees when it crawls that page, not what you think you’ve configured.
For multilingual sites specifically, you want to check the canonical URL Google has selected. If it’s pointing to a different language version than the one you’re inspecting, that’s a sign Google is consolidating your translated pages into the original, which will hurt your localized rankings.
Frequently Asked Questions
Do I need a separate Google Search Console account for each language?
No. You can manage all language versions from one Google account. Add each language version as a separate property — either as a Domain property (for separate domains) or a URL prefix property (for subdirectories and subdomains) — and they’ll all be accessible from the same Search Console dashboard.
What is hreflang and why does it matter for Search Console?
Hreflang is an HTML tag that tells Google which language and region a page is intended for. Without it, Google may index the wrong language version for users in a given country, or consolidate your translated pages into the original — both of which hurt localized rankings.
How do I know if my translated pages are being indexed correctly?
Go to Indexing → Pages in Search Console for each language property. Watch for “Duplicate, Google chose different canonical than user” errors — this means Google is ignoring your translated pages in favor of the original. Use the URL Inspect tool to check what canonical URL Google has assigned to individual pages.
Can I use Google Search Console with TranslatePress?
Yes. TranslatePress creates SEO-friendly URLs (subdirectories by default, separate domains with an addon), automatically adds hreflang tags, and generates multilingual sitemaps — all of which are what Google Search Console needs to correctly identify and track your language versions.
Create a Manageable Multi-Language Website With TranslatePress
Are you looking for a way to build a website with well-separated languages to connect to Google Search Console? Here’s how TranslatePress can assist you.
1. Choose Your Desired URL Format
By default, language versions in TranslatePress are set up as subdirectories (e.g. yoursite.com/de/). However, with the Different Domain per Language addon, you can also assign unique domains or subdomains to different translations.
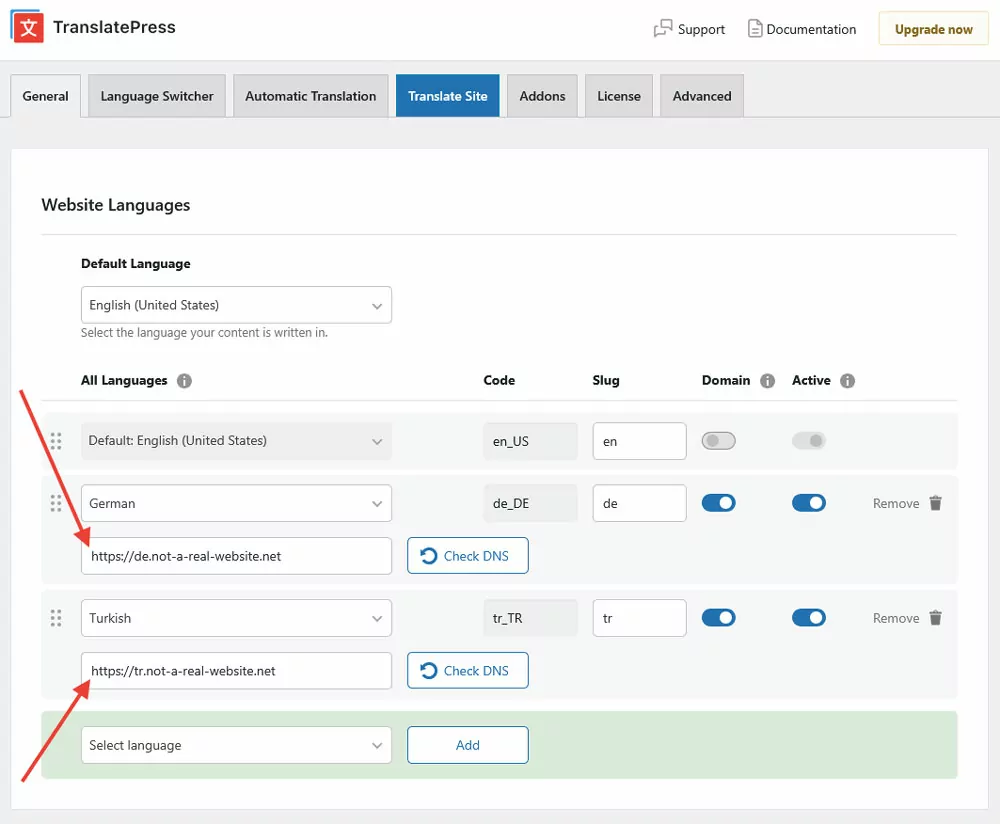
This helps with regional targeting and local SEO, improves user experience and trust, and lets you run multiple domains on one install.
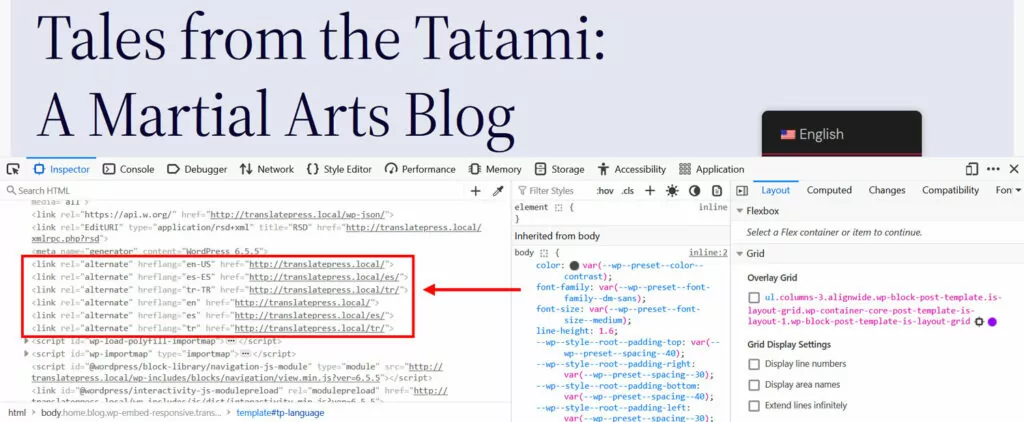
2. Implement Multi-Language SEO
TranslatePress also helps you with multilingual SEO. For one, by automatically implementing hreflang tags for all your chosen languages.
TranslatePress Pro additionally comes with the SEO pack addon. It allows you to translate your page URLs, SEO titles, meta descriptions, ALT tags, and other important SEO markers to other languages.
The extension also creates multilingual sitemaps for most of the popular WordPress SEO plugins.
3. Easily Add More Languages
TranslatePress also makes it super simple to create a multi-language website in the first place. All you have to do is go to Settings → General, pick your default language at the top, then select your target language(s) under All Languages, and click the Add button.
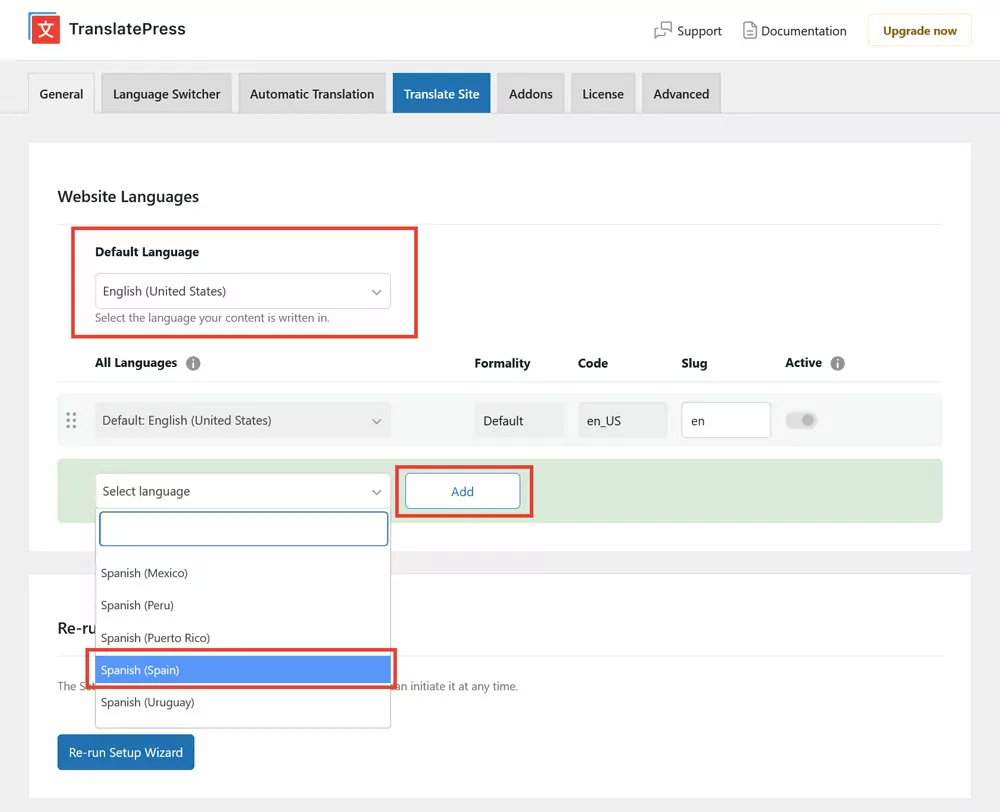
Save at the bottom after you’ve made your choices. That’s it.
4. Use Automatic AI Translation
With TranslatePress, you can translate your web content in different ways. The easiest method is to use TranslatePress AI.
For that, go to the Automatic Translation tab and Enable Automatic Translation. Then, save at the bottom.
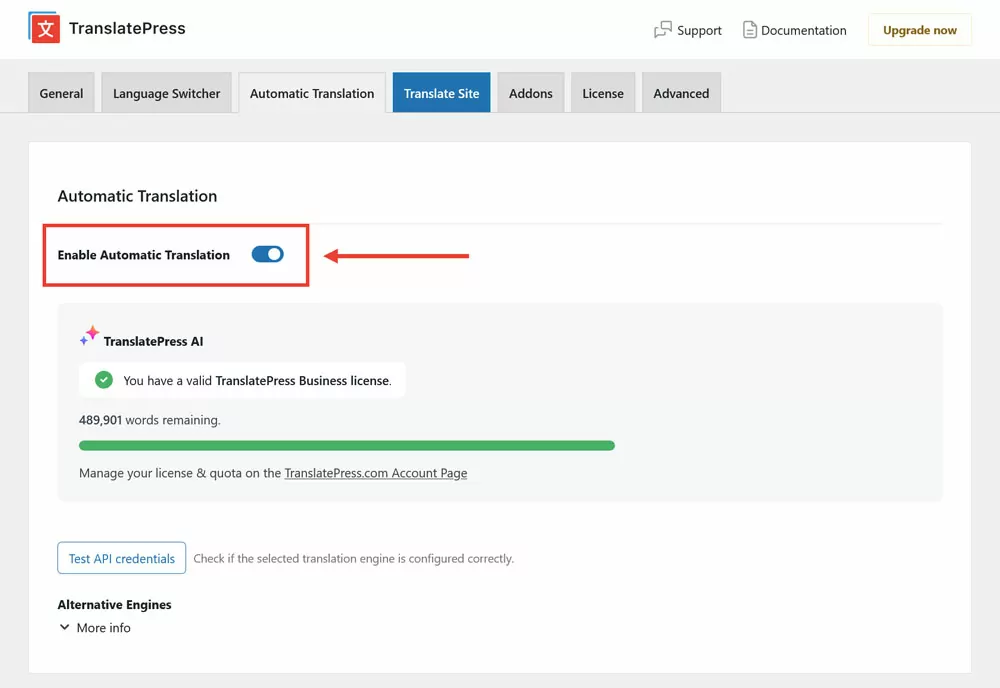
The integrated TranslatePress AI translation engine will immediately start converting your website to your target language(s). By the time you access the front end of your site and use the language switcher, the process has likely already finished.

Besides your posts and pages, TranslatePress AI also converts your menus, themes, plugins, and even SEO metadata. Be aware, however, that you need a TranslatePress license and AI credits for this to work.
5. Alternatively, Use Google Translate and DeepL
Without a license, you can still use machine translation. Under Alternative Engines, choose Google Translate (with a TranslatePress license, DeepL is also available).

Obtain an API key using this guide for Google Translate or this one for DeepL. The rest of the process is the same as using TranslatePress AI.
6. Make Manual Adjustments and Localize Images
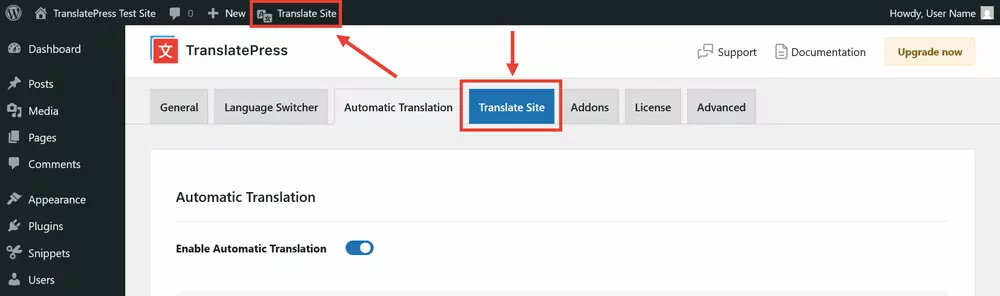
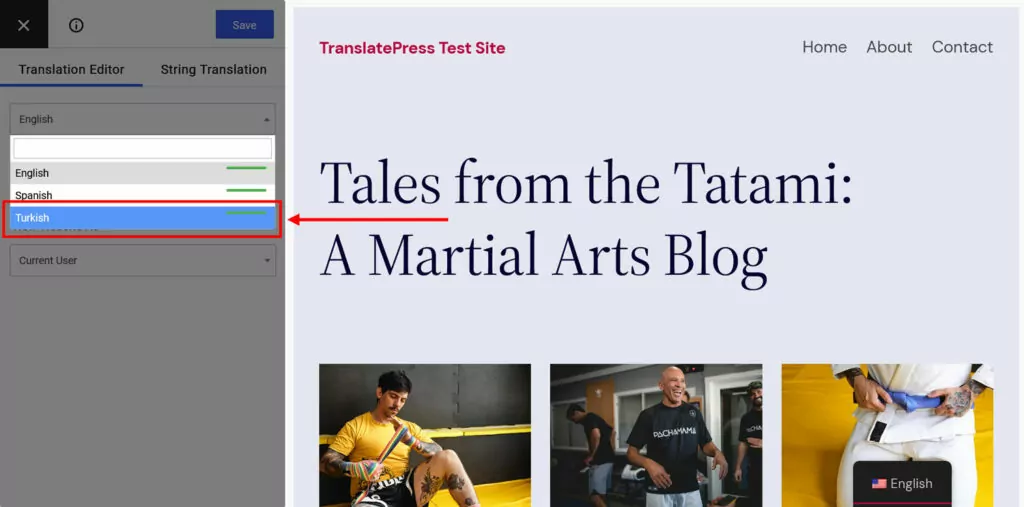
Access the TranslatePress translation interface by clicking Translate Site in the settings or the WordPress taskbar.
The upcoming screen has a preview of your site on the right and translation tools on the left. First, switch the screen to your target language using the drop-down menu.
Then, choose the text you want to modify in the preview window. You can do this through the second drop-down menu, forward and backward arrows, or by clicking it in the preview screen.
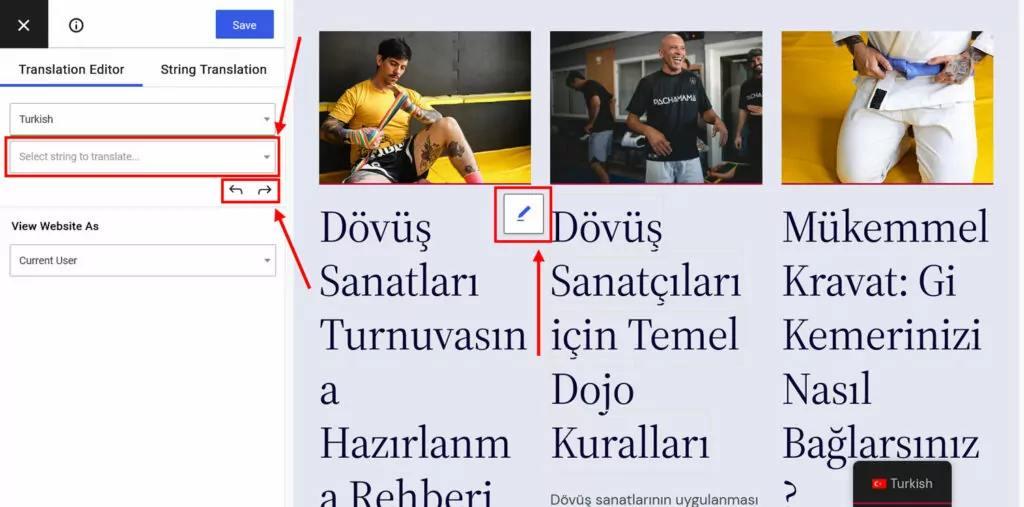
A new field for the translation will appear on the left.
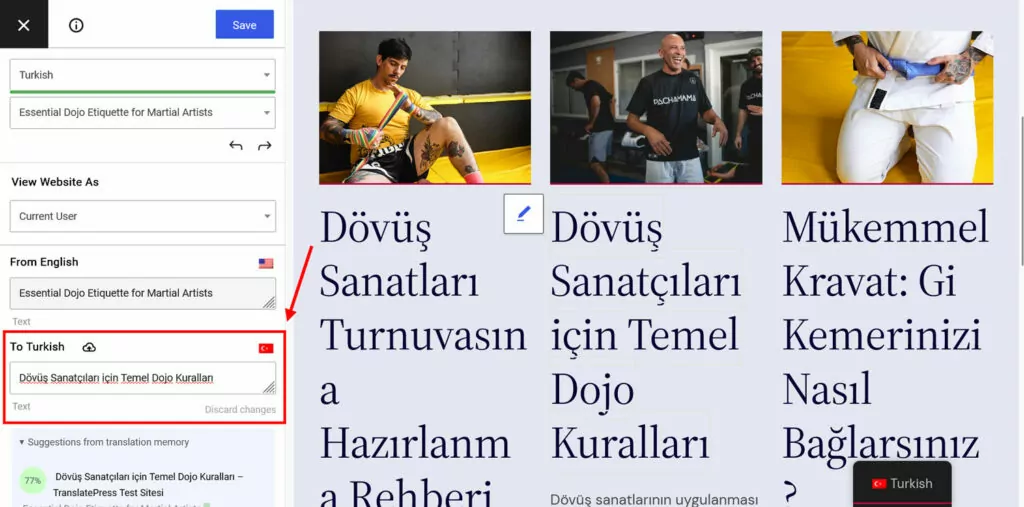
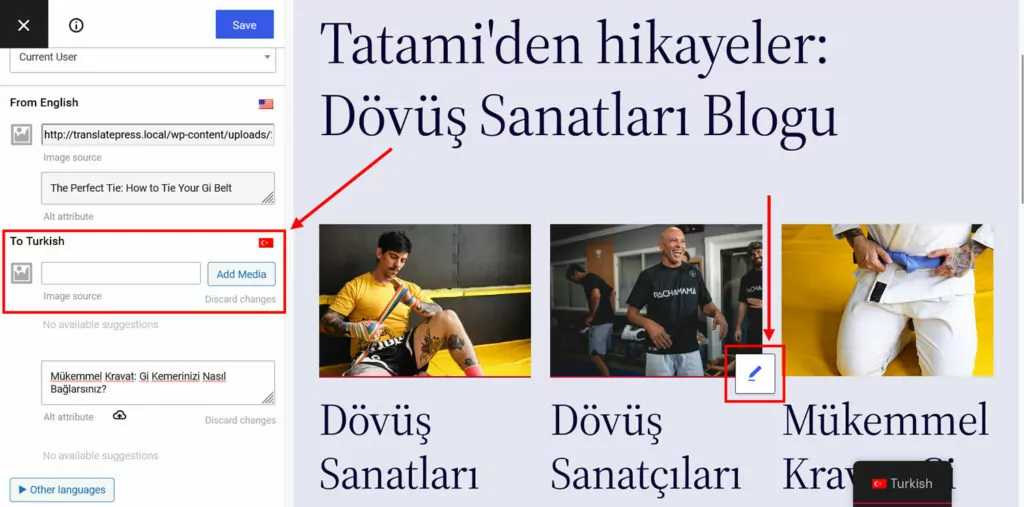
Make any corrections or input you need, then click Save at the top or press Cmd/Ctrl+S. The same process also works for images. Click to choose them, then provide a link to the translated version or pick it from your WordPress media library.
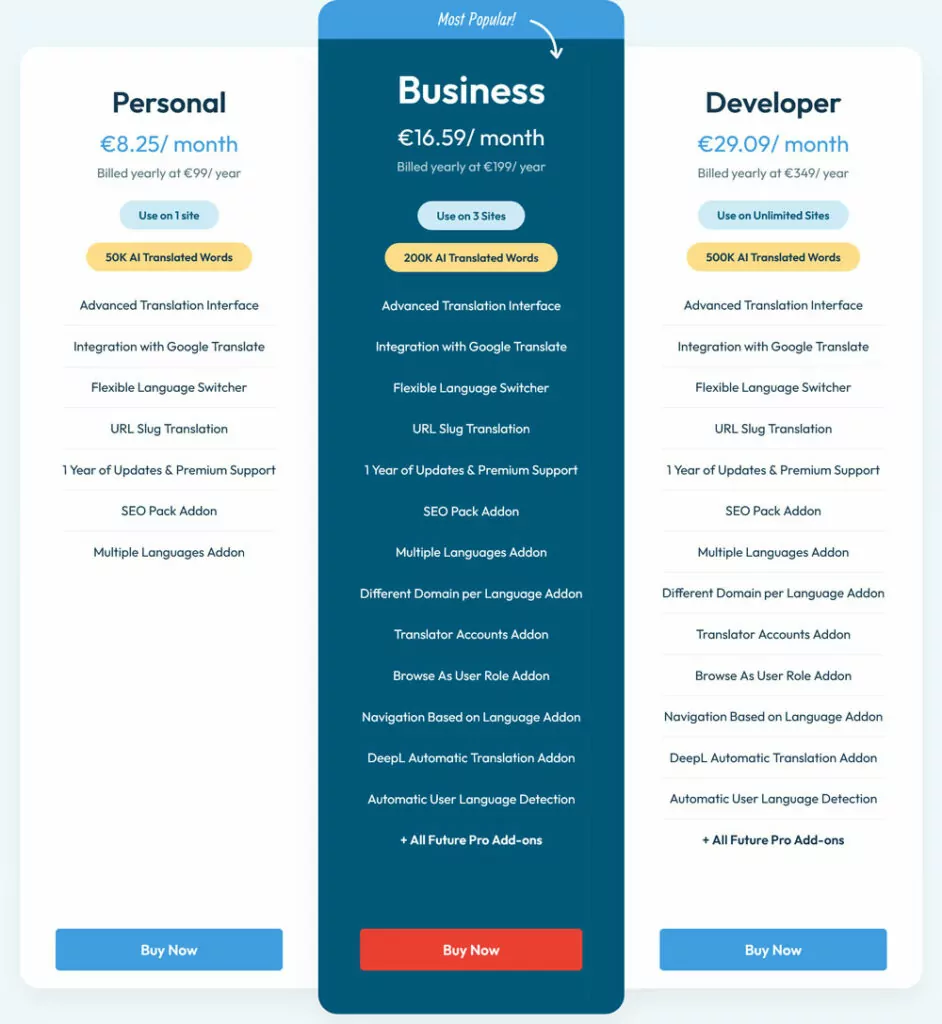
The free version of TranslatePress is good for one additional language on your website. If you need more, TranslatePress Pro offers three pricing tiers so you can find the right option for you.
Connect Your Multi-Language Website to Search Console Today
The key to using Google Search Console effectively on a multi-language site is separation: separate properties per language, separate sitemaps, and properly implemented hreflang tags. Get that structure right from the start, and Search Console will give you a clear view of how each language version is performing — and where it’s failing.
TranslatePress is the perfect tool to do this on your WordPress website. It supports all multi-language setups preferred by Google, automatically creates the necessary hreflang tags, offers multilingual sitemaps, helps you easily add languages, can quickly translate your entire site via AI.
TranslatePress Multilingual
Get TranslatePress now and test it risk free with our 15-day money-back guarantee!