Looking to translate Neve theme?
Neve is among the top 10 most popular WordPress themes in the official directory at WordPress.org. Every day, around 2,000 new users pick Neve to be the foundation of their website design. Many of those users also want to learn how to translate Neve to match the multilingual content on their websites.
In this tutorial, we show you – step by step – how to install Neve correctly, how to set it up with TranslatePress, and how to translate every element of your Neve-built website for smooth everyday use with multilingual content.
1. Install the Neve theme and import your starter design
The starting point with Neve is pretty standard. Go to your WordPress dashboard, then into Appearance → Themes, and click on Añadir Nuevo. In the search field, enter Neve. Install and activate the theme normally.
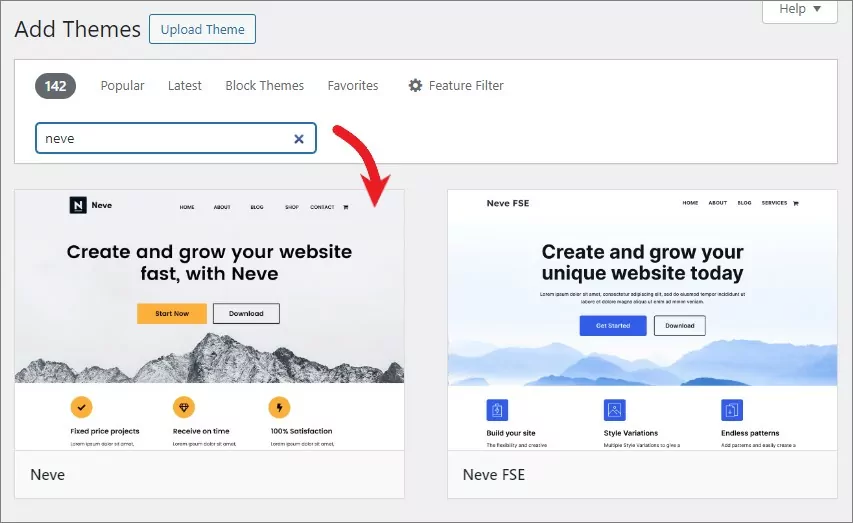
At this stage, your Neve theme is just a shell with no specific design on top. To make it more appealing, you’ll need to import one of the available pre-made starter templates.
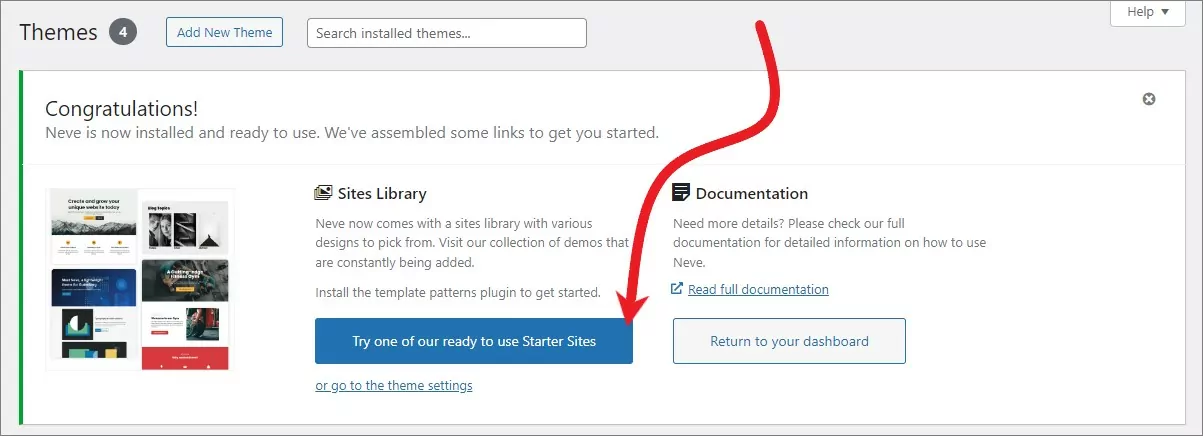
Click on the blue button to get started.
Neve will take you through onboarding training to get everything set up and ready to go.
First, it will prompt you to install an additional plugin with the starter site designs. Click on the Instalar y Activar button to proceed.
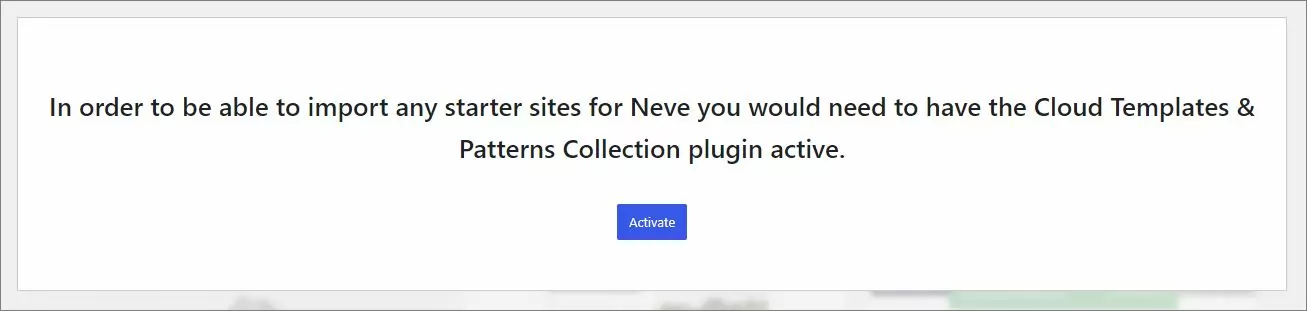
When the installation is done, you’ll get to choose from hundreds of ready-made designs. All of them only take a couple of clicks to get onto your site.
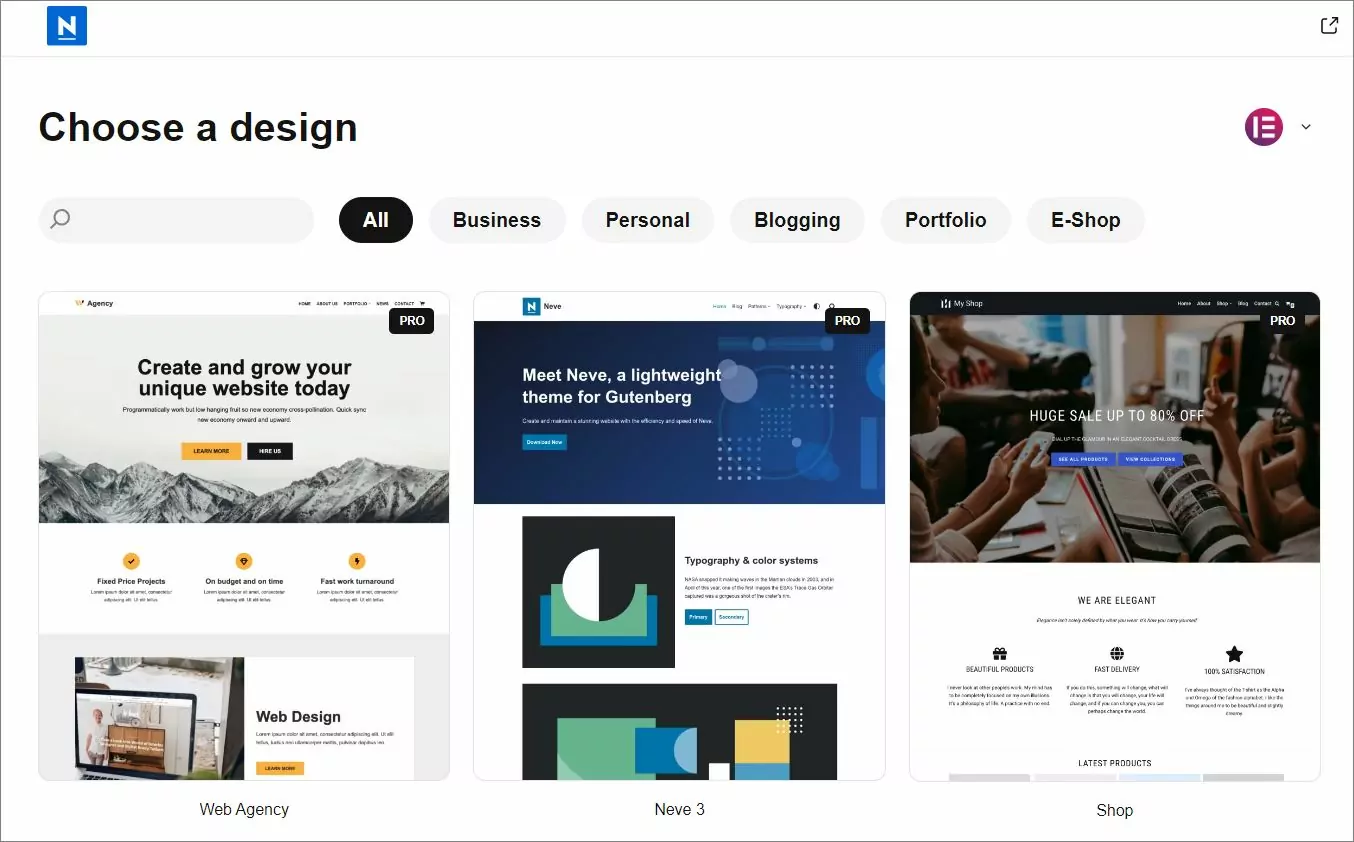
As you can see in the screenshot above, Neve lets you select a design made for your favorite builder plugin.
An important detail here is that all these starter designs can be translated using TranslatePress – no matter which specific design or specific page builder you go with.
Pick your favorite design and click on Import to get it fetched to your site.
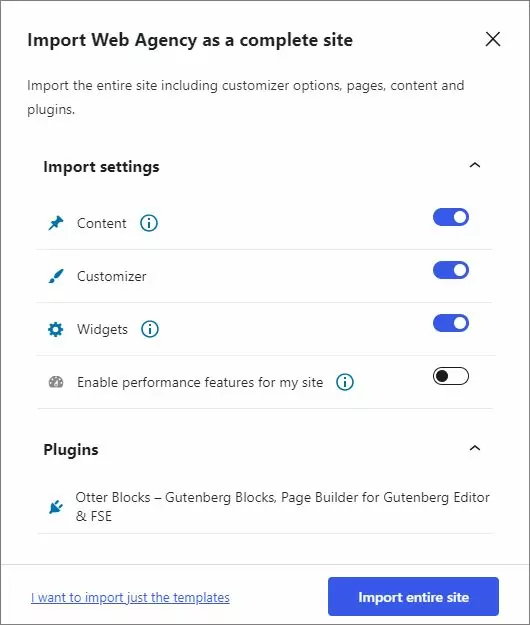
Haz clic en el Import entire site button to proceed. Neve will install the required plugins for you as well, so no need to worry about those either.
Importing the data can take a couple of minutes. You’ll see a screen like this when it’s done:
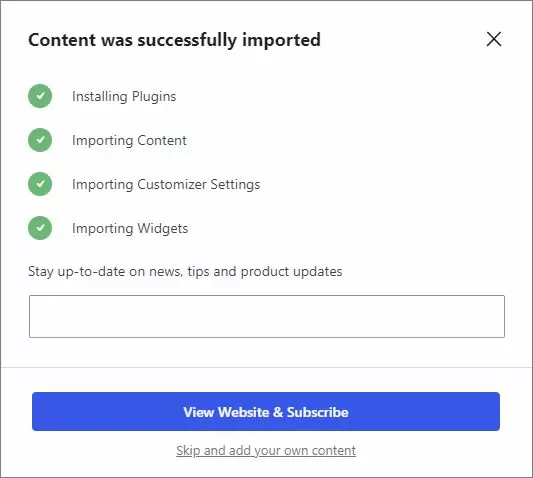
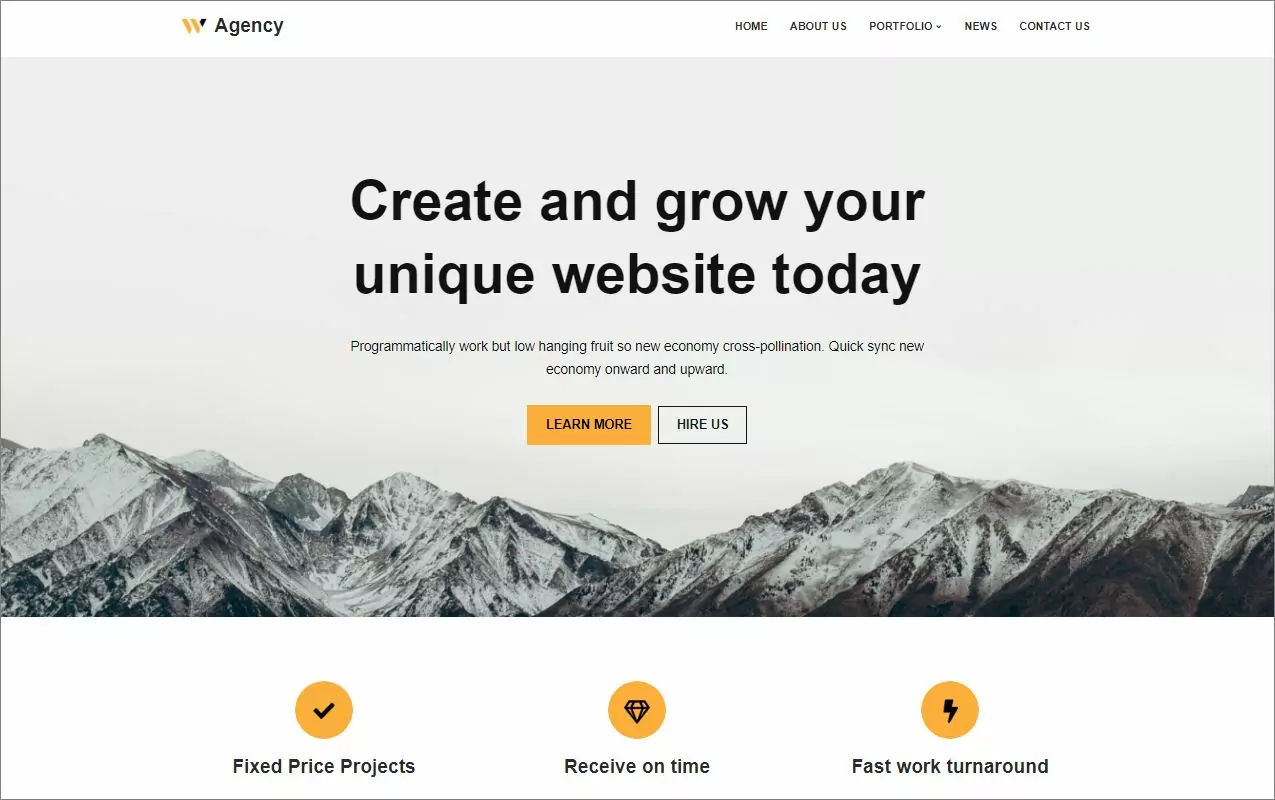
With this taken care of, you can now see your Neve design in all its glory! ✨
2. Add your original content
At this stage, you can customize the pages and designs imported by Neve and add your own original content.
Don’t worry about translations yet. For now, focus on creating content in your site’s default language. We’re going to add additional languages in the next steps.
As part of the starter design import, Neve fetched not only the homepage design but also a set of other, most-used pages. You can go through them now and customize their contents to fit your needs.
You can also create new pages – either via WordPress’ standard block editing interface or with your page builder plugin. The bare minimum is to customize your home and about pages.
Again, what you’re working on now is just the primary language version of your site.
3. Install TranslatePress and configure it
Once you have the main language version of the site ready, it’s time to turn it multilingual! 🏯
This is where TranslatePress comes into play!
In your WordPress dashboard, go to Plugins → Añadir Nuevo.
Enter TranslatePress into the search field, and click on Instalar ahora y Activar.
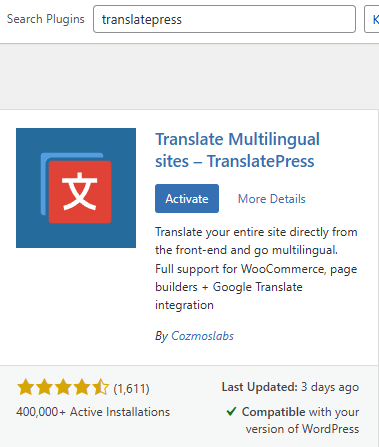
A continuación, ve a Configuración → TranslatePress to configure the basic settings.
The first order of business is to select the default language of your website. Most likely, that setting is already correct. If not, choose the right language.
Next, in the Add Languages section, add a new language to your website.
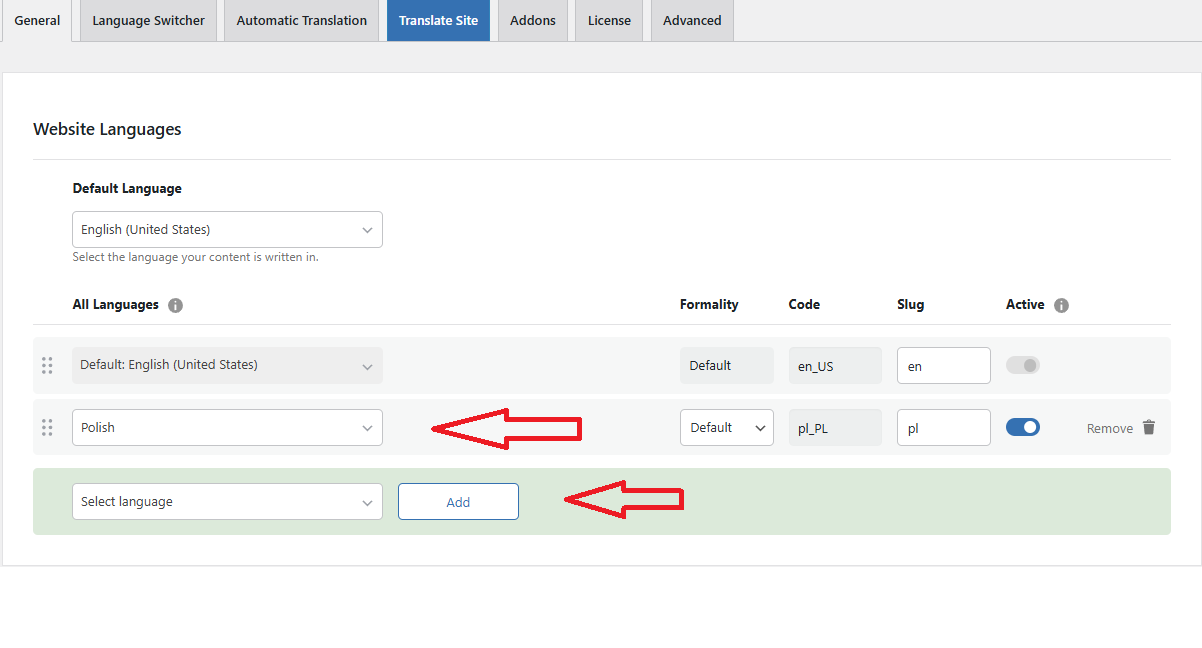
👉 The free version of TranslatePress allows you to add one additional language. If you need more than that, you can upgrade to the paid version, which will let you translate your Neve site to unlimited languages.
The other settings on this page are all optional, but you can go through them to get a better idea of what’s possible in TranslatePress.
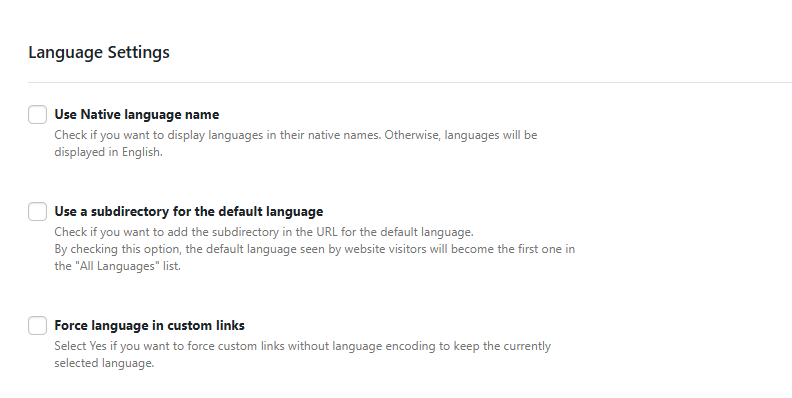
Remember to click on the Guardar cambios button when you’re done here.
🤖 Note; if you’d prefer to have all your translations done on autopilot, you can switch to the Traducción Automática tab in the settings panel.
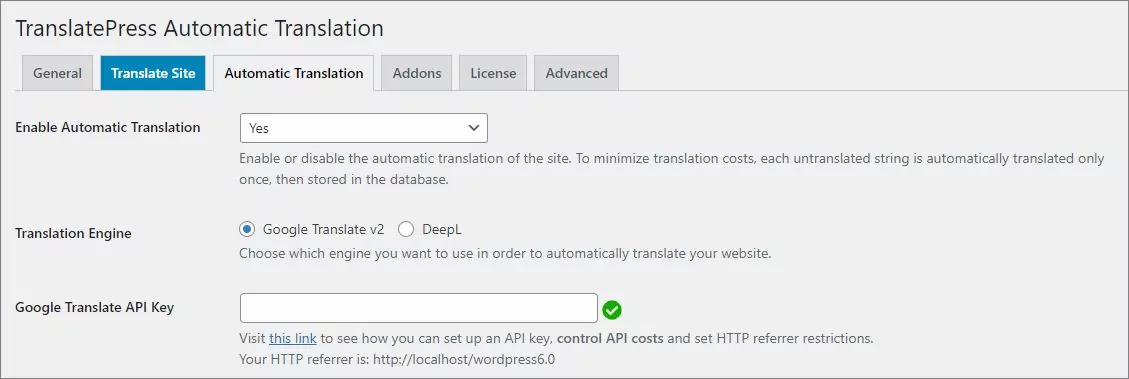
TranslatePress allows you to connect your site to Google Translate API or DeepL – an advanced traducción automática solution (DeepL is available with the versión pro de TranslatePress) or you can use the integrated engine TranslatePress AI which will help you more to manage the usage of the words better and is easy to be maintained.
What’s great about this approach is that TranslatePress will do all the heavy lifting on its own, but then you can still step in afterward and fine-tune your translations to make them perfect.
With your new language added, you can now proceed to translate Neve along with all your website content.
4. Translate your site’s main menu
A good place to start when working on your translations with the Neve theme is the site’s main menu.
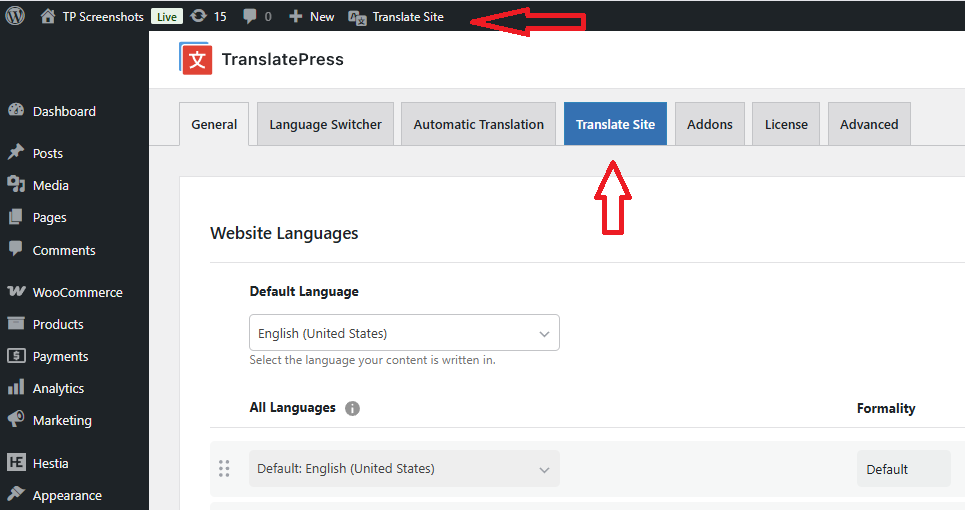
Haz clic en el Traducir sitio button in the settings panel or the top admin bar:
You’ll be taken to the translation interface of TranslatePress. Up top, hover your mouse over the main menu links. You’ll see a lápiz icon next to each link. Click on any of these lápiz icons and translate your menu items one by one.
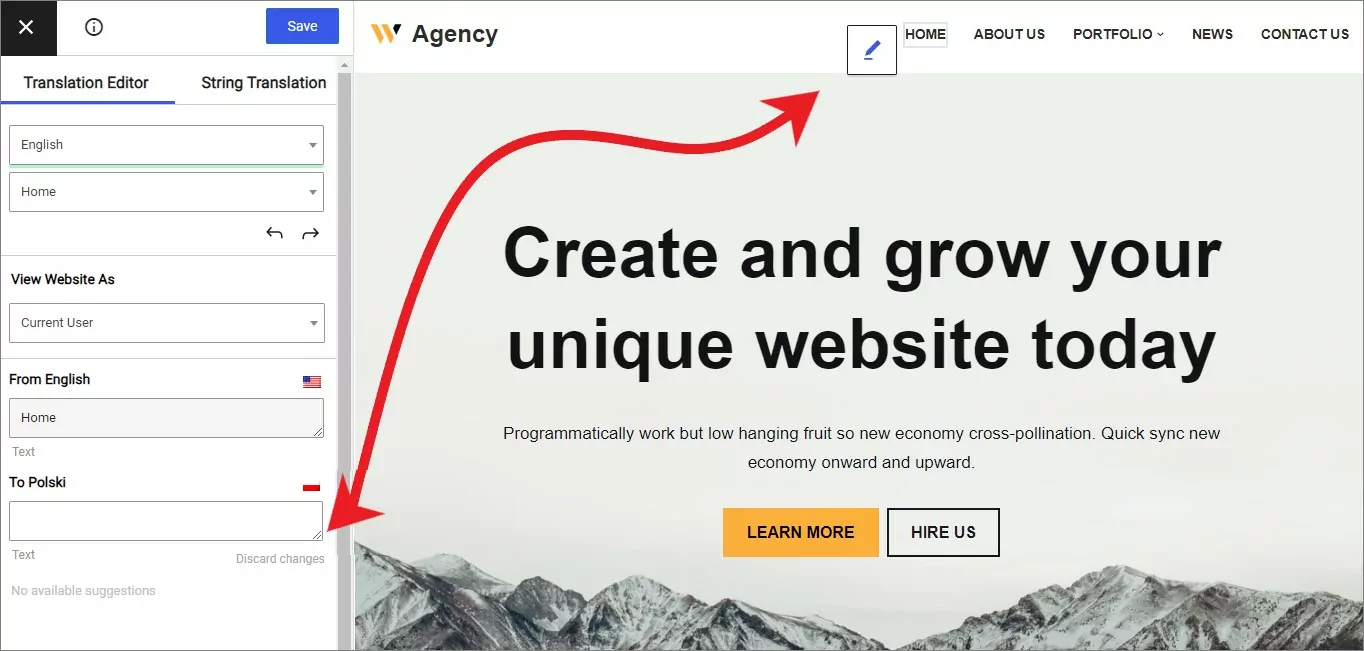
Don’t forget to click on Guardar traducción when you’re done with each one.
To see your menu translations in action, we need to take care of one more thing – adding a language switcher to the menu itself.
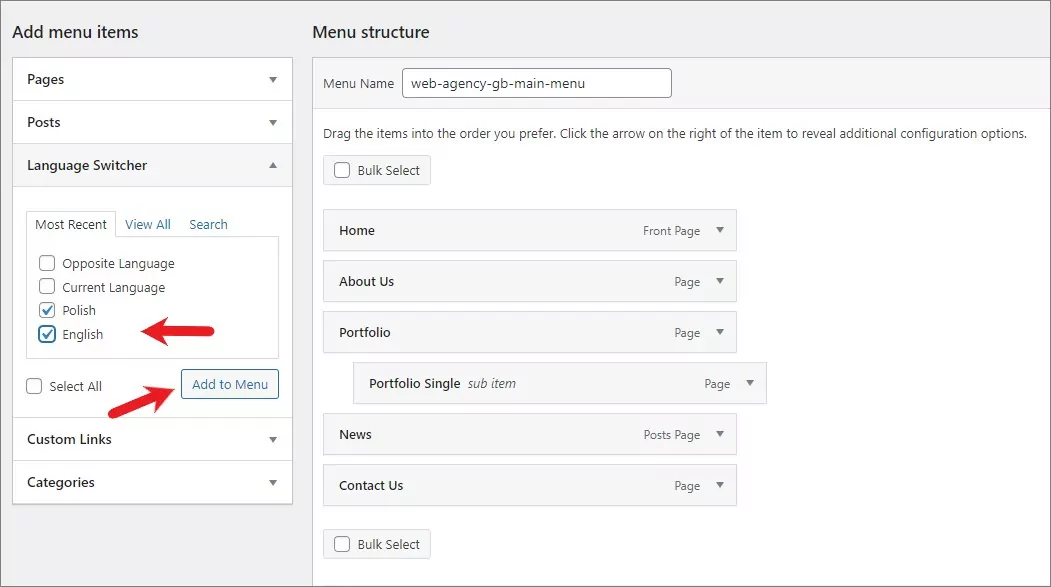
In the WordPress dashboard, go to Apariencia → Menús. From the list of available menu items, select all your languages and add them at the end of the main menu.
To make it more pleasing to the eye, you can move those language links under a dropdown, like so:
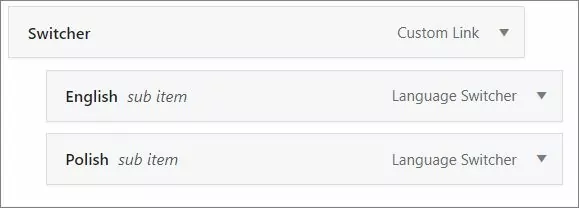
With this done, you should see your language options in the menu:
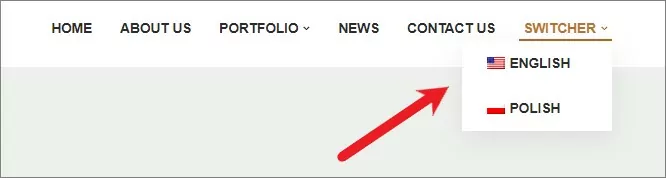
Switching the current language will show the alternative – translated – version of your menu.
5. Translate your Neve homepage
Let’s now translate what’s usually the most important page on any website – the homepage.
To begin, visit your homepage and click on the Traducir página link up top.
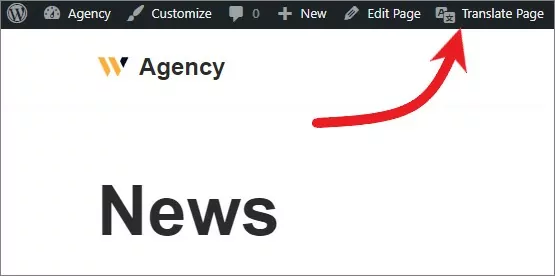
You’ll see the main translation interface of TranslatePress, but this time, instead of customizing the menu, we’re going to work on everything else that’s on the page.
The great part about this whole process is that you can translate Neve and all its contents simply by clicking on the lápiz icon next to a specific piece of text and then adding your translation in the sidebar. Lastly, as always, click on Guardar traducción cuando termine.
For example, here’s what this looks like when translating the main headline:
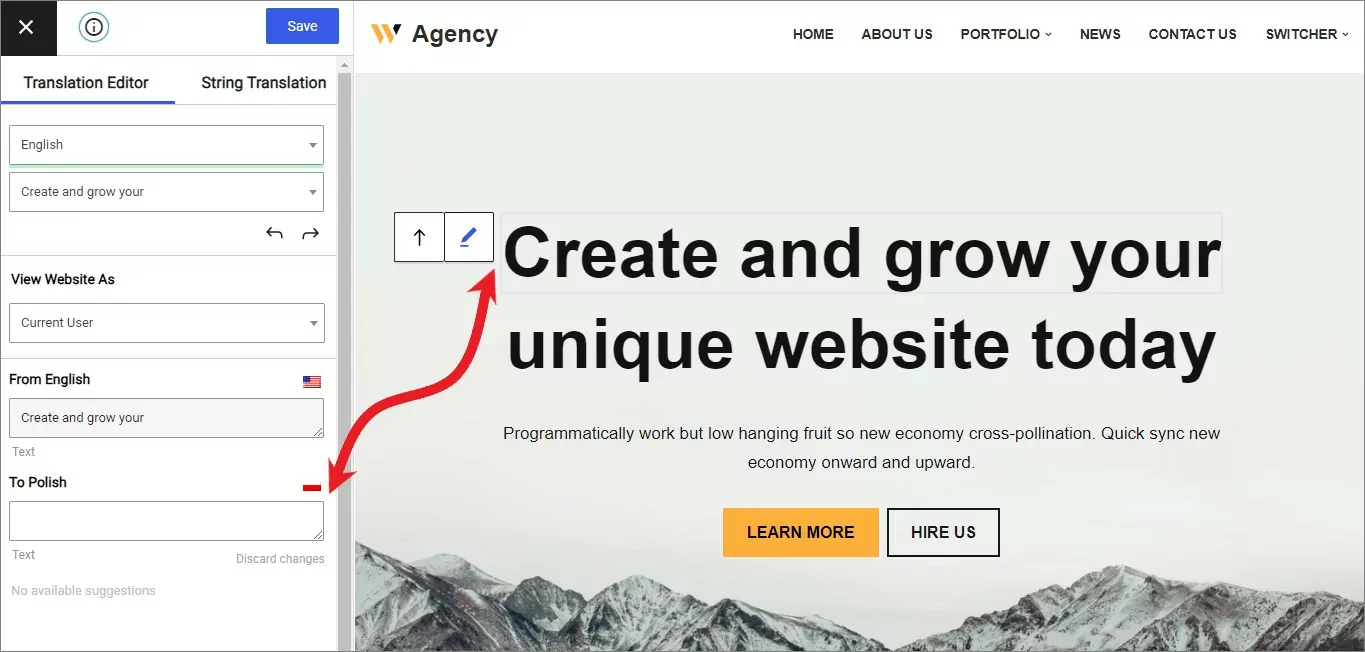
Similarly, you can translate any other piece of text on the page: paragraphs, list items, subheadings, and so on.
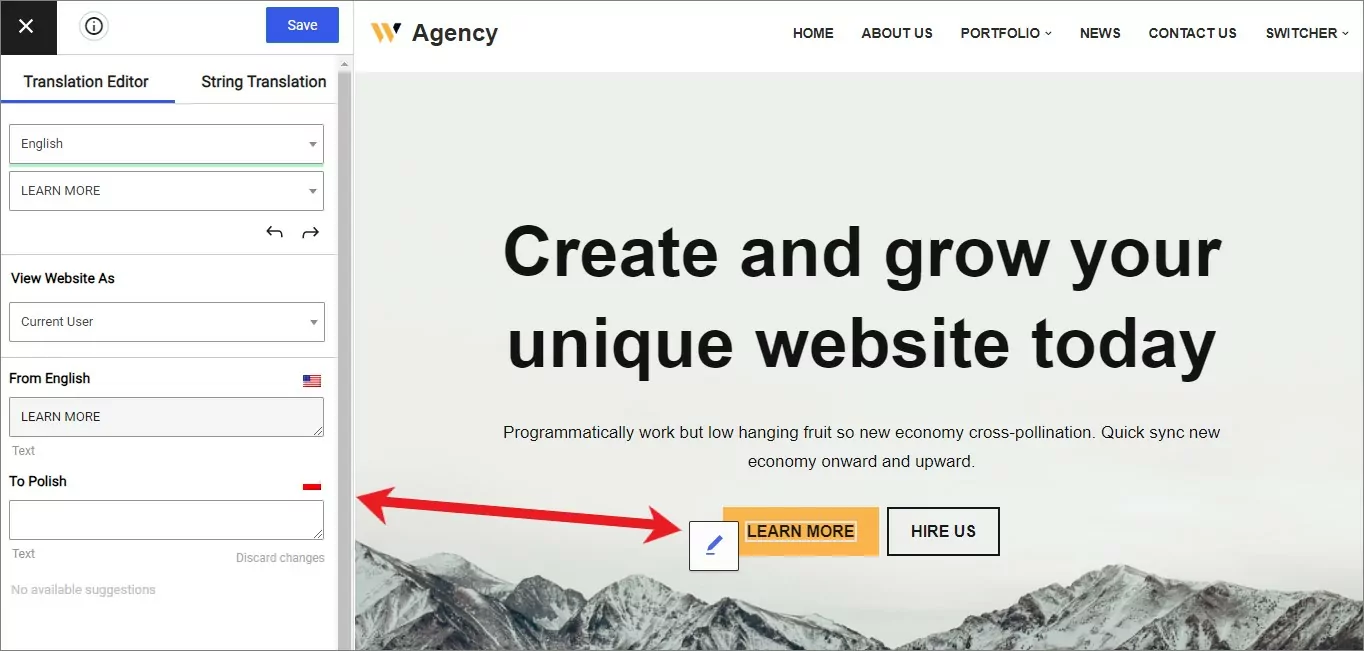
This also includes translating buttons and other link texts. Again, click on the lápiz icon next to any given button, and then enter your translation in the sidebar.
Apart from text content, you can also “translate” your images. In this case, “translating” images simply means replacing them with other images that may be better suited for a given language version of the site.
The good news is that the translation mechanism for this works the same. Again, hover your mouse over the image that you want to replace and click on the lápiz icon next to it.
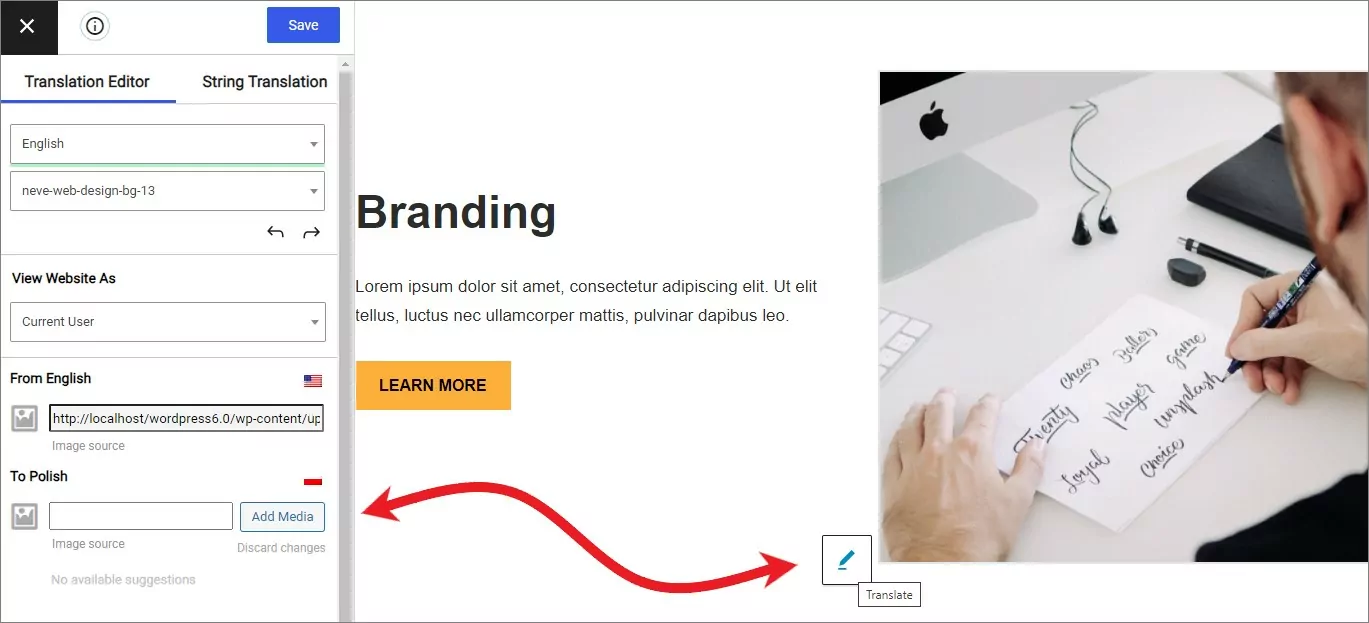
You’ll be able to upload a new image through the interface directly or pick an existing image from your site’s media library. Click on the Añadir multimedia button to do that.
All images that you can see on the Neve homepage can be “translated” this way.
Last but not least, to find the remaining strings of text that Neve uses on the homepage – but which might not be visible at the moment, look through the Lista de Cadenas dropdown in the sidebar:
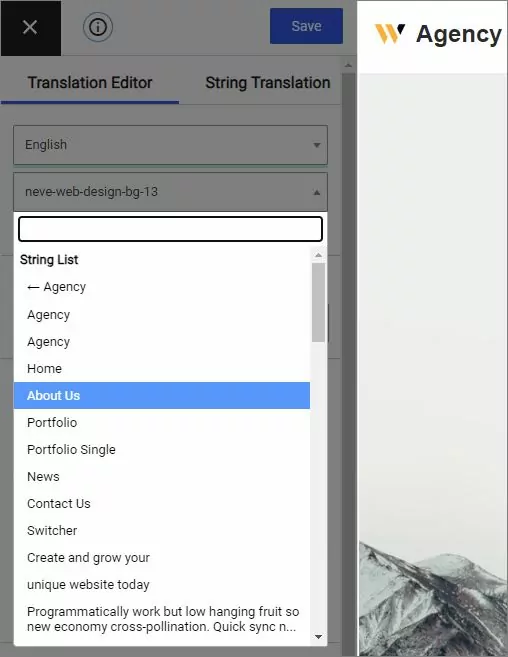
It’s best to carefully go through this list and make sure that everything has an accurate translation before you roll out your Neve site to the public.
6. Translate other pages imported by Neve
The homepage is probably not the only page you have on your site. This is a good moment to go through every Neve sub-page and translate them as well.
Commonly with Neve starter sites, you’ll get pages such as Quiénes somos, Contact, y Portfolio. Mind you; you don’t have to keep them. Any of these pages can be deleted if you don’t have a use for them.
For those you do need, go through them one by one and translate them the same way you translated the homepage.
The only new element you’ll encounter is the formulario de contacto on the Neve Contact page. While the element might be new, translating it works the same as with anything else.
Hover your mouse over each label in the form, click on the lápiz, and enter a new translation in the sidebar.
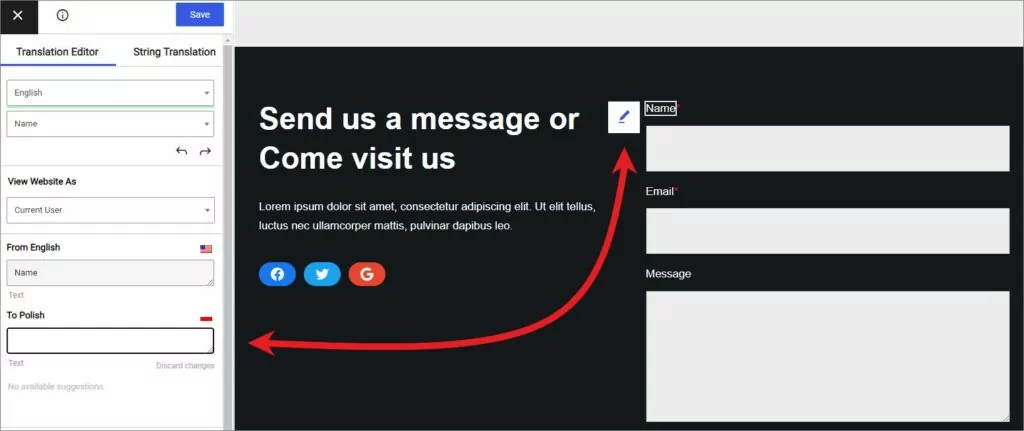
You should translate the main submit button of the form as well.
To translate the placeholder texts inside the form fields (like “Your Name” or “Please add your message here”), you can find those strings in the Lista de cadenas dropdown in the sidebar.
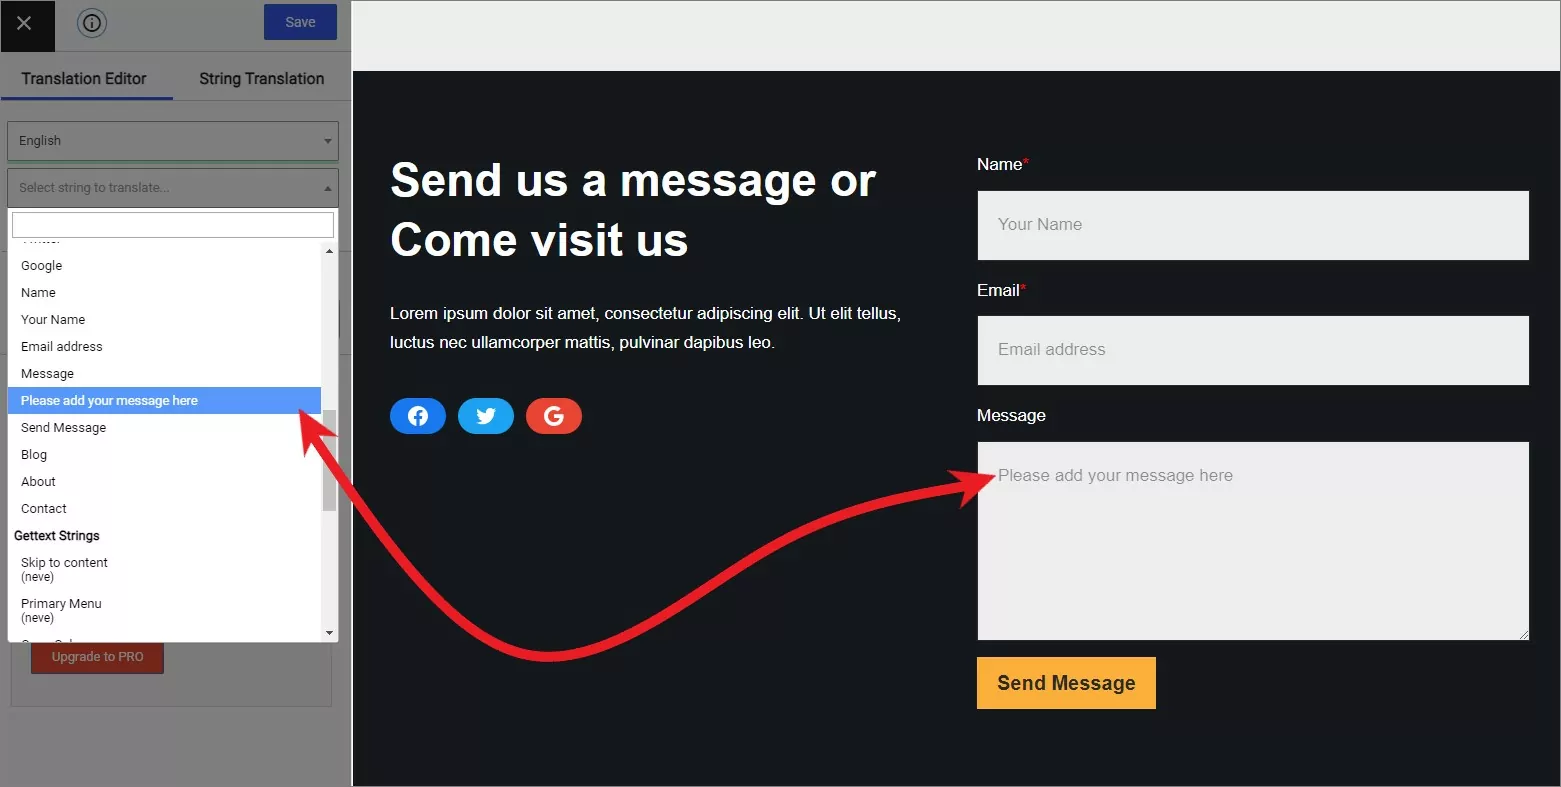
Generally speaking, Neve is very translation-friendly, so whenever you stumble on a new element, just hover your mouse over it and look for the lápiz icon to enter the translation interface.
7. Translate the SEO parameters of your Neve site
The last stage of full Neve translation is taking care of some key SEO parameters of your site. This is an important step if you want your translated pages to appear in Google searches correctly.
The premium version of TranslatePress allows you to handle this through the Complemento SEO Pack that’s part of the upgrade package. It has options for translating your pages’ slugs (unique URLs), page titles, and descriptions.
Handling the translations themselves is easy to do. For each page, enter the translation interface by clicking on the same Traducir página button in the top bar and then go immediately to the Lista de cadenas dropdown. At the top of it, you’ll find the SEO strings of the page:
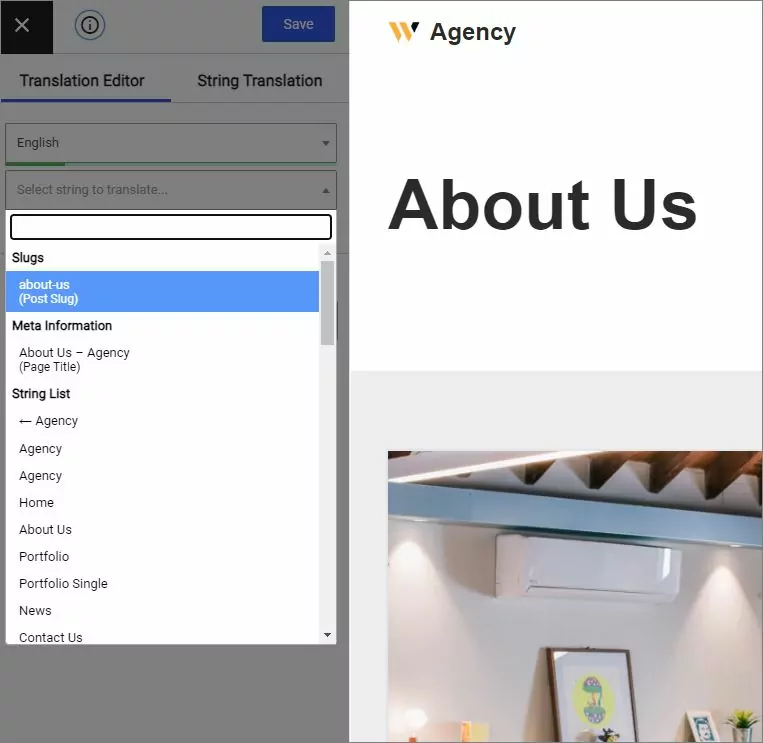
Go through them one by one and add translations for each of your languages. Click on Guardar traducción cuando termine.
If you want to go the extra mile, you can also translate your images’ alt tags. To do this, with the SEO add-on enabled, click on the lápiz icon next to any of your images. You’ll see a new Alt attribute box in the sidebar.
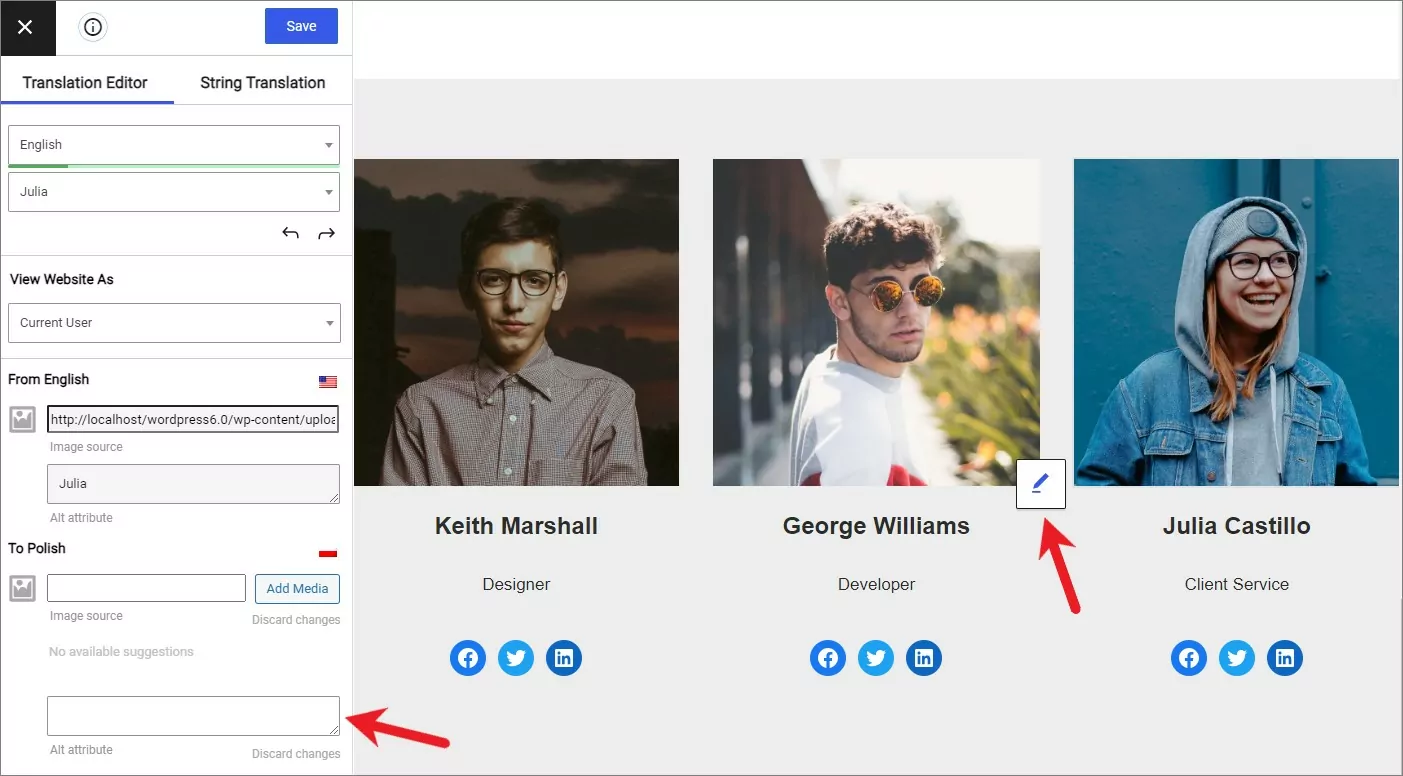
Adding alt tags to all images on your site will take a while, but it’s the kind of thing that can be the differentiating factor that puts your website above the competition in Google rankings.
Create a multilingual website with Neve today
As you can see, getting the Neve theme installed on your site and then making it fully multilingual is not difficult at all.
All it takes is some patience when translating your content piece by piece. TranslatePress hooks to Neve’s inner structure and lets you translate every single element that’s on the page (this includes text, images, headlines, buttons, you name it).
To follow this tutorial and get started, you can use the free version of TranslatePress available at WordPress.org.
Then, if you want to enhance your multilingual SEO, translate your site into more than two languages, use DeepL for automatic translation, and access a ton of other useful features, actualizar a la versión premium.