No matter what kind of site you have, the easiest way to let visitors view your content in their preferred language is with a WordPress language switcher.
In a nutshell, language switchers can be text, a button, or a dropdown on a page that users can click (or tap) to translate the content into another language. Generally, you’ll find WordPress language switchers in the header, footer, or navigation.
It doesn’t matter what form your language switcher takes, the important thing is giving visitors a convenient way to switch to their preferred language. It’s essential for improving the overall user experience of any multilingual website or ecommerce store.
In this tutorial, we’ll take a look at some examples of language switchers on popular websites and cover how you can add one to your site with TranslatePress.
Let’s get started.
5 Examples of WordPress Websites with Language Switchers
Language switchers can take many forms, from language codes and flags to dropdowns and localized text.
Let’s take a look at a variety of real-world examples of language switchers.
1. WordPress.org
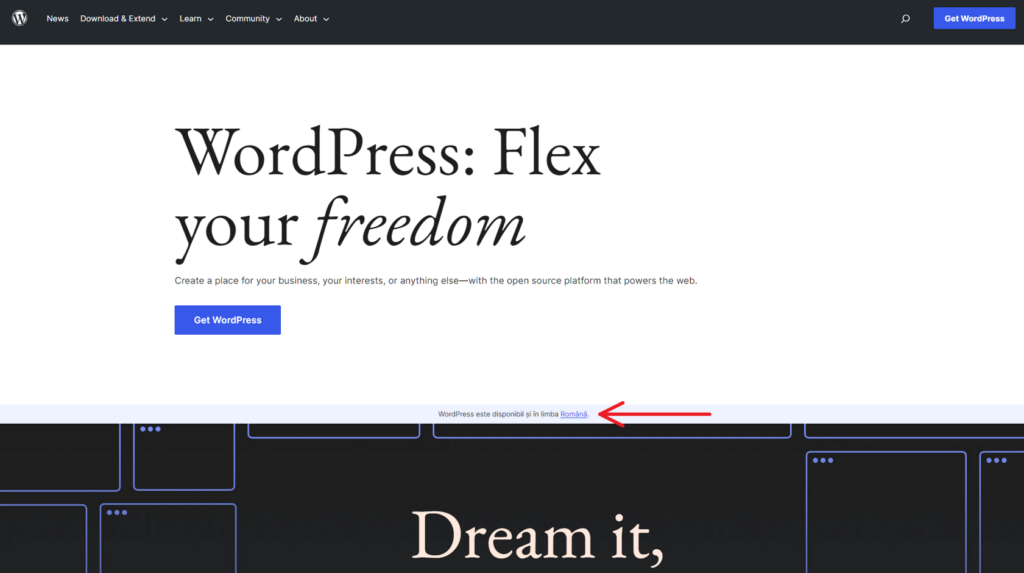
The official WordPress.org site displays a prominent green text box in the middle of the homepage that asks visitors if they would like to switch languages. The site uses geotargeting to automatically detect where the visitor is located and then offers up the most appropriate language for their location.
Text language switchers such as this one are eye-catching and hard to miss. Importantly, they provide an easy way for visitors to quickly change to their preferred language without having to search the page for a language switcher.
2. Inpsyde
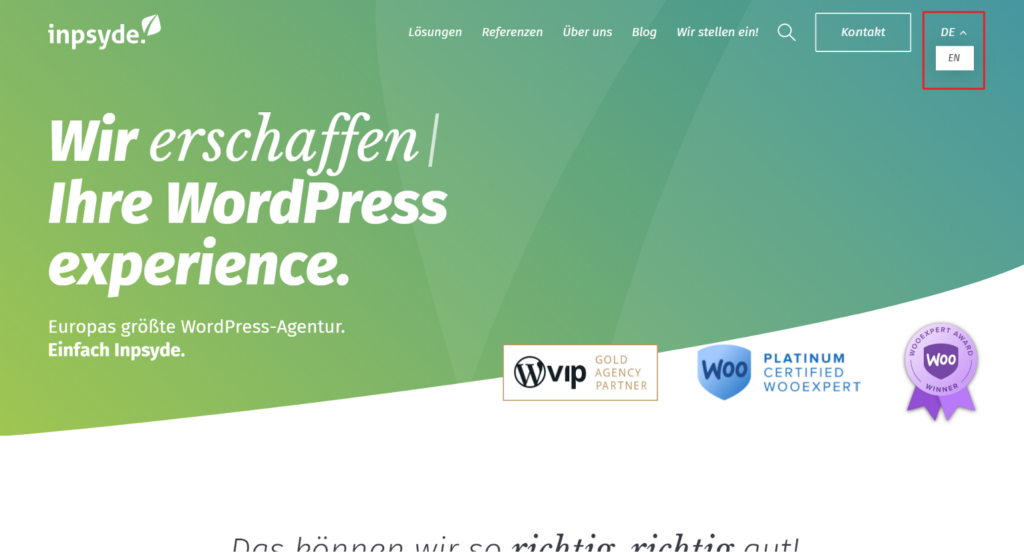
German WordPress agency Inpsyde displays simple language codes in the top-right corner of its site. Visitors can choose between German and English. The language codes are easy to spot and clear—there’s no confusing what each of the languages is on this WordPress multi language website.
3. WP Safe & Sound
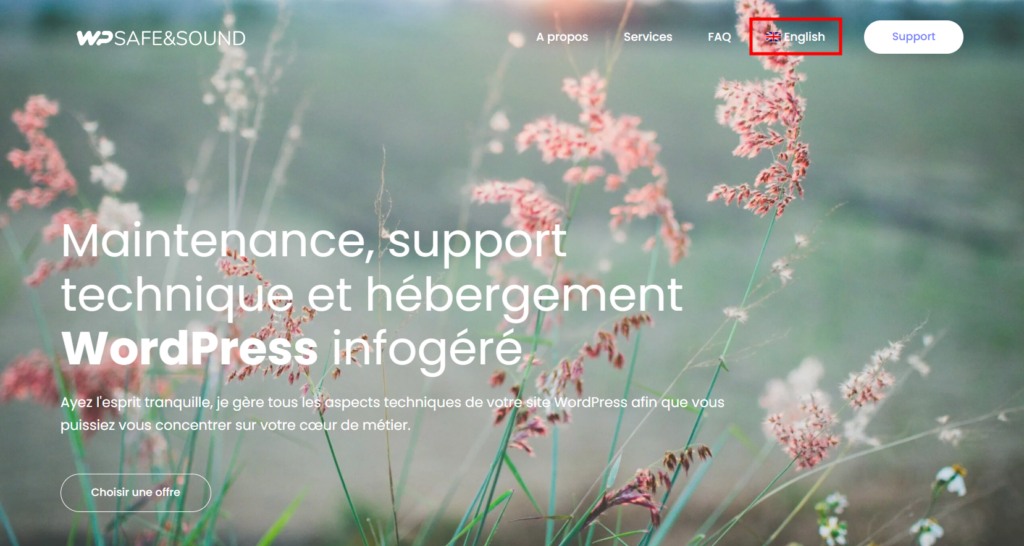
Web development agency WP Safe & Sound offers its content in French and English via a simple language switcher button in the top-right of the page.
Using the full name of the language—“Français” rather than “French,” as English speakers generally know it—is more easily recognizable, not to mention respectful for French speakers.
4. Sweden Sverige
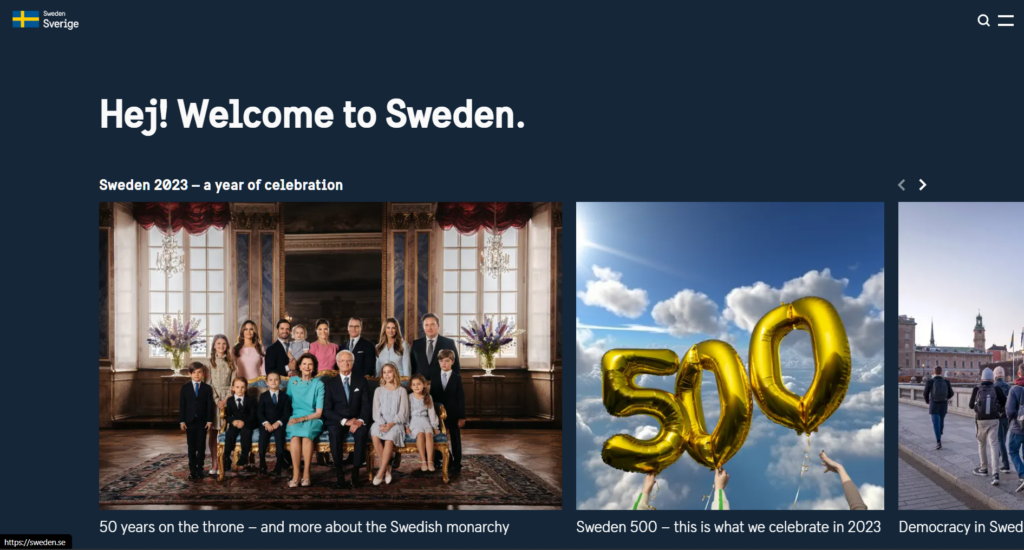
The official site of Sweden is a repository for facts about the country. The language switcher is displayed in their main menu, so you do have to click around to find it, however once you open up the menu, it is fairly easy to identify.
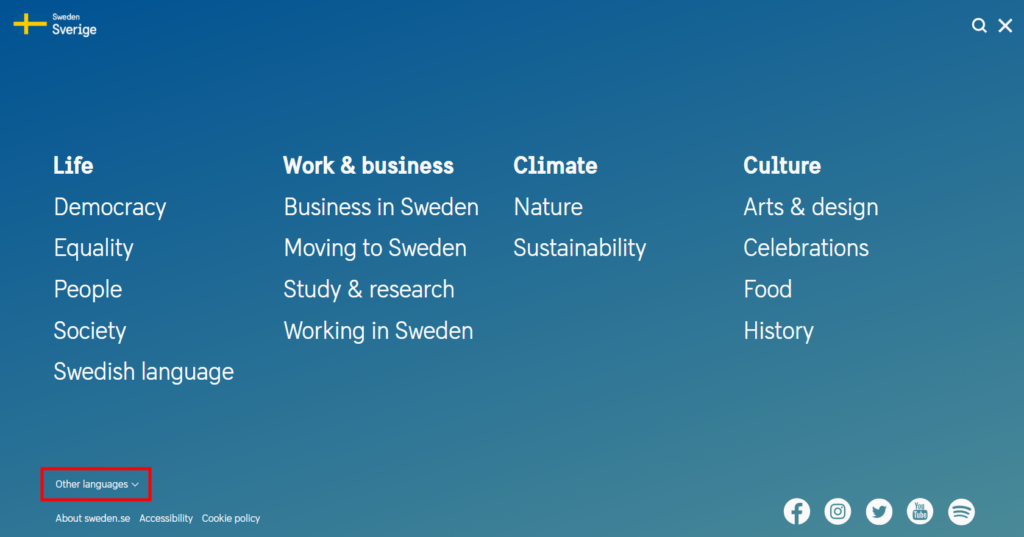
English is the default language for the site, with content also available in Arabic and Russian.
5. Mariener

Mariener Eyewear is based in The Netherlands and originally invented matte reflective lenses. The site, built on WooCommerce, provides translations in English and Dutch.
This site is a great example of why you need to speak the language of your customers. In fact, there’s an undeniably strong link between multilingual content and a customer’s likelihood of making a purchase.
Common Sense Advisory surveyed 2,430 web consumers in eight countries to learn about how language affected their ecommerce purchasing habits and found:
- 72.1% of consumers spend most or all of their time on sites in their own language.
- 72.4% of consumers said they would be more likely to buy a product with information in their own language.
- 56.2% of consumers said the ability to obtain information in their own language is more important than price.
Just to emphasize that last finding, more than half of consumers are willing to pay more if you are willing to give them information in their own languages.
3 Ways to Add a Language Switcher to Your WordPress Site
To add a WordPress language switcher, you’ll need to install TranslatePress, an easy-to-use WordPress translation plugin.
It’s available to download for free at WordPress.org, so from your WordPress admin interface, navigate to Plugins → Add New and search for “TranslatePress”.
TranslatePress lets you translate your entire WordPress site, directly from the front-end, using a super intuitive visual translation interface.
This includes everything, from posts and pages, custom post types, output from plugins, shortcodes, to contact forms or even images containing text.
It also works out of the box with popular plugins like WooCommerce or Elementor, as you’ll see below.
TranslatePress’ user-friendly interface enables both manual and automatic translations. To speed things up you can automatically translate your site using Google Translate or DeepL and then make additional manual edits.
If you have a WordPress multisite, you’ll be happy to know TranslatePress supports multisite networks, so you can create multisite language switchers.
Here’s how to set up TranslatePress and create one of three different types of WordPress language switcher: shortcode, menu item, and floating language selection.
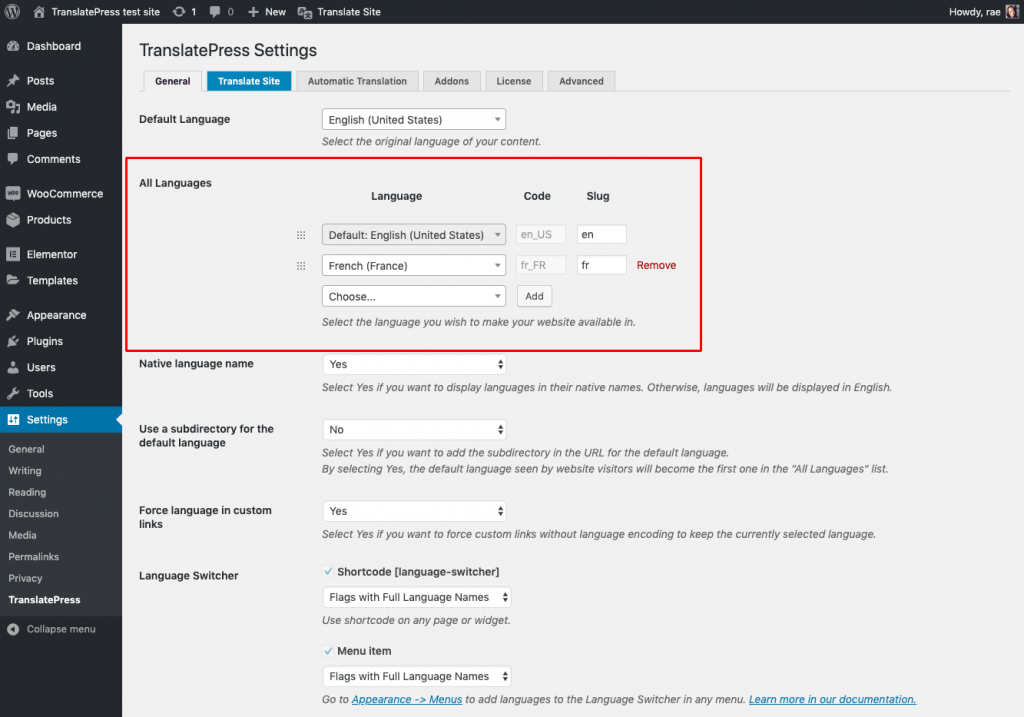
1. Choose Your Languages
After you’ve installed and activated TranslatePress in the WordPress admin, head over to Settings → TranslatePress. ln the General settings, select your main language, and add any other languages you want to add to your WordPress multilingual website.
For this example, I’ve added French but you can add as many languages as you like with the premium version of TranslatePress.
2. Choose Your Language Switcher
There are three options for adding a language switcher to your site:
- Shortcode – You can add the shortcode [language-switcher] to display a language switcher on any page or widget. This also works as a Language Switcher Gutenberg block directly.
- Menu item – Go to Appearance → Menus to add languages to your navigation.
- Floating language selection – Adding a floating dropdown that displays on every page of your site.
Let’s look at each option in more detail.
1. Shortcode Language Switcher
The shortcode option lets you add a WordPress language switcher anywhere on your site that allows shortcodes. With the Gutenberg editor, this works as a language switcher block.
In the General settings for TranslatePress, there are five options for configuring what the language switcher displays:
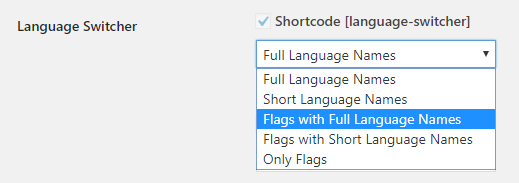
Choose one of the options above, click Save Changes and then add the shortcode or the block where you want your language switcher to display.
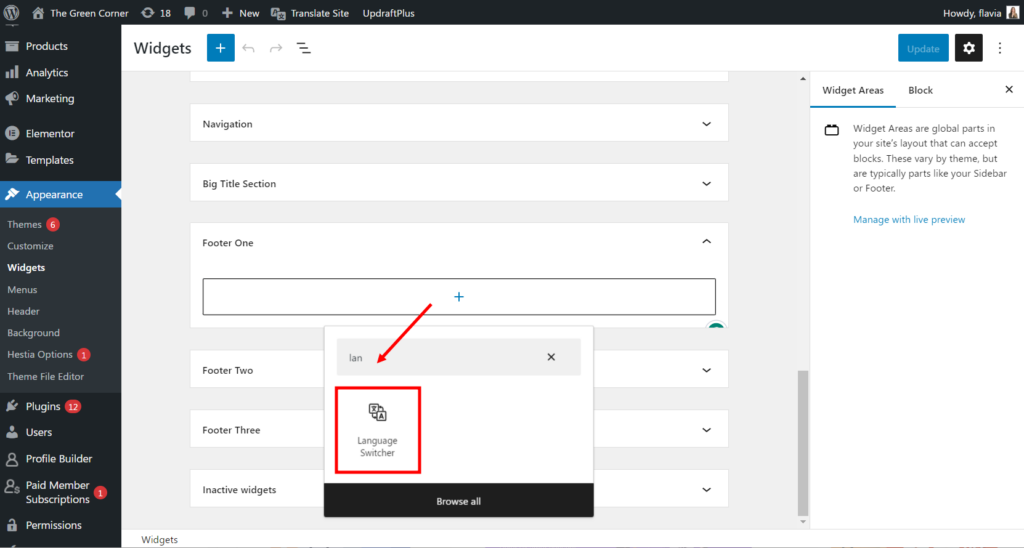
For this example, I want to add a language switcher to the footer of my site. To do this, in the WordPress dashboard go to Appearance → Widgets, and open up the Footer section. Click the “+” icon to add a block and start typing “language switcher” in the search bar. You will immediately see the Language Switcher block that you can simply add to the footer.
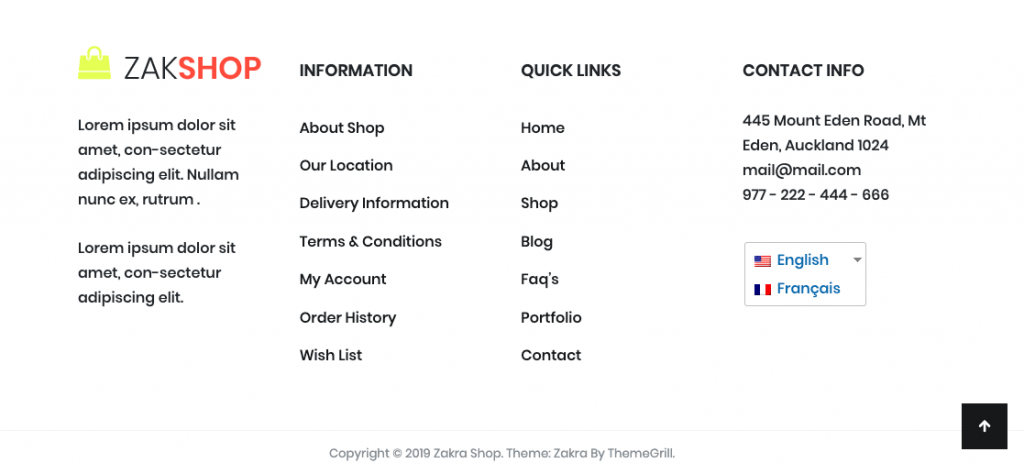
On the front-end, the language switcher widget shows a dropdown box that lets visitors to switch languages:
2. Menu item
The menu option lets you add languages to the navigation of your WordPress site.
Again, there are five options for what the language switcher displays:
- Full language names
- Short language names
- Flags with full language names
- Flags with short language names
- Only flags
Choose one of the display options and then go Appearance → Menus to add languages to your navigation like so:
On the front-end, the primary navigation for my site now displays French and English language switcher text:

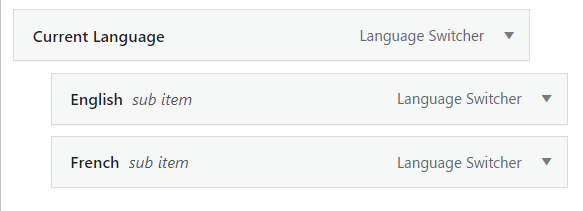
If you want to display your language switcher as a dropdown, you’ll have to use the Current Language option too. Place it as an item in the menu and then place your languages as sub-items under it like so:
If you only offer two language options and want your language switcher to always display the opposite language from the one the website is currently in, you can use the Opposite Language item. For this setup, there’s no need to add the languages as well.
3. Floating language selection
Floating dropdowns provide a convenient way for visitors to switch to their preferred language since they display on every page of your site.
With TranslatePress, you can customize how your floating dropdown looks and works (and even disable it if you want) in the General plugin settings.
You can also choose where you want the WordPress language switcher to display:
- Bottom right
- Bottom left
- Top right
- Top left
Once you’ve selected and saved your options, simply refresh the front-end of your site to see what it looks like.

No matter which type of WordPress language switcher you choose for your site, you’re providing a simple and convenient way for visitors to read your site in their preferred language.
Don’t forget to configure the rest of the settings in the plugin, including whether or not you want to use machine translation (go to Settings → Automatic Translation tab).
Then all you need to do is browse your site, page by page, using the visual translation editor. Just click to select a certain text on your site, enter your translations, and move on to the next piece of text. Your site will be fully translated with TranslatePress in no time!
For more check out our complete guide on how to Create a Multilingual WordPress Site.
4 Best Practices for WordPress Language Switchers
Now that you know how to add a WordPress language switcher to your site, let’s cover some important best practices before launching your new languages.
1. Make sure it’s easy to find
Ensure your WordPress language switcher is prominent and easy to spot. It shouldn’t take visitors more than a second to find it. I recommend placing your language switcher in the header, footer, or navigation of your multilingual theme as these are locations visitors are accustomed to checking when they want to switch languages.
Many sites preempt language switching with geographic auto-detection that sets the language for that locale. It saves visitors having to manually change languages, providing a more streamlined user experience. You can do this with TranslatePress as well, using the Automatic User Language Detection add-on.
Even in this case, make sure to also add a language switcher to your multilingual site in case the visitor wants to browse your site in the original language.
2. Limit the number of languages used
Be selective with how many languages you add to your site. Just because multilingual plugins typically provide dozens of different languages, doesn’t mean you should enable every single one. Only add the languages you need for your target audiences.
Also, keep in mind that in many countries, people speak multiple languages and there might be more than one official language. Take Switzerland, for example, where the official languages are French, German, Italian, and Romansh.
3. Style to match your site design
While it may be tempting (not to mention easier) to use the default language switcher design provided by most translation plugins, it’s a good idea to customize how it looks to match your WordPress themes.
This might be as easy as configuring your plugin’s settings or could mean customizing the CSS for your theme.
By default, TranslatePress will take into account your site’s styling when displaying shortcode and menu language switchers so you don’t have to make any extra effort customizing CSS.
4. Use language names not just flags
Flags are an easy way to indicate languages but can be confusing for residents from some countries. Why? Well, languages are blind to borders.
Take Portuguese, for example. As United Language Group explains, it’s the official language in Portugal, Brazil, Cape Verde, Guinea-Bissau, Mozambique, Angola, São Tomé & Príncipe, East Timor, Equatorial Guinea, and Macau. It also has cultural presence in India, Sri Lanka, Malaysia, the ABC islands in the Caribbean, and the Indonesian island of Flores.
So which country’s flag should serve as a representative for Portuguese?
Flags are not languages recommends using the name of languages in their local format as opposed to their English name. For example, for Japanese you would use 日本語 and for Spanish it’s Español.
Get Started Adding a WordPress Language Switcher to Your Site
TranslatePress makes it easy to add a WordPress language switcher to your site, providing three simple ways for visitors to make the switch: shortcode, menu item, and floating language selection.
For a quick recap check out this short video:
As we’ve covered above, all you need to do is choose the type of language switcher you want, configure the simple options, and TranslatePress will take care of the rest. You don’t need to mess around with code — it just works.
If you want support for more than two languages or redirect users based on their language, check out all the premium features of TranslatePress.
TranslatePress Multilingual
TranslatePress is the easiest way to translate your WordPress site. It's fast, won't slow down your website, works with ANY theme or plugin and it's SEO friendly.
Get the pluginDon’t forget to be selective when choosing languages for your multilingual site—it’s best practice.
Got a question about setting up a WordPress language switcher with TranslatePress? Let us know in the comments below!
Thanks for sharing. I thought that Google will switch the languages of sites by default. I’m targeting some Europe countries speaking French and Spanish. I might lose a lot of potential customers due to displaying English only. I will stall one of your plugin recommendations.
Would have been nice to have the option to have the language switcher as a drop down box in the menu section. Is there a way to modify it somehow ?
Very good point Carlos. This is already on our to do list and will be implemented very soon.
On mobile, the language switcher is hidden inside the menu.
So a visitor would need to click the hamburger icon to change the language. This is not user friendly.
Why is there no simple option in translatepress settings that moves the language selector beside the hamburger icon like it does with WPML?
Floating is not a viable alternative – it covers too much space on mobile.
Thanks!