
Love ’em or hate ’em, sliders and carousels are popular design choices for a lot of WordPress sites. But if you’re looking to create a multilingual WordPress site, figuring out how to translate sliders in WordPress can be difficult because slider content exists outside the WordPress editor.
You might be using a dedicated slider plugin or the slider widget in a page builder plugin like Elementor. Either way, you’ll need to be able to translate those sliders to ensure a cohesive multilingual experience for your visitors.
To help, we’re going to show you how to translate sliders in WordPress using a simple, non-technical interface like this:
This method will work with all slider plugins and you’ll be able to follow this tutorial for free – no need to purchase a premium plugin just to translate your WordPress sliders.
What You Need to Translate Sliders in WordPress
To follow this tutorial and create multilingual sliders on WordPress, you’ll only need two things:
- Your slider – we’ll create an example slider with the free Smart Slider 3 plugin, but the method that we’ll outline will work with any slider plugin/widget including MetaSlider, Slider Revolution, Soliloquy, Elementor, Divi Builder, and more.
- TranslatePress – an easy-to-use WordPress translation plugin that automatically lets you translate sliders (no special compatibility needed). You can download it for free from WordPress.org and the free version is all you need to follow this tutorial.
As you saw in the GIF above, TranslatePress lets you translate your entire website using a visual interface that looks a lot like the WordPress Customizer.
You can either manually translate all of your content or use automatic machine translation from Google Translate (and then manually refine translations if needed).
Below, we’ll show you every step in the process, from creating your slider with Smart Slider 3 to translating it with TranslatePress. If you already have a slider that you want to translate, you can skip ahead to step two to go right to the translation part.
1. Create Slider With Smart Slider 3
Active on over 600,000 WordPress sites with a 4.9-star rating on 700+ reviews, Smart Slider 3 is one of the most popular WordPress slider plugins that you’ll find.
There’s a good reason for that – Smart Slider 3 is simple and free but still includes features that many other slider plugins only provide in a premium version.
Smart Slider 3 lets you design each slide using a visual, drag-and-drop interface and different content layers. You can add all kinds of content, like images, text, buttons, and more.
If you don’t want to start from scratch, Smart Slider 3 also includes tons of pre-built templates that you can use as a starting point.
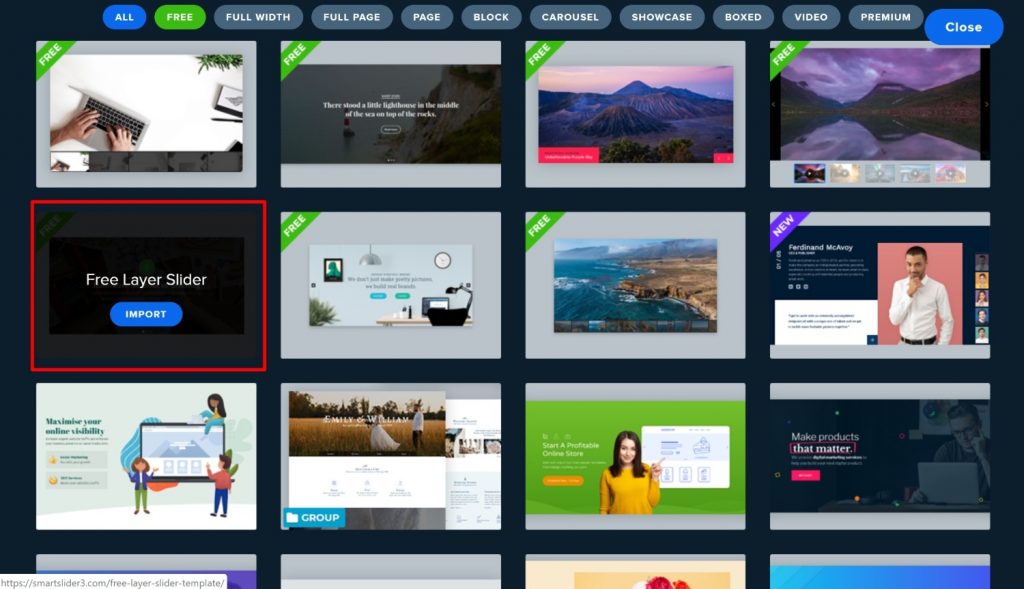
Once you install and activate the plugin, head to the Smart Slider tab. There, you can either create a New Slider from scratch or choose from the Template Library. For this tutorial, we’ll use one of the free templates called “Free Layer Slider”:
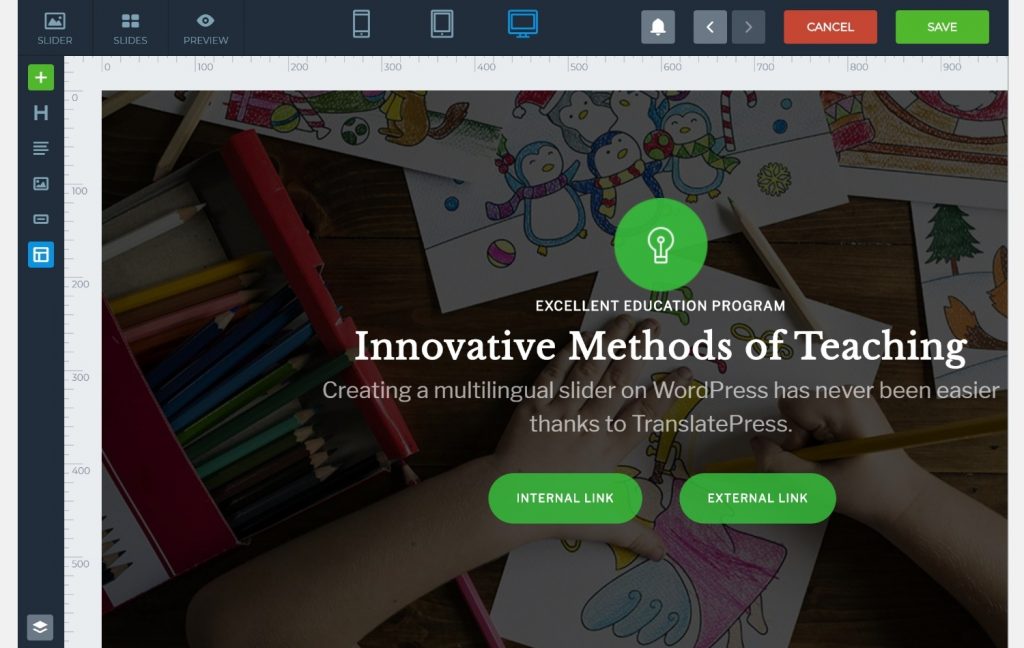
From there, you can use the visual drag-and-drop interface to customize your content:
- Edit the text
- Change the button URL
- Swap out images
- Etc.
We’ll add two buttons – one to an internal link and the other to an external link. In the next step, you’ll be able to “translate” these button links, too. The internal link will automatically go to the proper language version and you’ll be able to change the external link for each language (if desired):
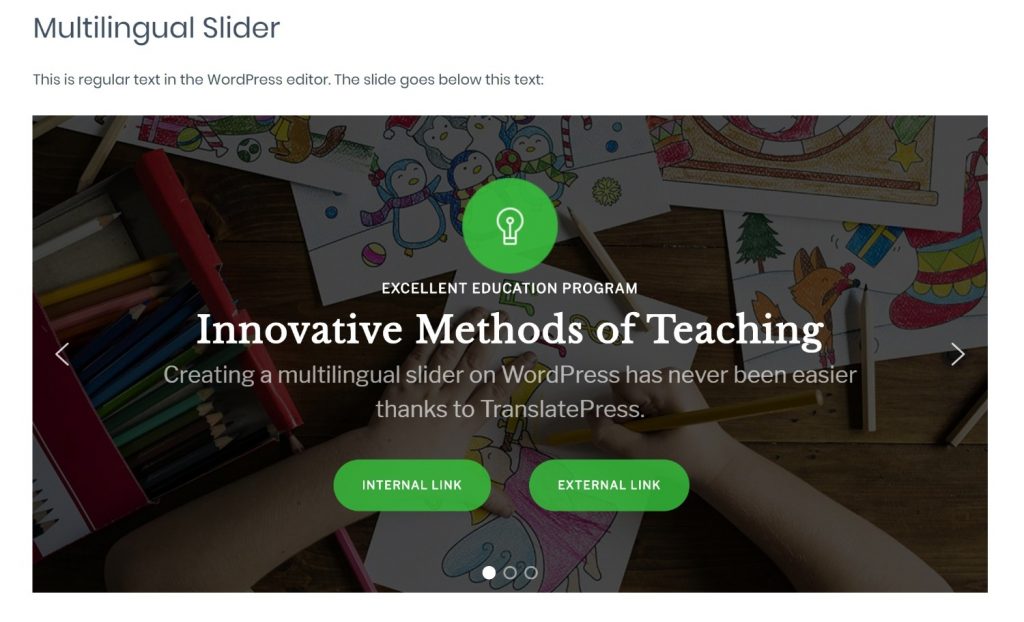
Once you finish configuring and designing your slider, you can display it on the front-end of your site using either a shortcode or a dedicated block:
Now, let’s translate it…
2. Configure TranslatePress Plugin
Before you can start translating your slider, you’ll need to configure a few basics in the TranslatePress plugin, like which languages you want to offer and whether or not you want to use machine translation powered by Google Translate.
To get started, install the free TranslatePress plugin from WordPress.org and then go to Settings → TranslatePress in your WordPress dashboard.
First up, you’ll want to choose the languages to use on your site. Select the current language of your site in the Default Language drop-down. Then, choose the new language into which you want to translate your slider (and other content):
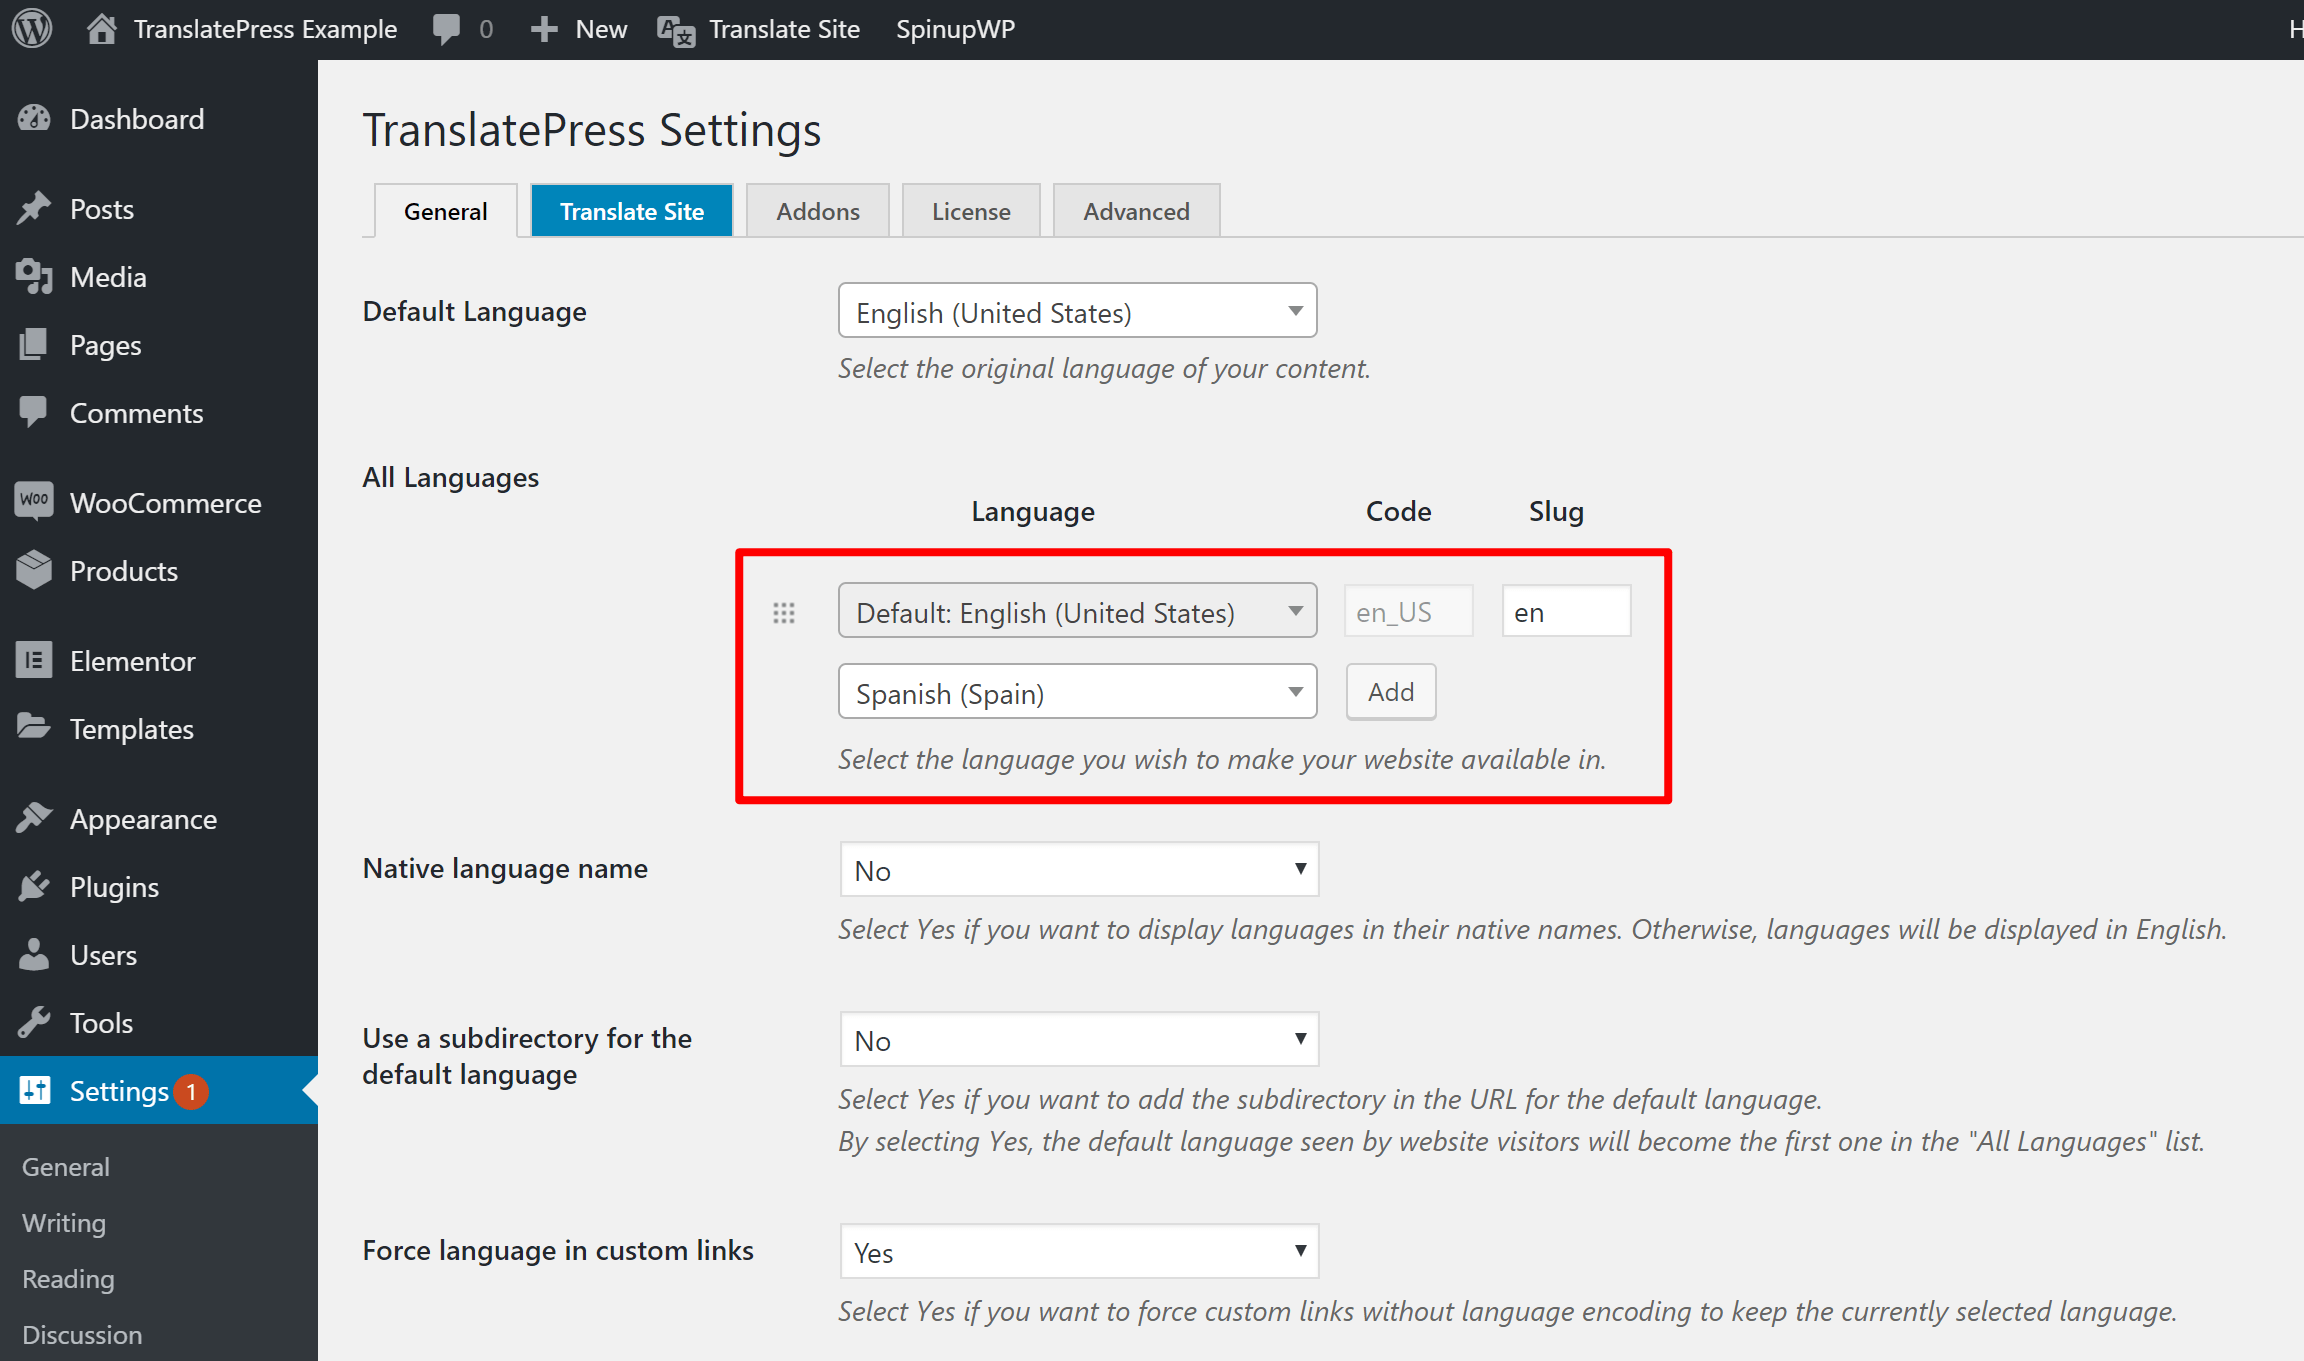
The free version of TranslatePress lets you translate your site into one extra language, while the premium version has support for unlimited languages.
Further down, you can also customize the looks of your language switcher and choose where to use it on your multilingual website.
Under the Automatic Translation tab, you can choose whether or not to automatically translate your content (using Google Translate or DeepL). Even if you use machine translation, you’ll still be able to manually edit your translations:
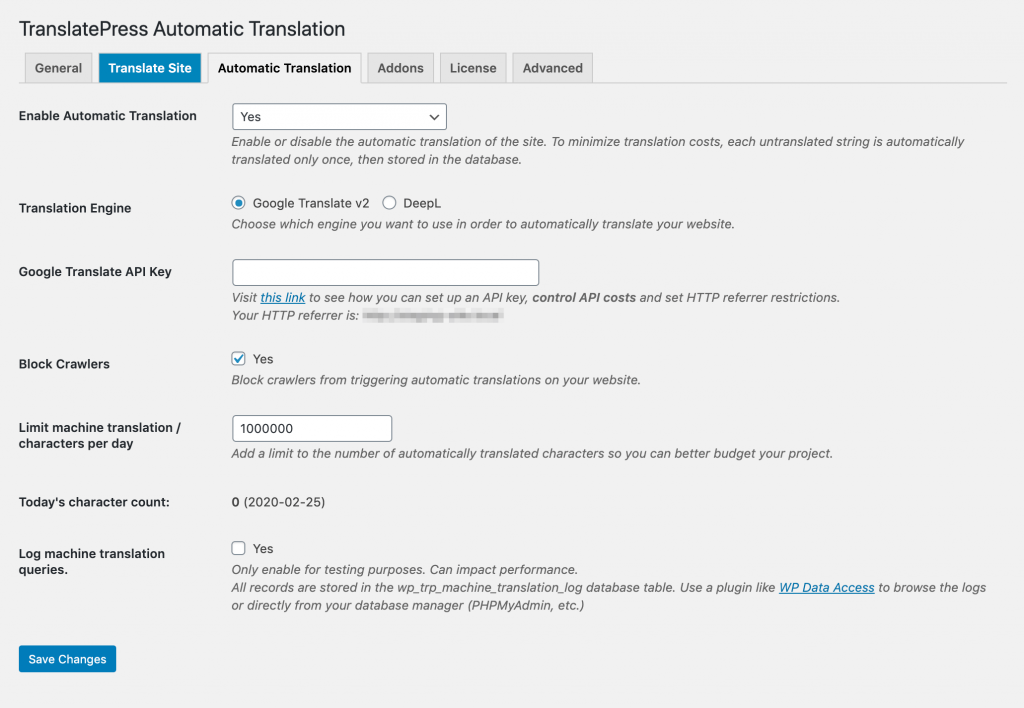
We’d recommend checking out the other settings, as well. You can make the choices that best fit your situation.
3. Launch Translation Editor to Translate Sliders
At this point, you’re ready to begin translating your slider(s).
To get started, go to the page that contains your slider and click the Translate Page button in the WordPress toolbar:

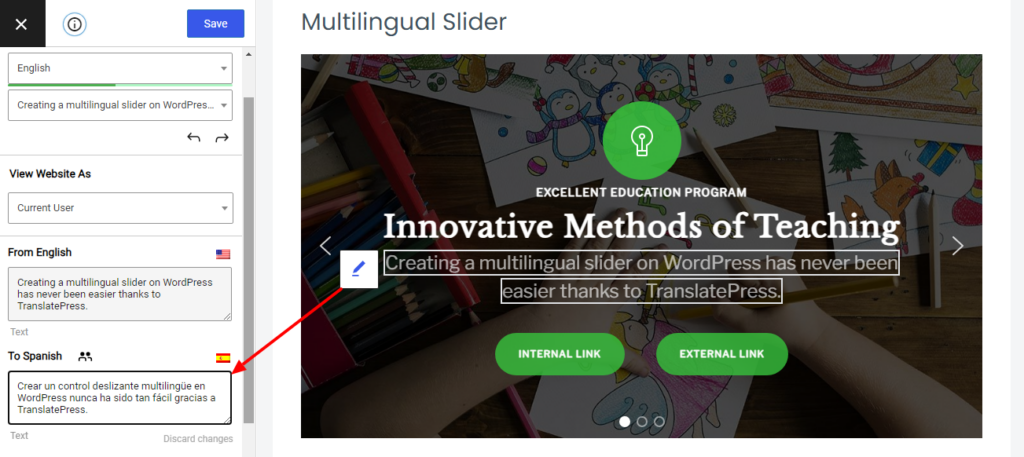
This will open the visual translation interface – you should see a sidebar on the left and a live preview of your website on the right.
To translate the text in your slider, hover over it and click the blue pencil icon. This will open the text in the sidebar, where you can add your translation:
You can repeat the same step to translate other text.
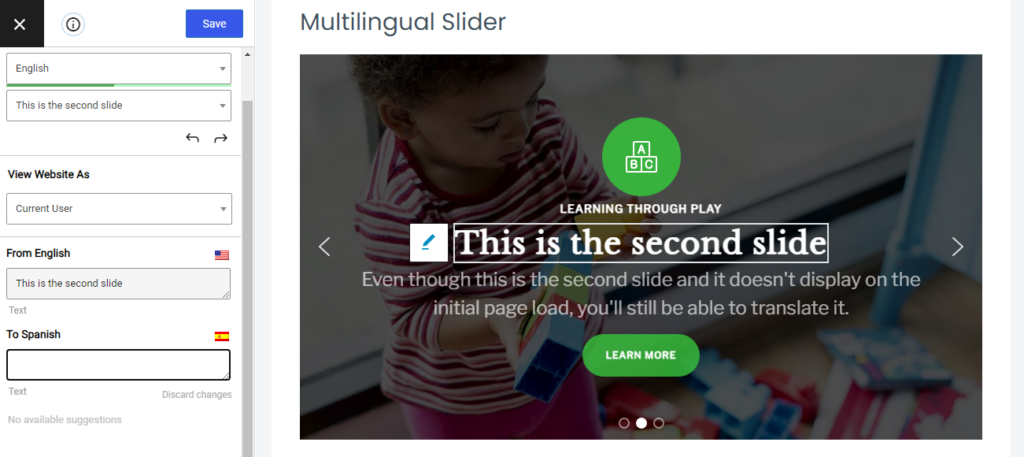
You’re also still able to interact with your slider. So to translate text on different slides, you can use the arrows to navigate between slides just as if you were browsing your live site.
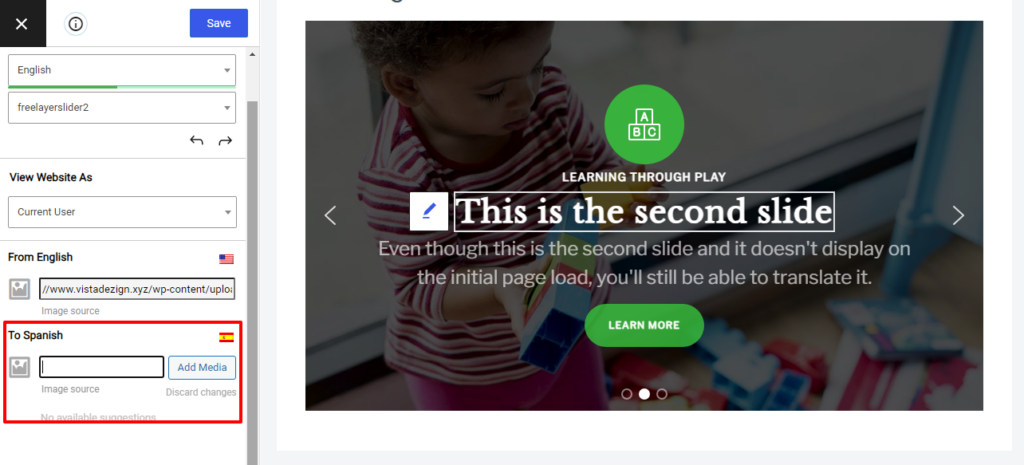
For example, here’s what it looks like to translate the second slide:
TranslatePress also helps you translate more than just text. For example, you can use different slide image backgrounds depending on a user’s language. To “translate” an image, you can use the drop-down in the top-left corner to select the relevant image:

You’ll then be able to choose a different background image from your media library:
As we mentioned above, you’re also able to “translate” destination URLs. For example, if you click to translate the “External Link” button, you’ll be able to translate both the link’s anchor text, as well as the destination URL that it takes visitors to:
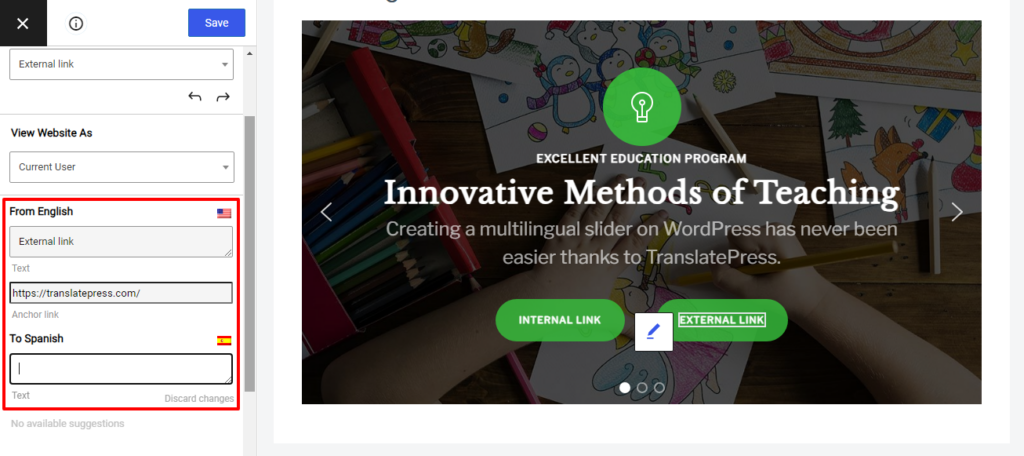
For internal links in your sliders, TranslatePress will automatically rewrite URLs to send people to the right language version. For example, if the original link is yoursite.com/hello-world, TranslatePress would automatically rewrite the URL to go to yoursite.com/es/hello-world when a person is browsing in Spanish.
That’s How to Translate Sliders in WordPress!
And there you have it! A comprehensive way to translate everything in your slider, from the text all the way down to images and URLs.
There’s no need to mess around with code or integration plugins – TranslatePress works with sliders by default and lets you translate everything using a simple visual interface.
And here’s the great thing:
You can use the exact same approach to translate the rest of your site – including content from your theme and other plugins. If you want to see how TranslatePress works with other types of WordPress content, we have tons of tutorials you might be interested in on how to translate…
- WooCommerce products
- Gutenberg blocks
- Custom fields
- Custom post types
- WordPress forms
- WordPress menus
- Images
- Popup content
You can translate all of those content types for free.
But if you’re serious about creating a multilingual WordPress site, there are also some benefits to considering the premium version of TranslatePress.
The premium version adds lots of helpful features like:
- Deeper support for multilingual SEO to help you rank each language’s content in Google.
- The ability to use unlimited languages on your site. The free version supports translating your site into one additional language.
- Special WordPress accounts for translators, which help you work with freelancers or translation services.
- The ability to preview your site’s content as different user roles, which is helpful if you dynamically display different content based on a user’s role.
- Automatic user language detection, so you can redirect visitors to their own language based on browser language or IP address.
TranslatePress Multilingual
TranslatePress is the easiest way to translate your WordPress site. It's fast, won't slow down your website, works with ANY theme or plugin and it's SEO friendly.
Get the pluginTo learn more, head here to check out all of the premium features.
Do you still have any questions about how to translate sliders in WordPress? Let us know in the comments!
If you found this post helpful, please check out our YouTube channel, where we constantly upload short & easy-to-follow video tutorials. You can also follow us on Facebook and Twitter to be the first to know each time we post.
Hi amazing people !
I used translatepress to translate my site. Will definitely get the pro plan to edit SEO and stuff. my site is designed with elementor pro and your plugin worked flawlessly to translate all the content…but one thing : the slider.
this is what i used
https://docs.elementor.com/article/93-slides
And i don´t get the magic blue pencil to translate the text, when it is different to each slide. Is there a workaround ?
kindest regards
hugo
PS, the slider in question are on the home page and our brewery page
Hi Hugo,
Translating Elementor sliders should work just fine with TranslatePress.
Maybe reach out to our support channel so we can have a closer look at what’s happening. I’m sure we’ll get to the bottom of it 🙂
Well it doesn’t work well as translator for Slider Revolution or any other slider plugin, if we cant move elements that have different size in different languages. Of course it works fine when we use only centered elements. But i use text fields that are come from left and right and meet in the same row (not in the center) – for different languages – it looks like total mess 🙁
Hey, when the language is switched using TranslatePress a class is added to the body of the page which represents the current language.
In a case like what you describe, with some custom CSS, you would make use of that class to rearrange the text if necessary.