Custom post types, along with custom fields, help you take WordPress from its blogging roots and turn it into the full-service, flexible content management system that it is today.
If you use custom post types on your site and are looking to go multilingual, it’s important to be able to translate custom post types in WordPress so that you’re able to fully localize your site in different languages.
While most WordPress translation plugins can help you translate your regular posts and pages, things aren’t always so simple when it comes to any custom post types that you’re using.
To help, we’re going to show you how to translate custom post types in WordPress in the easiest way possible. No coding. No checking whether something is “X-compatible” or installing an integration plugin – just a simple solution that works right out of the box.
By following this tutorial, you’ll be able to translate your custom post types using a simple visual interface like this:
The same interface will also work for custom fields and custom taxonomies, which we’ll also demo in this post.
Let’s get into it…
What You’ll Need to Translate Custom Post Types in WordPress
If you want to follow this tutorial and translate custom post types in WordPress, you’ll only need two things:
- A custom post type – we’ll create our example custom post type with WCK, but you can use any tool, including Toolset, Custom Post Type UI, Pods, etc. This method will also work if you manually created your custom post type with code.
- TranslatePress – a beginner-friendly WordPress translation plugin that supports custom post types. It’s available for free at WordPress.org, and the free version is all you need to follow this tutorial.
TranslatePress helps you translate your entire WordPress site, including content from your theme, plugins, and – you guessed it – custom post types.
It lets you use manual or automatic translation (via Google Translate and DeepL) and it also gives you a simple visual interface to work with all of your translations.
We’ll start off this guide by showing you how to create a custom post type with WCK. However, if you’ve already created the custom post type that you want to translate, you can skip ahead to step two to get straight into translating your custom post type.
1. Create Custom Post Type With WCK
To create your custom post type, you can use the free WCK plugin at WordPress.org.
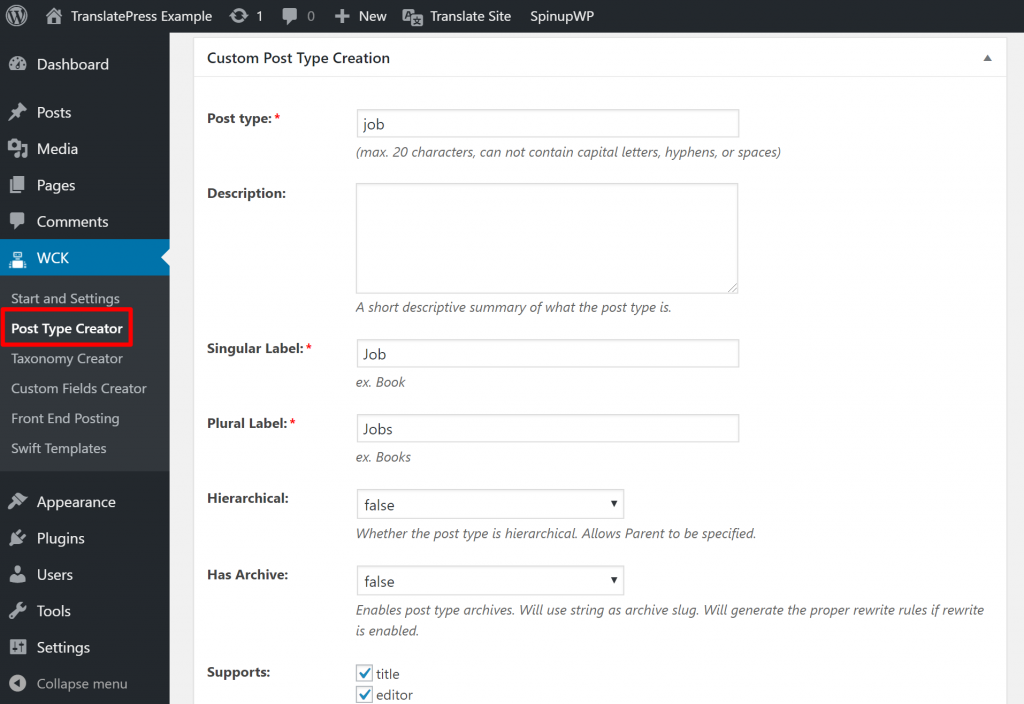
Once you’ve installed and activated the plugin, go to WCK → Post Type Creator. Fill out the short form and then click Add Entry to create your custom post type.
For example, if you’re creating a custom post type for “Jobs”, you might configure it like this:
Then, you should see your new custom post type in your WordPress dashboard sidebar. Easy, right?
If you’d like, WCK can also help you create custom taxonomies and custom fields, which we’ll create for this tutorial so that you can see how it works to translate those content types, too.
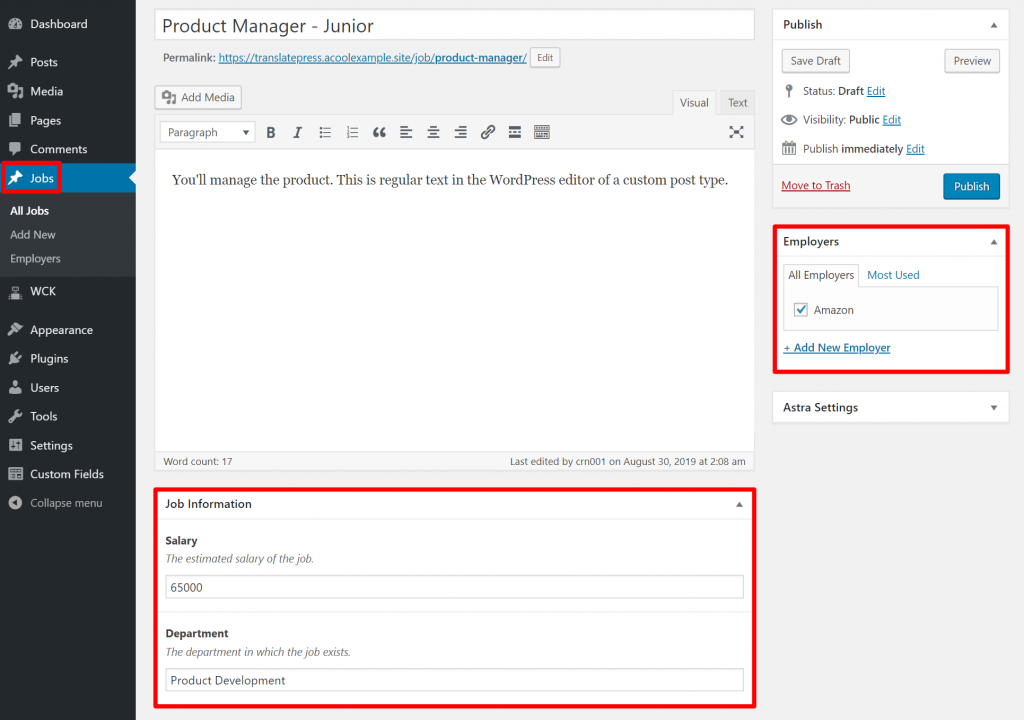
For example, we added a custom taxonomy for the “Employer” so that visitors can find all the jobs from a specific employer. We also added some custom fields for data like “Department” and “Salary”.
Putting it all together, here’s what it looks like in the WordPress editor:
You can easily display registered custom post types, custom fields, and taxonomies in your theme using the Swift Templates module available in the premium version of WCK. This lets you build your front-end templates directly from the WordPress admin UI, without writing any code.
Here’s what the original English version looks like on the front end of our test site when we display the custom fields.
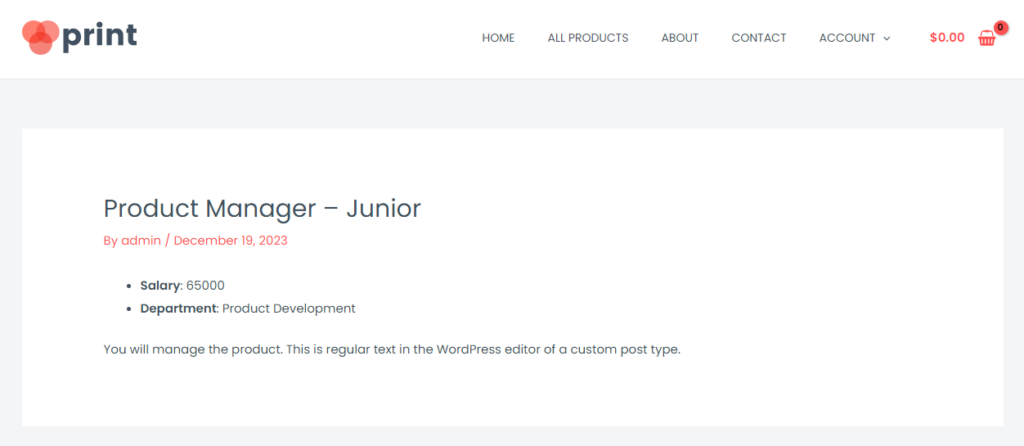
So in that screenshot, we have content in a custom post type coming from both the regular WordPress editor and custom fields. Now, let’s translate it…
2. Set Up TranslatePress
To start translating your custom post types, you’ll first need to install the TranslatePress plugin and configure a few basics, like which languages you want to use and whether or not you want to use automatic machine translation.
To begin, install and activate the free TranslatePress plugin from WordPress.org.
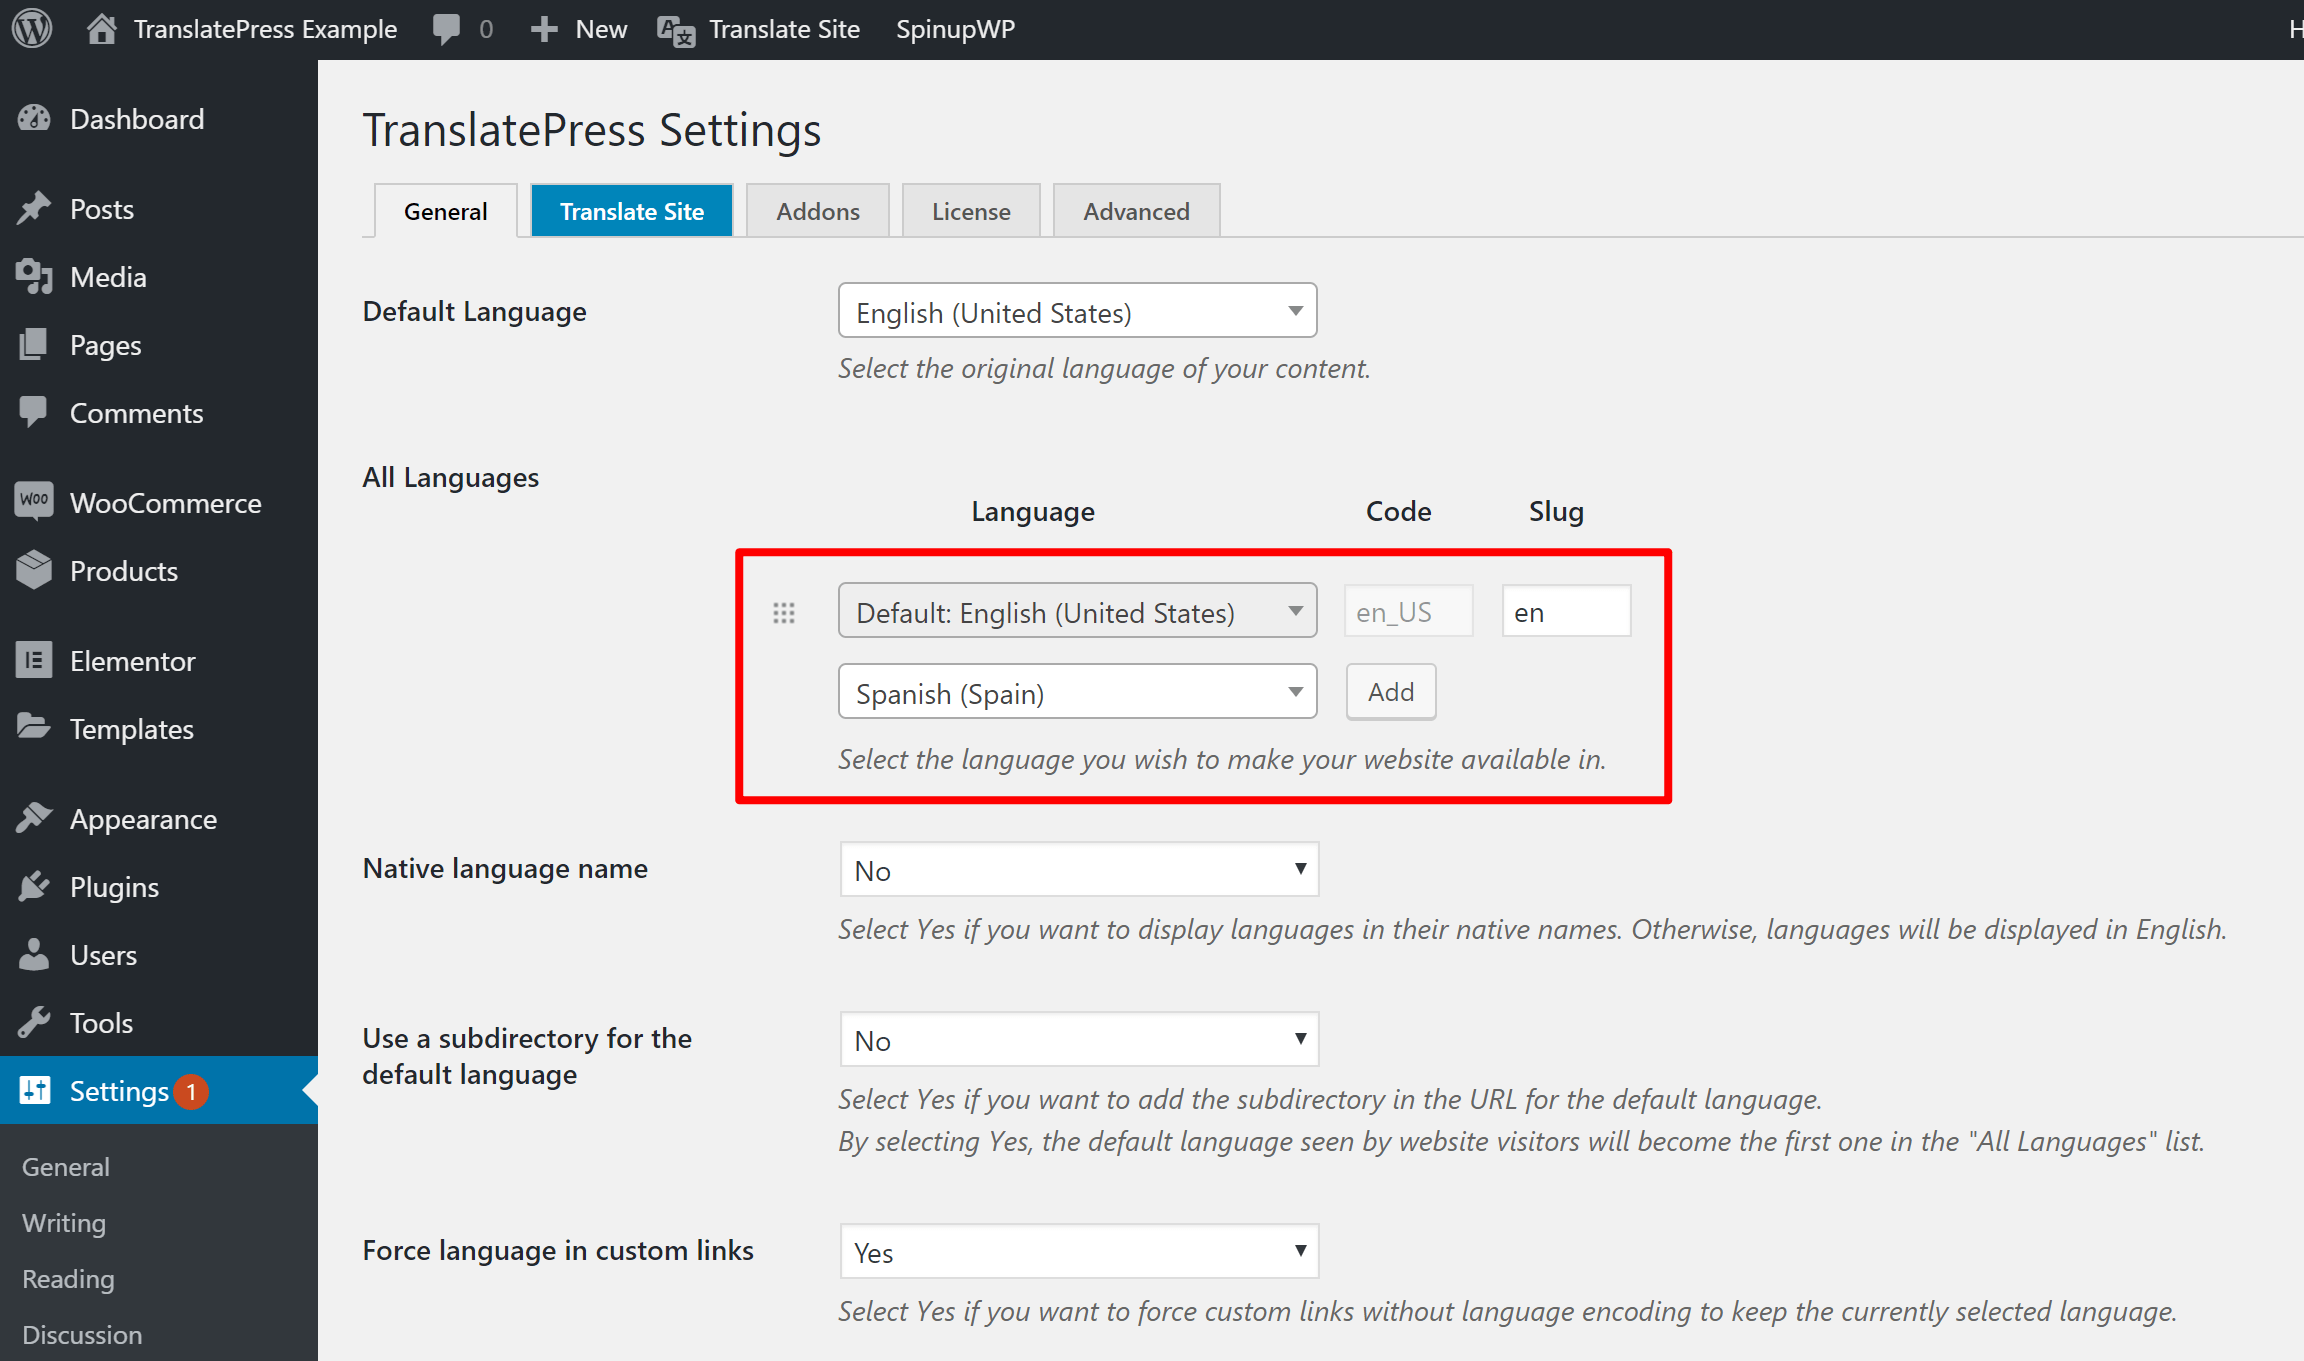
Then, go to Settings → TranslatePress to set up the basics.
First, choose the default language of your site, as well as one or more languages into which you want to translate your custom post types (and all of your site’s other content):
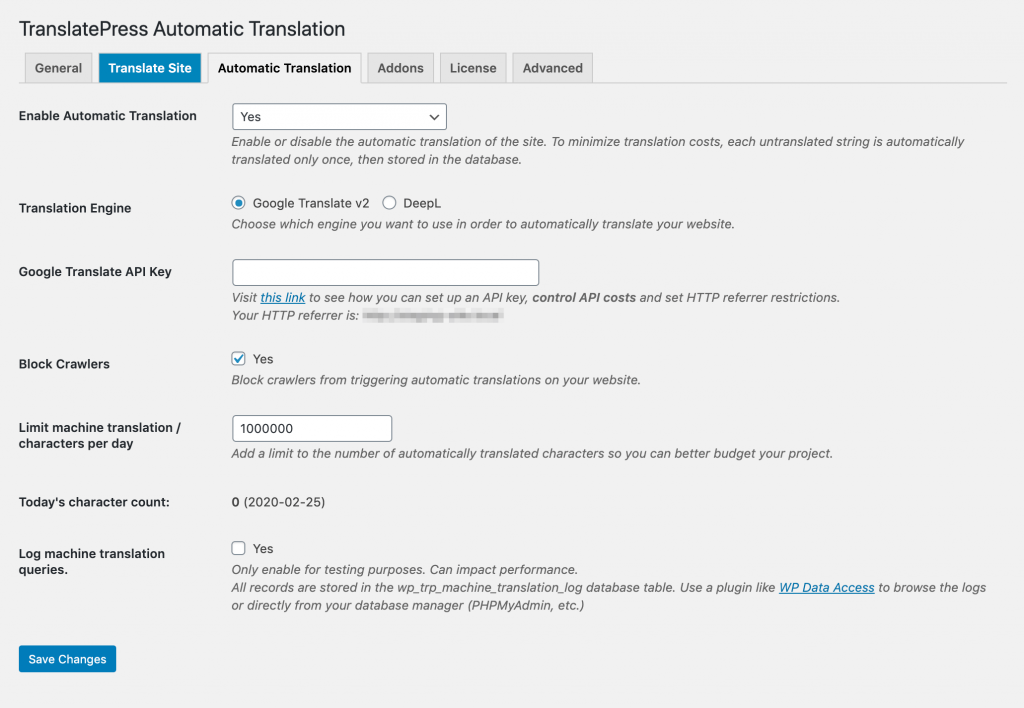
To speed things up you can also set up Automatic Translation so TranslatePress will automatically translate all of your site’s content to get you started. You can enable this feature from the Settings → Automatic Translation tab in TranslatePress. You’ll still be able to go back and manually edit all the automatic translations to ensure accuracy:
You’ll want to peruse the other settings as well, as there are some important choices (like adding and customizing the looks of your language switcher), but once you’ve configured the two settings above, you’re ready to start translating your custom post types.
3. Launch Translation Editor to Translate Custom Post Types
To translate your site’s content, TranslatePress gives you a visual editor that looks a lot like the WordPress Customizer.
To launch the editor, open the custom post type that you want to translate and click the Translate Page button on the WordPress toolbar:
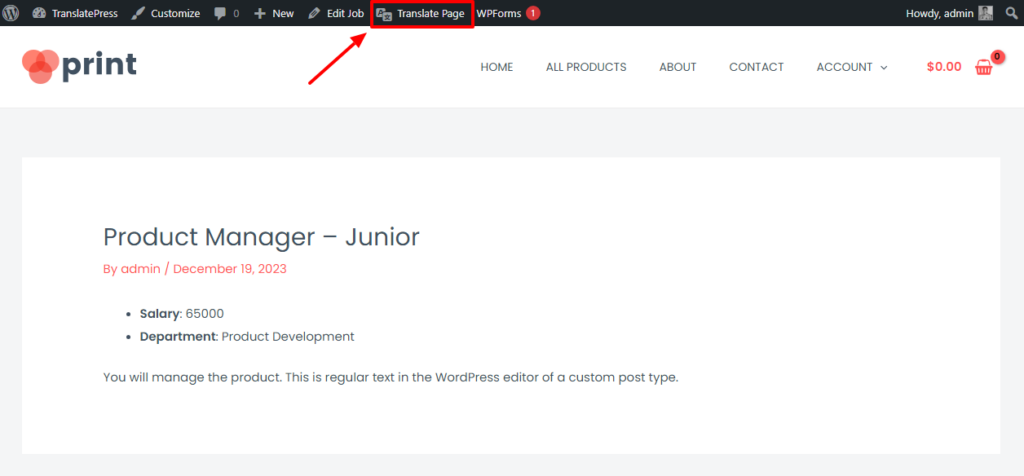
You should see a live preview of your site, along with a sidebar on the left.
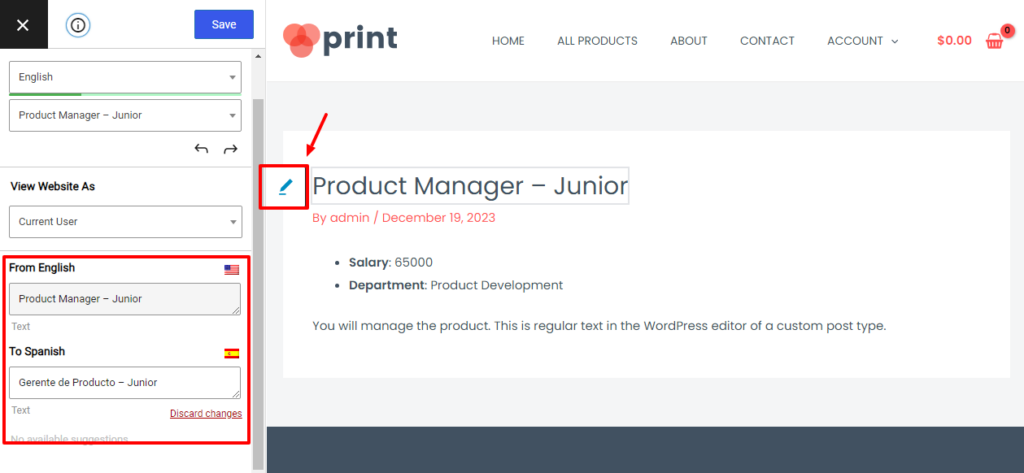
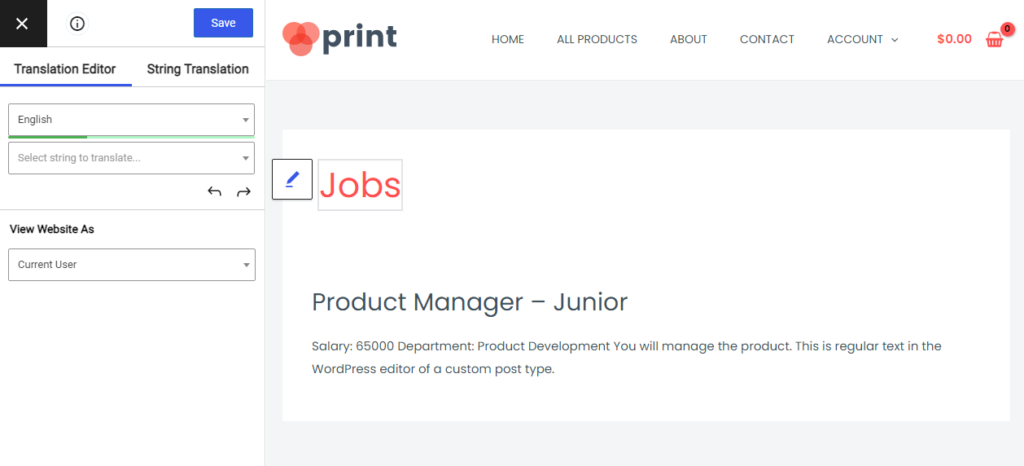
To translate any text in your custom post type, all you do is hover over it and click the blue pencil icon. That will open an editor in the sidebar where you can add your translation.
For example, here’s what it looks like to translate the title of the custom post type:

You can use the same approach for the text in the editor and any custom fields or custom taxonomies that you might be using. For example, here’s what it looks like to translate one of the custom fields:

Finally, in addition to translating individual custom post types (the “single”), you can also use the same approach to translate the archive page for your custom post types.
The neat thing here is that TranslatePress will recognize translations that already exist. For example, it will automatically pull in the translation for the individual custom post type title on the archive page:
That is, all you would need to translate is content that’s unique to the custom post type archive page – there’s no need to duplicate work that you’ve already performed.
That’s How to Translate Custom Post Types in WordPress!
TranslatePress makes it easy to translate custom post types in WordPress via its comprehensive visual interface.
Rather than needing to mess around with code, integrations, or a disconnected backend interface, TranslatePress works right out of the box and lets you translate all of your custom content right on a live preview of your website.
While we’ve focused on how to translate WordPress custom post types, the exact same TranslatePress interface works for all your other content, too – including any content from your theme or plugins. If you’re interested in other applications for TranslatePress, we have plenty of other tutorials on how to translate…
- Custom fields
- Categories and Custom Taxonomies
- WordPress forms
- WordPress menus
- Images
- WooCommerce products
- Gutenberg blocks
- Popup content
You can do all of that for free.
However, if you’re serious about creating a multilingual WordPress website, there’s also a premium version of TranslatePress that gives you even more helpful tools like:
- More detailed multilingual SEO features to help you rank your content in Google in different languages.
- Support for unlimited destination languages (the free version supports translating your site into a single destination language).
- The ability to create special WordPress accounts for translators.
- An option to preview your site’s content as different user roles, which is super helpful if you run any type of site with restricted content.
TranslatePress Multilingual
TranslatePress is the easiest way to translate your WordPress site. It's fast, won't slow down your website, works with ANY theme or plugin and it's SEO friendly.
Get the pluginTo learn more, head here to check out all of the premium features.
Do you still have any questions on how to translate custom post types? Let us know in the comments!
If you found this post helpful, please check out our YouTube channel, where we constantly upload short & easy-to-follow video tutorials. You can also follow us on Facebook and Twitter to be the first to know each time we post.
Hi,
Great and very informative tutorial, thank’s for that!
I’ve just started to translate with Translatepress and it is really amazing:)
Maybe you could advice in one thing – how to translate categories incl. in the dropdown filter widget?
Best,
Kate