WordPress custom fields are one of the features that make WordPress such a flexible content management system, so if you’re looking to translate your WordPress site, it’s super important that you’re able to easily translate data from any custom fields that you’re using at your site.
Thankfully, with the right WordPress translation plugin, it’s pretty simple to translate custom fields in WordPress.
In this post, you’re going to learn how to translate custom fields in WordPress using some example custom fields from Advanced Custom Fields (though this method will work with any custom fields).
Better yet, with this method, there’s no code, no need for special compatibility, and no need to search around a backend interface for the custom field text strings that you want to translate.
Instead, you’ll be able to translate all your custom fields using a visual interface that looks like this:
Ready to learn? Let’s get started…
What You Need to Translate Custom Fields in WordPress
To translate custom fields in WordPress, you’ll only need two things:
- Some custom fields – we’ll use Advanced Custom Fields for this example, but feel free to use other tools like Pods, WCK, Meta Box, etc. You can also just use the native WordPress custom fields functionality if that’s more your speed.
- TranslatePress – an easy-to-use WordPress translation plugin. You can use the free version at WordPress.org for this tutorial.
TranslatePress lets you translate 100% of your WordPress site using manual or automatic machine translation. It also gives you a nice visual interface to help you manage all of your translations, including your custom fields
We’ll start with a quick tutorial on creating the custom fields themselves, but feel free to skip ahead to step two if you already have some WordPress custom fields that you want to translate.
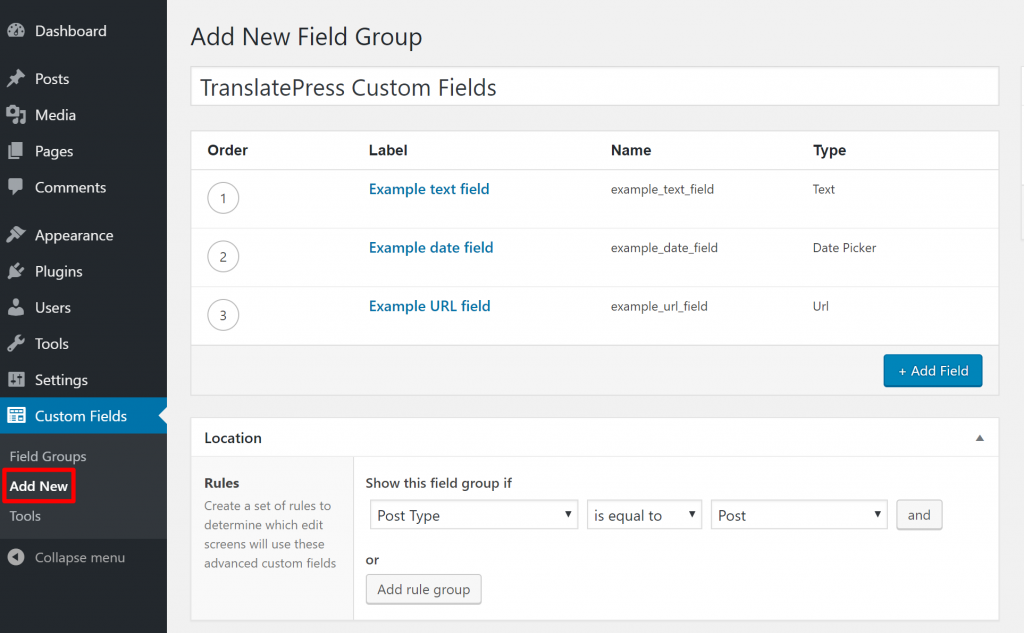
1. Create Custom Fields with Advanced Custom Fields
Once you install and activate the free Advanced Custom Fields plugin from WordPress.org, you can head to Custom Fields → Add New to create your first field group and associated fields.
For this example, we’ll use a few different field types to show you how TranslatePress can work with all different types of custom field data:
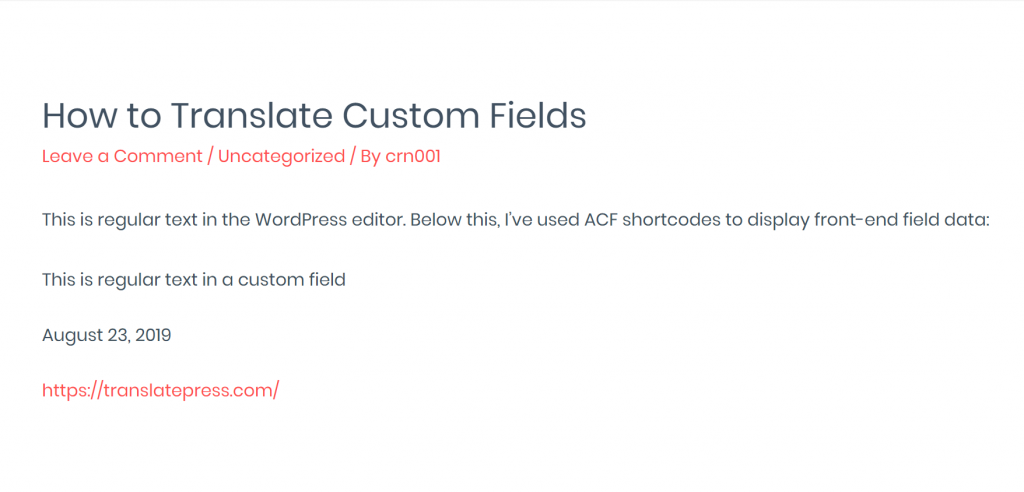
Once you save your field group, you can add data to those custom fields in the WordPress editor. We’ll also use Advanced Custom Field’s shortcodes to display the custom field data on the front-end, though you could also add them directly to your theme’s template files (the translation process is the same either way):
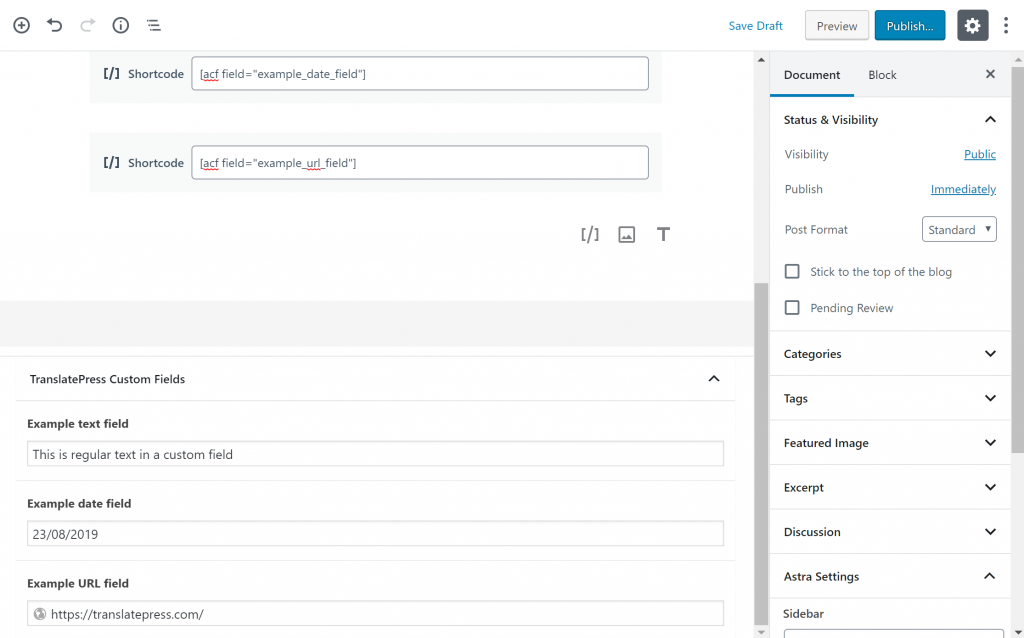
And here’s how things look on the front-end before we’ve done any translation:
Time to translate!
2. Configure TranslatePress
Before you can start translating your custom fields, you need to configure some basic settings in TranslatePress, like which languages you plan to use on your site.
To get started, you can install and activate the free TranslatePress plugin from WordPress.org. Then, head to Settings → TranslatePress to configure the plugin.
First, you’ll want to choose the language that your site currently exists in, as well as the language(s) into which you want to translate your site’s custom fields (and other content):
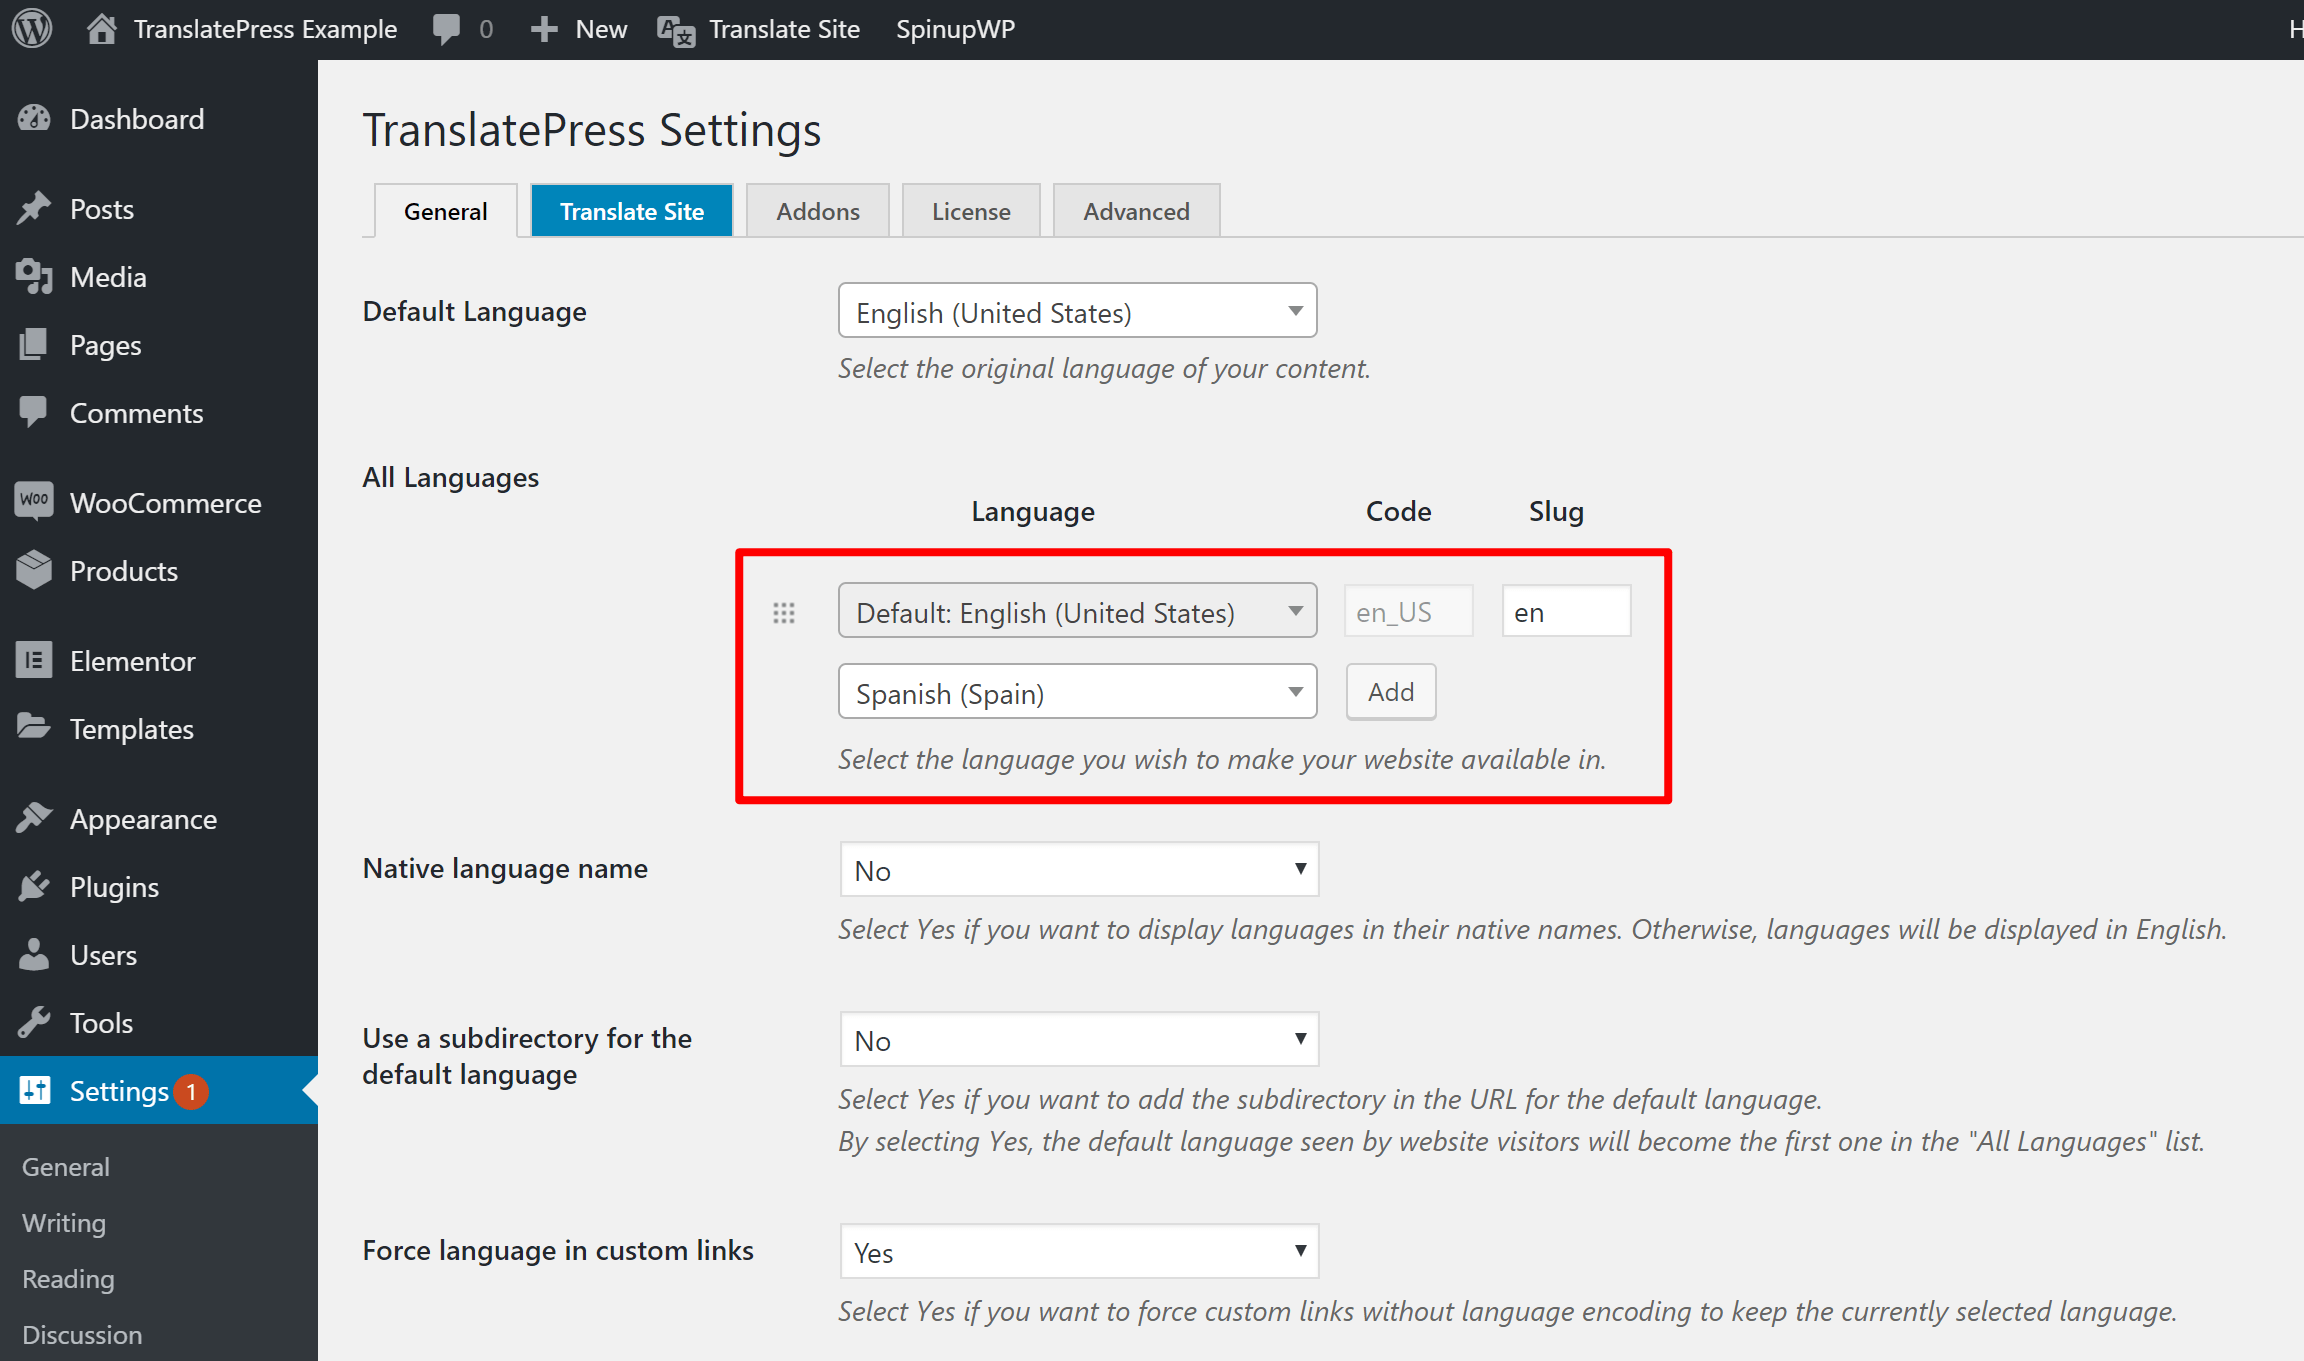
The free version of TranslatePress allows you to add one extra translation language, while in the premium version you can have unlimited languages.
You can also configure some other settings here – like how your front-end language switcher functions – so we’d recommend taking a peek at all the settings.
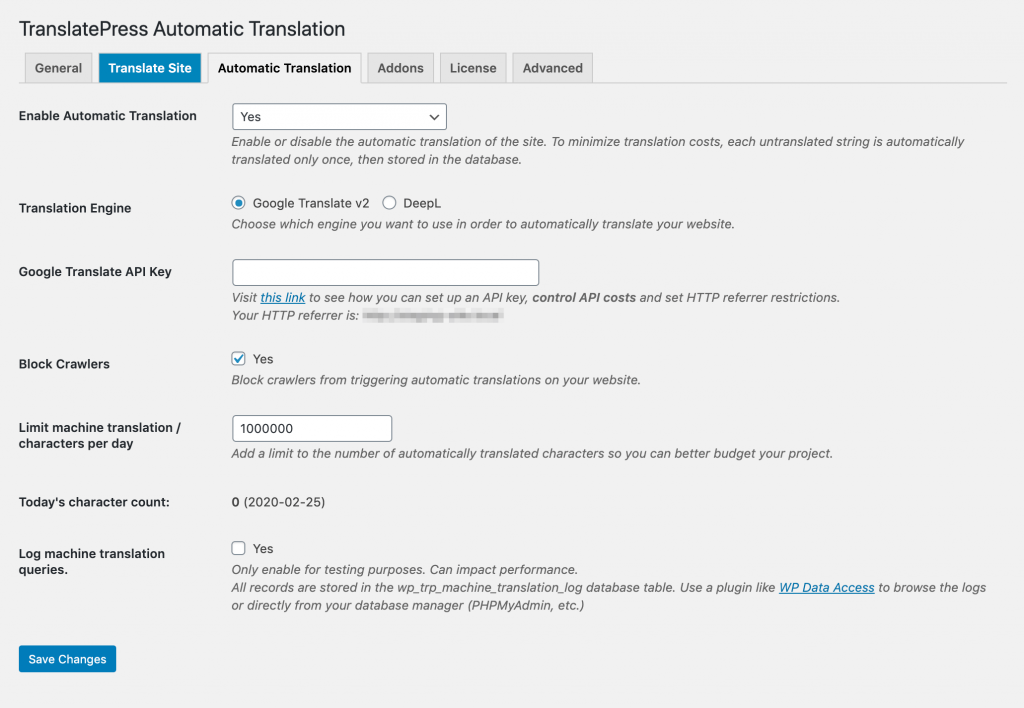
Besides that, you can choose whether or not to use automatic translation via Google Translate or DeepL. If enabled, TranslatePress will automatically translate all your site’s content, including your custom fields. Then, you can always go back and manually refine those translations if needed:
Simply click “Save Changes” and let’s proceed with translating the custom fields.
3. Open Translation Editor and Translate Custom Fields
Once you’ve configured the basics in TranslatePress, you’re ready to start translating.
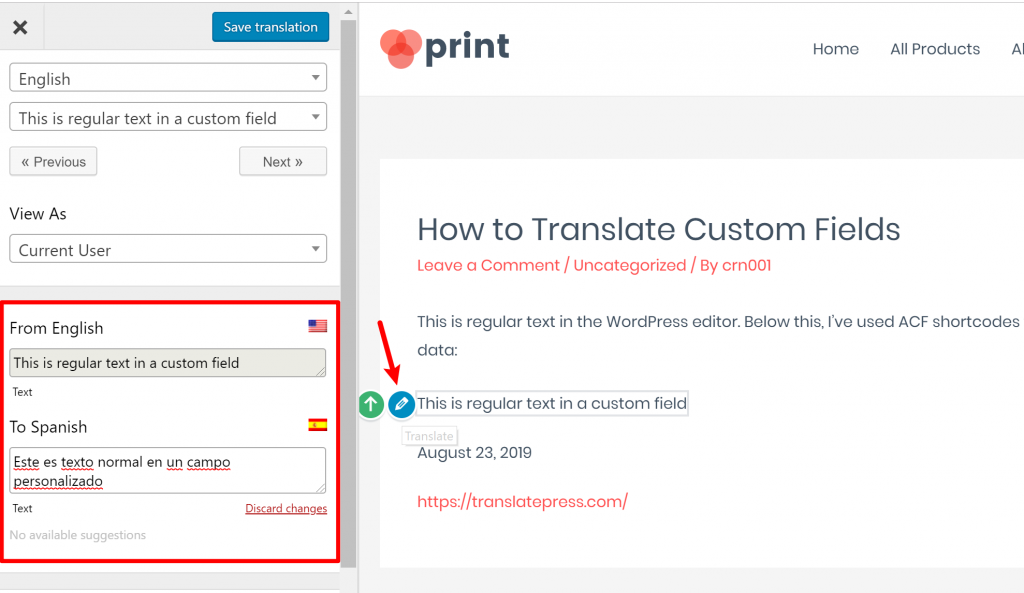
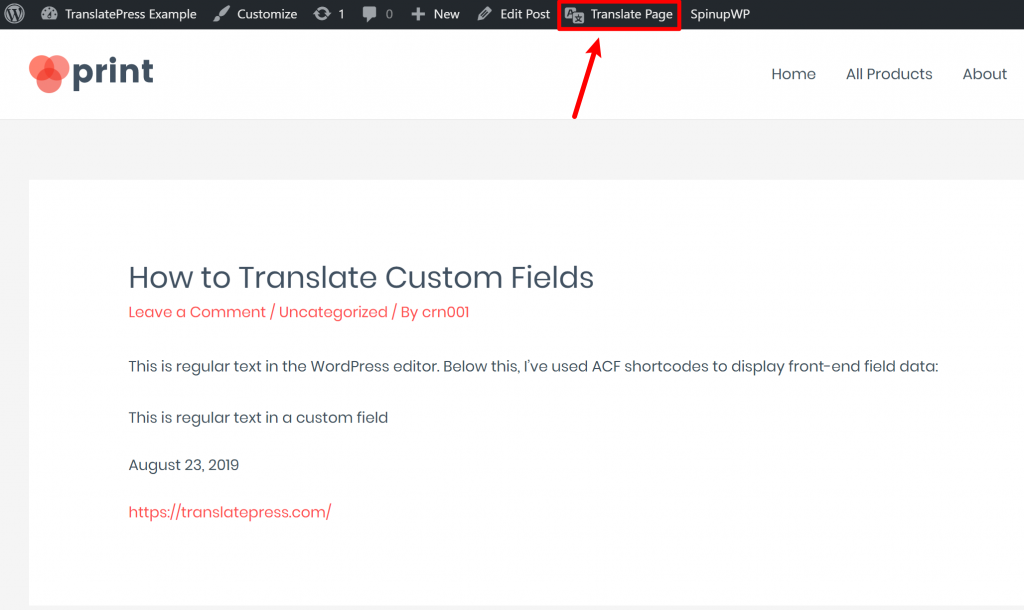
Open a page with custom fields that you want to translate and then click the Translate Page button in the WordPress toolbar to open the translation editor:
Now, here’s where the magic happens. You should see a live preview of your site, much like the native WordPress Customizer.
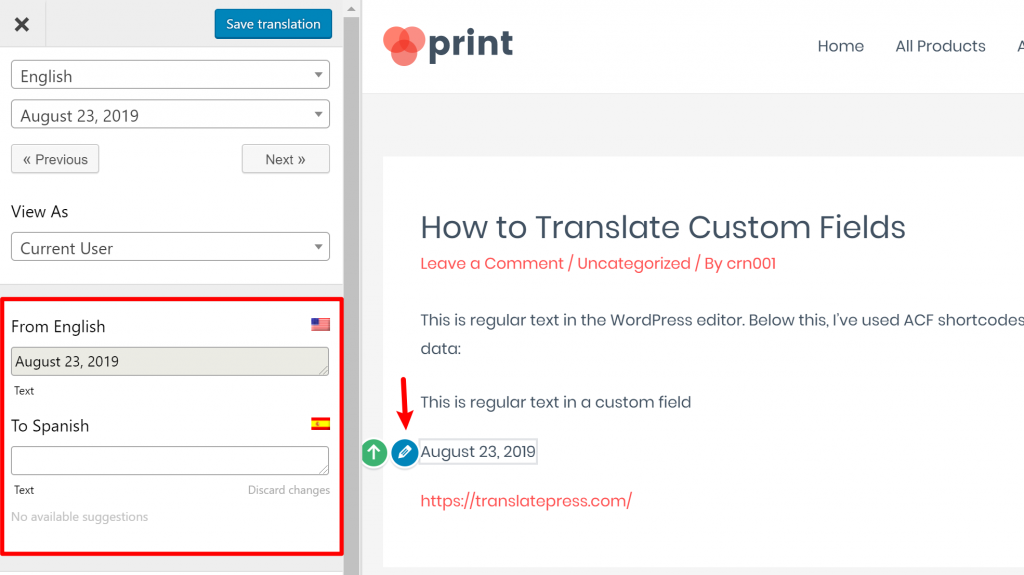
To translate a custom field, all you do is hover over it and click the blue pencil icon. That will open the translation in the sidebar where you can enter your desired translation:
The same approach works for the date picker field…
It also works for the URL anchor in the URL custom field…
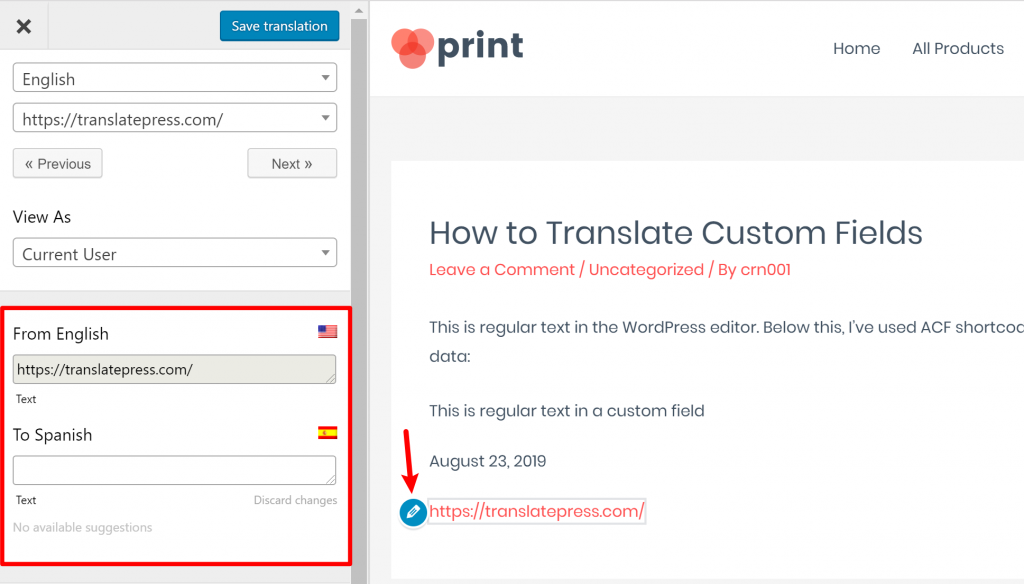
…and it’s the same for any other front-end custom field data, whether you’ve added it with Advanced Custom Fields or any other plugin.
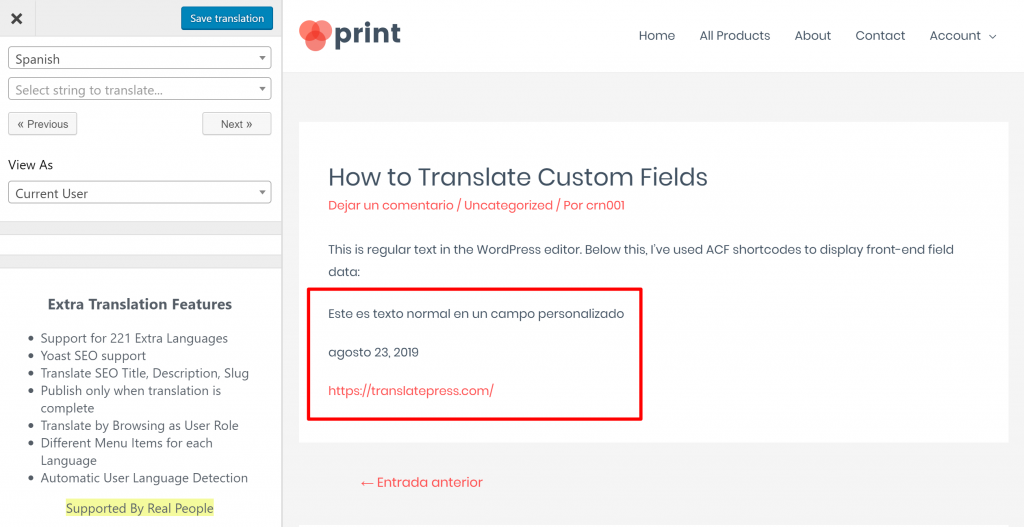
Once you save your changes, you can switch to a different language to verify that your custom fields are translated (you can also use the exact same approach to translate the rest of your site):
That’s How to Translate Custom Fields in WordPress!
With TranslatePress, it’s easy to translate custom fields in WordPress via a simple visual interface.
There’s no code, no need to look for special compatibility in your custom fields plugin or install an integration plugin – it just works.
What’s more, you can use TranslatePress to translate a lot more than just WordPress custom fields.
Using the same simple interface, you’ll be able to translate your regular WordPress content plus content from any theme or plugin. Again – no need to look for special compatibility or use integration plugins – everything just works right out of the box. You can check out some of our other tutorials on how to use TranslatePress to translate…
And if you want to take things even further, you can upgrade to the premium version of TranslatePress to get access to:
- More multilingual SEO features.
- Support for multiple languages (the free version lets you translate your site into one new language).
- An option to create special translator user accounts to manage your translations.
- The ability to preview your site as different user roles for your translations.
TranslatePress Multilingual
TranslatePress is the easiest way to translate your WordPress site. It's fast, won't slow down your website, works with ANY theme or plugin and it's SEO friendly.
Get the pluginTo learn more, check out all the premium features.
Do you still have questions on how to translate custom fields in WordPress? Let us know in the comments!
If you found this post helpful, please check out our YouTube channel, where we constantly upload short & easy-to-follow video tutorials. You can also follow us on Facebook and Twitter to be the first to know each time we post.
Thank you so much for this tutorial! It’s the best method I’ve found, I was so excited when it worked. Thanks again!!
Happy you found it useful Barbara!
Can I do thematic translation through this plugin? There are several languages which do not translate exactly as they are expressed in English. I want to translate a website from English to Bengali language.
Yes, you can translate everything manually. If you’re using automatic translation, you can then make edits to everything that sounds off.